Following this url to the files the title of the freecloud page is “gx290” not “gx290 plus”.
This is confusing me, (and maybe others) are there files for “gx290 3GB+32GB” ?
any more news on this? i just order a gx290+. someone has a build for it?
Hello Gajus,
I have been using it on GX290+ for nine months now without updating. Flashing was difficult and I recommend to check for restore path before starting your journey.
Best regards
Sebastian
@Santos @Gajus @sax if you are still into it: I managed to update the build instructions for v0.23-r. You may download the result. Kindly be aware that I had trouble with bootloops and boot verity. I cannot exactly recall what I did in the end.
I would like to try, please provide the password for freecloud, or remove it ![]()
Yes, I follow the instructions, fastboot flash all 3 files.
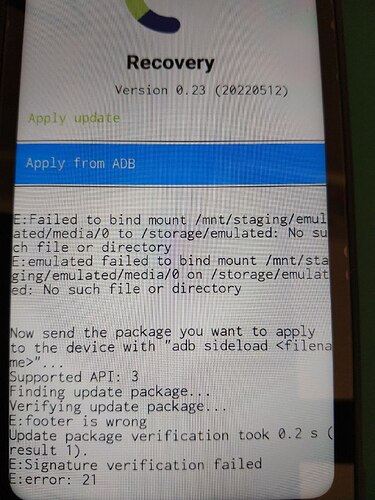
Sideload the .zip give me an error:
I guess this device GX290 is not compatible with GX290+ may different layout of partitions…
Could you please provide these images?
Sebastian Schoeller via /e/ community community@e.email schreef op 14 mei 2022 10:03:58 CEST:
You 've got your answer :
Yes yes yes, it works:
sideloaded e-0.23-r-20220512-UNOFFICIAL-GX290.zip
I’m happy, finally can start to use this phone. Thanks to all of you who helped!
@Gajus
I am glad it worked out for you. Please describe (for others to use) the exact working order you used for your GX290+
My phone is a GX290 (not plus)
These are the step I took:
First I went back to stock Android version 9.
Update to first version of 10 (it takes 3 updates): Gigaset_GX290_10.0_V08_20200617_20200617-1948
reboot to recovery (vol-up + power)
select reboot to bootloader
some users will need to ‘sudo’ each command.
…/platform-tools/fastboot flash recovery recovery.img
…/platform-tools/fastboot flash system system.img
…/platform-tools/fastboot flash boot boot.img
…/platform-tools/fastboot reboot recovery
#wait to you see Recovery to continue
Apply update - apply from ADB
…/platform-tools/adb sideload e-0.23-r-20220512-UNOFFICIAL-GX290.zip
From the recovery menu select Factory Reset.
Format data + Format cache partition
Reboot system now.
@Gajus thanks. For complementary purposes please kindly document your adb version too.
Android Debug Bridge version 1.0.41
Version 30.0.5-6877874
Sorry for the necrobump, guys.
@schoeller @Gajus Do any of you still have the custom build e-0.23-r-20220512-UNOFFICIAL-GX290.zip perchance? I would very much appreciate a reupload to a more stable file hosting service such as mega.nz as the file has been taken down since.
I left a message for Sebastian on GitHub before but figured another one here wouldn’t hurt. I’m sure others would still like to try installing /e/ OS on the GX290 (non-plus version) but don’t want to go to the trouble of installing Ubuntu just to create their own build. Anyway, your help would be appreciated.
Many thanks for the quick reply and for reuploading the file! Already grabbed it.
I’ll give it a shot with your method now.
@Gajus Which files are you flashing with the fastboot command? That is, where did you get these IMGs from?
…/platform-tools/fastboot flash recovery recovery.img
…/platform-tools/fastboot flash system system.img
…/platform-tools/fastboot flash boot boot.img
…/platform-tools/fastboot reboot recovery
I am under the impression that these are to be flashed after I downgraded to Android 9 and after I updated three times to the first Android 10 version (from within Android I guess) but before e-0.23-r-20220512-UNOFFICIAL-GX290.zip comes into play (which you have to adb sideload after all that and which only has a boot.img but not recovery.img or system.img).
My guess is these three IMGs are from the /e/ OS build for the GS290 (https://images.ecloud.global/stable/GS290/) but I’d rather ask you than bricking my phone. If this is indeed the source for these IMGs, which build version did you use?
Sorry, total noob here. >_<
Thanks for the upload.
But it seems the system.img is still missing here? Your wetransfer_boot-recovery-system_2023-05-16_1832.zip only has boot.img and recovery.img, and e-0.23-r-20220512-UNOFFICIAL-GX290.zip doesn’t have the system.img either (which is probably not needed in there anyway?).
I’ve successfully downgraded and then updated to the Android Q version you recommended (Gigaset_GX290_10.0_V08_20200617_20200617-1948). But now that I have to fastboot flash the IMGs, I’d like to stick to your method as closely as possible. It seems all you did is flash those three IMGs, then after the reboot recovery do adb sideload e-0.23-r-20220512-UNOFFICIAL-GX290.zip - which seems easy enough. But the fact that I seem to be missing the system.img and that the two ZIP files you uploaded seem light compared to the official GS290 /e/ build makes me a little nervous. ![]()
As for the stable file hosting: sure, I’ll gladly upload all the files to a long-term hosting service and compile them in a single post once I’m done with the process.
Sorry it took a while. It’s working! I now have /e/ OS running on the Gigaset GX290 (non-Plus), installed from a Windows-only machine. ![]() Many thanks Gajus for providing the files, and also to schoeller for compiling the build!
Many thanks Gajus for providing the files, and also to schoeller for compiling the build!
Based on Gajus’s method, I took the liberty of compiling a more in-depth description of the process for less advanced smartphone users with Windows PCs. You can use schoeller’s build files (see download links below) for this and won’t have to build them yourself.
I strongly recommend getting the file versions and using the download links listed below as you may run into problems if you don’t (for example, schoeller mentioned he had problems with newer versions of the Android SDK Platform Tools).
Be sure to keep the 7Z and ZIP files until the process is finished. In case something goes wrong and you brick your GX290, you might be able to downgrade to Android 9 again and retry (whats-in-a-name on the XDA Forums said he downgraded five times to test different builds, luckily I didn’t have to try that myself).
And just to make it clear: I opened and ran all Windows programs with administrator rights from the command line/CMD (right click “C:\Windows\System32\cmd.exe” and select “Run as administrator”). It might work without admin rights but if you want to play it safe, run as administrator. At your own risk, mind you. Now for the method:
==== Downgrading to Android 9 ====
Backup any data on your GX290 that you want to keep.
Turn off your GX290.
Download “GX290_eOS.7z” = GX290 Android 9 stock OS, IMGs to flash and the unofficial /e/ OS build for GX290 (courtesy of schoeller and Gajus):
https://mega.nz/file/0UszFAjQ#xIQ5VYhDwojD0fd1Z442CsNWsqll_nznQsjjp2SLdNo
Extract the “GX290_android9_2019-07-31” folder from “GX290_eOS.7z”.
Download “SP_Flash_Tool_v5.1924_Win.zip” = Smart Phone Flash Tool (source is said to be MediaTek but it doesn’t look official to me, so use at your own risk):
https://spflashtools.com/wp-content/uploads/SP_Flash_Tool_v5.1924_Win.zip
Extract the “SP_Flash_Tool_v5.1924_Win” folder from “SP_Flash_Tool_v5.1924_Win.zip”.
Connect your USB cable to your PC but not yet to your GX290.
Open “SP_Flash_Tool_v5.1924_Win\flash_tool.exe” = Smart Phone Flash Tool.
Click on tab “Download”.
Under “Download-Agent” click “choose” and select “MTK_AllInOne_DA.bin” in the “SP_Flash_Tool_v5.1924_Win” folder.
Under “Scatter-loading File” click “choose” and select “MT6763_Android_scatter.txt” in the “GX290_android9_2019-07-31” folder.
In the dropdown menu, select “Download Only”.
Click “Download”.
Now connect the USB cable to your GX290 (the phone must still be turned off).
Downgrading to Android 9 via Smart Phone Flash Tool will start.
When the process is finished, a green tick mark popup will appear on your PC.
Close Smart Phone Flash Tool and deconnect the USB cable.
You can delete the “GX290_android9_2019-07-31” and “SP_Flash_Tool_v5.1924_Win” folders now.
Turn on your GX290.
Enter 0000 as the PIN/password.
An error “Decryption unsuccessful” will appear. Click on “RESET PHONE”.
Configure your phone until the home screen/desktop appears.
==== Updates to Android 10 ====
Connect your GX290 to Wi-Fi.
On your GX290, go to “Settings → About device → System update” and update to the Gigaset_GX290_9.0_V09_20190816_20190816-1150 version.
After that update, go to “Settings” → About device → System update" and update to the Gigaset_GX290_9.0_V12_20200213_20200213-1749 version.
After that update, go to “Settings” → About device → System update" and update to the Gigaset_GX290_10.0_V08_20200617_20200617-1948 version.
==== Installing MTK Android USB Driver on Windows 10 ====
Connect your USB cable to both your PC and your GX290.
Download “MTK_Android_USB_Driver.zip” = MTK Android USB Driver (courtesy of Mediatek):
http://online.mediatek.com/Public%20Documents/MTK_Android_USB_Driver.zip
Extract the “MTK_Android_USB_Driver” folder from “MTK_Android_USB_Driver.zip”.
You might want to write down/print out the next few steps as you’ll have to do a reboot your PC to disable the Windows driver signature enforcement first (if you don’t do this, trying to install the driver will cause an error: “The hash for the file is not present in the specified catalog file. The file is likely corrupt or the victim of tampering.”).
On your PC, go to “Start → Settings → Update & security → Recovery” and under “Advanced startup” click “Restart now”.
Click “Troubleshoot”, “Advanced options”, then “Startup Settings”.
Once the Startup Settings are displayed, press 7 or F7 to “Disable driver signature enforcement”.
Windows is now booting without driver signature enforcement. In the “MTK_Android_USB_Driver” folder, right-click “android_winusb.inf” and select “Install”. A warning message “Windows can’t verify the publisher of this driver software” will come up. Choose “Install this driver software anyway”. It should be done instantaneously. Reboot your PC.
You can delete the “MTK_Android_USB_Driver” folder now.
==== Flashing IMGs ====
Extract the “Flash_IMGs” folder from “GX290_eOS.7z”.
On your GX290, go to “Settings → About phone” and scroll way down. Tap “Build number” seven times, then enter your PIN (be sure not to have disabled any apps as the keyboard won’t show if you disable certain Google apps). You’ll get a message “You are now a developer”.
Go to “Settings → System → Developers options” and turn on both “USB debugging” and “OEM unlocking” (re-enter your PIN).
Download “platform-tools_r30.0.5-windows.zip” = Android SDK Platform Tools (courtesy of Google):
https://dl.google.com/android/repository/platform-tools_r30.0.5-windows.zip
Extract the “platform-tools” folder from “platform-tools_r30.0.5-windows.zip”.
In CMD, use the cd command to change the directory/navigate to the “platform-tools” folder.
In CMD, run “adb devices”. It should read something along the lines of:
"* daemon not running; starting now at tcp:5037
- daemon started successfully
List of devices attached
GX29000000… unauthorized"
On your GX290, there should be a popup message along the lines of “Enable USB debugging from this computer?” (select “Always allow…” and enable).
In CMD, if you run “adb devices” again, it should now read something along the lines of:
“List of devices attached
GX29000000… device”
In CMD, run “adb reboot bootloader”. This will reboot your GX290 and eventually display “=> FASTBOOT mode…” in the bottom left corner. This minimalist display means you’re now in the GX290’s fastboot mode.
If you installed the MTK Android USB Driver correctly, your GX290 in fastboot mode should show up in the Device Manager as “Android Device → Android ADB Interface”. In CMD, if you run “fastboot devices”, it should now read something along the lines of:
“GX29000000… fastboot”
In CMD, run “fastboot flashing unlock”.
On your GX290, read the warning message and press “Volume +” to unlock the bootloader.
Move the files “boot.img”, “recovery.img” and “system.img” from the “Flash_IMGs” folder to the “platform-tools” folder.
In CMD, run “fastboot flash recovery recovery.img”. Transfer should be done instantaneously.
In CMD, run “fastboot flash system system.img”. Transfer should be done in a minute or so.
In CMD, run “fastboot flash boot boot.img”. Transfer should be done instantaneously.
In CMD, run “fastboot reboot recovery”.
Your GX290 will now reboot and display the Gigaset logo and the message:
“Orange State
your device has been unlocked and can’t be trusted
your device will boot in 5 seconds”.
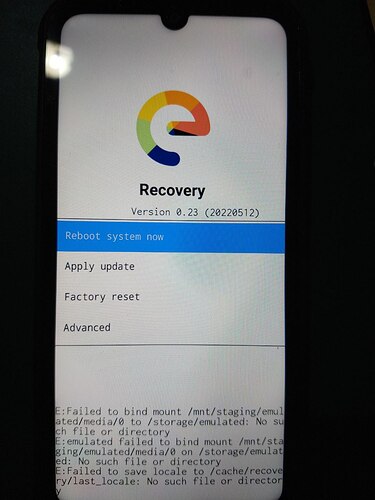
After a few seconds (more than 5…), the GX290 should load the /e/ Recovery menu Version 0.23 (20220512).
You can delete “boot.img”, “recovery.img” and “system.img” in the “platform-tools” folder and the empty “Flash_IMGs” folder now.
==== ADB sideloading /e/ OS ====
Extract “e-0.23-r-20220512-UNOFFICIAL-GX290.zip” from “GX290_eOS.7z” to the “platform-tools” folder. Do not extract the contents of “e-0.23-r-20220512-UNOFFICIAL-GX290.zip”, just put the ZIP file in the “platform-tools” folder.
On your GX290 in the /e/ Recovery menu, press “Volume -” to select “Apply update” and press “Power” to select it.
“Apply from ADB” is already highlighted, press “Power” to select it.
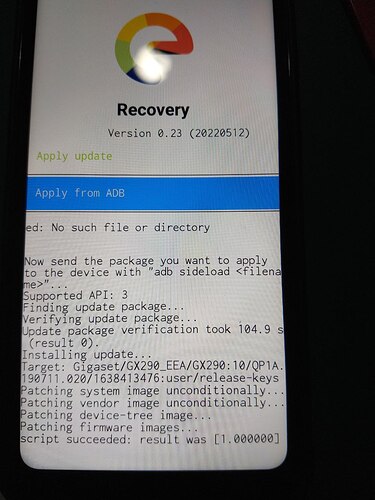
In CMD, run “adb sideload e-0.23-r-20220512-UNOFFICIAL-GX290.zip”. Transfer should be done in a few minutes or so. Your GX290 should display the same messages as Gajus’s phone (check Gigaset GX290 Plus - #32 by Gajus for a screenshot).
Once it’s done, tap the “back” arrow in the top left corner of your GX290, select “Reboot system now” and press “Power”.
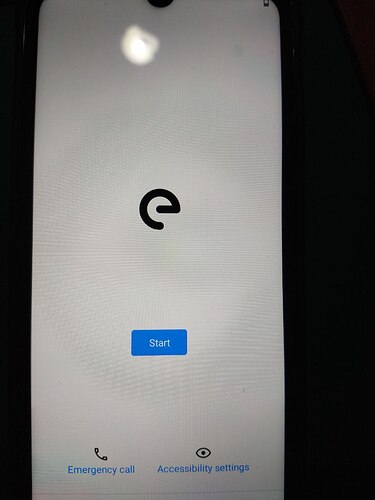
Note that the “Orange State” message will prevail upon turning on your GX290, but /e/ OS is successfully installed and will now boot.
Once you’ve reached the home screen/desktop and made sure your GX290 is working, you can delete all remaining files from your PC.
Enjoy your shiny new GX290 with /e/ OS. ![]()


