I tried flashing a unofficial /e/ rom using ADB Sideload in TWRP 3.3.0.0. Already found out that using an OTG cable is probably smarter better. But for the moment I am confused by the reboot menu in TWRP. Though used a few times I see now that I never fully understood TWRP’s reboot behaviour if no system is installed
Just for completeness sake I will outline briefly what is I my current status is and how I got there.
I did my preparations:
- Bootloader is unlocked
- USB debugging is enabled
However when the sideload froze, after 20-30min I unplugged usb. When I inserted the usb-cable again I tried the following things:
- when I type
adb
devices I see my device-id and the status is recovery
-
fastboot devices
is not returning my device
-
adb push
returns me a couldn't read from device
- ADB Sideload in TWRP wont work
- when I trype
adb root
I get a msg saying that I already am root
When I go into twrp reboot menu I have the options System, Power Off, Recovery and Bootloader. In addition I have the option slot A and slot B. It also tells me that currently I am in Slot B. Here are my questions:
- How do I reboot TWRP from TWRP? My current guess is to reboot Slot B
- I also noticed in previous installations that TWRP seems to reboot automatically if no System has been installed.
- What is the difference between rebooting Slot B and Recovery? Would both reboot in TWRP?
- Does it make sense to reboot into Bootloader?
- Do I then need to flash TWRP from fastboot again? Because I am unsure if this would work, as currently my fastboot doesn’t find my device
Regain your privacy! Adopt /e/ the unGoogled mobile OS and online services
The fastboot command only works in Fastboot Mode (= bootloader).
TWRP doesn’t offer the same ADB support a booted Android OS would. Apart from ADB sideload, which needs to be started first in TWRP to make it work, there’s not much to see apparently … https://twrp.me/faq/openrecoveryscript.html.
https://twrp.me/faq/ADBSideload.html
Depends.
If you installed TWRP on the device, choose Recovery.
If you just temporarily booted TWRP with fastboot from the computer, choose Bootloader and run the fastboot command again on the computer.
Recovery will boot into whichever recovery program is installed.
For Slot B it would depend.
If this really immediately reboots the device and not only sets the slot for the next reboot (didn’t try that myself yet), and if there’s a bootable OS on slot b, the OS will be booted, if you don’t keep the device’s designated button to boot into recovery pressed (Volume + on many devices).
If there’s no bootable OS, TWRP might be booted, if installed (and not only temporarily booted with fastboot from the computer).
If you want to use the fastboot command or if your device displays meaningful information in Fastboot Mode which you might like to see, then yes. Here’s an example from [HOW-TO] Flash /e/-OS on Fairphone 3 using Debian based GNU/Linux …
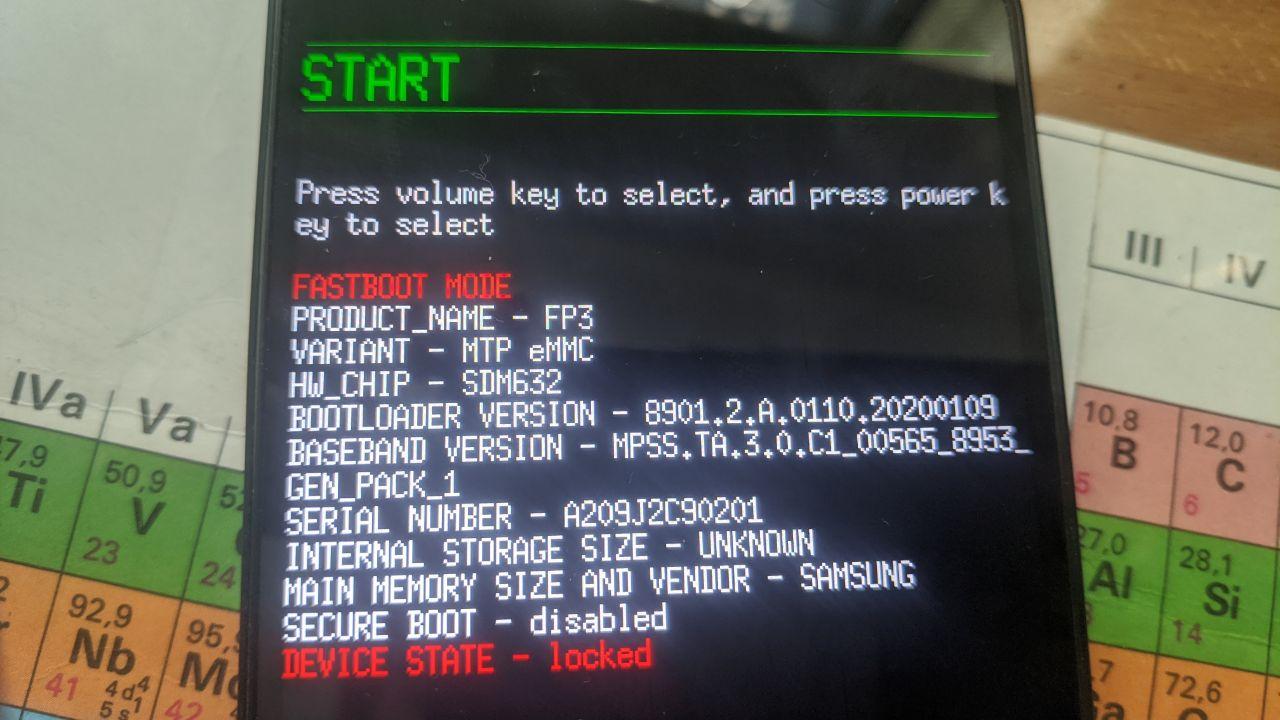
Else … no.
First please have a look at how installing TWRP on your device works at https://twrp.me/Devices/. Flashing TWRP to a partition is not necessarily the way to go on every device anymore, especially on A/B devices (which have slots A and B, and therefore a different partition layout compared to other devices).
4 Likes
Thanks a lot. No wonder there is no generic documentation. I will quickly summarise what I learned, should anybody else find this post:
- My device is indeed in a temporary TWRP flash - no idea why fastboot installed it in slot B
- Adb commands do not work since I just pulled the cable out while sideloading (cf. While in sideload mode, regular ADB commands will not work.). According to my devices TWRP site at least
adb push
should work
- I wiped Dalvik Cache/Cache, system and data
- I am in no OS, with no TWRP installed. Therefore my only option is to go into Bootloader and restart TWRP from fastboot again
If it is “only” to install /e/ on a device which has no OS installed, why not bypassing TWRP and install direct via fastboot? Look at THIS tutorial which explains the install process on a A/B layouted device
Update: In the end I managed to install using an OTG-cable.
1 Like