[HOW-TO] Flash /e/-OS on Fairphone 3 using Debian based GNU/Linux

I can t edit it anymore for now, that would be for @Manoj to enable :slight_smile:

Hi @Chimpthepimp I have made it a wiki…Pl go ahead and make the edits.

4 Likes

It was very important issue to preface all commands with sudo to get it to work, but finally it works great!

1 Like

Thanks for your Guide! :+1:
I’ have one question though. I’ve followed all your steps and managed to use /e/ successfully on my FP3.
Is it Okay now to disable in the developer option the “OEM unlock”? Or must it be enabled?

Hello,

I just bought a new FP3 and would like to use it from the beginning on with /e/ -OS (currently Android). This tutorial has worked great so far, but now I can’t get any further. When I enter the commands to install /e/ -OS in the terminal an error message appears (see screenshot in attachment).

I don’t have Linux or GNU, but a MacBook Pro (macOS Mojave 10.14.6), but until now everything worked as described.

Maybe someone has an idea how to solve the problem.

Thanks for the help.
PeteS
Bildschirmfoto 2021-07-05 um 14.19.58

Hi @PeteS welcome.

The fastboot command comes (with adb) from Android platform-tools. I am not a Mac user, but the mac method is described here.

Note it does not install the tools to the system, it just “provides” them.

Did that all go as expected for you? :slight_smile:

PS no Mac instructions here but just for reference.

https://doc.e.foundation/pages/install-adb

1 Like

If you made sure that you have the fastboot command in the folder you operate in, just add ./ before the command to tell the system to look in the current folder for it, resulting in ./fastboot flash system system.img.
(I don’t have a Mac, this is just a general Unix/Linux remark, as macOS is a kind of Unix.)

2 Likes

Thanks for the promt reply, now it works! :smiley:

2 Likes

Sorry for the late answer. You can disable the developer options.

This guide worked well for me, even thought there is some typing (first everything for _a, then for _b… but I didn’t see this post.

Thanks! But i’m still confused, because i’m not talking about developer options, but the option “OEM unlock”. Am i allowed to disable this as well?

Hi @solanum as I think you have a Fairphone 3, does this answer address your real question?

No, it doesn’t, but thanks for citing.
The “OEM unlock” switch is there to allow or not allow the unlocking process, it doesn’t lock or unlock anything itself.

You can disable it, if it makes you feel better.
But I guess in case the OS can’t be booted anymore for some reason and unlocking the bootloader again might be part of a possible solution, you could be in trouble if OEM unlocking wasn’t enabled to allow the unlocking process.
I have no practical experience with this scenario or a link to where this happened, it’s only my theory for now.

This worked fine for me on my FP3! Thanks for this guide! (the initial post #1)

1 Like

Hi! Thanks a lot for this guide. I am new to Fairphone (3+ in my case) and to the installation process of the /e/OS.
I have done the previous steps before rebooting the device on fastboot mode by pressing Power + Volume -. I can see the same screen content of the guide. But when running fastboot devices I get:

$ adb devices
List of devices attached
<empty>
$ fastboot devices
<nothing>
$

I have tried with both adb and fastbook installed from Debian repos, and from the Platform Tools from Android. Both versions offer the same result.
I guess there is a problem with the computer recognition of the mobile phone. Is that correct? Would you give me a hand?. Thanks in advance

Did you tried with a good cable ?

Is the guide up to date ?

Please compare to Install /e/OS on a Fairphone FP3/3+ - “FP3”

Thanks for replying Piero.

I have doble checked, I am using a good cable. I can do file transfers between phone and laptop, and the current Android system recognizes the connection: “USB debugging connected”, but now I have noticed in Settings > USB Preferences > USB Controlled by > Has two options: This device (chosen) and Connected device. And when I try to change it to Connected device, it takes a few a moments and then reports: “Couldn’t switch”. I wonder why? And if having “USB controlled by the Connected device” is required by the installation process, which as for both guides, it does not needed.

In the other hand both guides have similar steps at least up to the point of using fastboot. And for some reason the command is not aware of having the phone plugged as described in my previous post.

I was able to do the installation. Although I am not sure whether this solution (#1) helped, and made possible to unlock the device by running fastboot flashing unlock.

Thanks again Piero. And best regards.

Updated method, this image is of the unzipped folder extracted from IMG-e-1.10-s-20230412278810-stable-FP3.zip, May 2023.

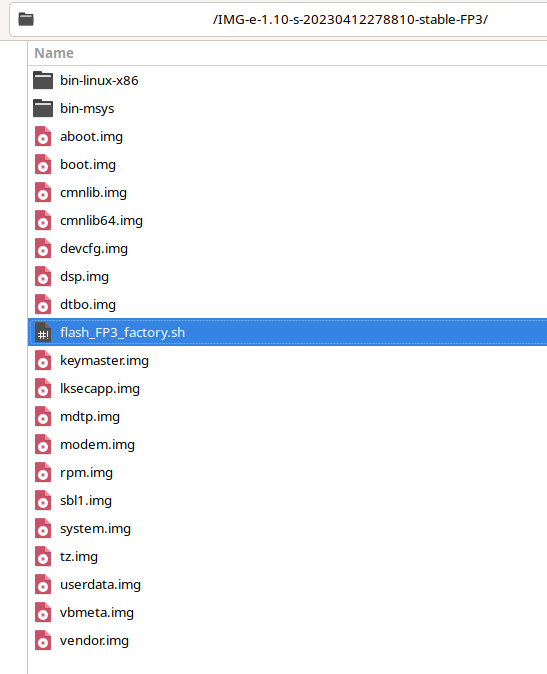
Note how the image shows selected / highlighted the install script flash_FP3_factory.sh – this is an update from the method of the OP where users had to flash the partitions manually one by one.

The following adapts the /e/OS official install page.

In your linux terminal run the installer script.

Make sure you are in the current directory which contains the flash_FP3_factory.sh file.

Execute the following command:

chmod +x flash_FP3_factory.sh && ./flash_FP3_factory.sh

The script will flash all required files and will wait for input at the last step.

The last command will ask you to confirm on the device to lock the bootloader.

If you choose to leave the bootloader unlocked, bear in mind that locking it later will involve deleting all data.

Select LOCK THE BOOTLOADER with Volume + and validate with Power button.

Off topic Windows users
This from the /e/OS official install page.

Tip: For Windows users, we advise to use Git Bash. For more info about Downloads and Installation see Official Documentation.

This involves searching how to use / install Git Bash UI in your version of Windows and then installing Git. With Git Bash UI successfully installed (and preferably tested on a harmless script), Windows users can now pick up from the matching heading above.

In your Git Bash UI terminal run the installer script.

  • I am leaving this post editable, I have no FP3 and would be very happy to see the post corrected if necessary, thanks.
1 Like

This article was very useful.
The only problem I had was not backing up a 2FA app on my previous /e/ OS.
Very clear instructions.
Thanks a lot!

2 Likes