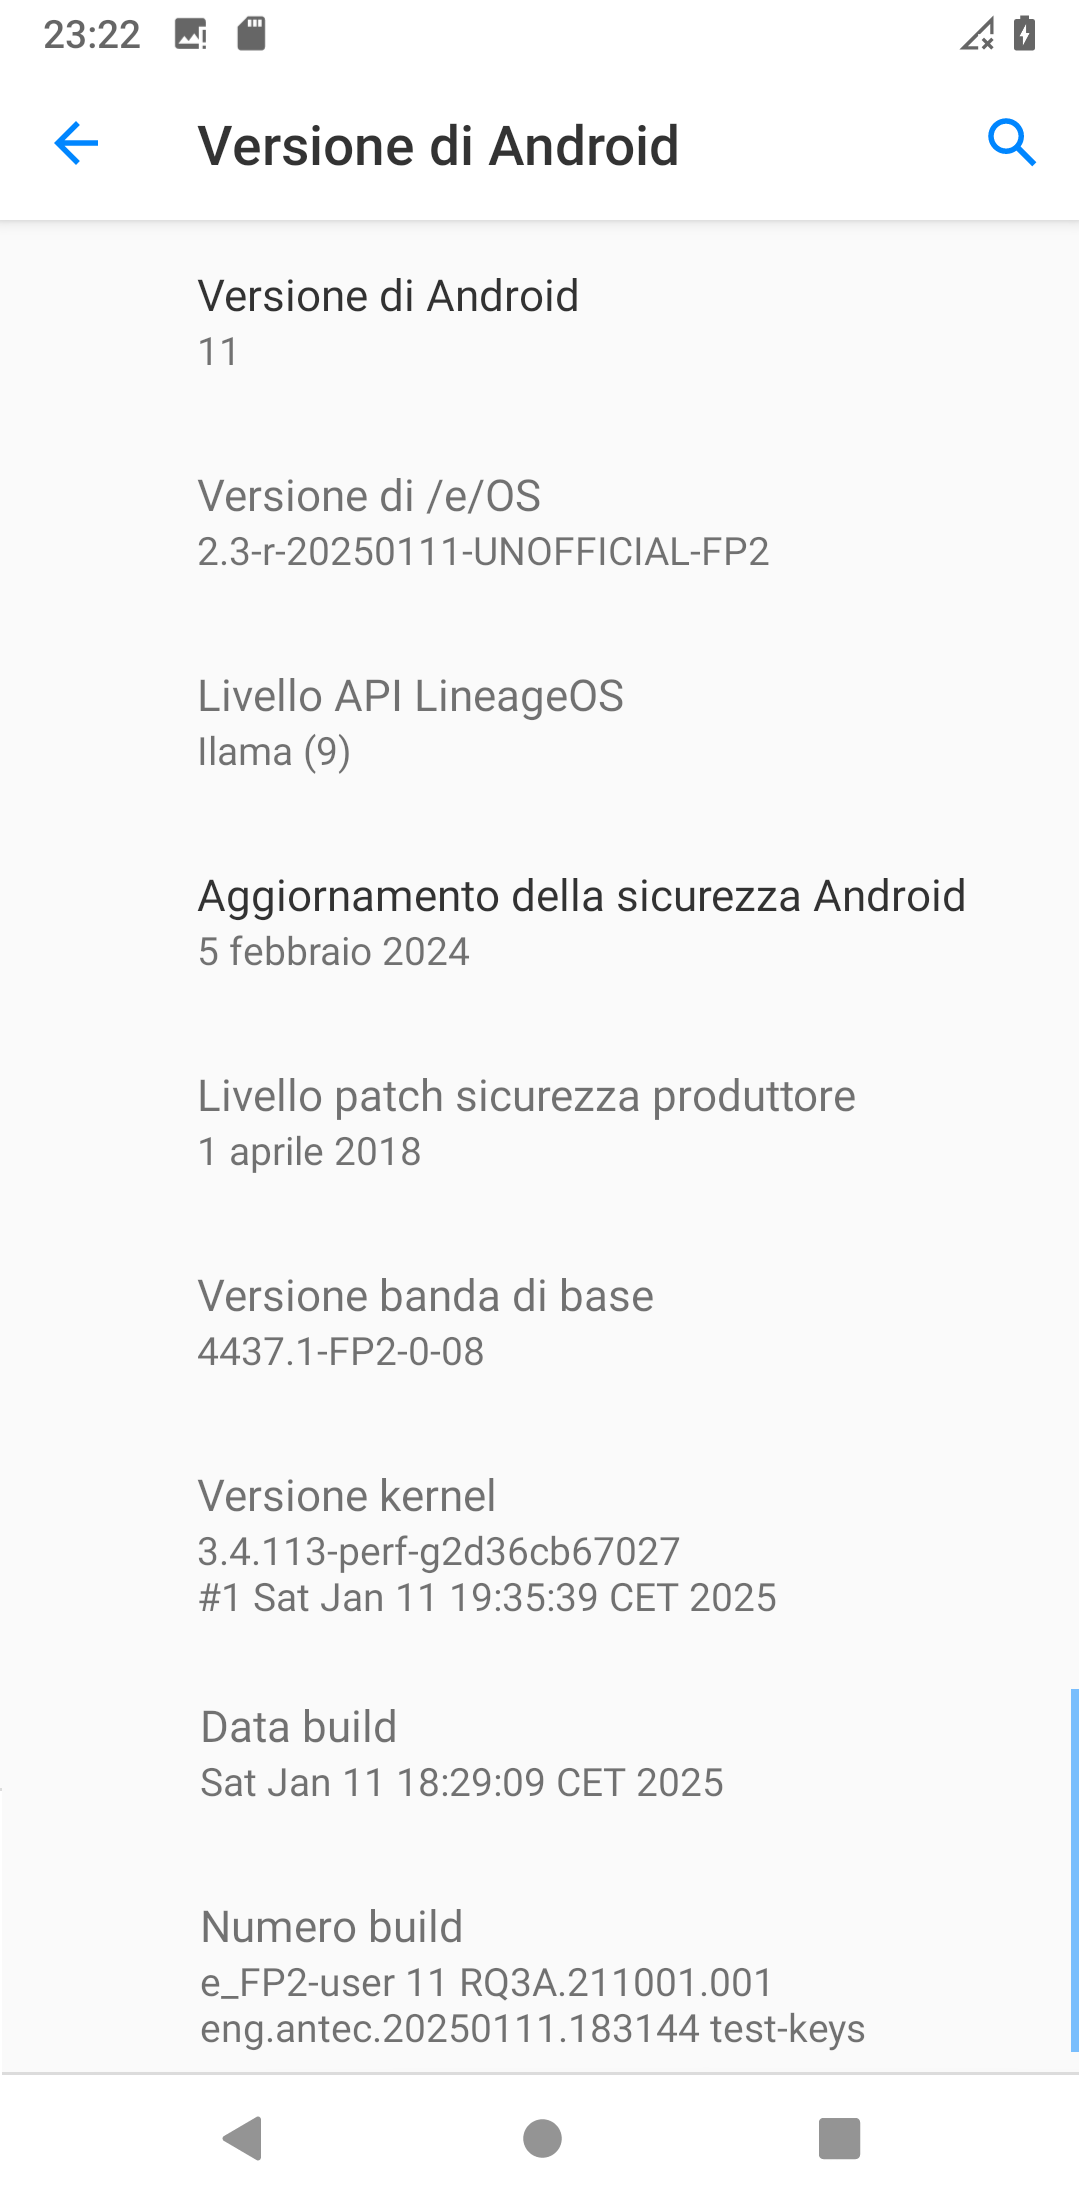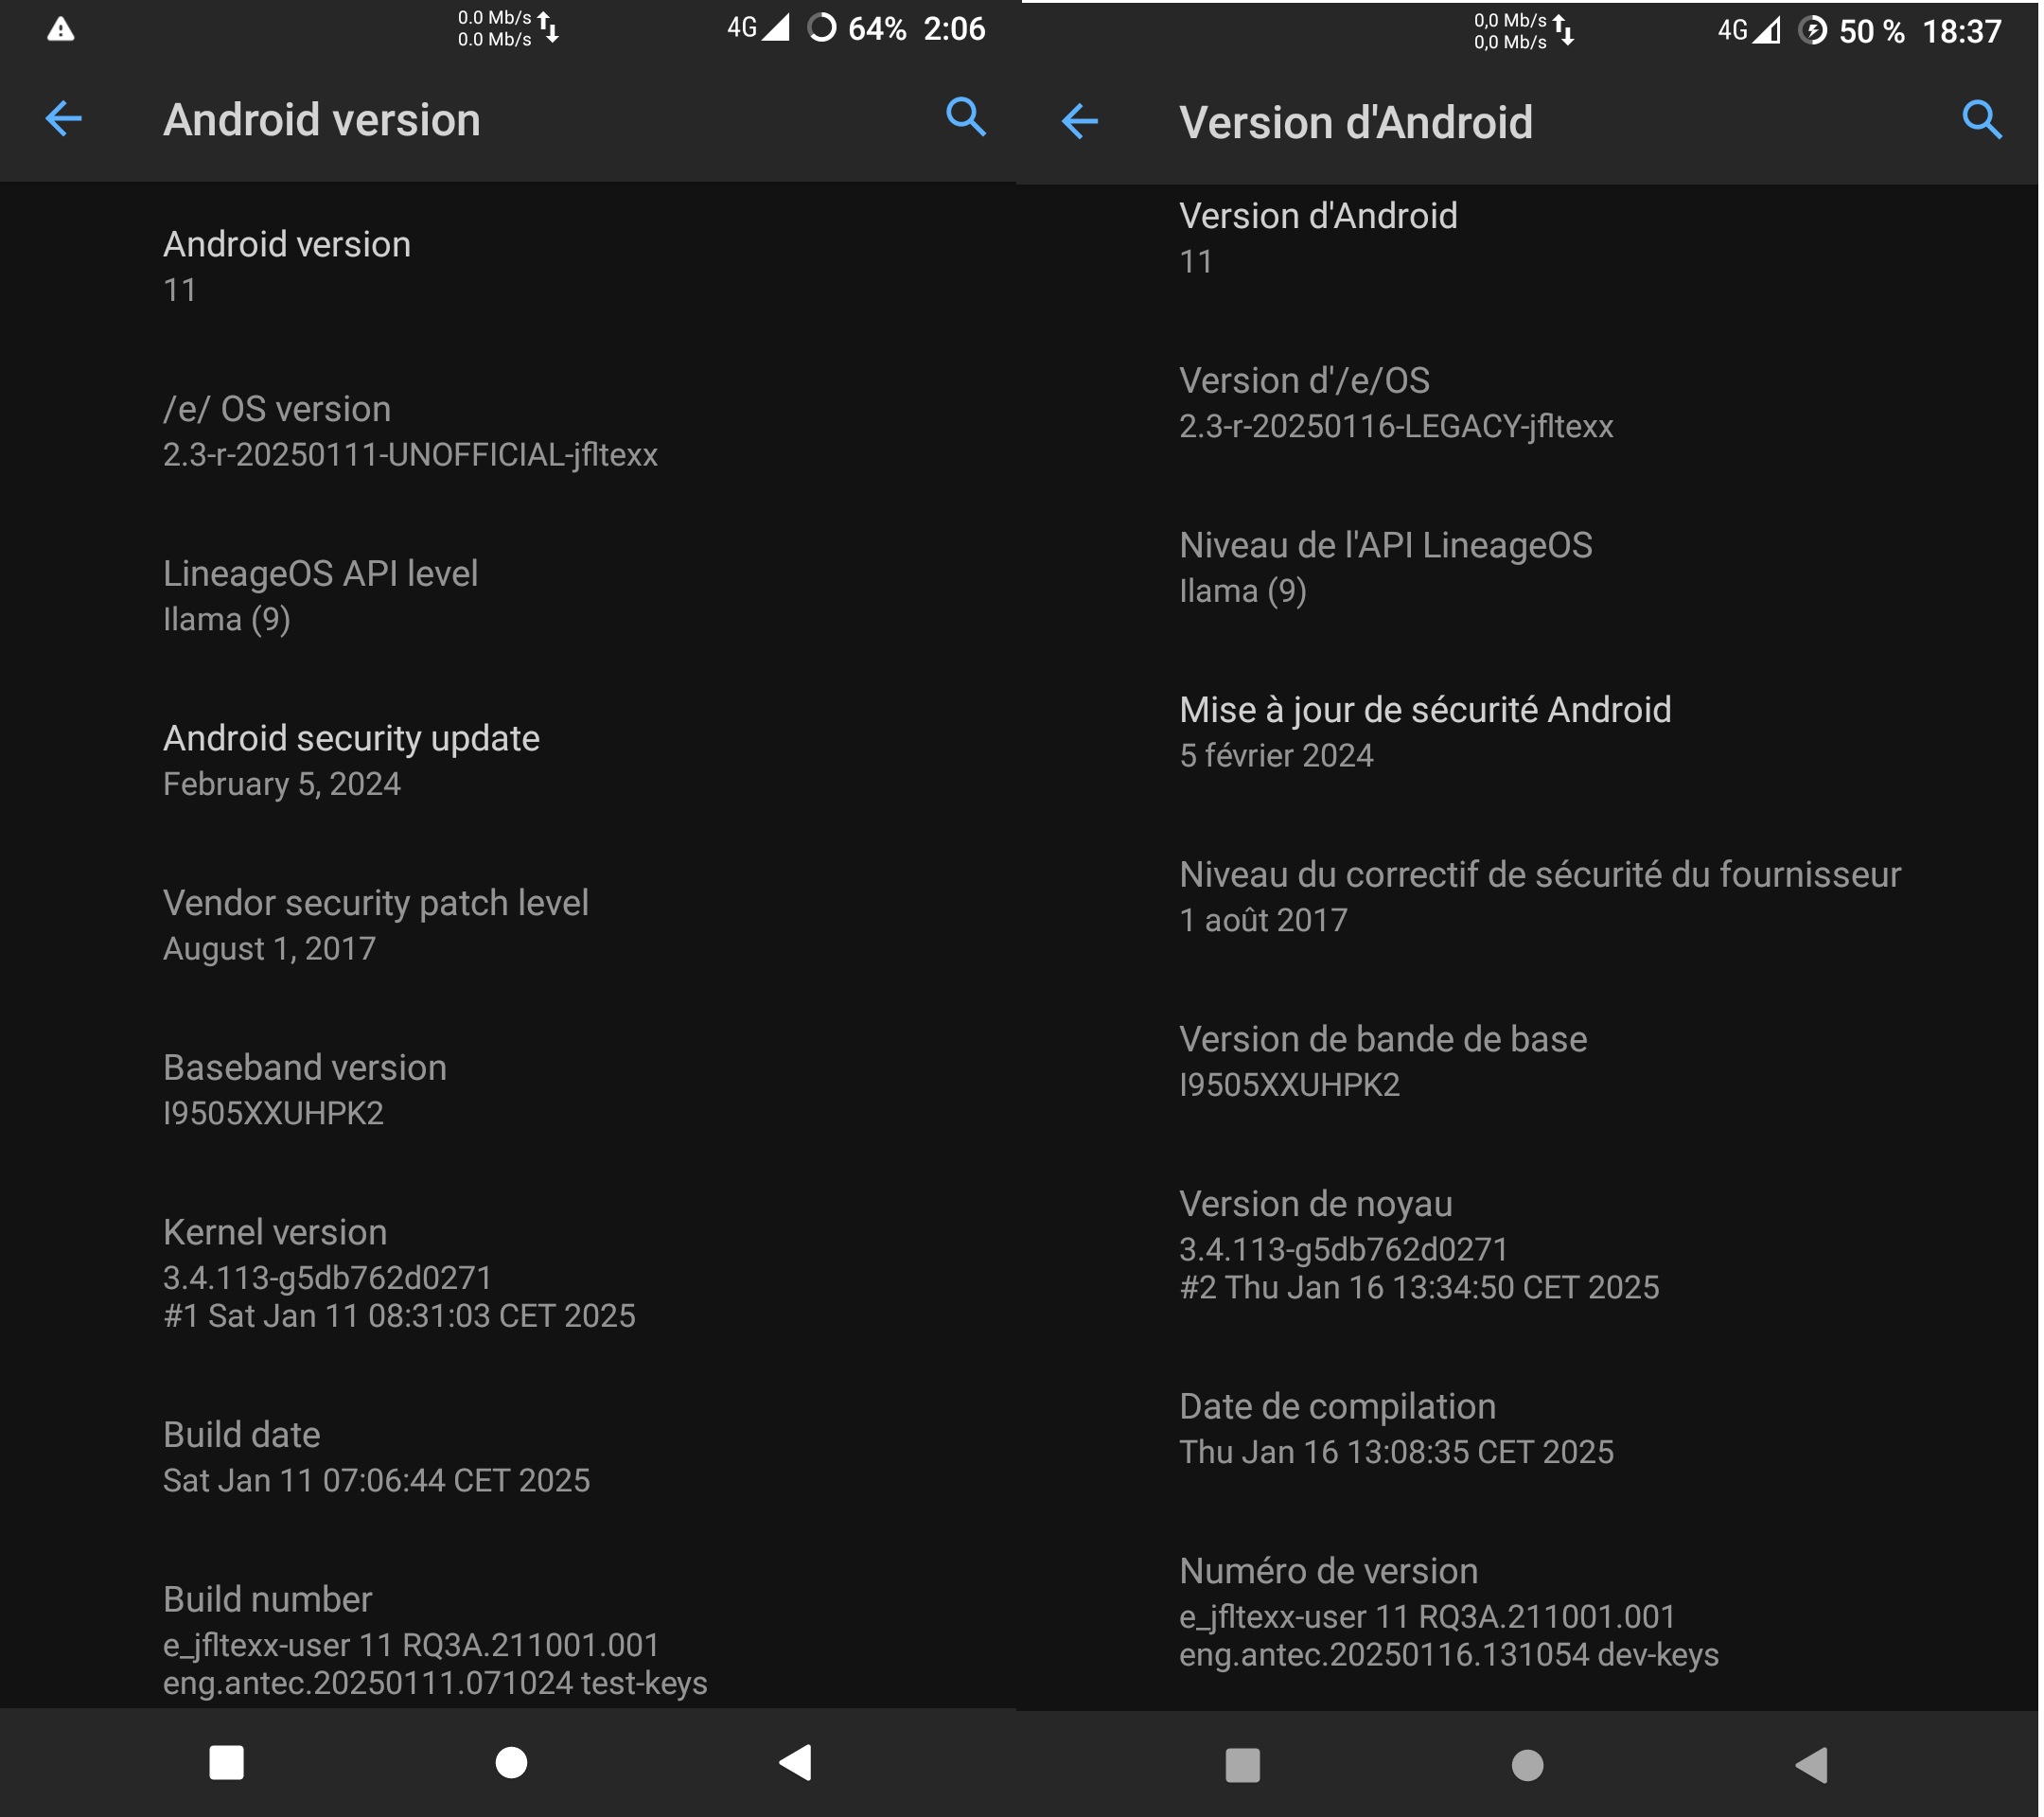
as developpement on some devices has been dropped on version e-2.2-r
the /e/ management decided to qualify those dropped devices as “legacy devices”.
But since the latest builds released by the /e/foundation for “legacy devices” are currently unavailables,
i wanted to make builds for devices where UNOFFICIAL builds don’t already exist or are outdated…
.
this LEGACY version is not an Update !
it is builded from the exact same source code as “e-2.2-r-20240719418592-dev-FP2.zip”
but i don’t own this device myself, so :
please have a test and share feedback !
because others users need to how it’s works…
.
instructions and downloads : (  …work in progress… )
.
by install-script for full installation on new devices (you will loose your data)
instructions for install-script
.
by the traditionnal way for familiar users, or update, upgrade (preserve your data)
.
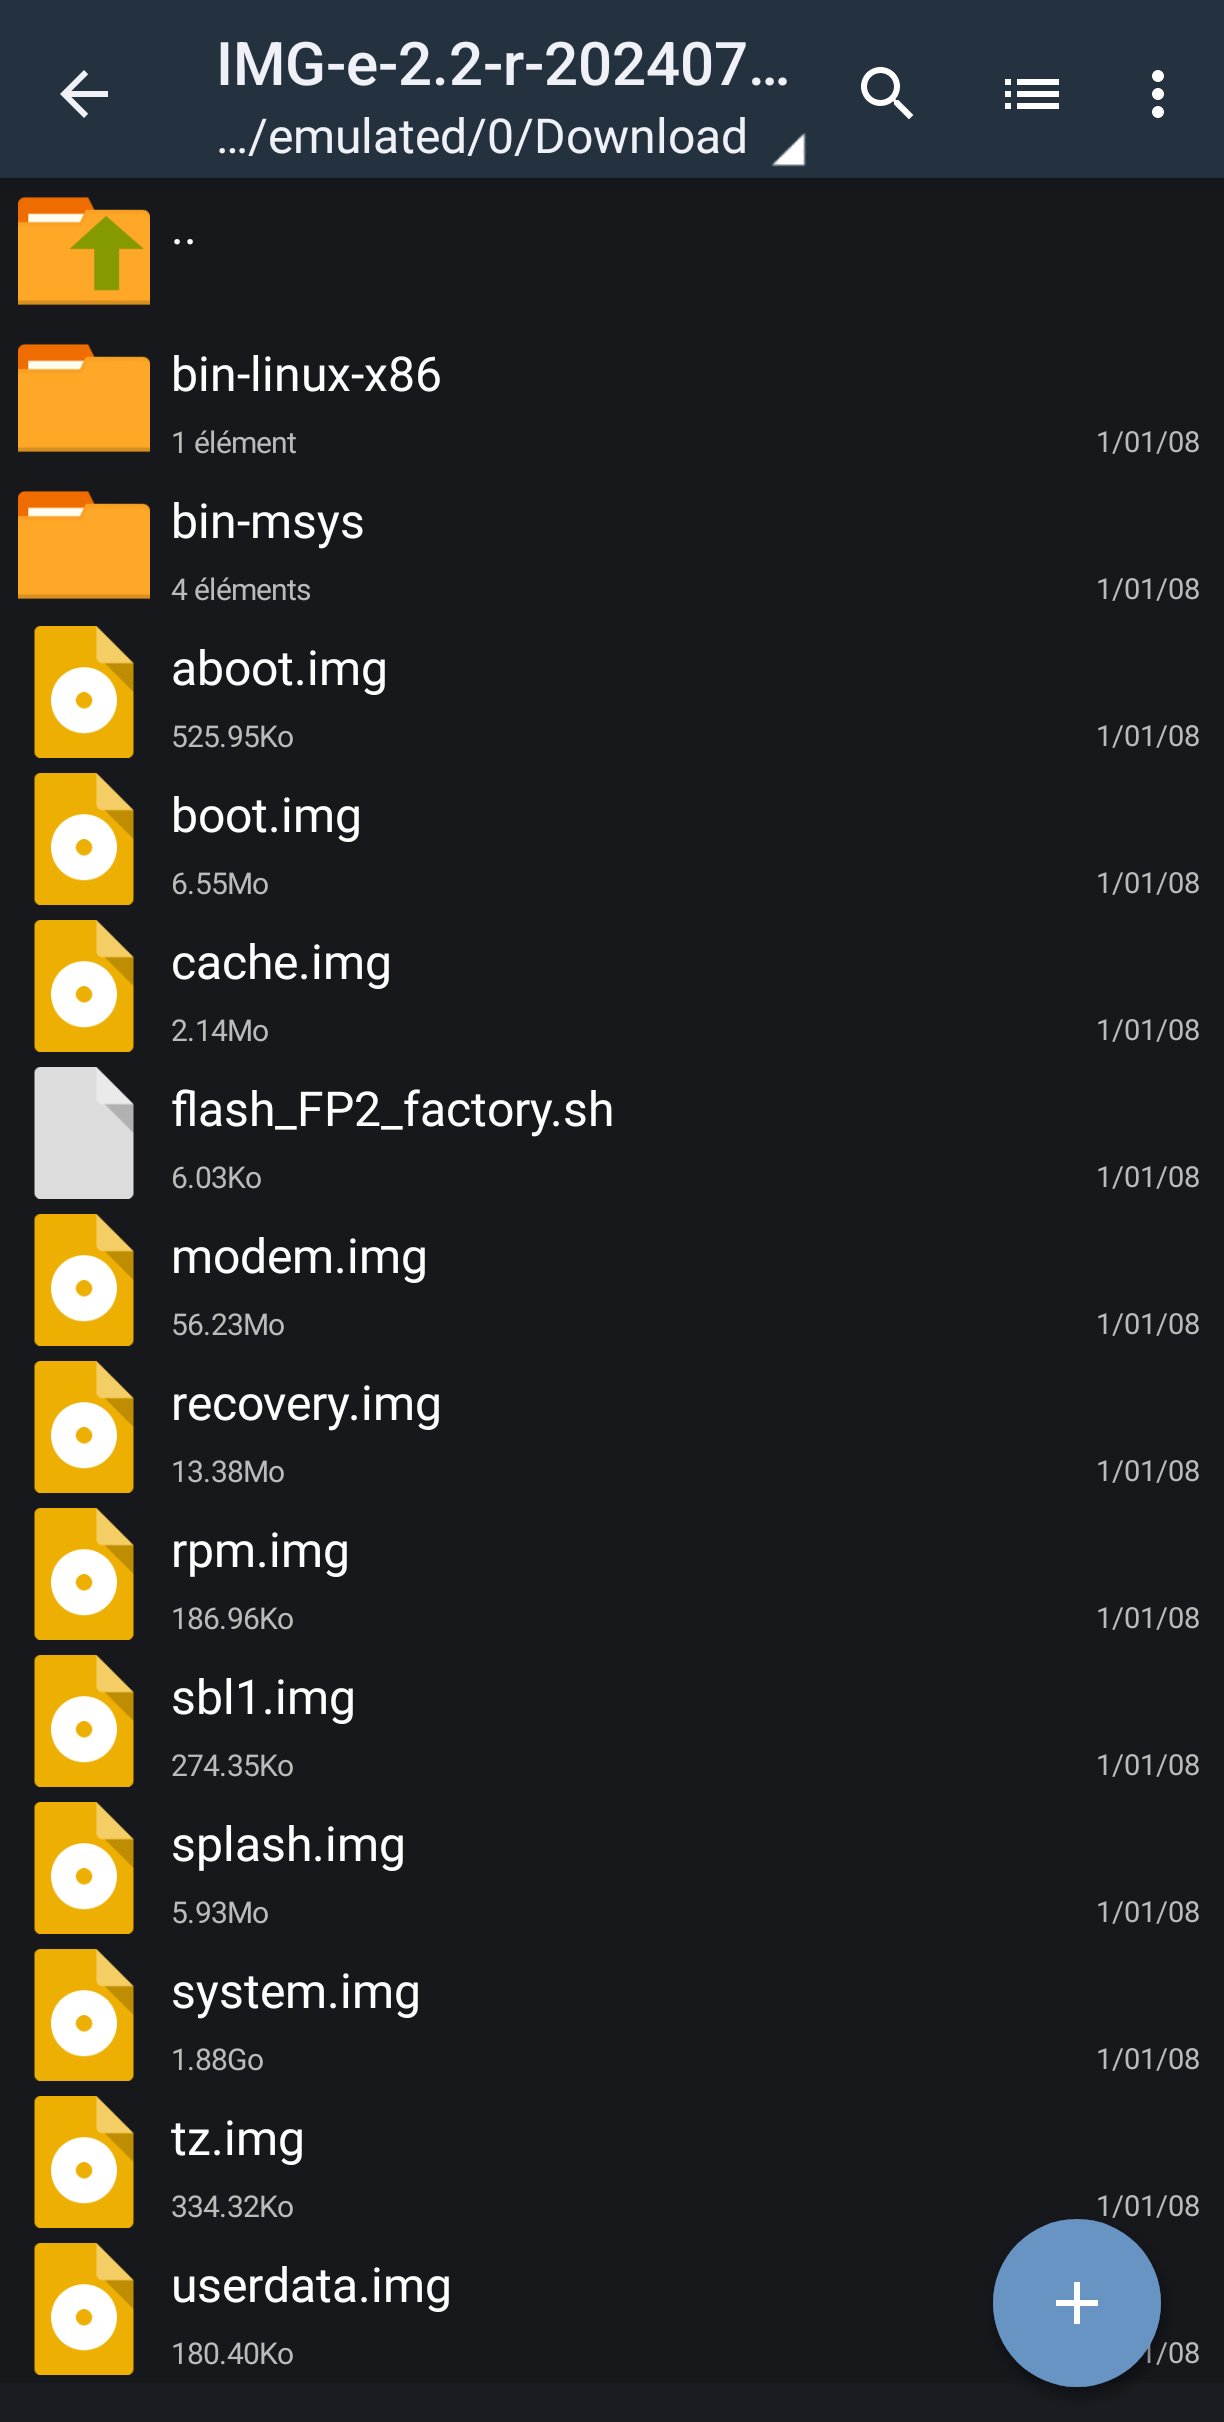
- Download the /e/OS OTA file + needed recovery include into the .zip
Download e-2.3-r-20250113-legacy-FP2.zip (/e/OS legacy builds)
.
- Download only TWRP and the recovery-e in a single .zip
Download recovery-IMG-e-2.3-r-20250113-legacy-FP2.zip (/e/OS legacy builds)
.
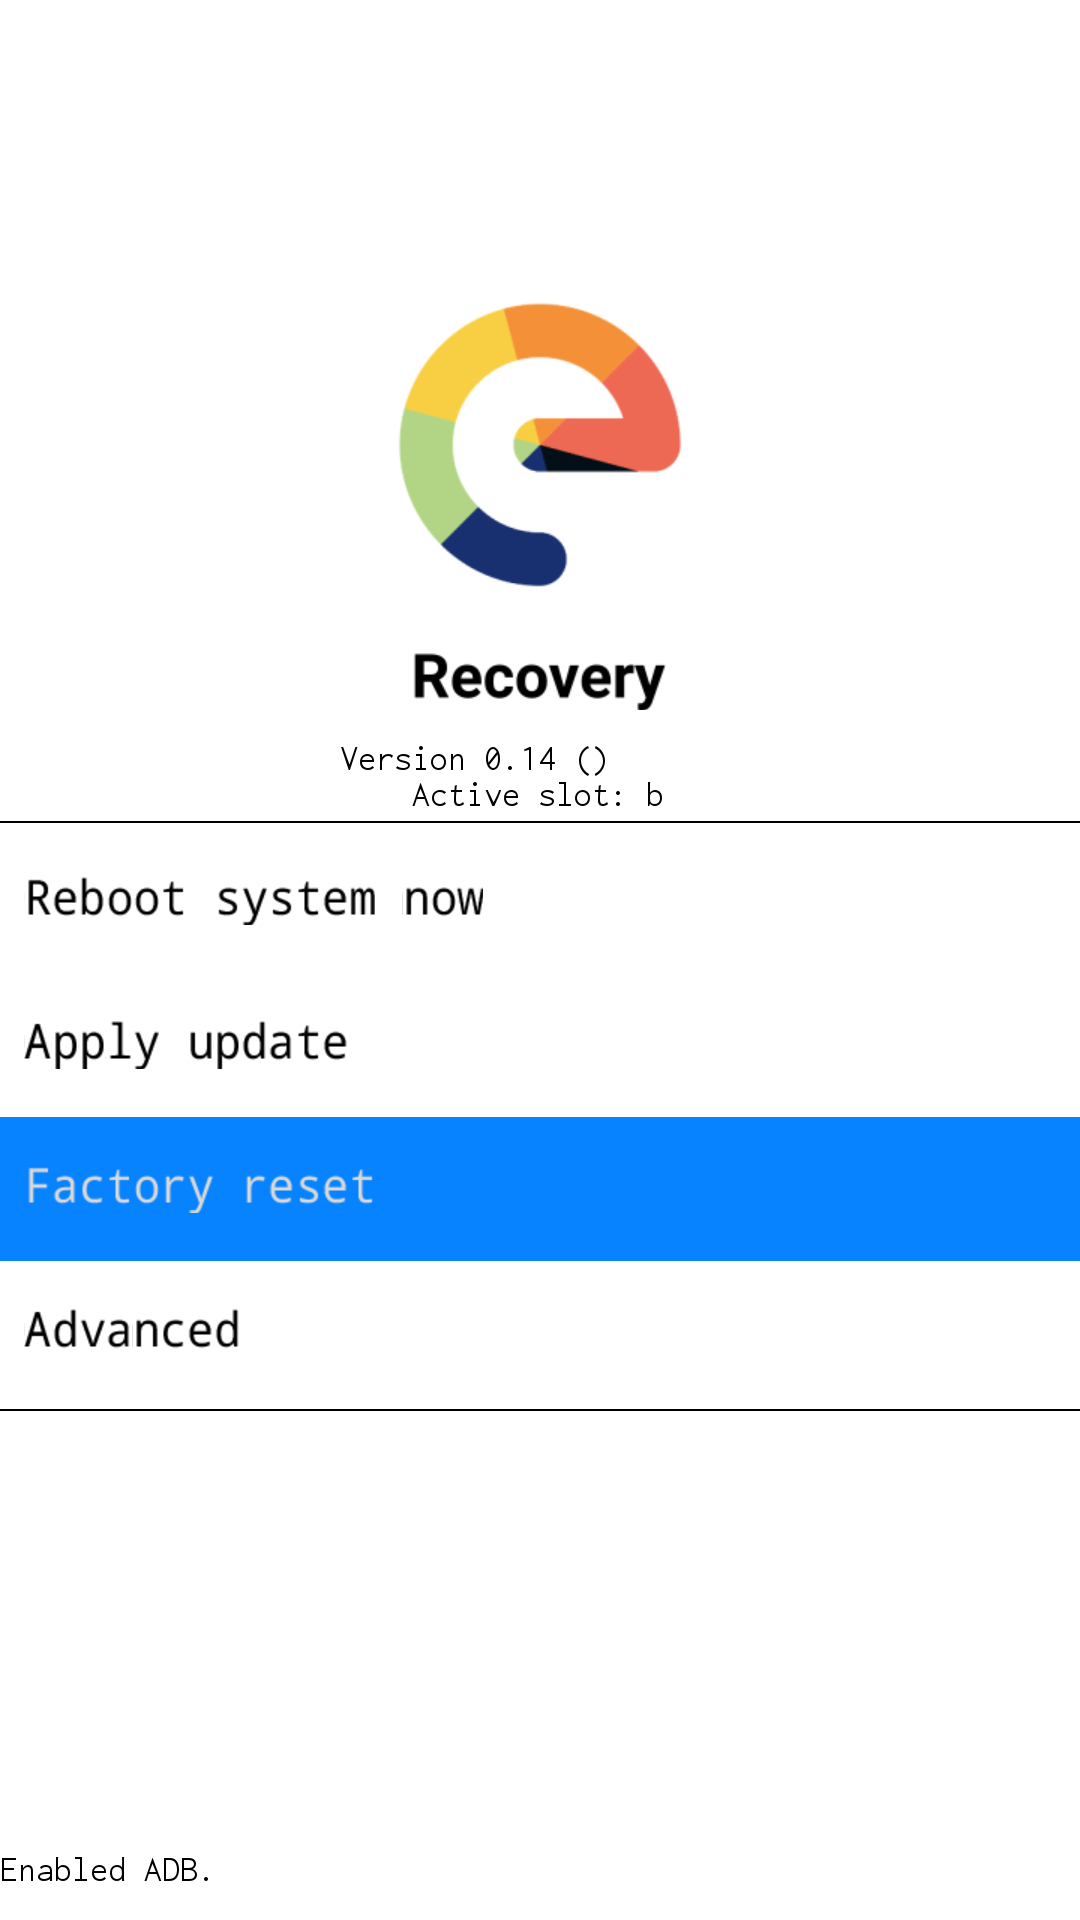
install a recovery manager
![]() work in progress…
work in progress… ![]()
Fastboot Install Method (No Root Required):
You will need the platform-tools from the Android SDK on your computer. Download the platform-tools as per your operating system.
Windows users will need proper drivers installed on their computer. You can try the simple FWUL adb/fastboot ISO or the Naked ADB drivers or the Universal ADB drivers if you don’t already have a working driver installed
On your device, go into Settings → About and find the Build Number and tap on it 7 times to enable developer settings. Press back and go into Developer Options and enable USB debugging. From your computer, open a command prompt and type:
adb reboot bootloader
You should now be in fastboot mode.
Download the correct image file and copy the file into the same folder as your platform-tools. Rename the image to twrp.img and type:
fastboot flash recovery recoveryname.img
fastboot reboot
immediatelly after typing fastboot reboot, hold the key combo,
Volume Up + Power to be sure to reboot to the custom recovery.
Once it is booted, the custom recovery will patch the stock ROM to prevent the stock ROM from keping its own recovery.
If you don’t follow this step, you will have to repeat the install.
.
Now the easiest part : install /e/ !
*. tap back to the main menu

.
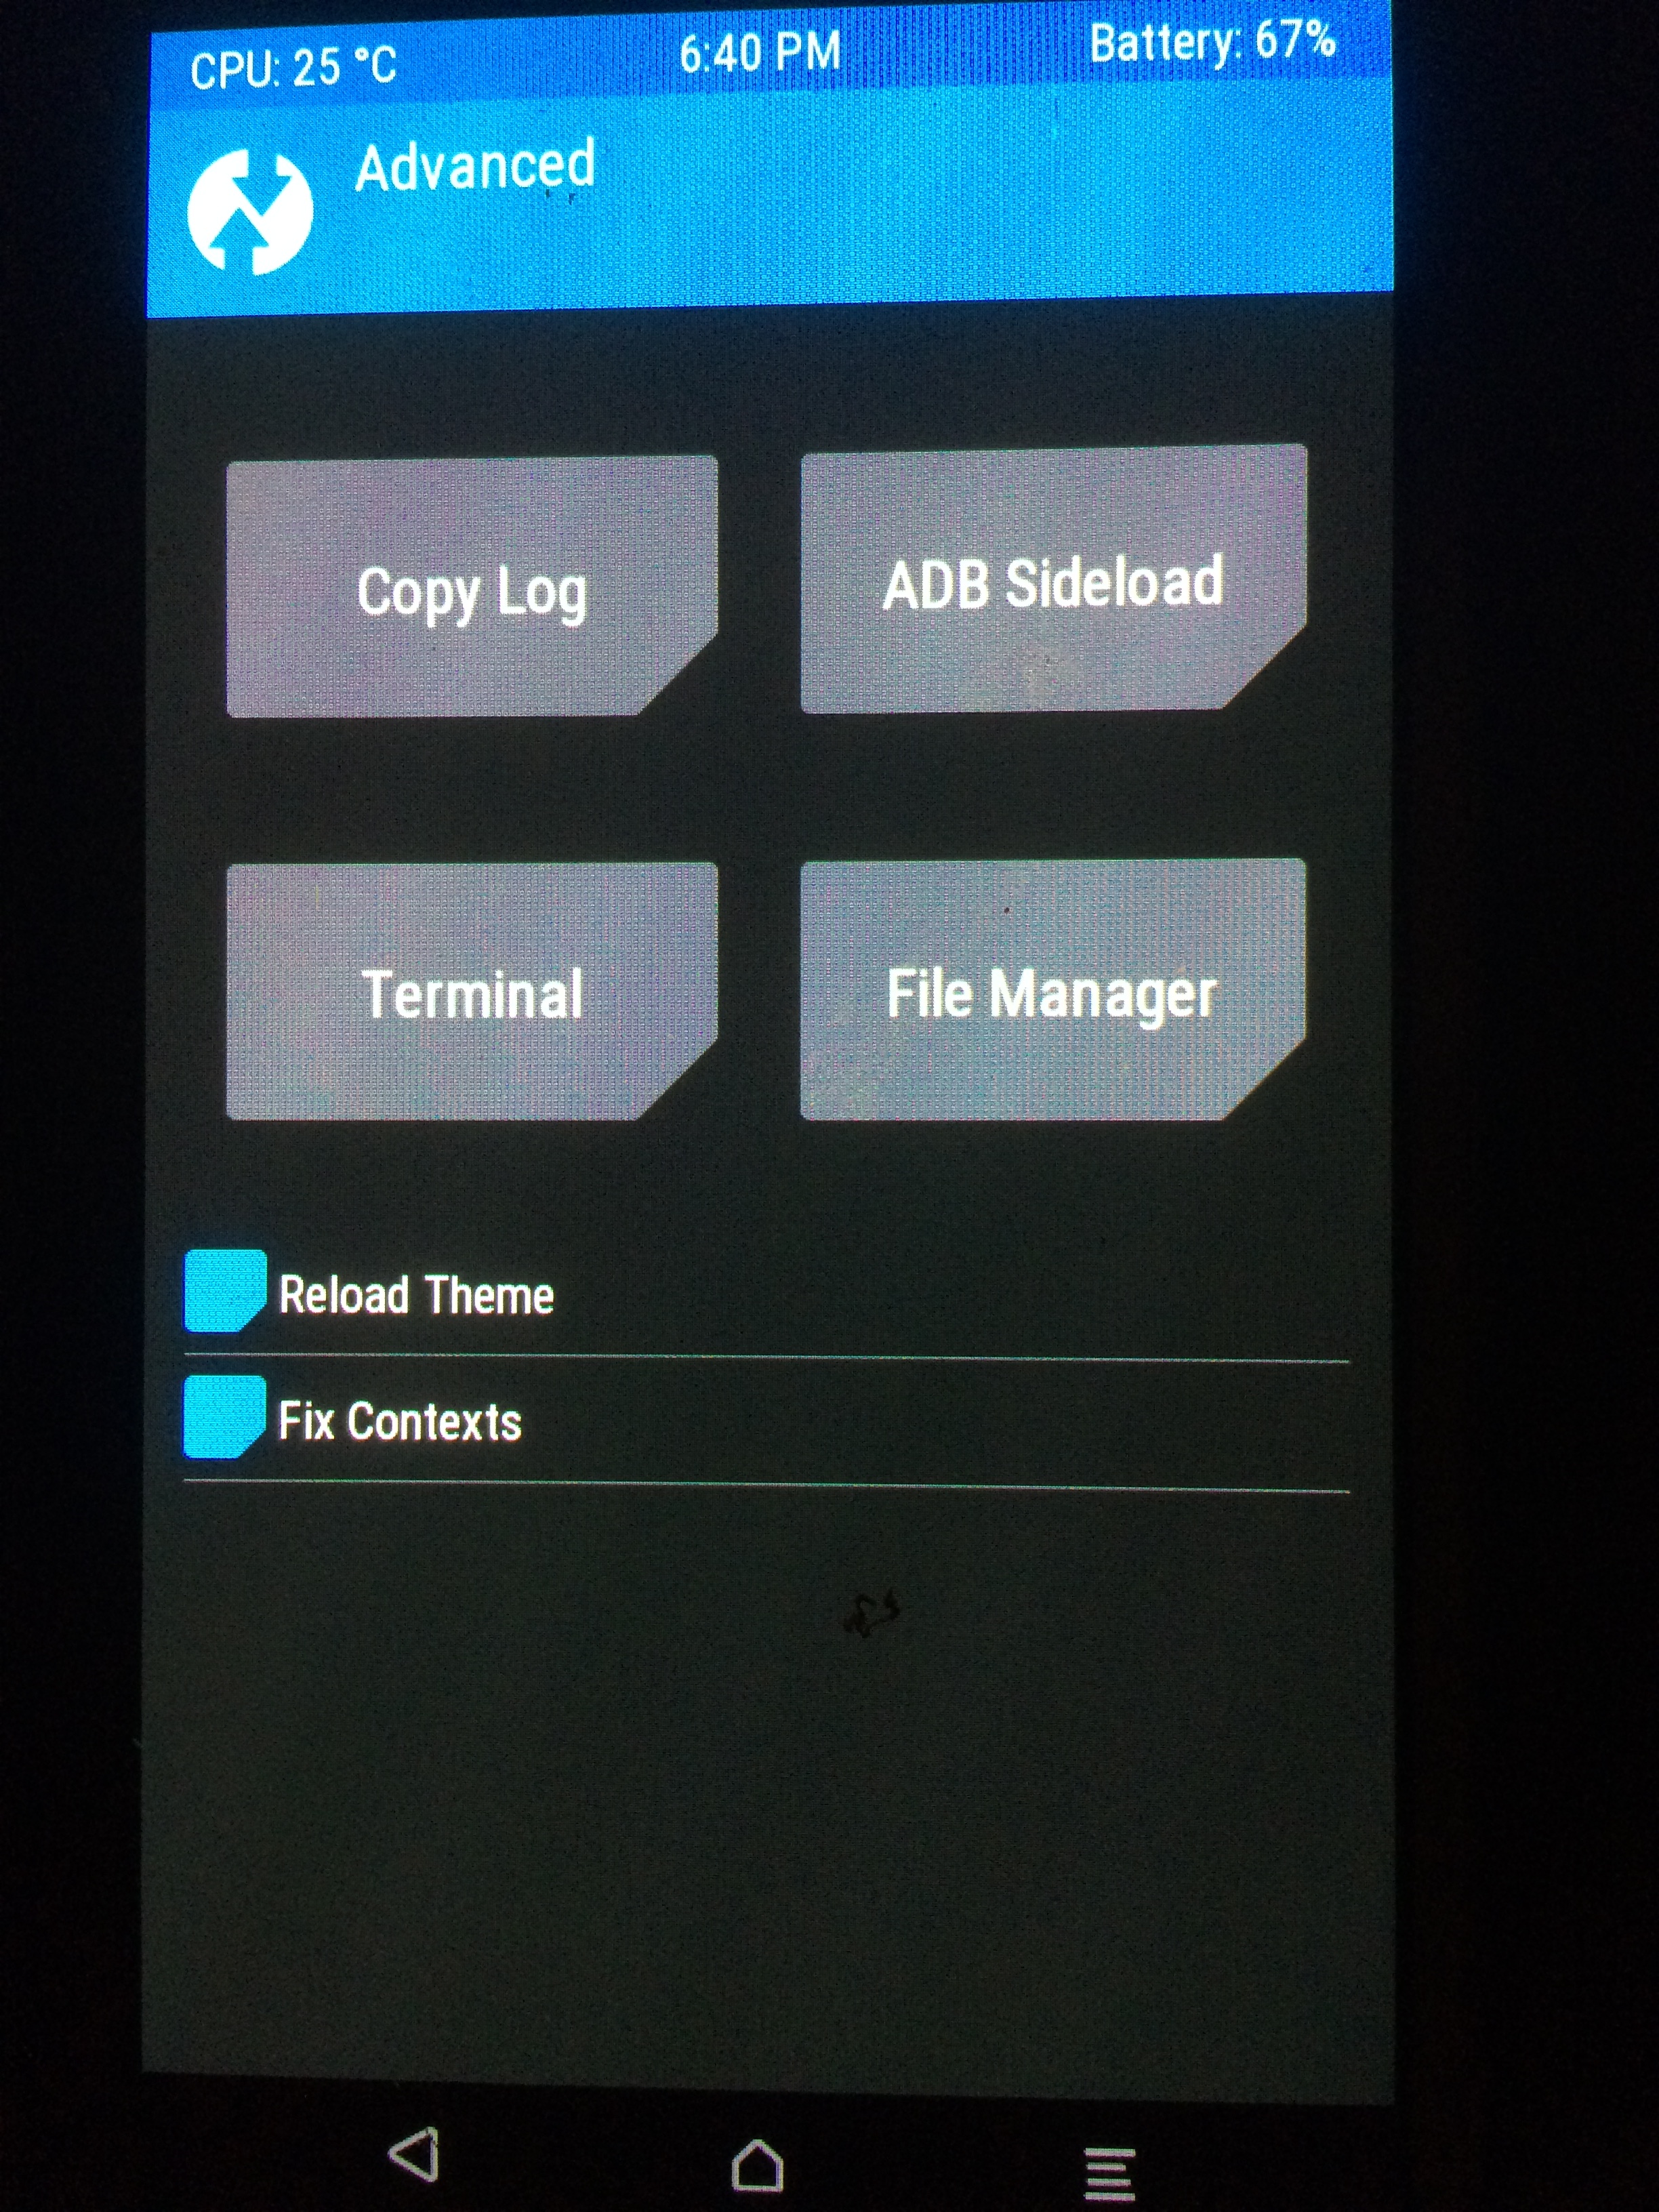
- choose Advanced

.
.
- Tap ADB Sideload

.
- Select Wipe Dalvik Cache and Wipe Cache
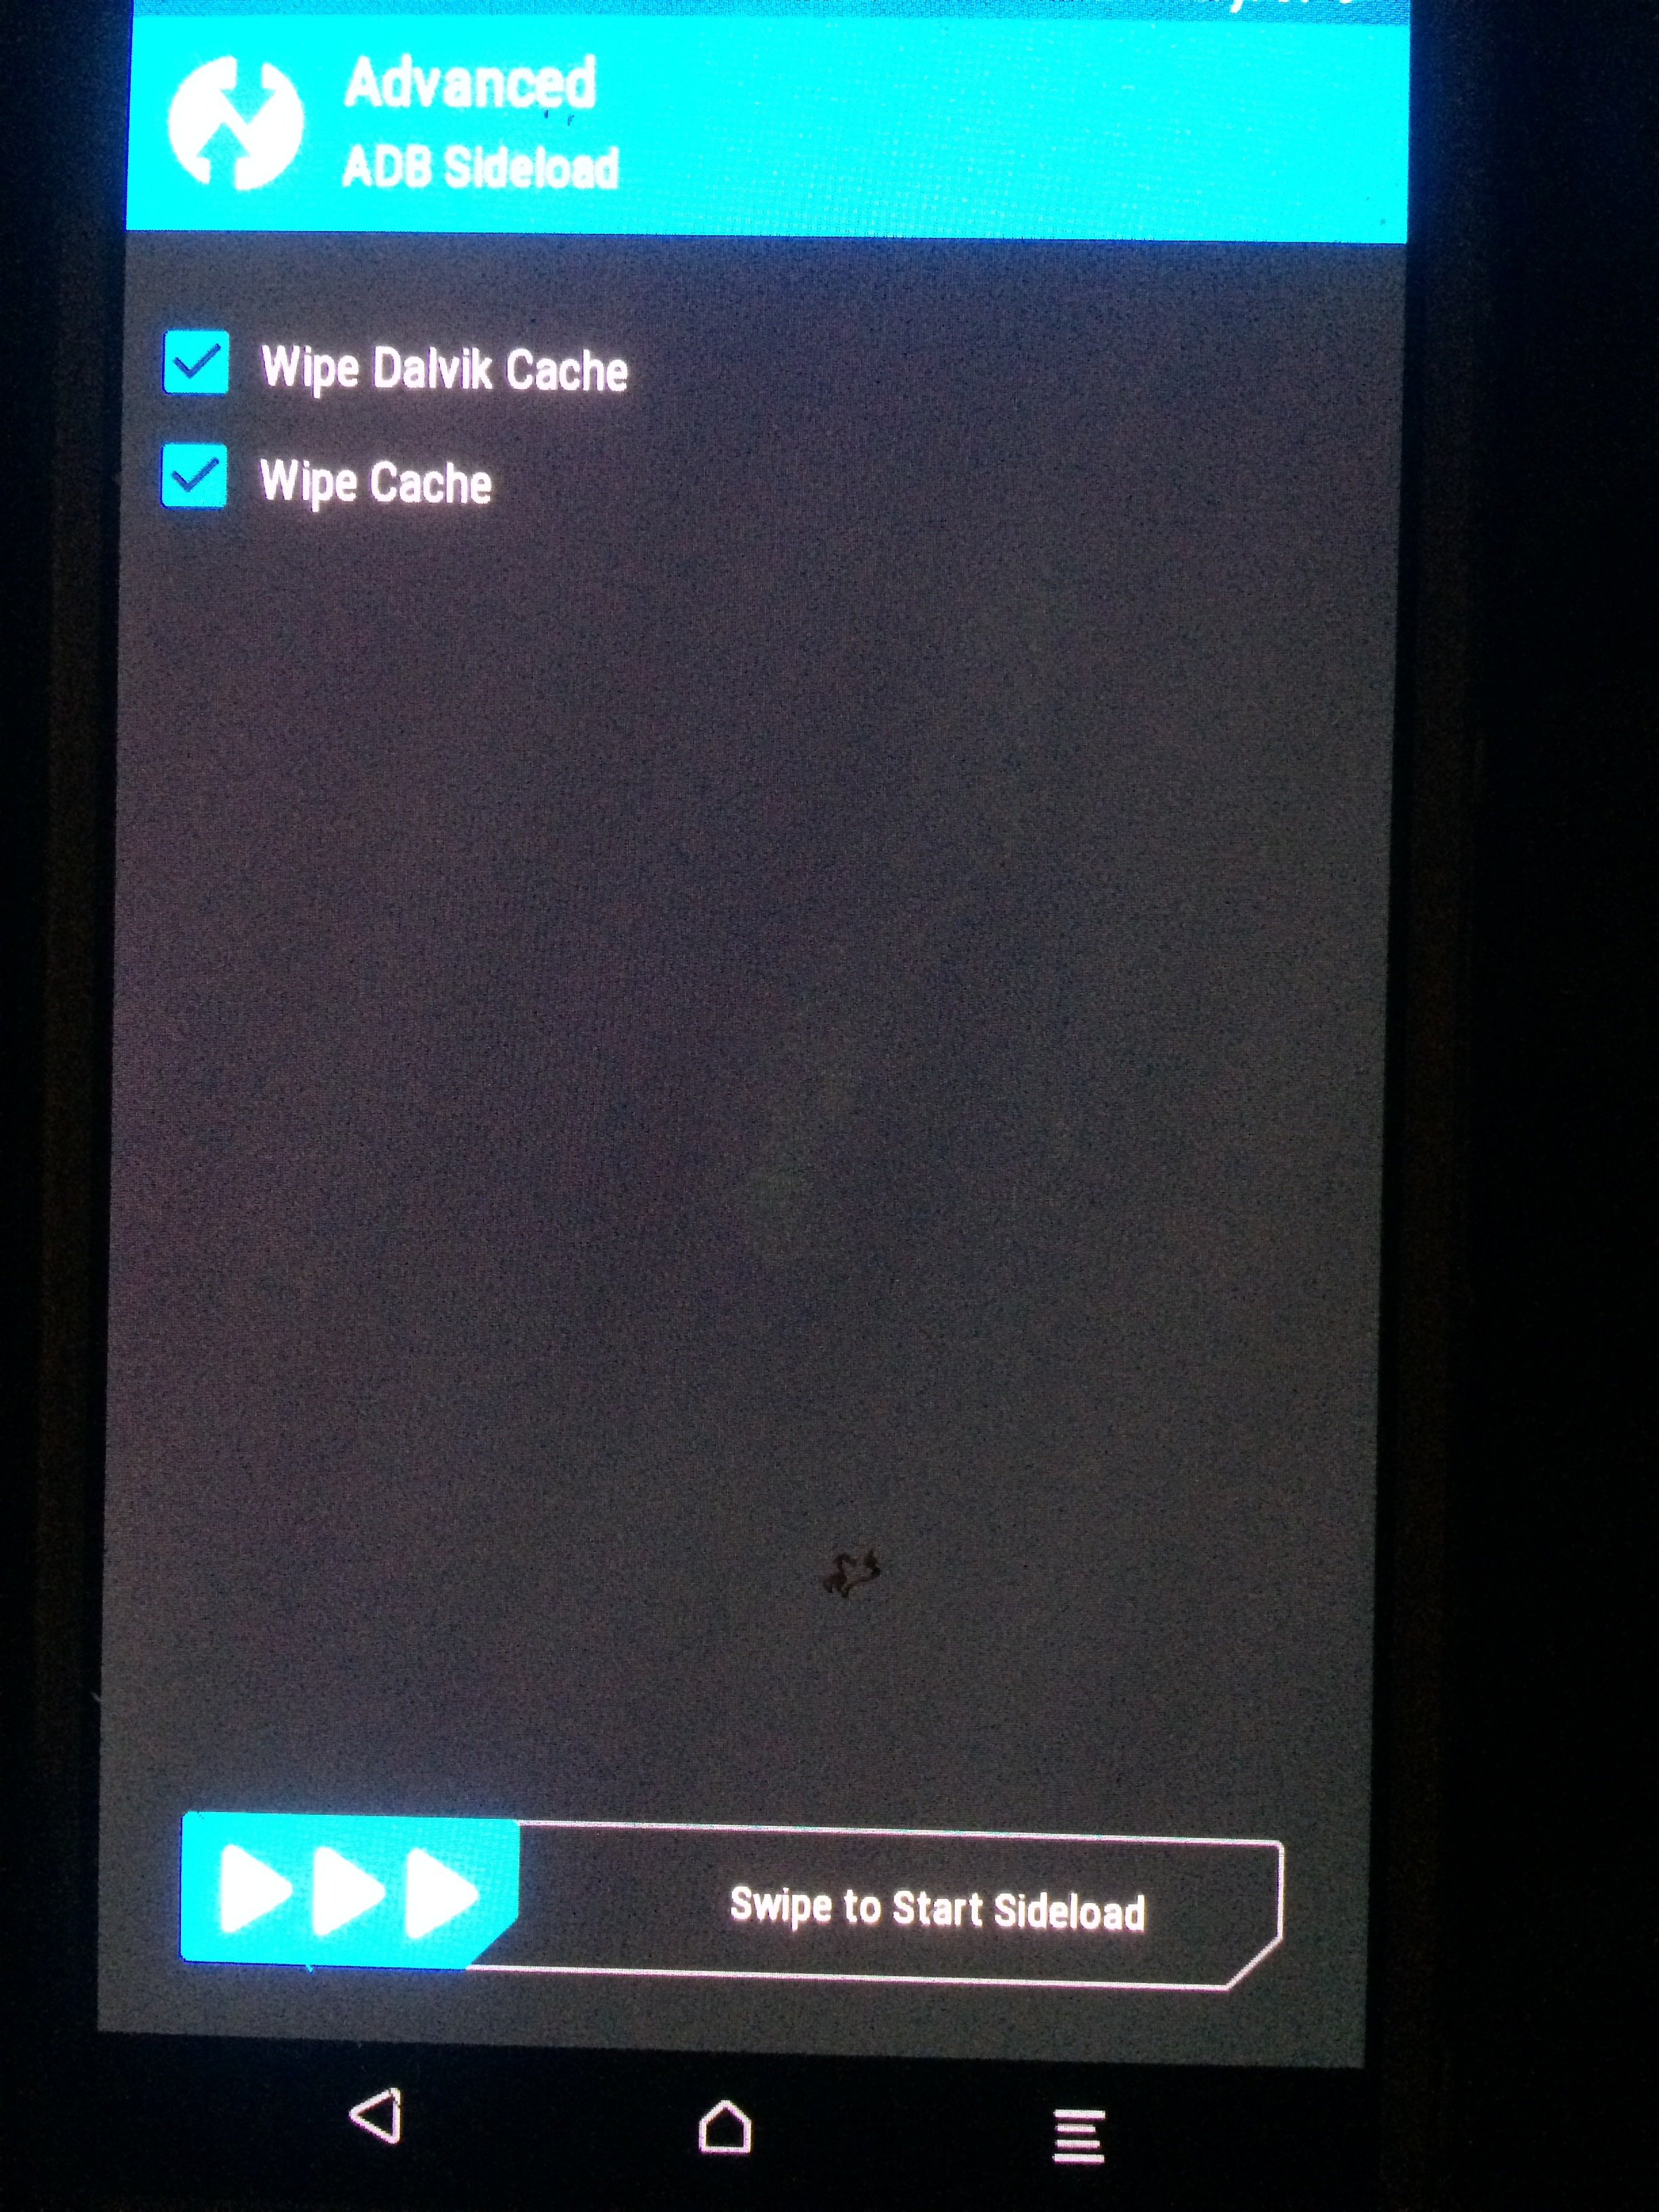
- then Swipe to Start ADB Sideload
.
on your PC
- in the command-prompt on your Windows PC,
or in the console on your MacOS PC
In the Terminal application on your GNU/Linux PC,
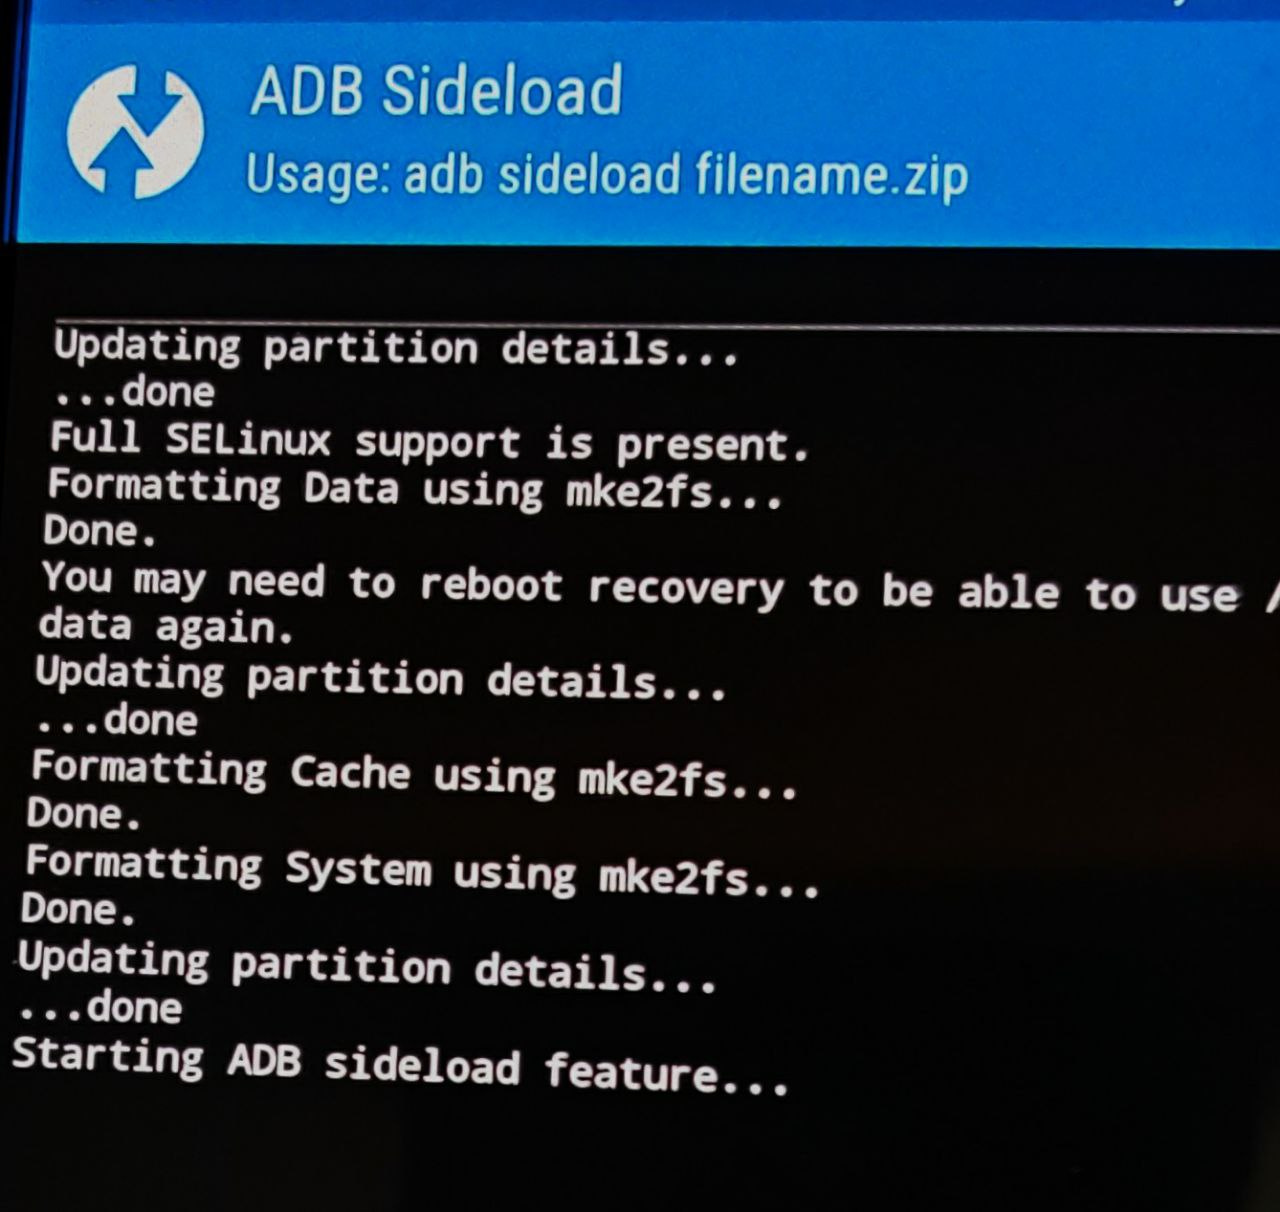
navigate to file path where you have downloaded the /e/OS.zip to execute the following command:
adb sideload e-0.11-n-2020082970471-dev-your-device.zip
- It will result in the following output on PC when finished:
serving: '/home/modi/Downloads/e-0.11-n-2020082970471-dev-herolte.zip' (~47%) Total xfer: 1.00x
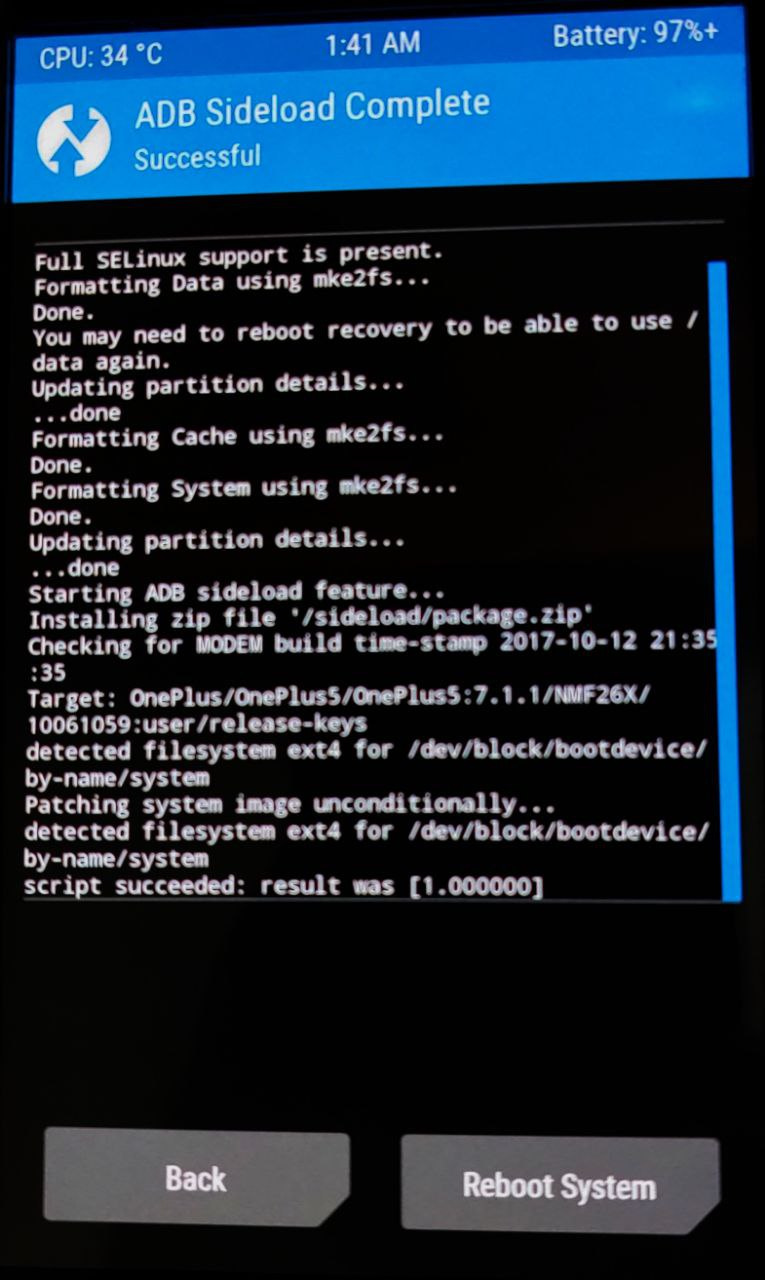
- On your smartphone, a successful result as seen in the image below appears.
.
. - Tap Reboot System
…
- wait several minutes…
…
to boot into freshly installed /e/OS on your Samsung device.
.

- Voila! Easy, isn’t it?
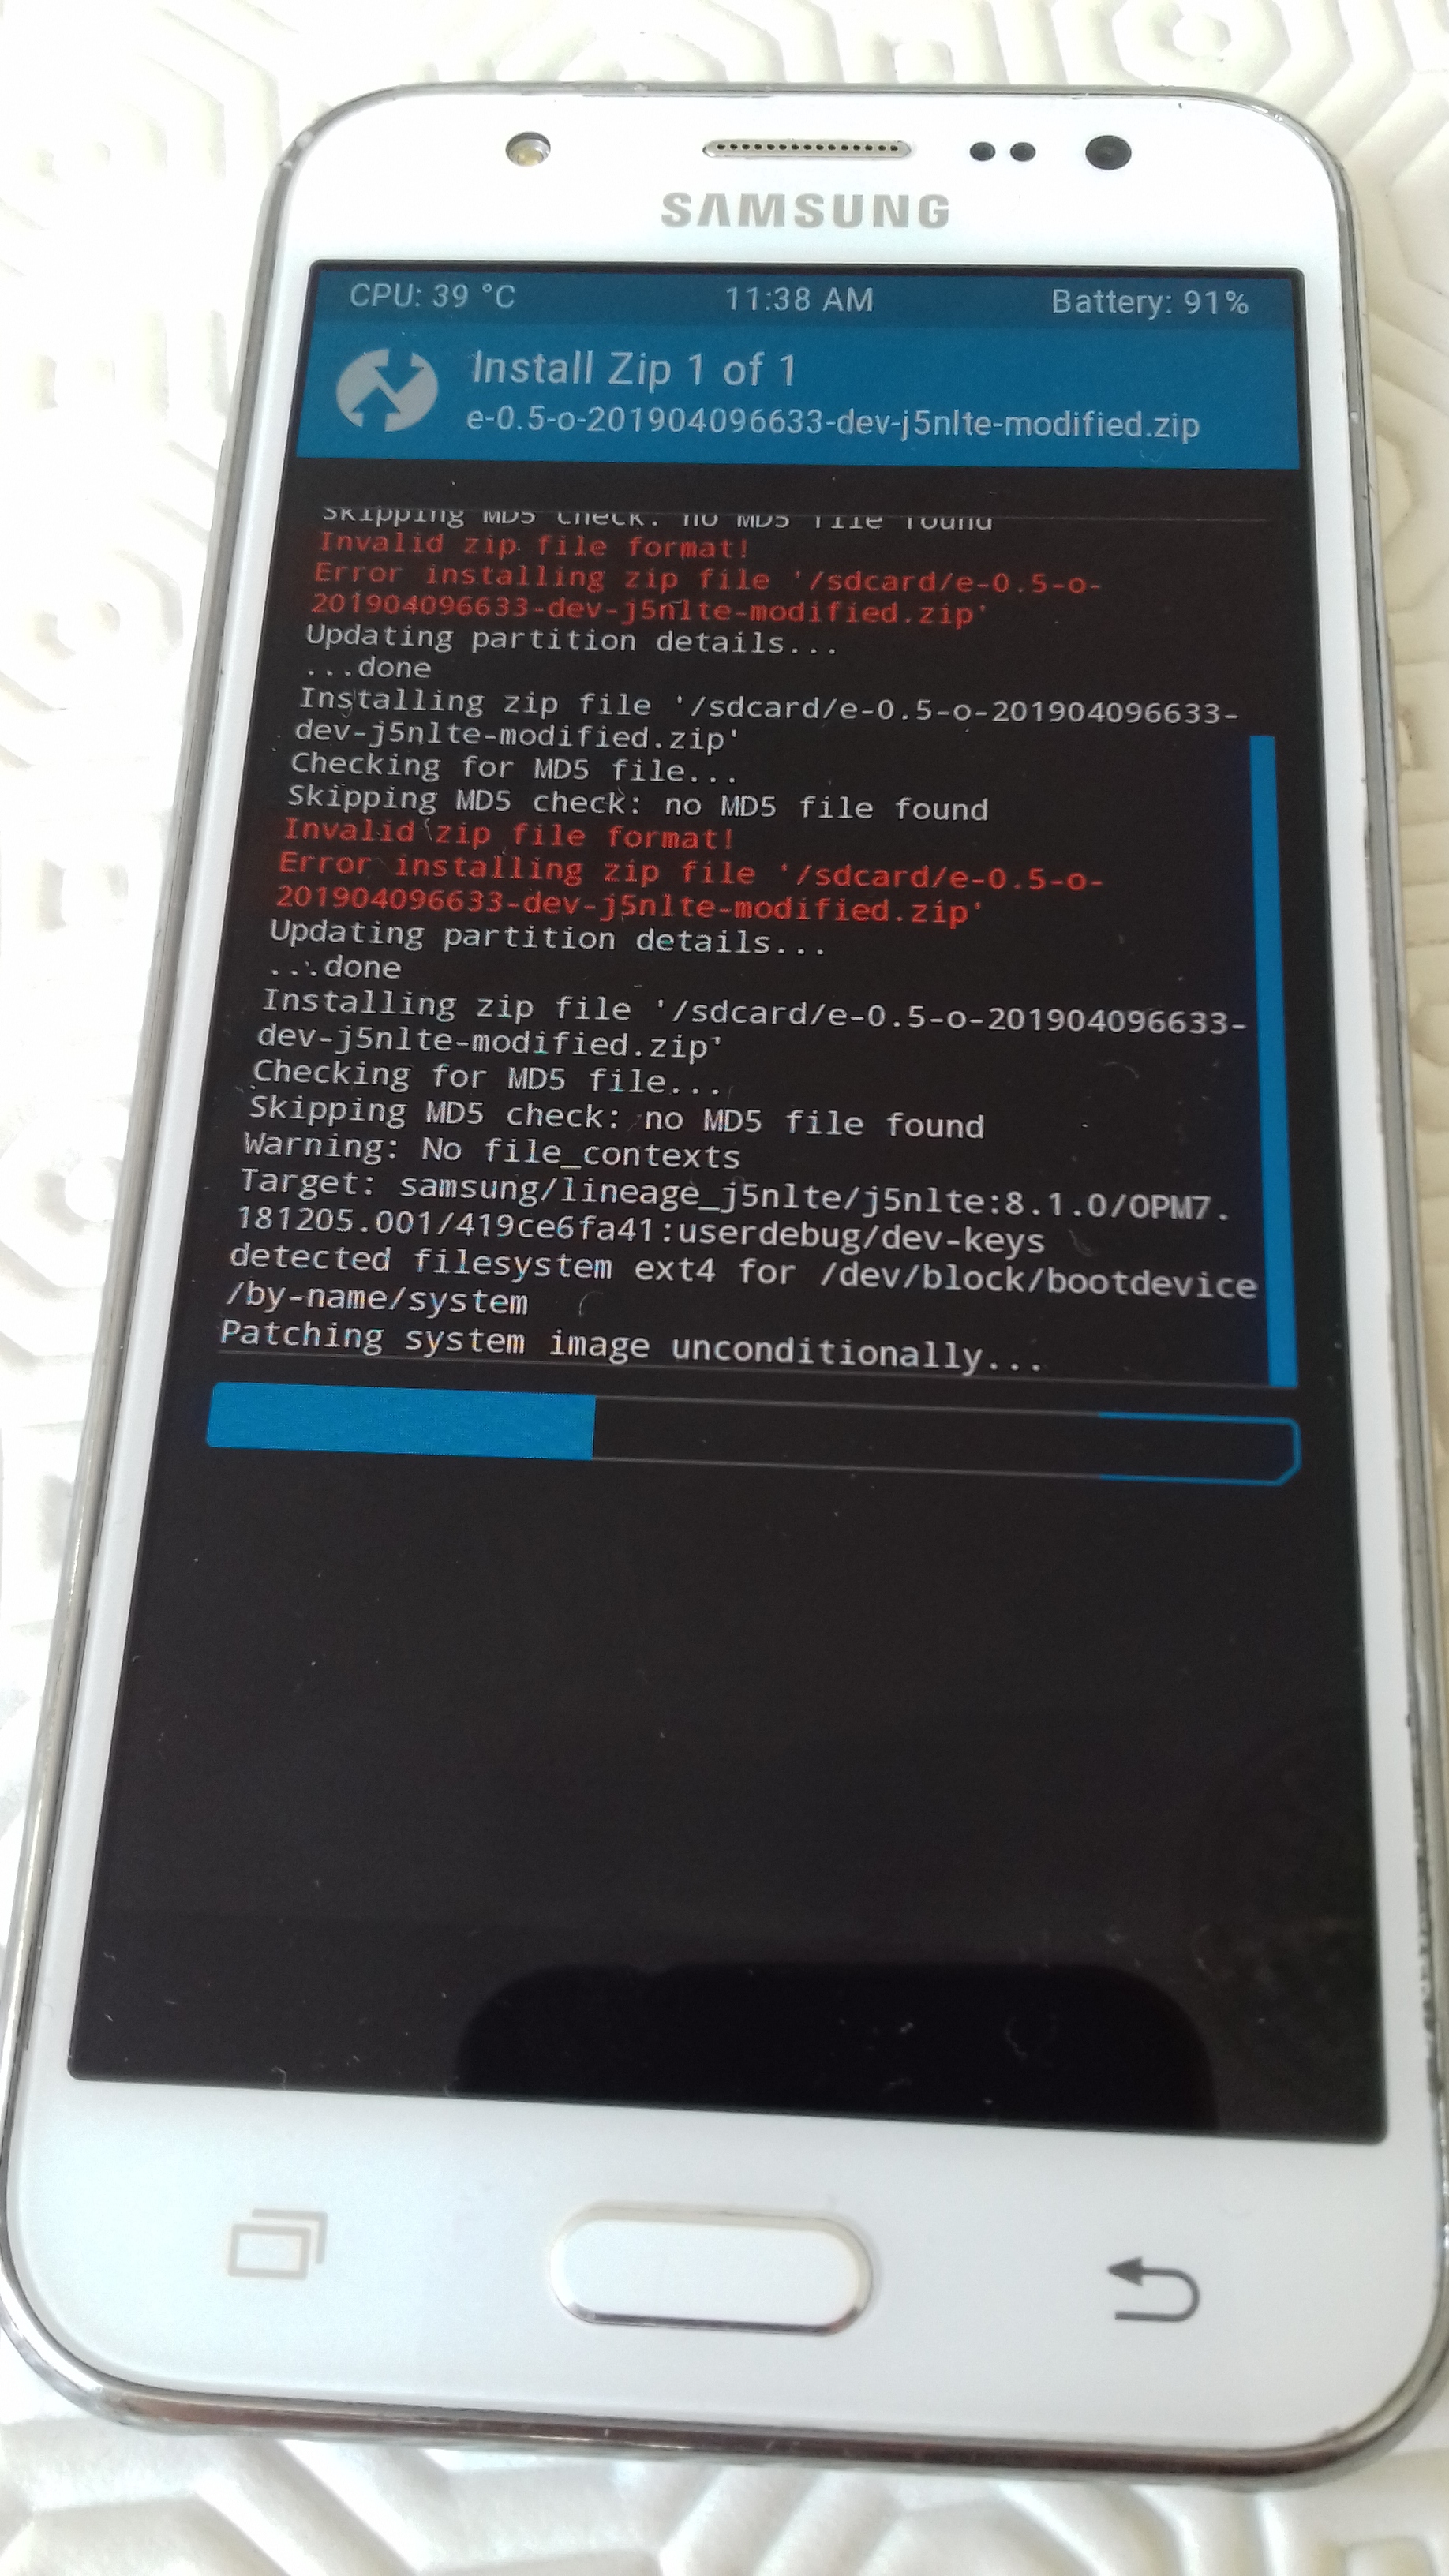
If you encounter an “error 7”,
.
refer to this topic .
This could also be due to the fact that :
your TWRP version isn’t compatible with the ROM you are trying to install,
-
-
-
Samsung.
for installing /e/OS on a recent devices “a/b_slot” or “treble” ( originaly shipped with Android 8 or later ) use twrp version 3.5.x-x
twrp version 3.4.x-x was buggy, don’t choose it
BUT for installing /e/OS on an older device ( originaly shipped with nougat.7, or older), better is to use a version like twrp 3.3.1-0
-
-
[/details]
.
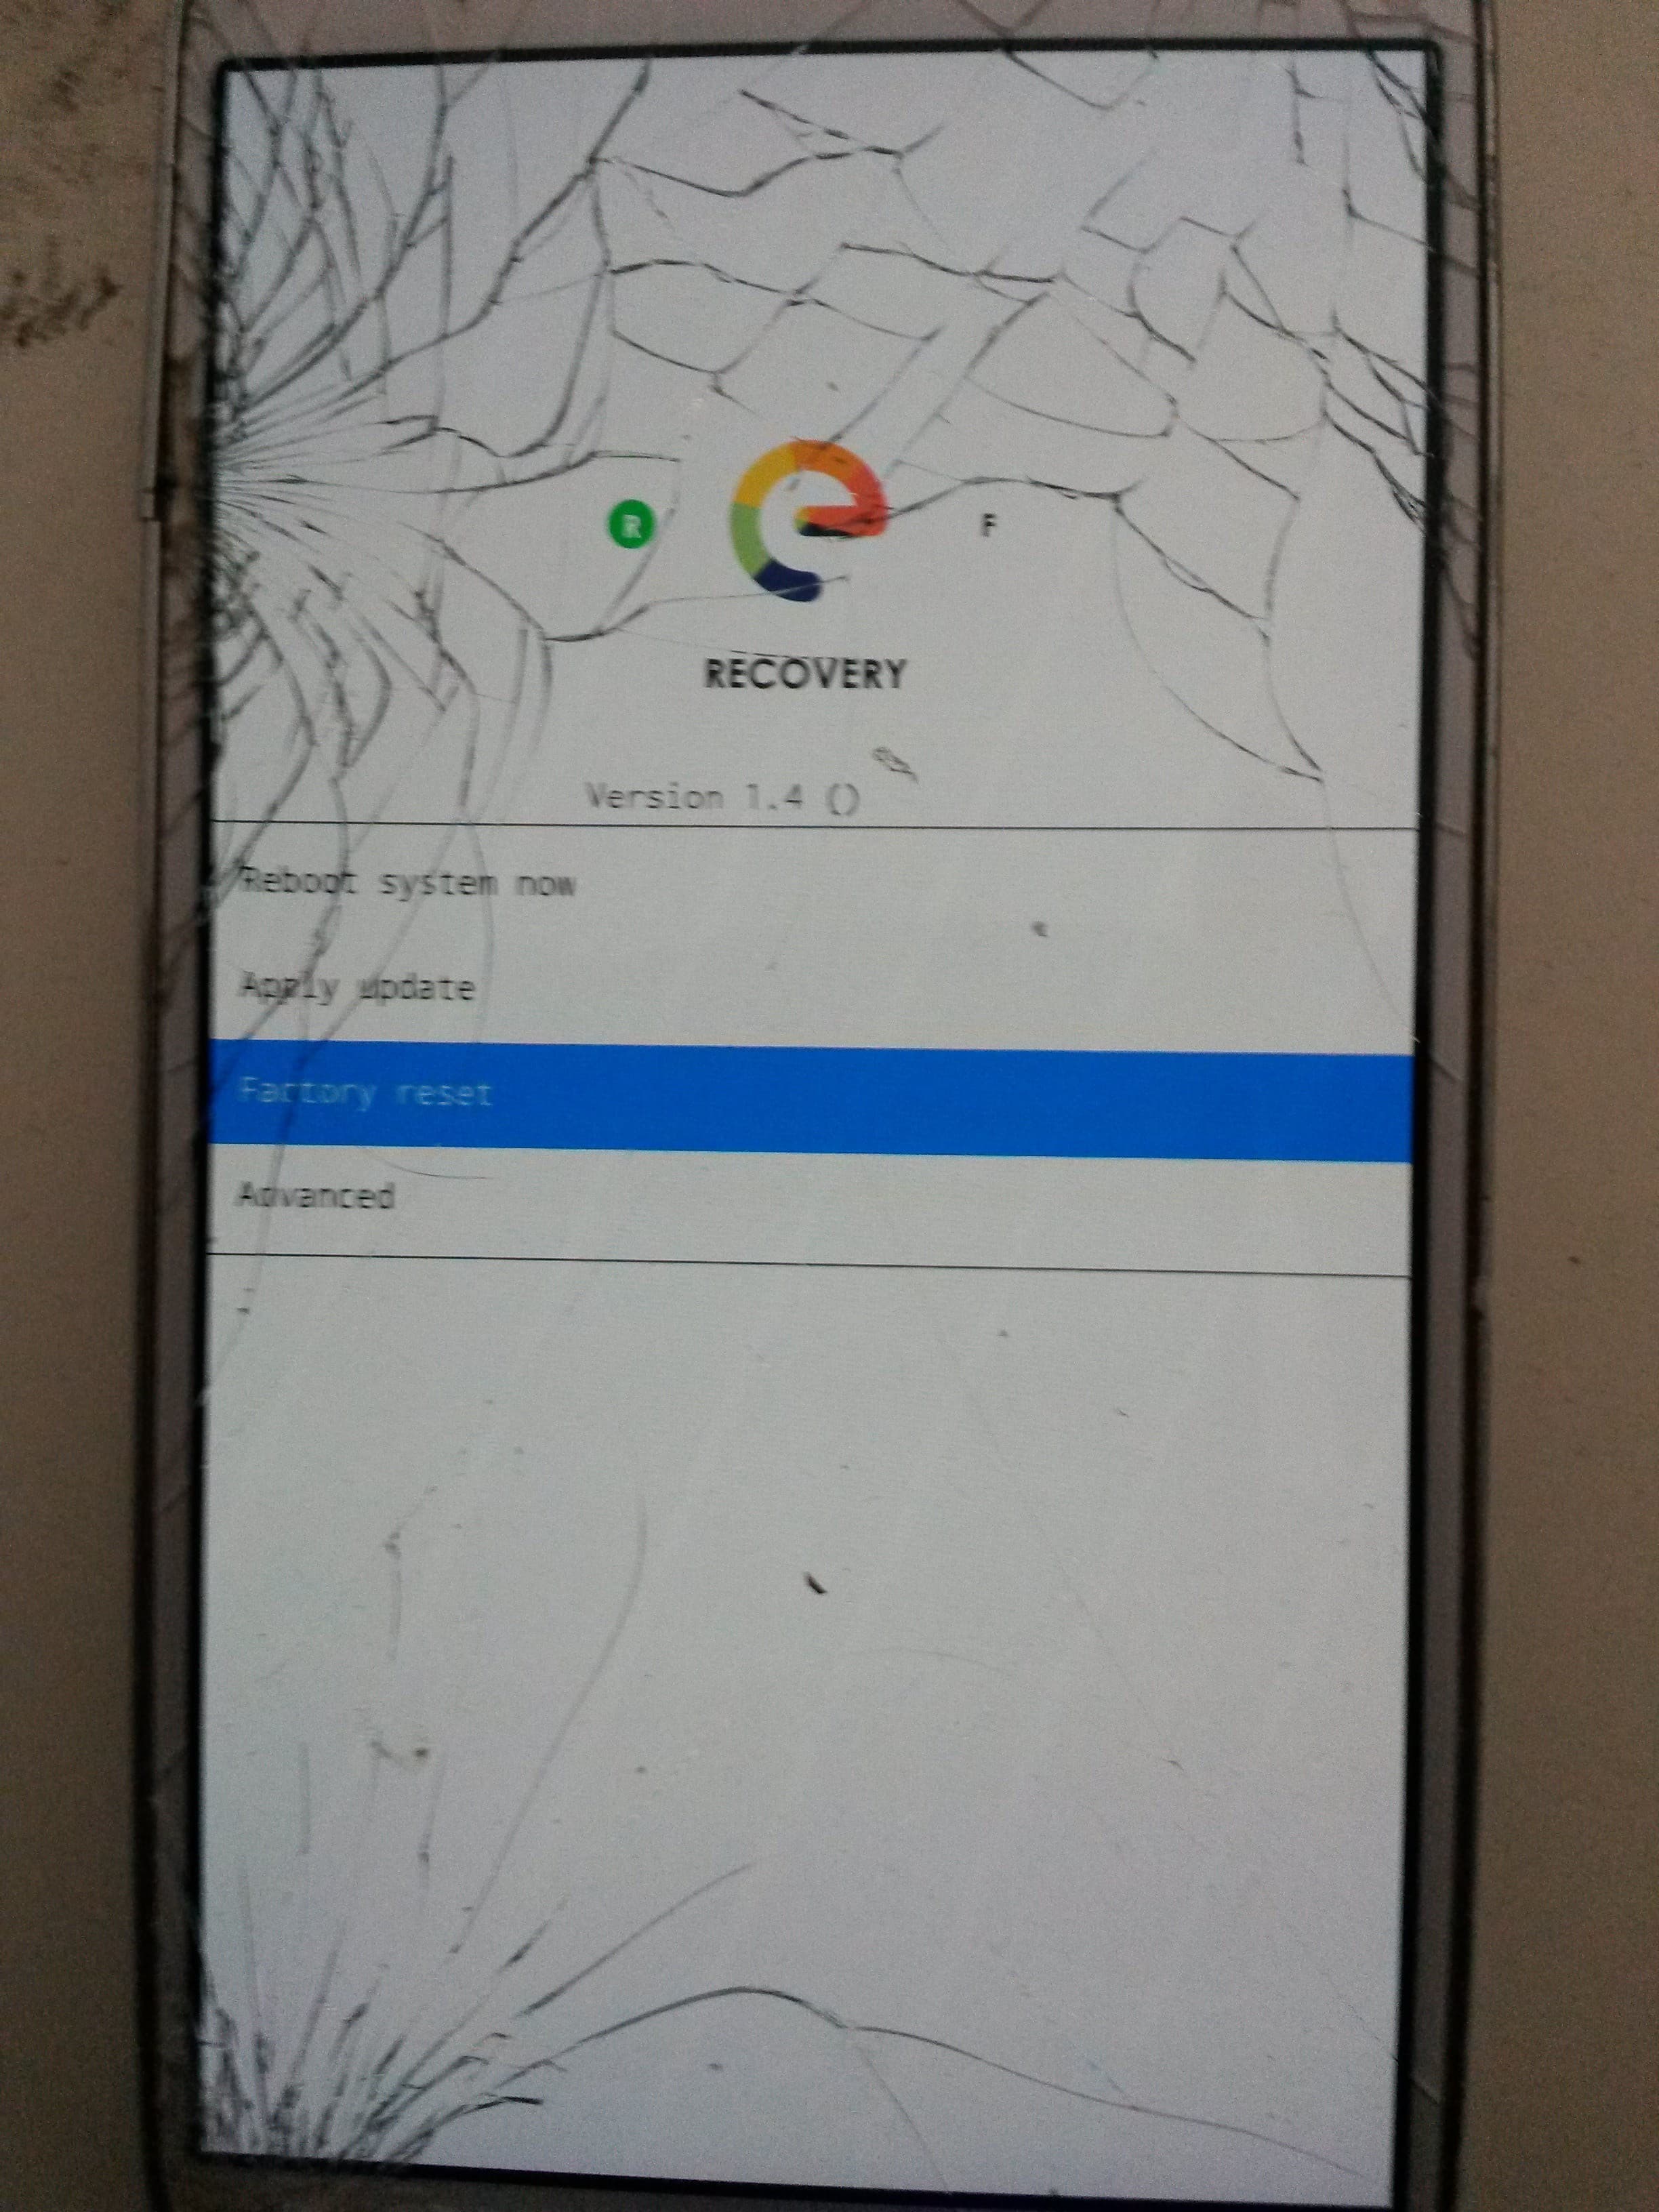
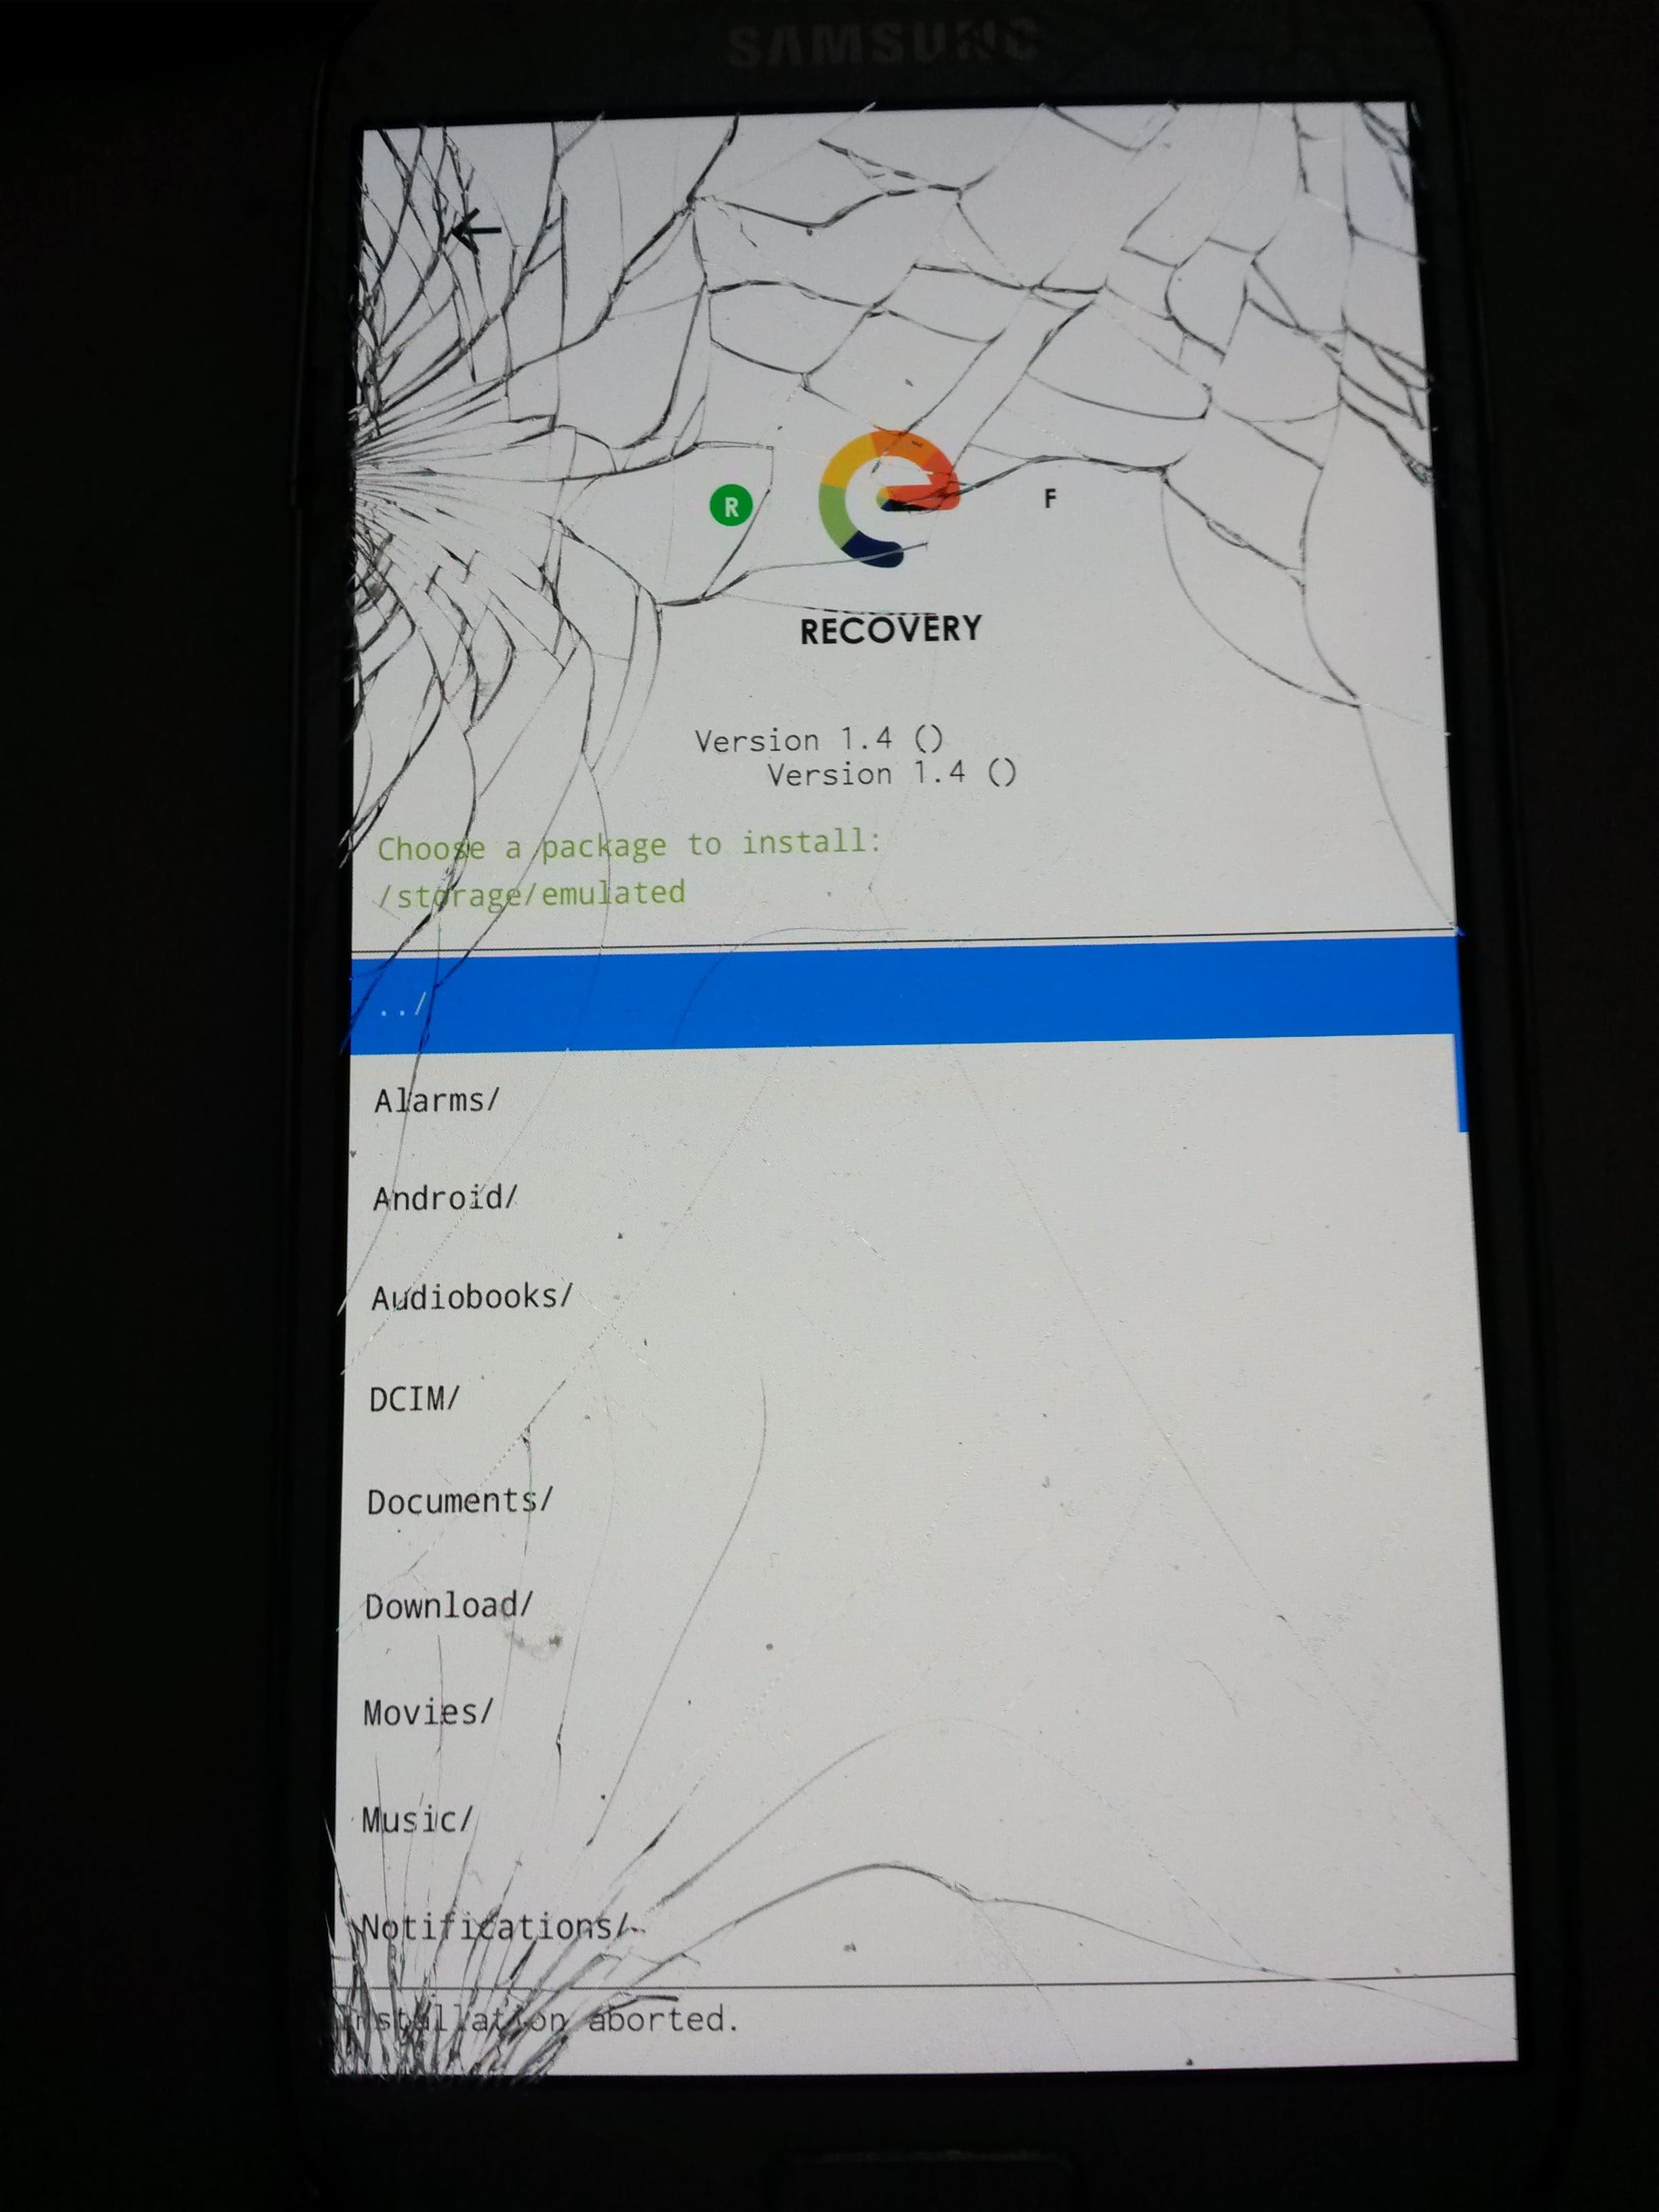
using recovery-e
The e-recovery.img will perform many of the same functions as twrp and is probably a bit easier in some respects for installing the eOS.zip. There are just a few basic steps to carry out:
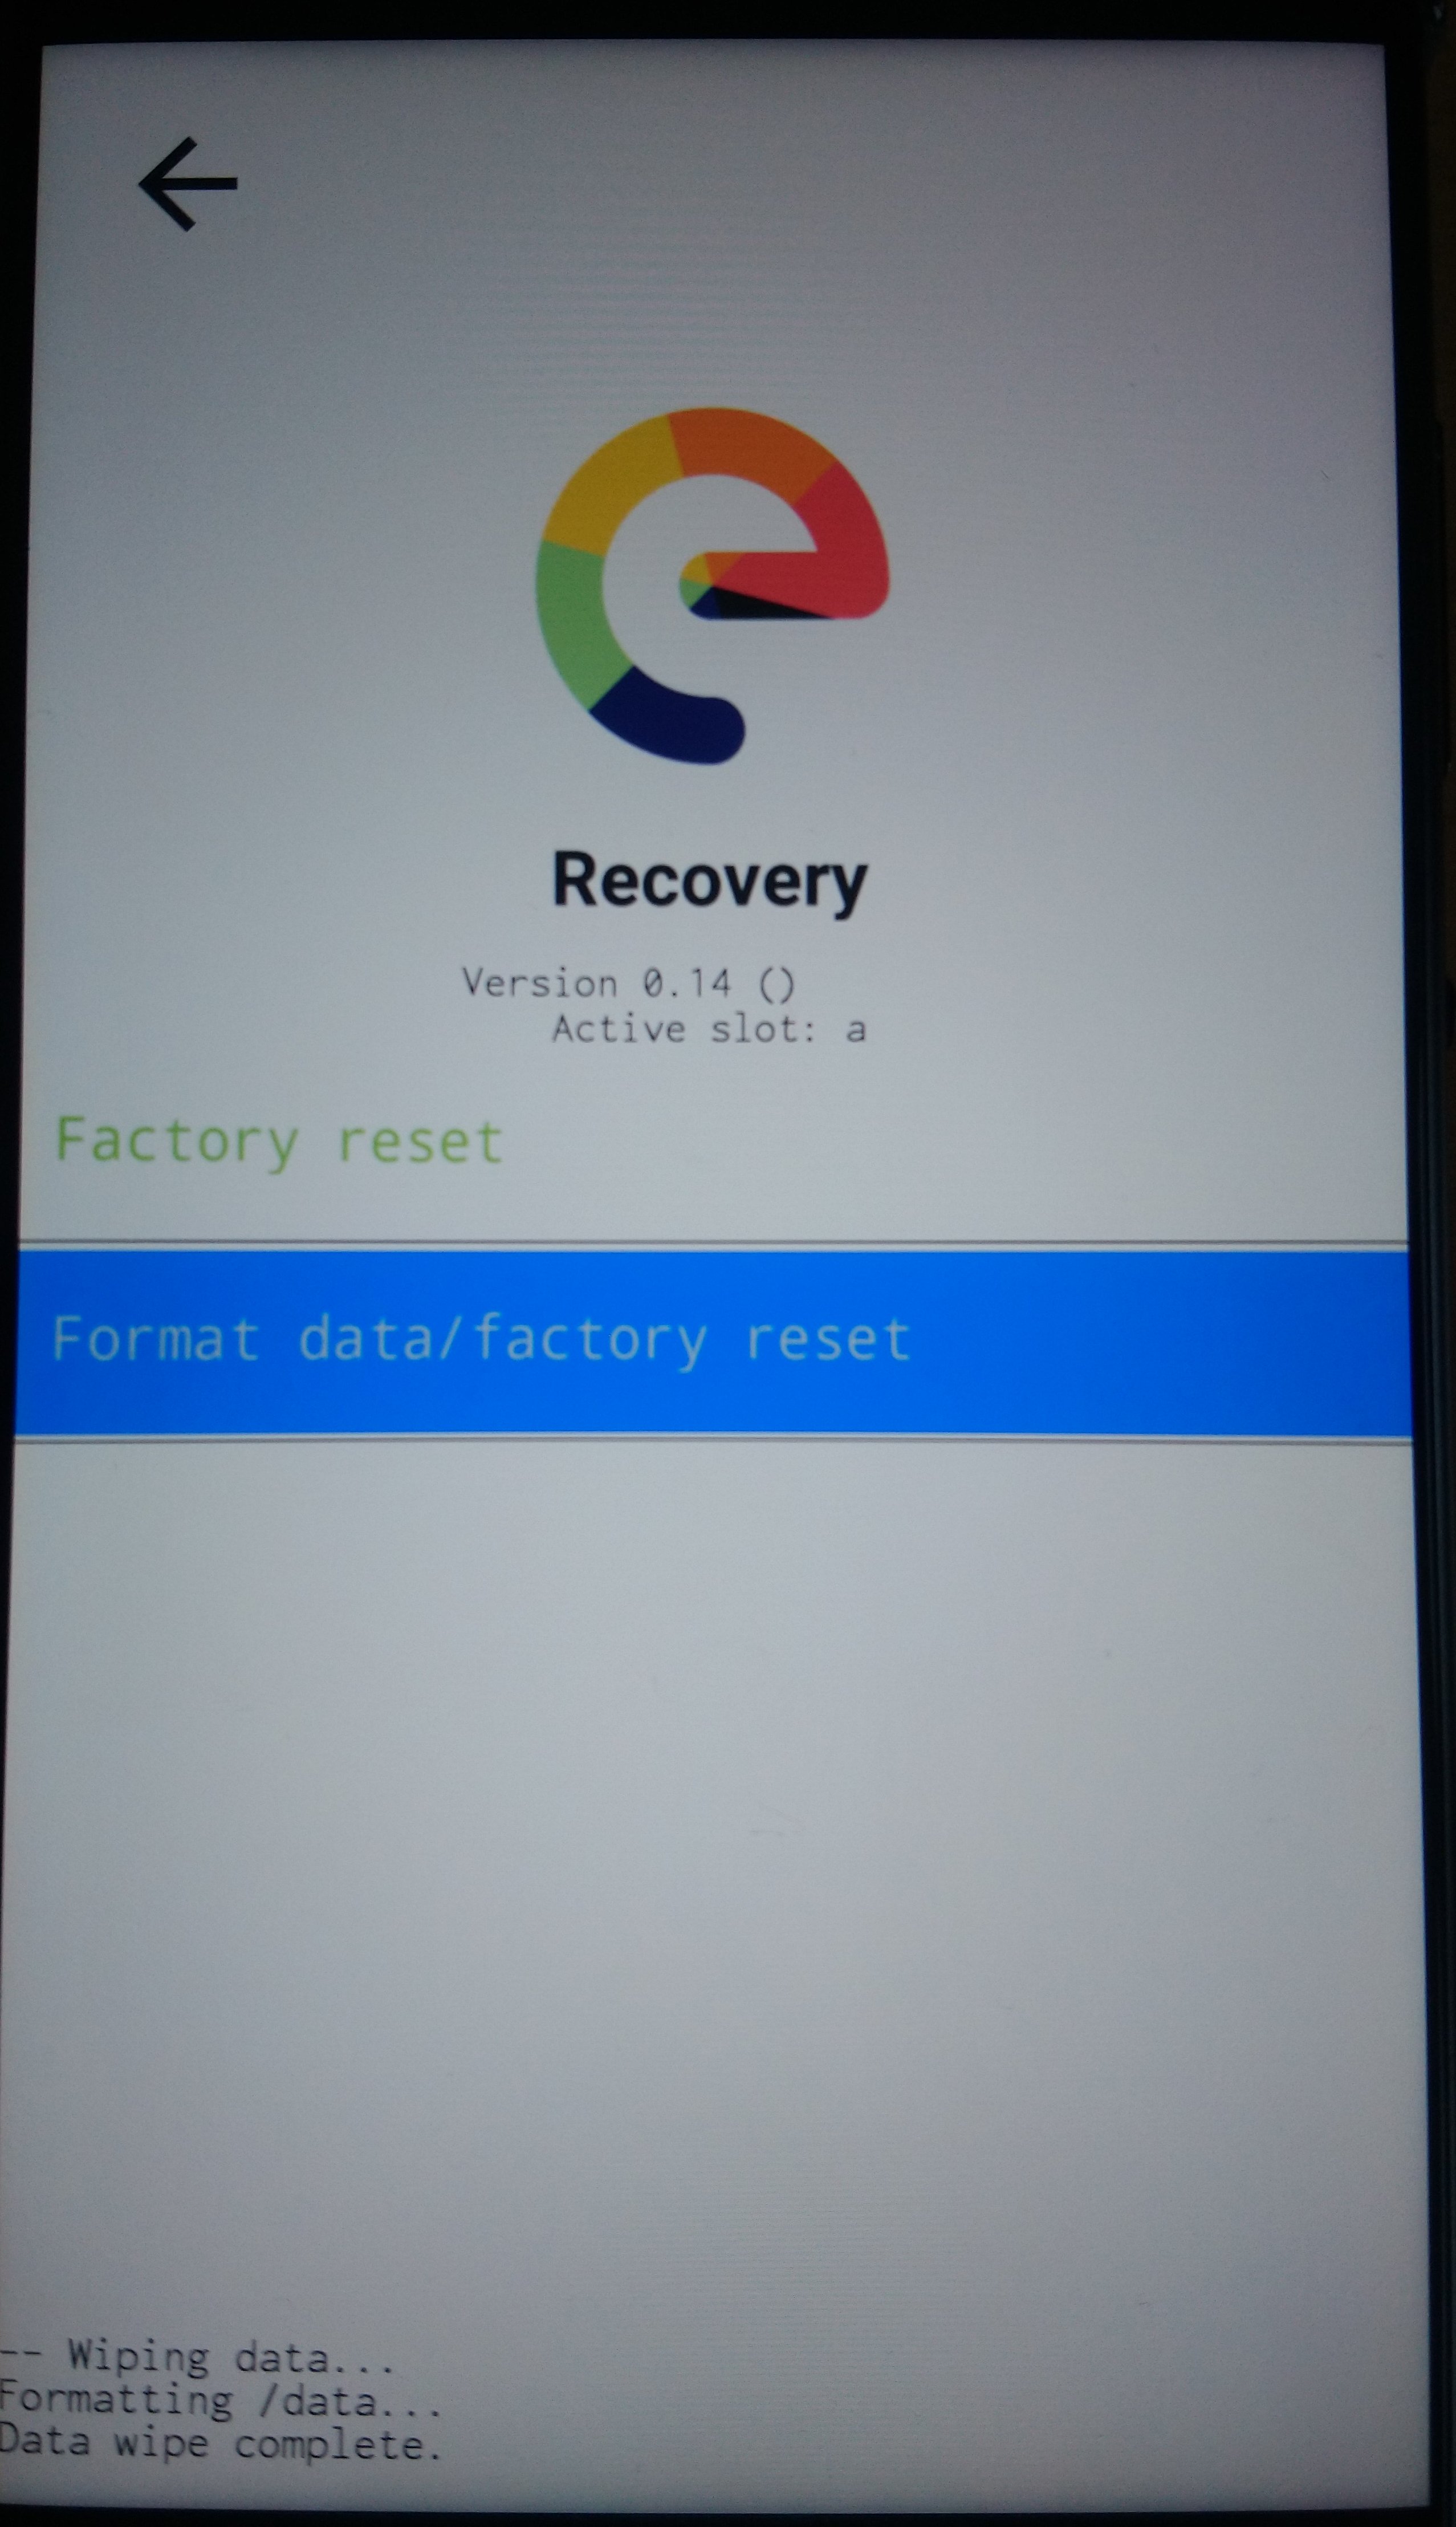
- (only for new install, not for update), select Factory Reset, then Format data / factory reset and continue with the formatting process
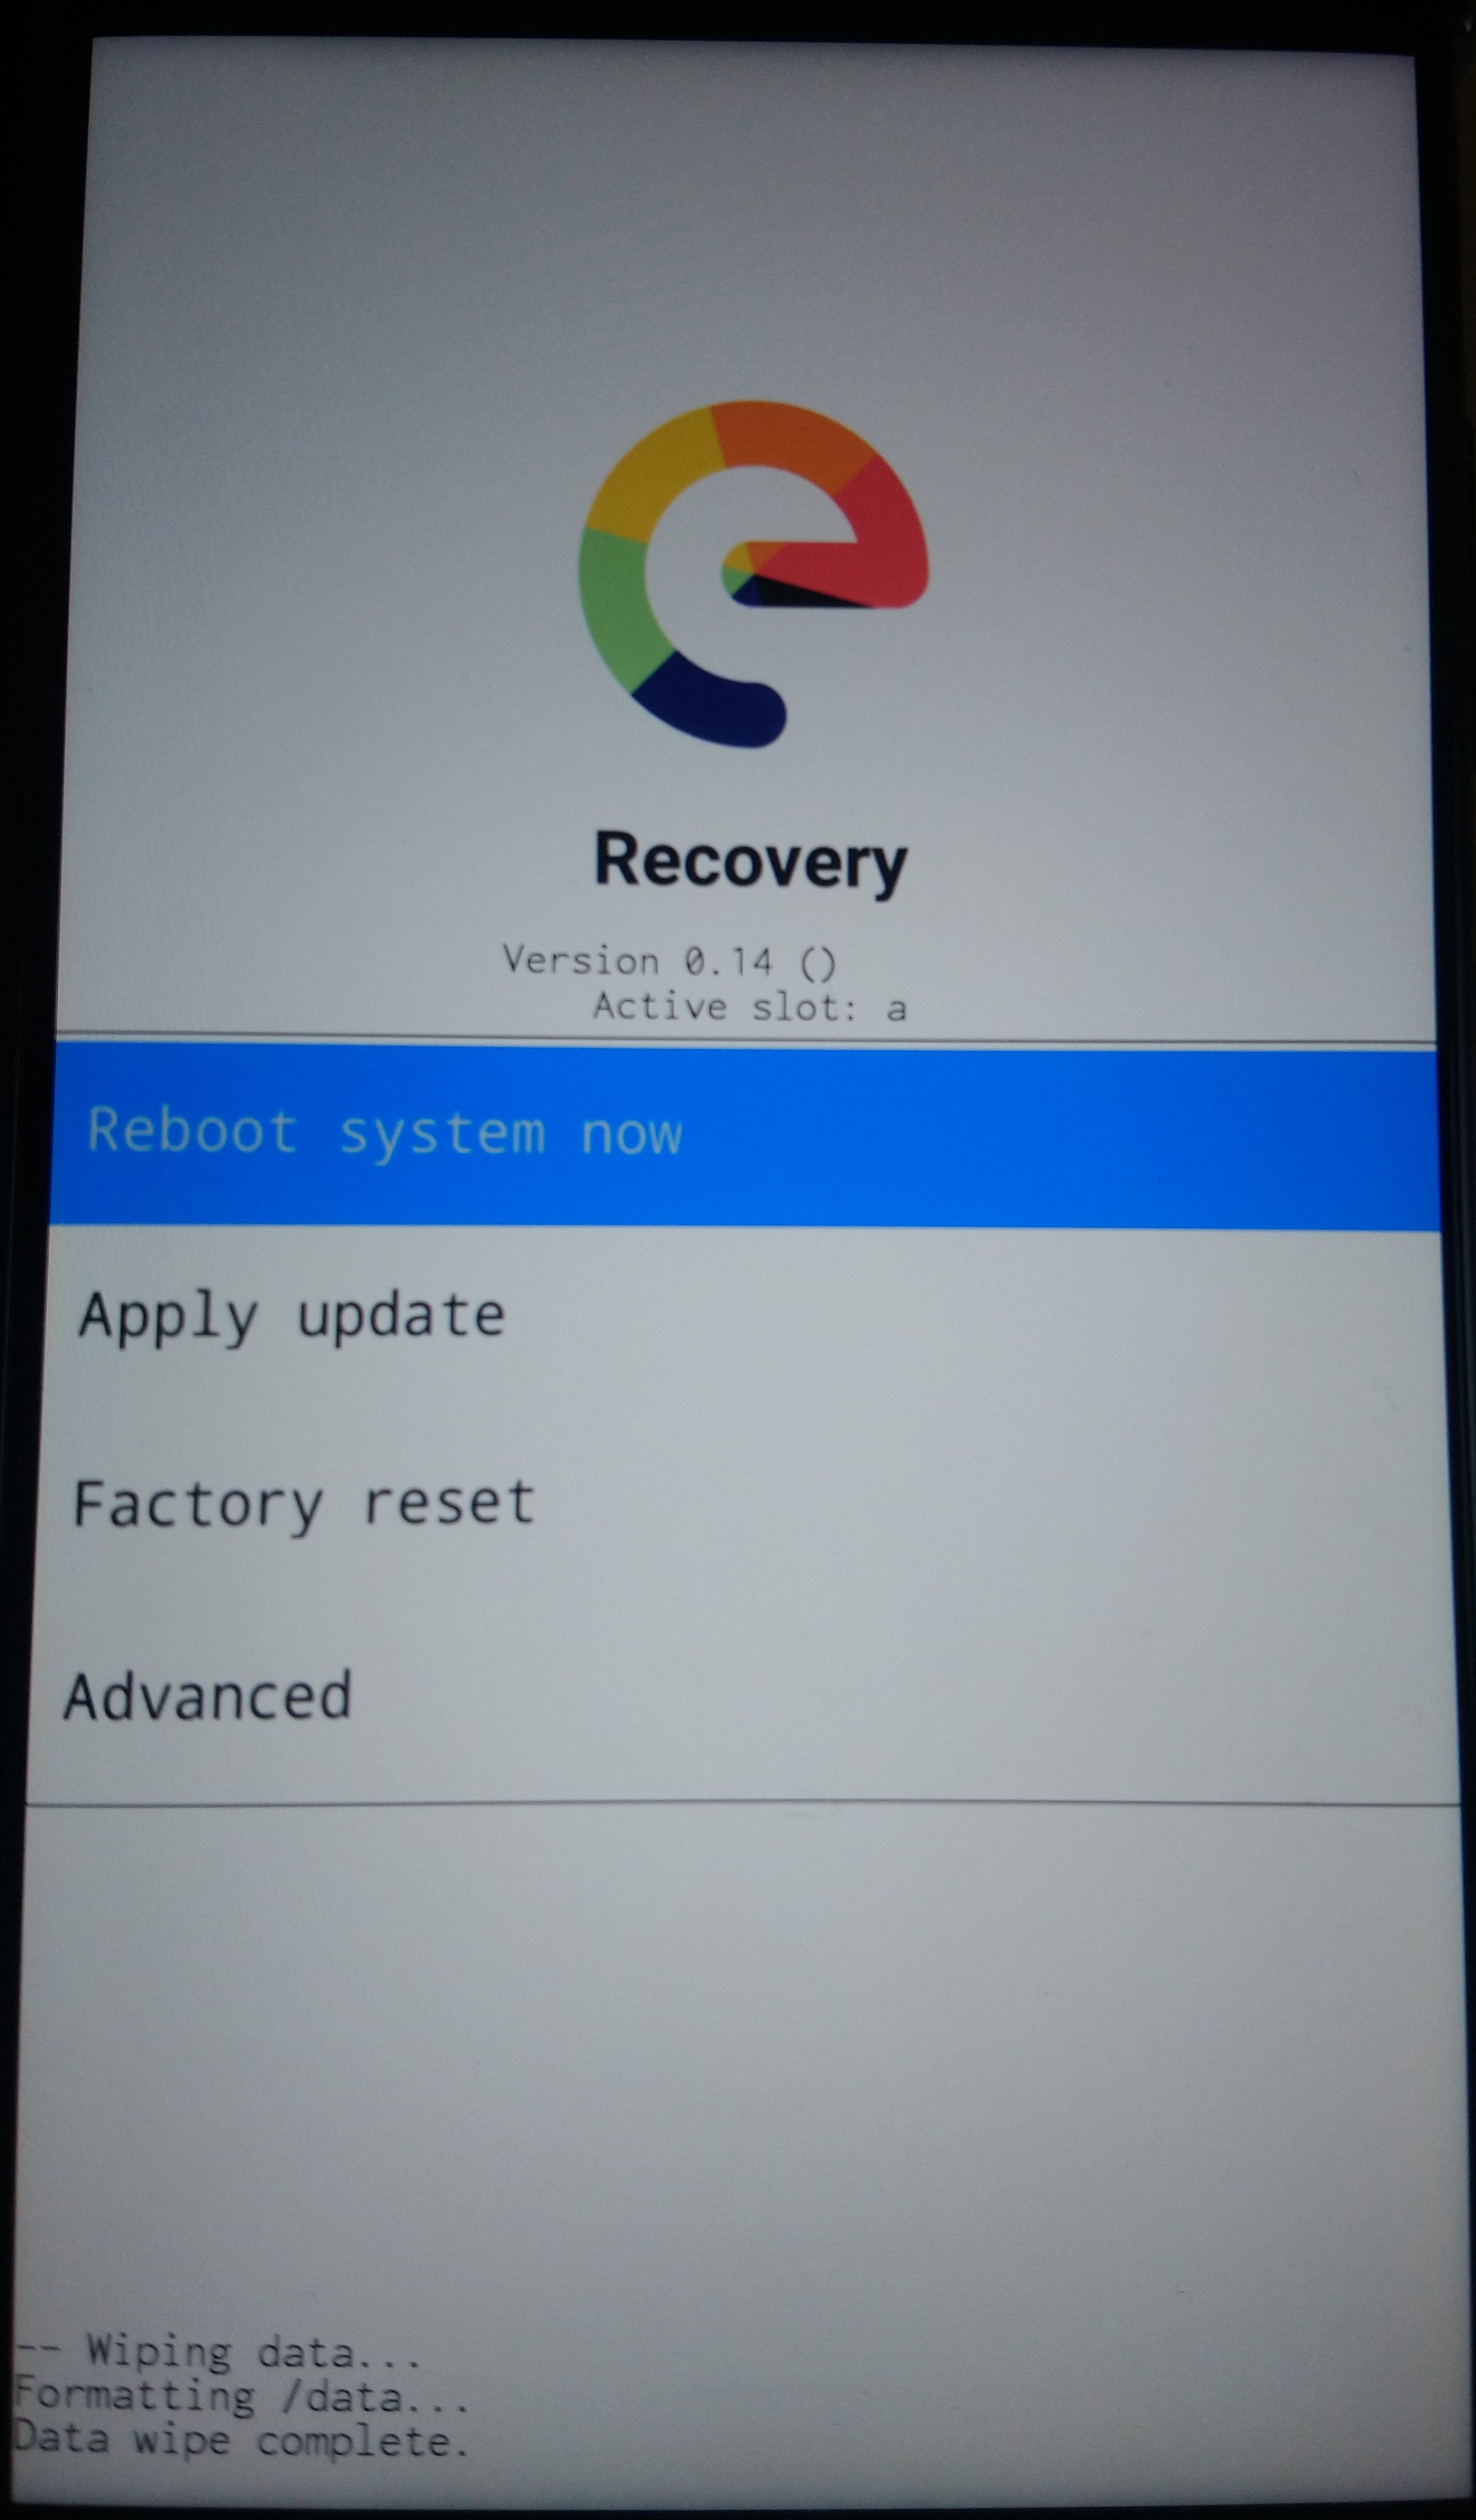
- Return to Home Screen
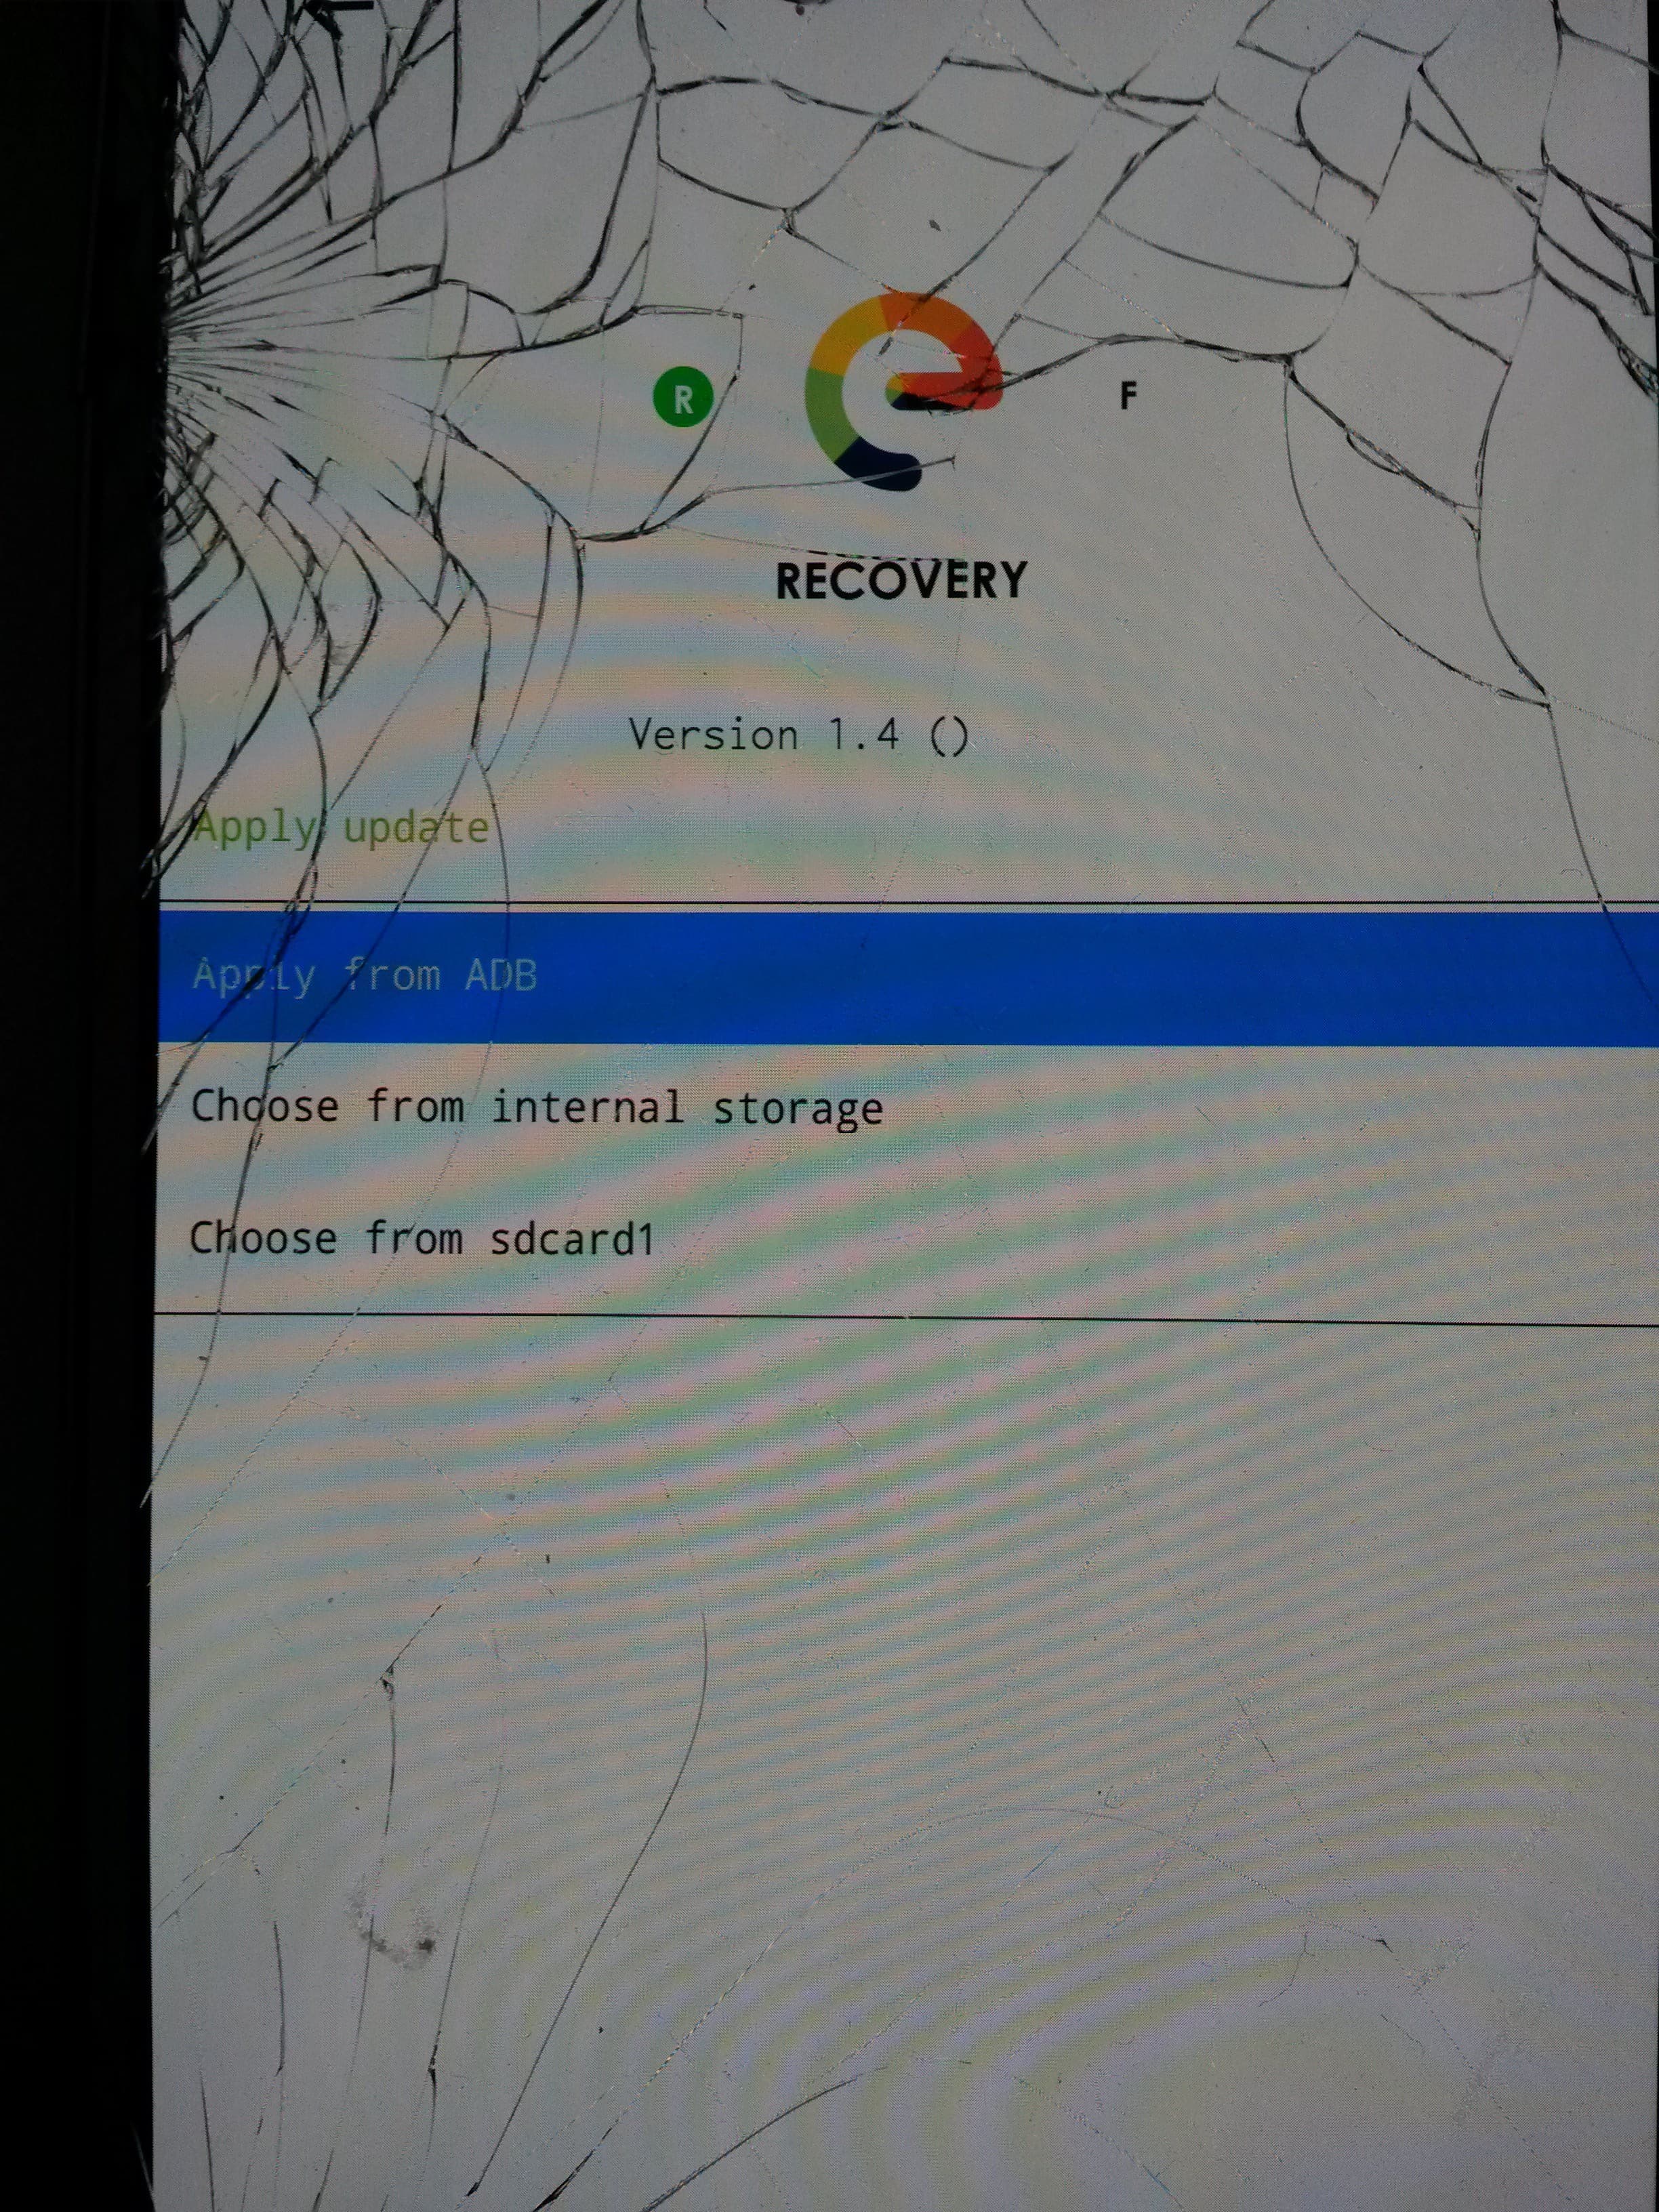
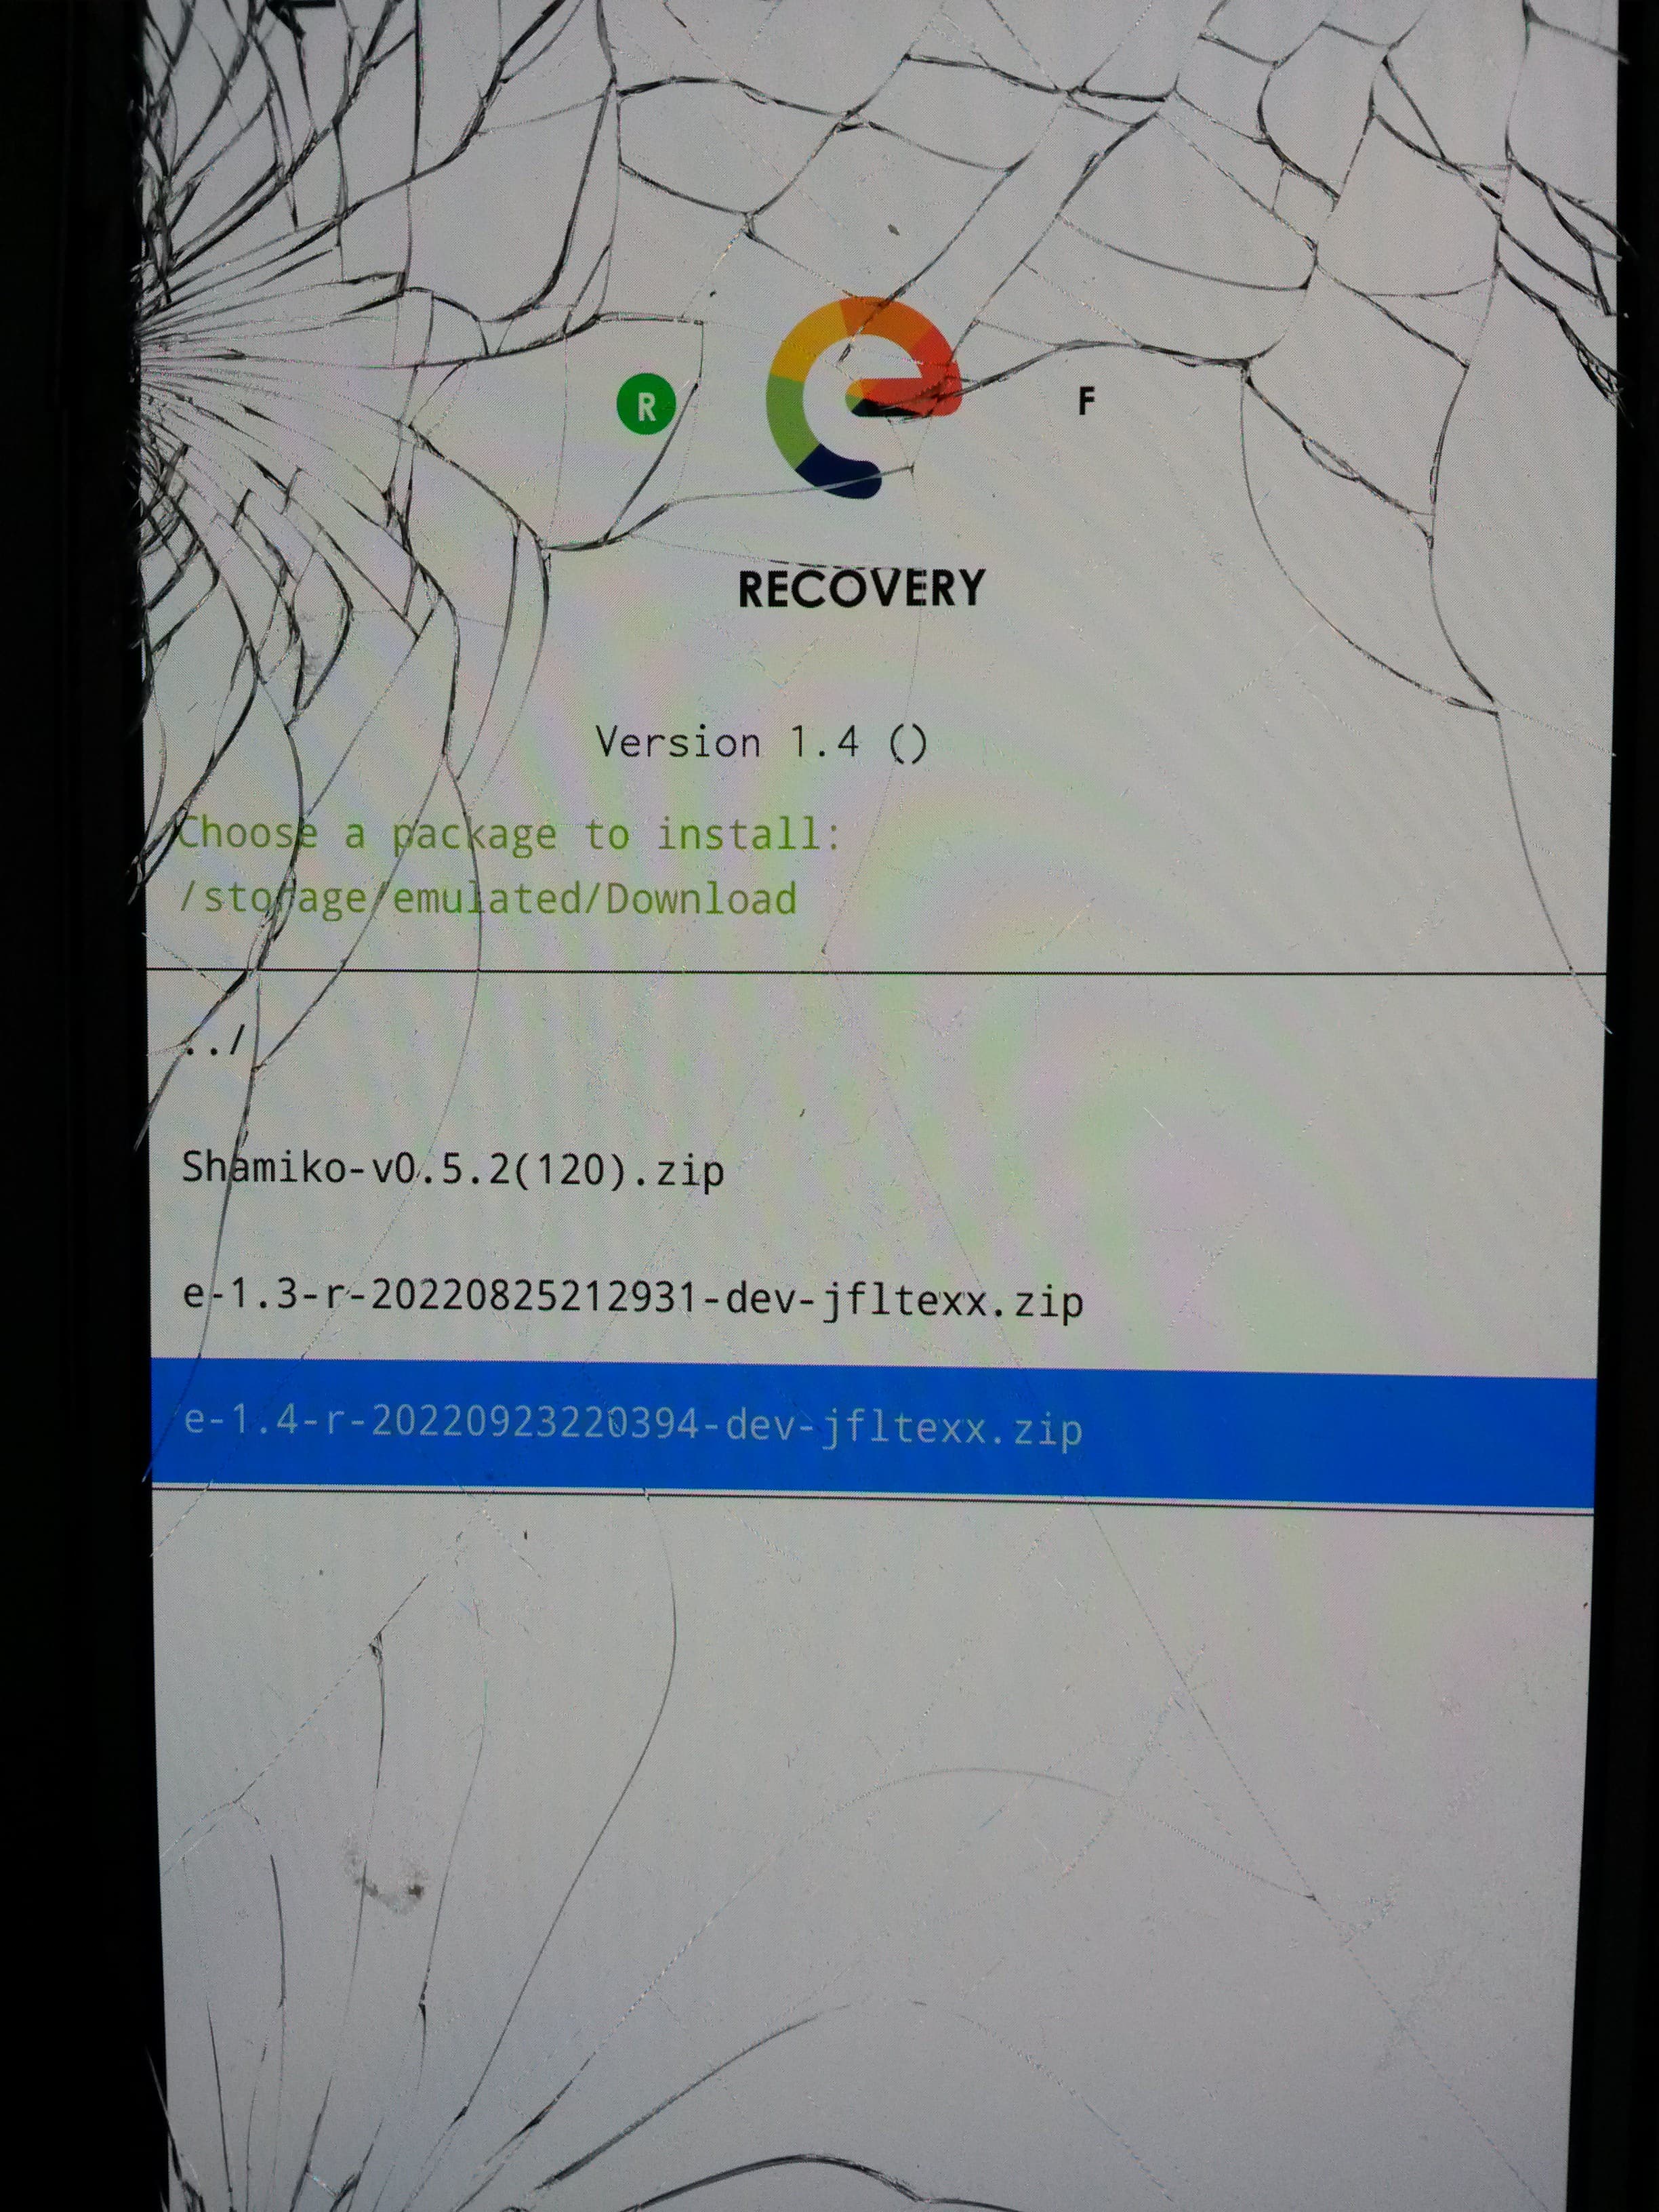
- Select Apply Update, then Apply from ADB
Now turn to your computer and issue the command to sideload the eOS installation zip
adb sideload filename.zip
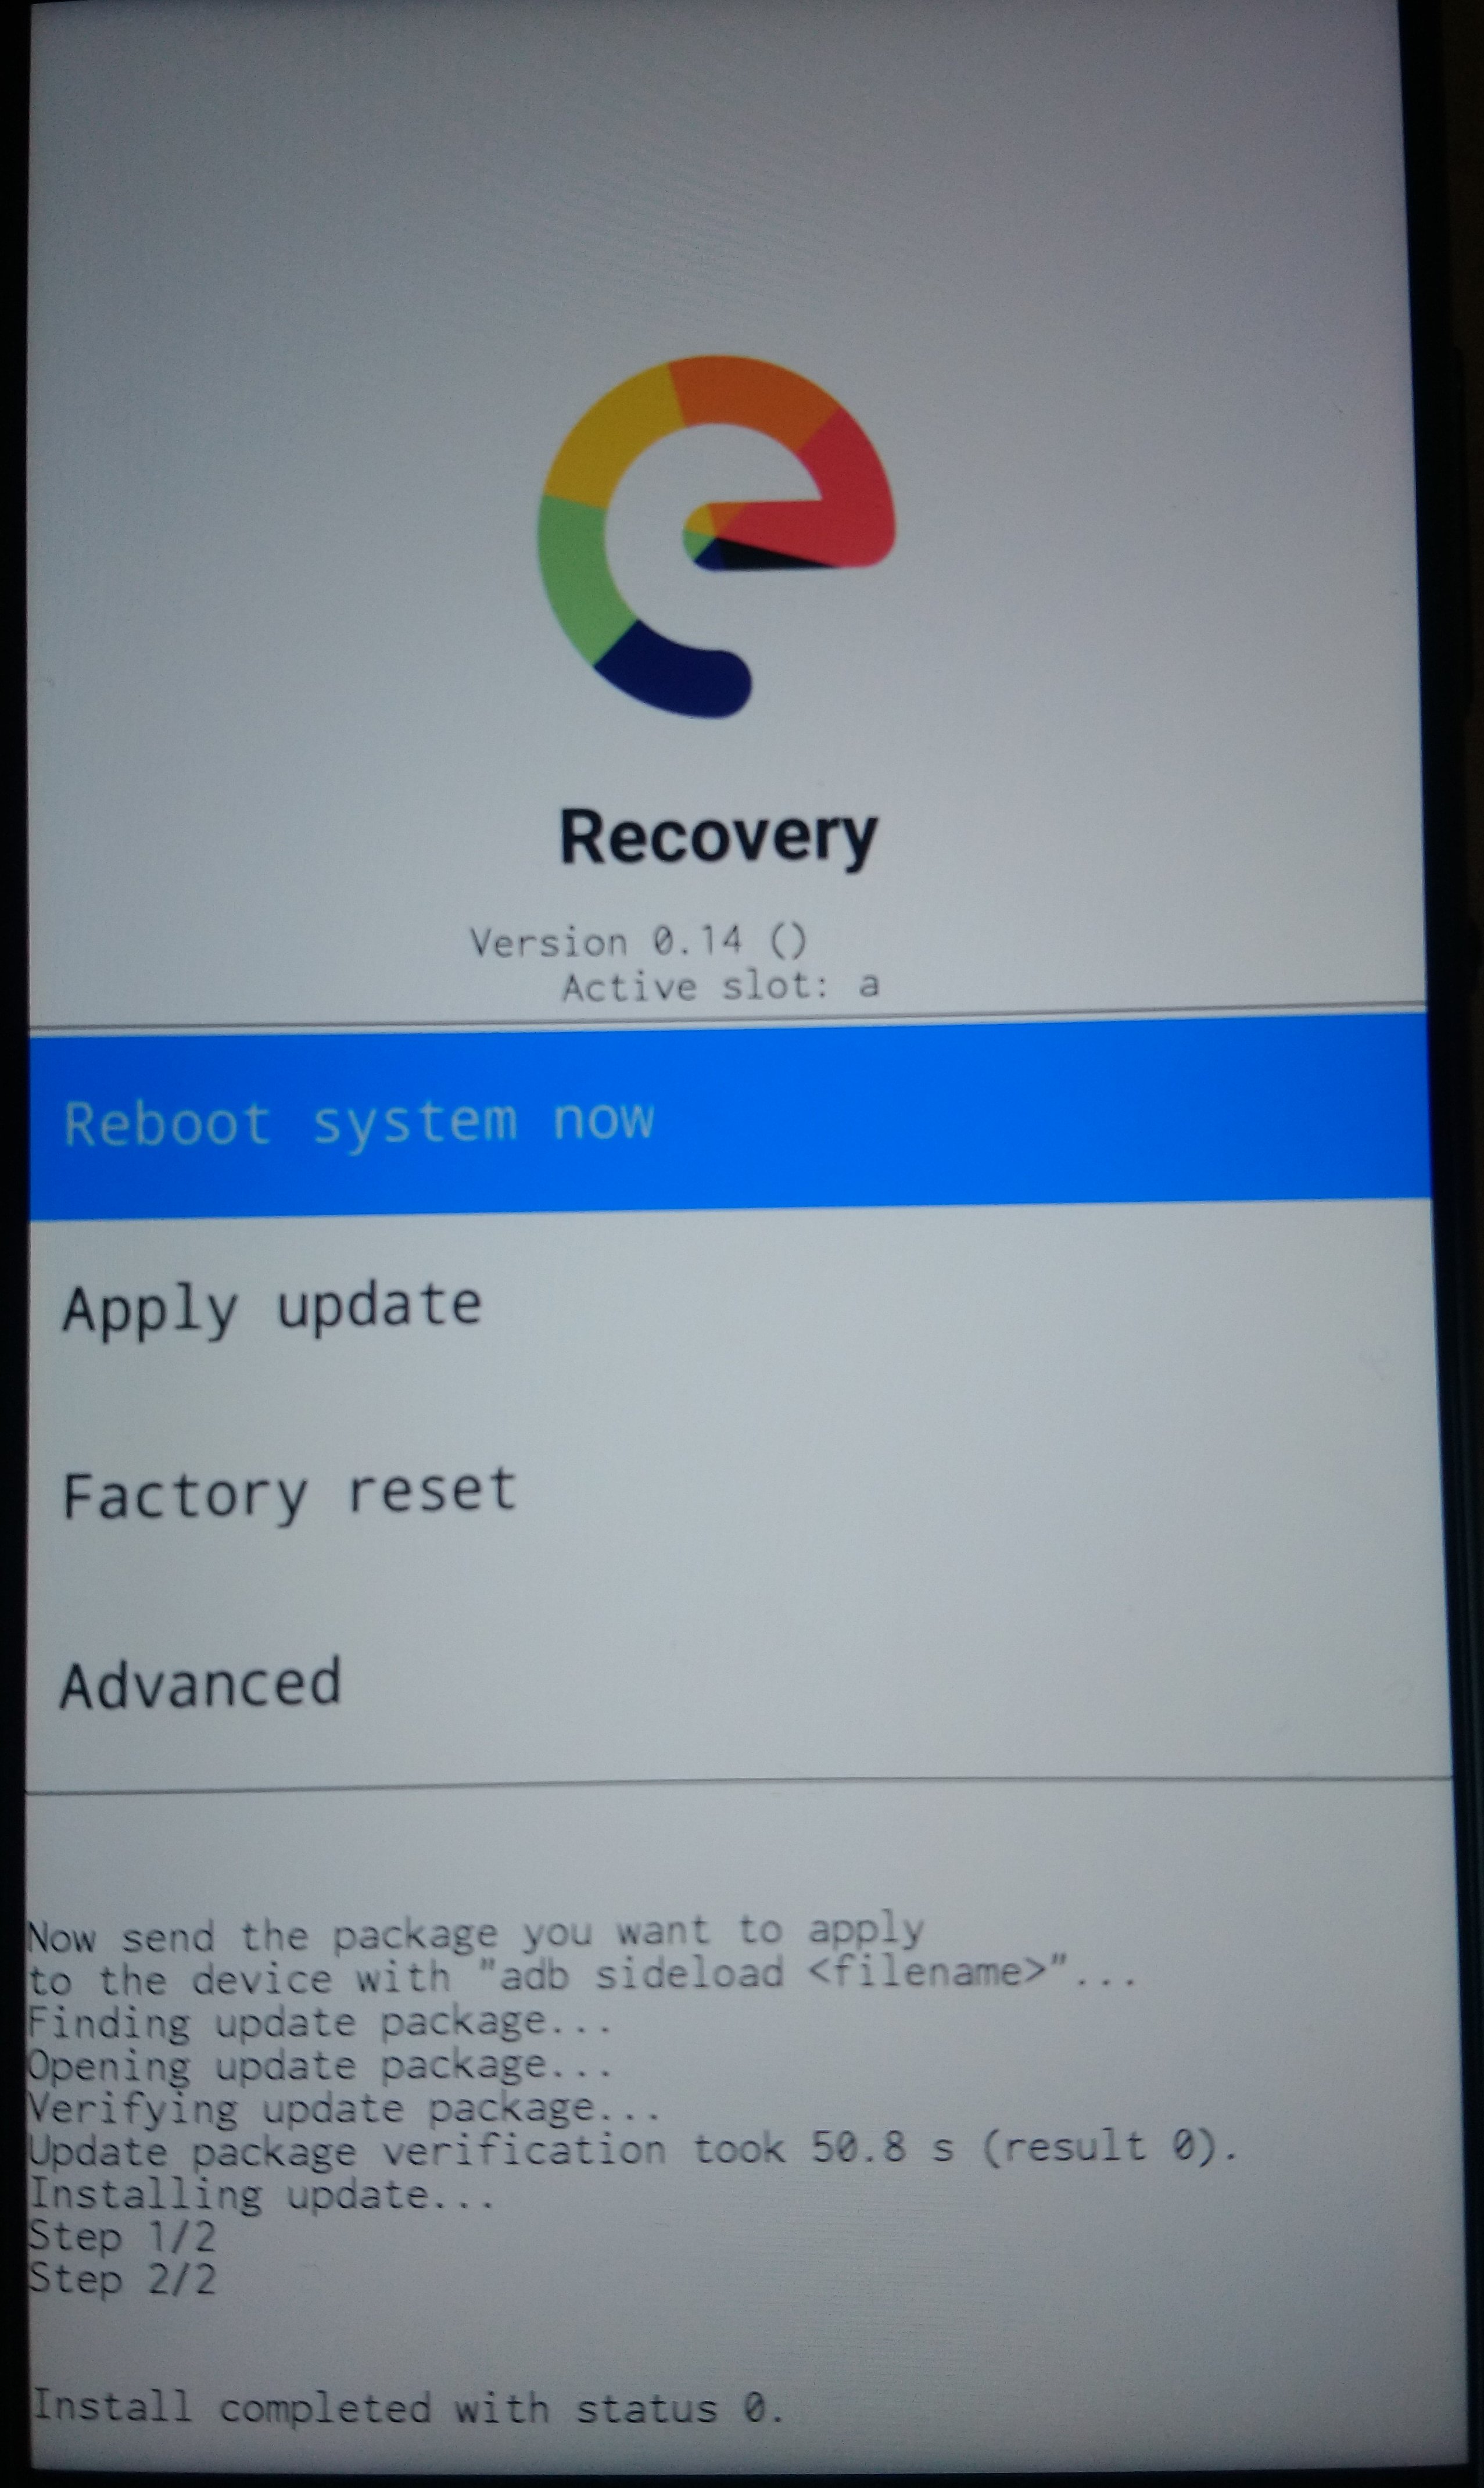
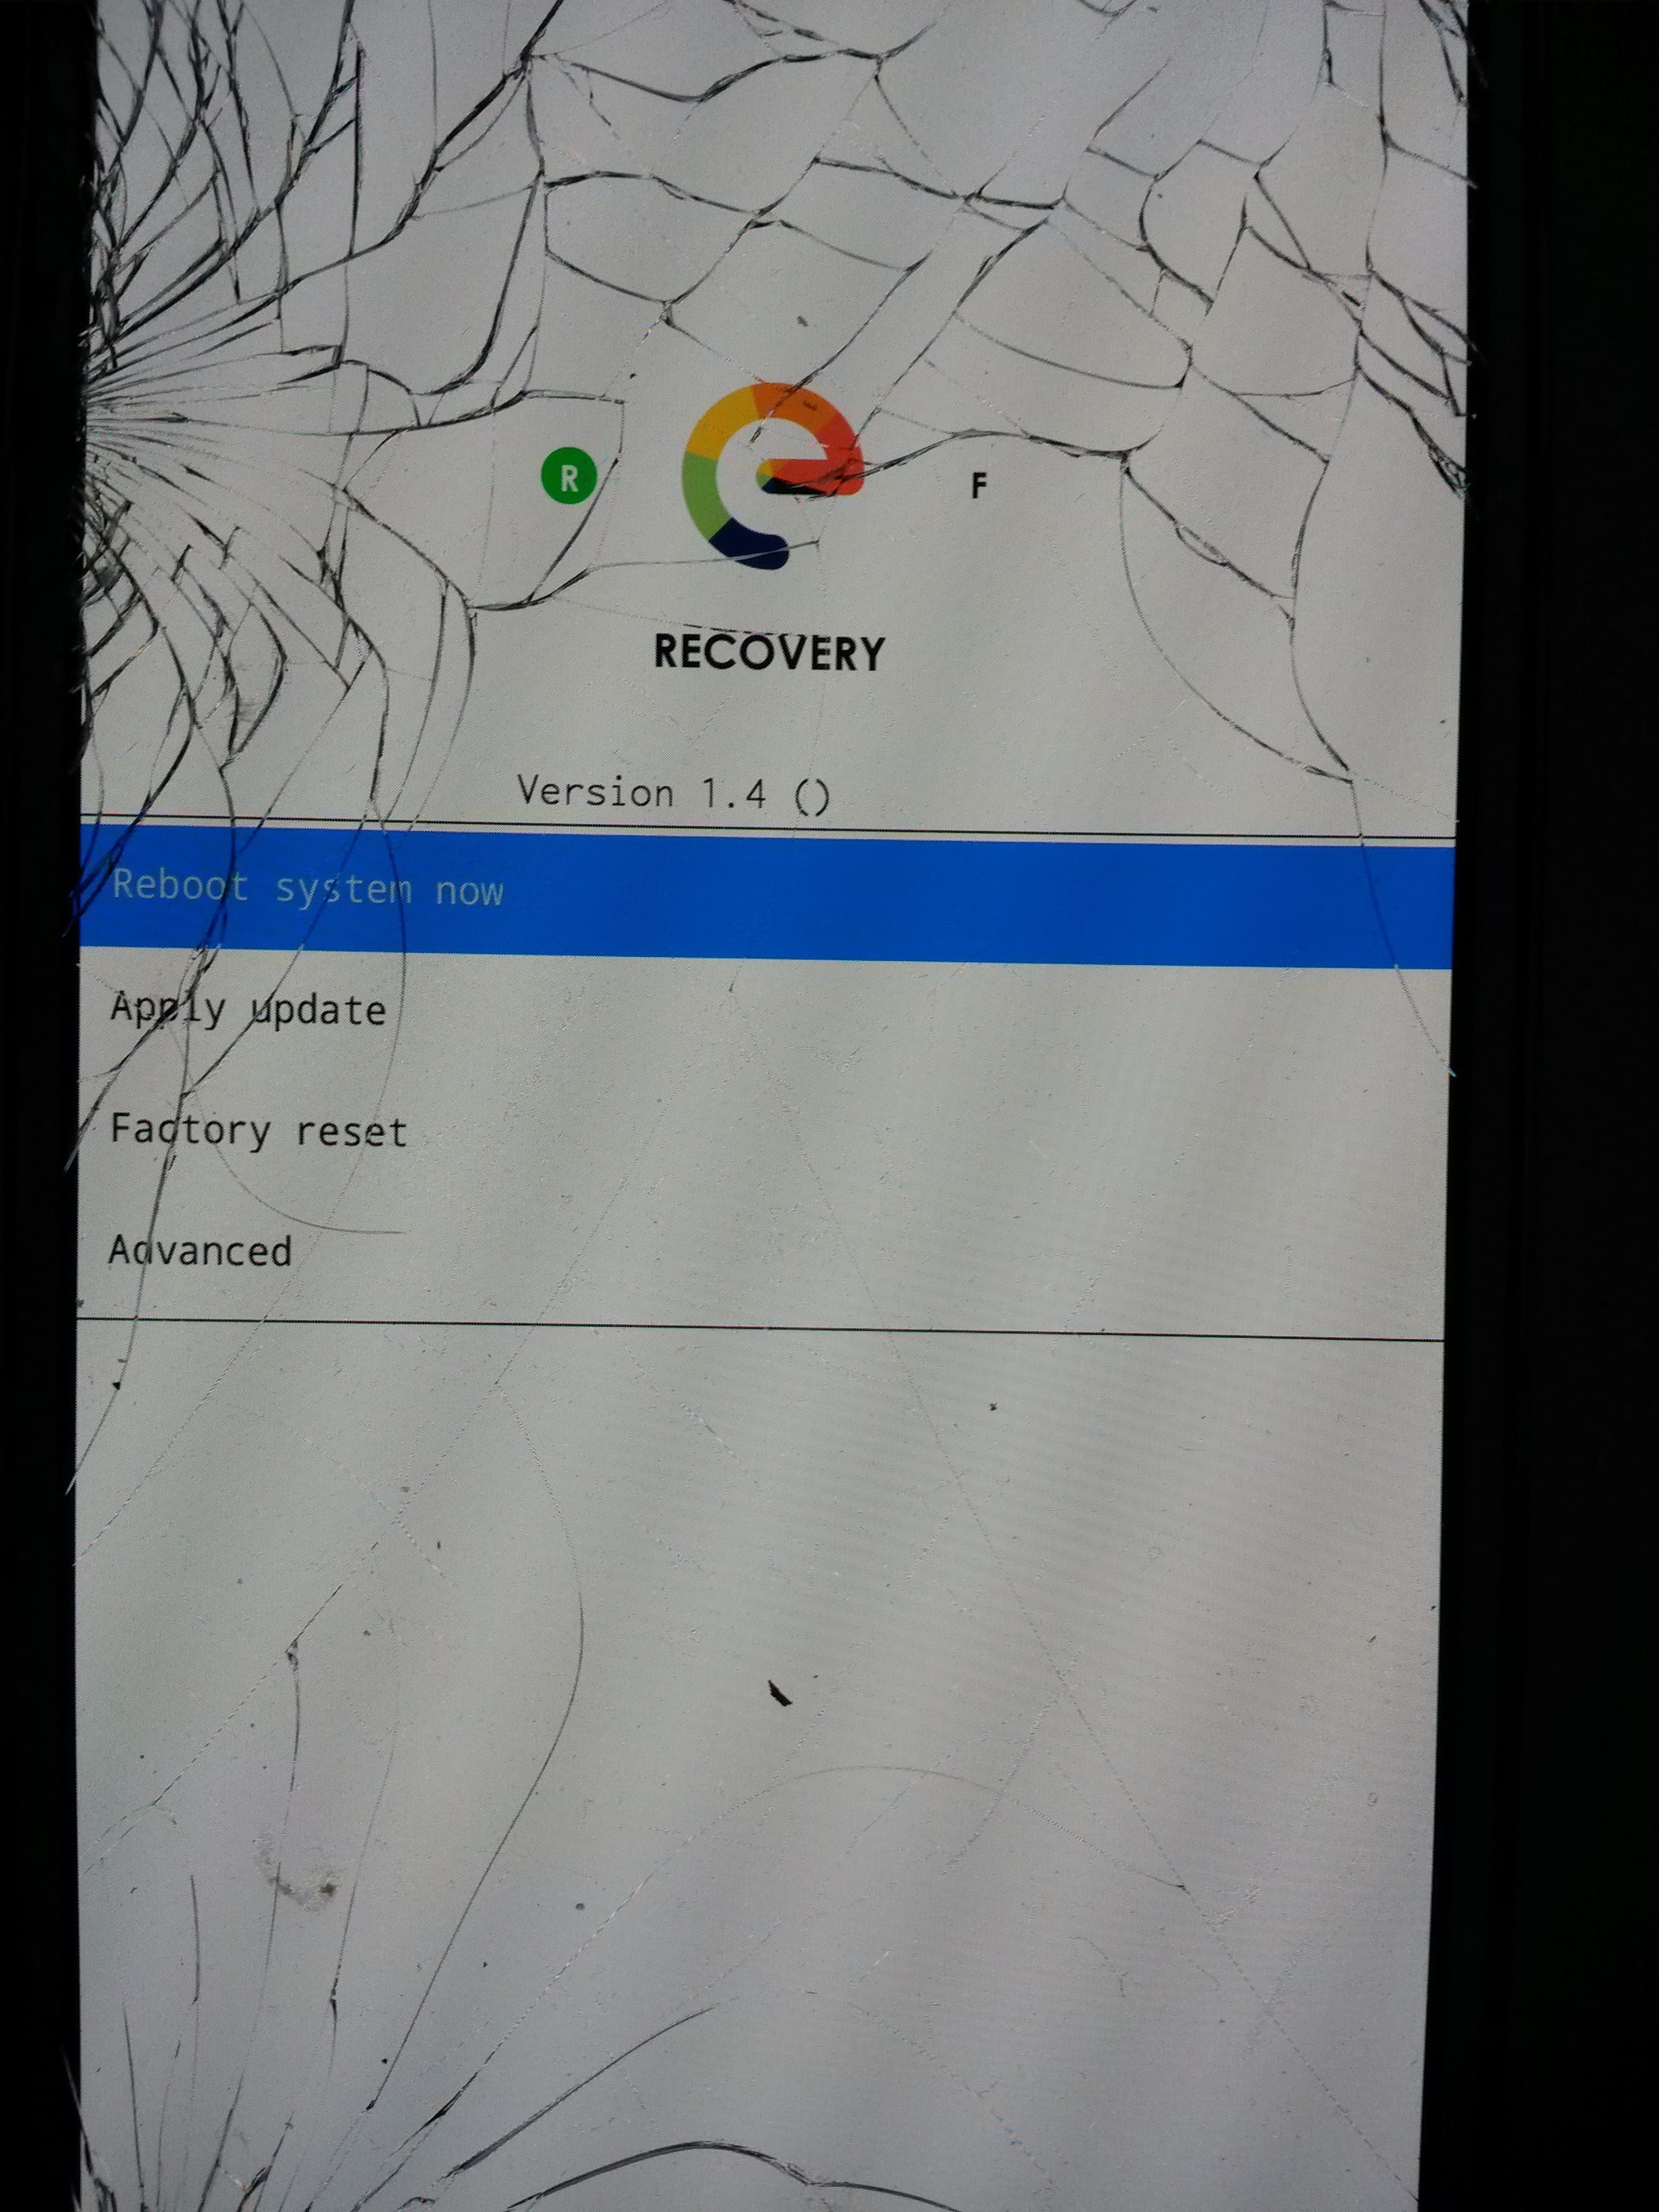
When installation has finished, return to the main menu, tap Reboot system now
Your phone should now boot into eOS.
Step-by-step, with images
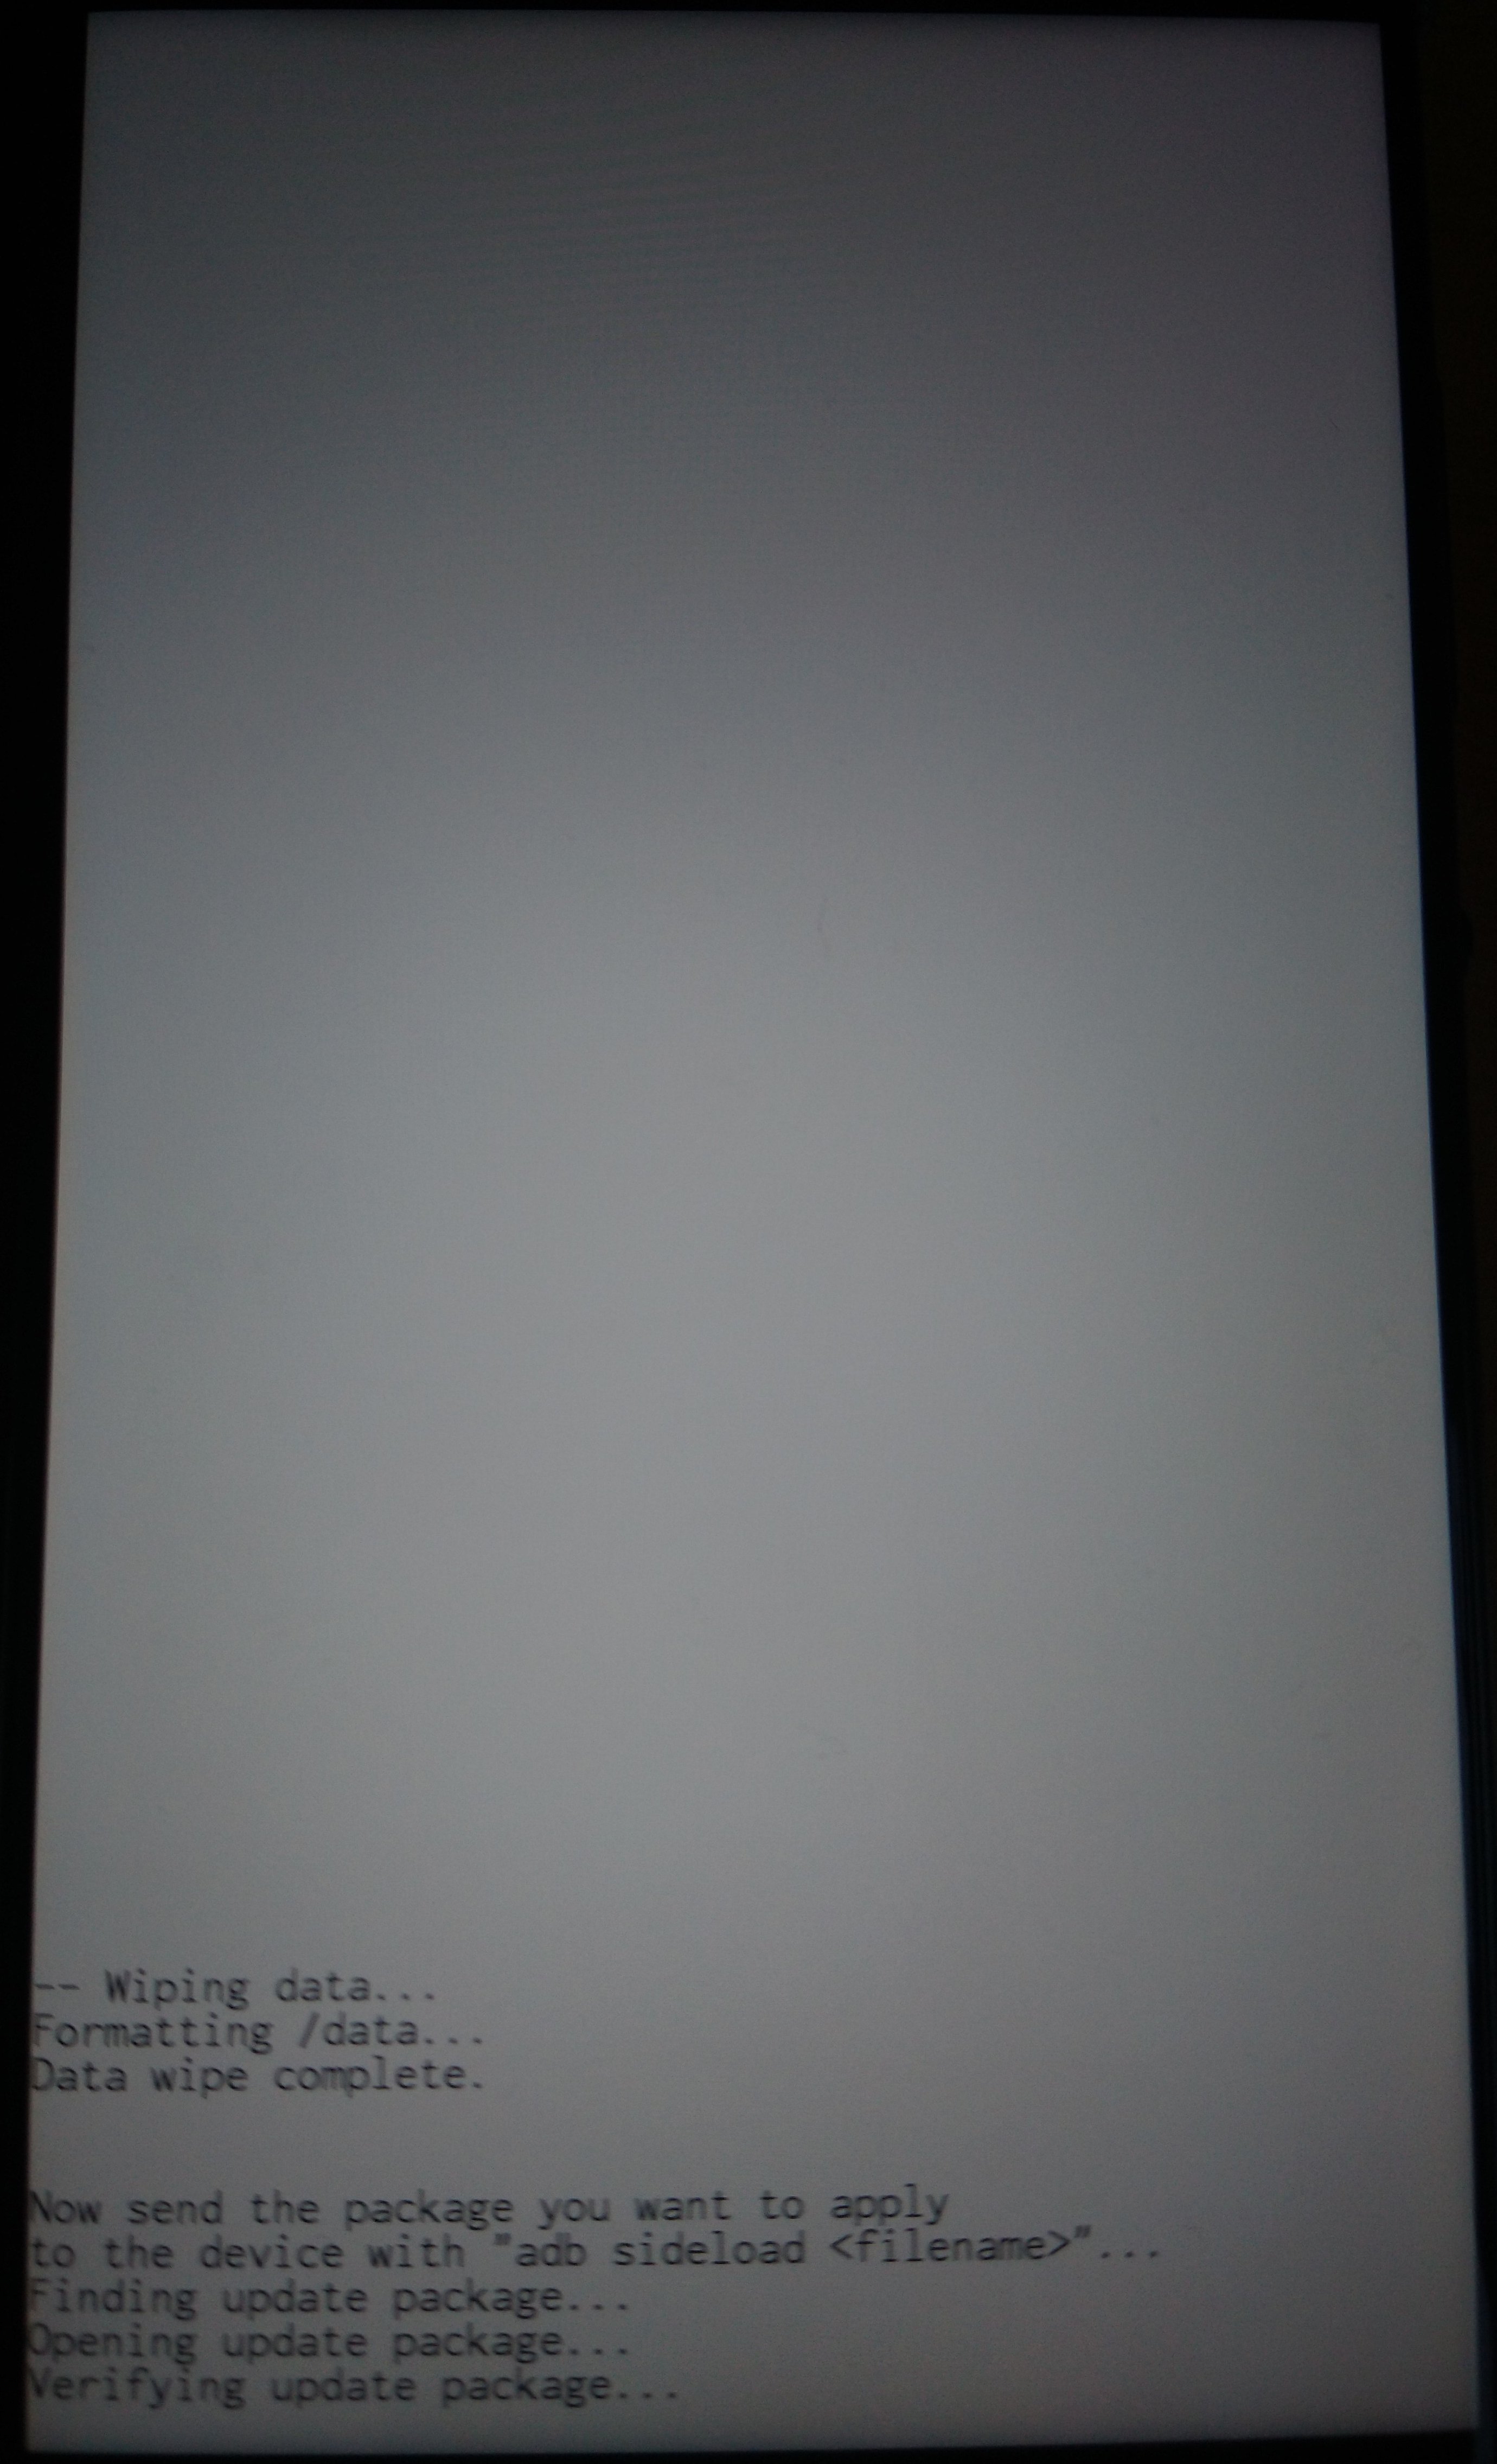
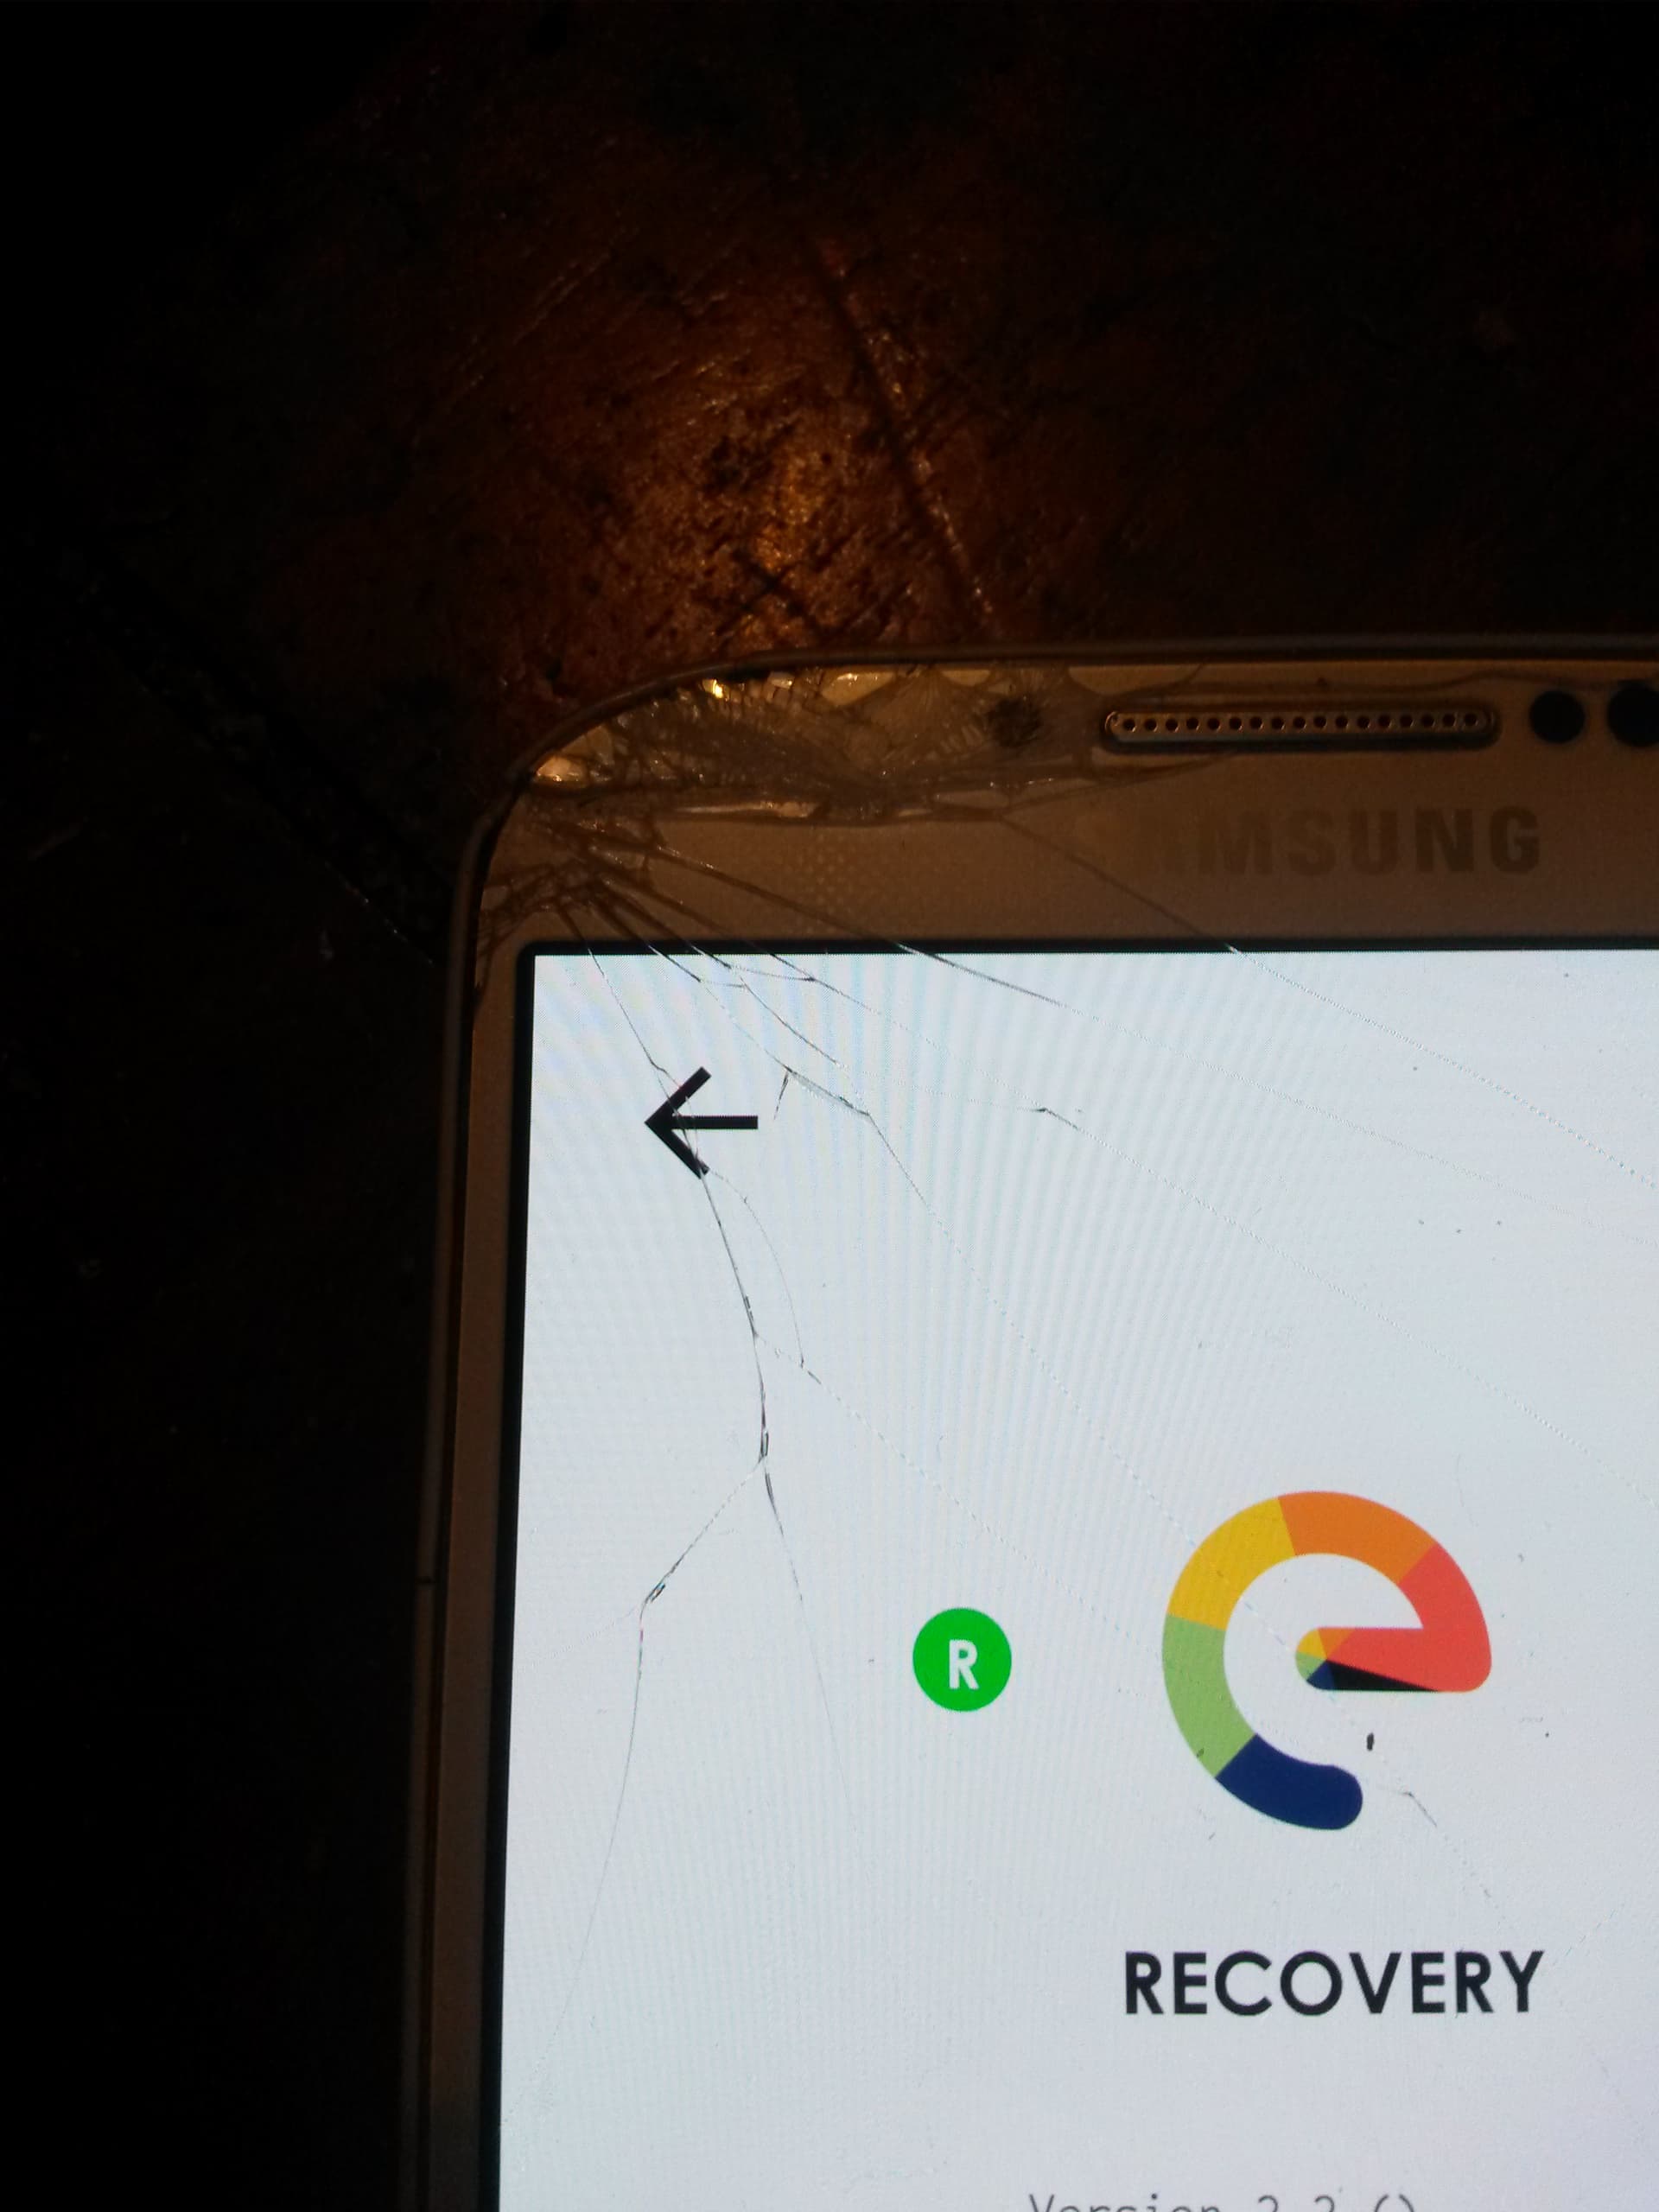
The e-recovery Home Screen. Select Factory reset
Select Format data/factory reset (notice the output appearing at the bottom of the screen)
Then press the arrow at the top of the screen to return to Home Screen
Select Apply Update, then Apply from ADB
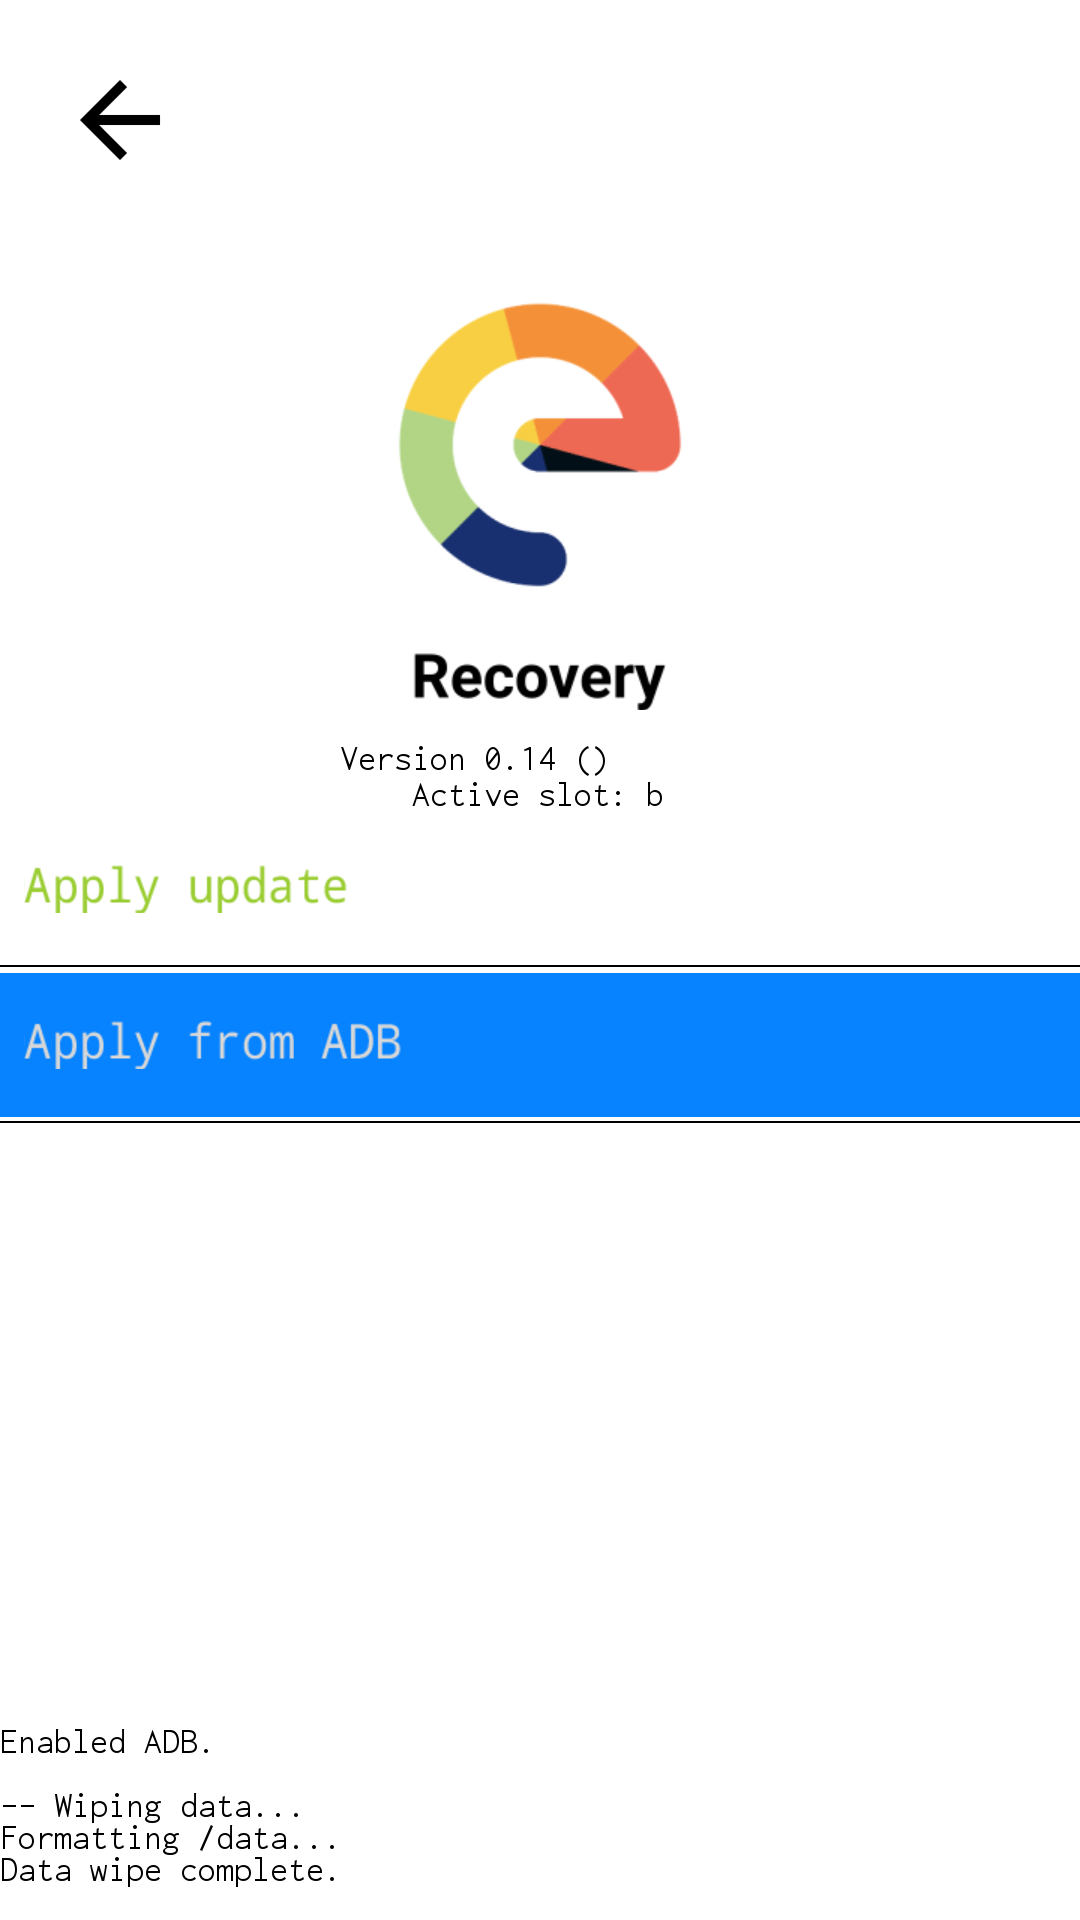
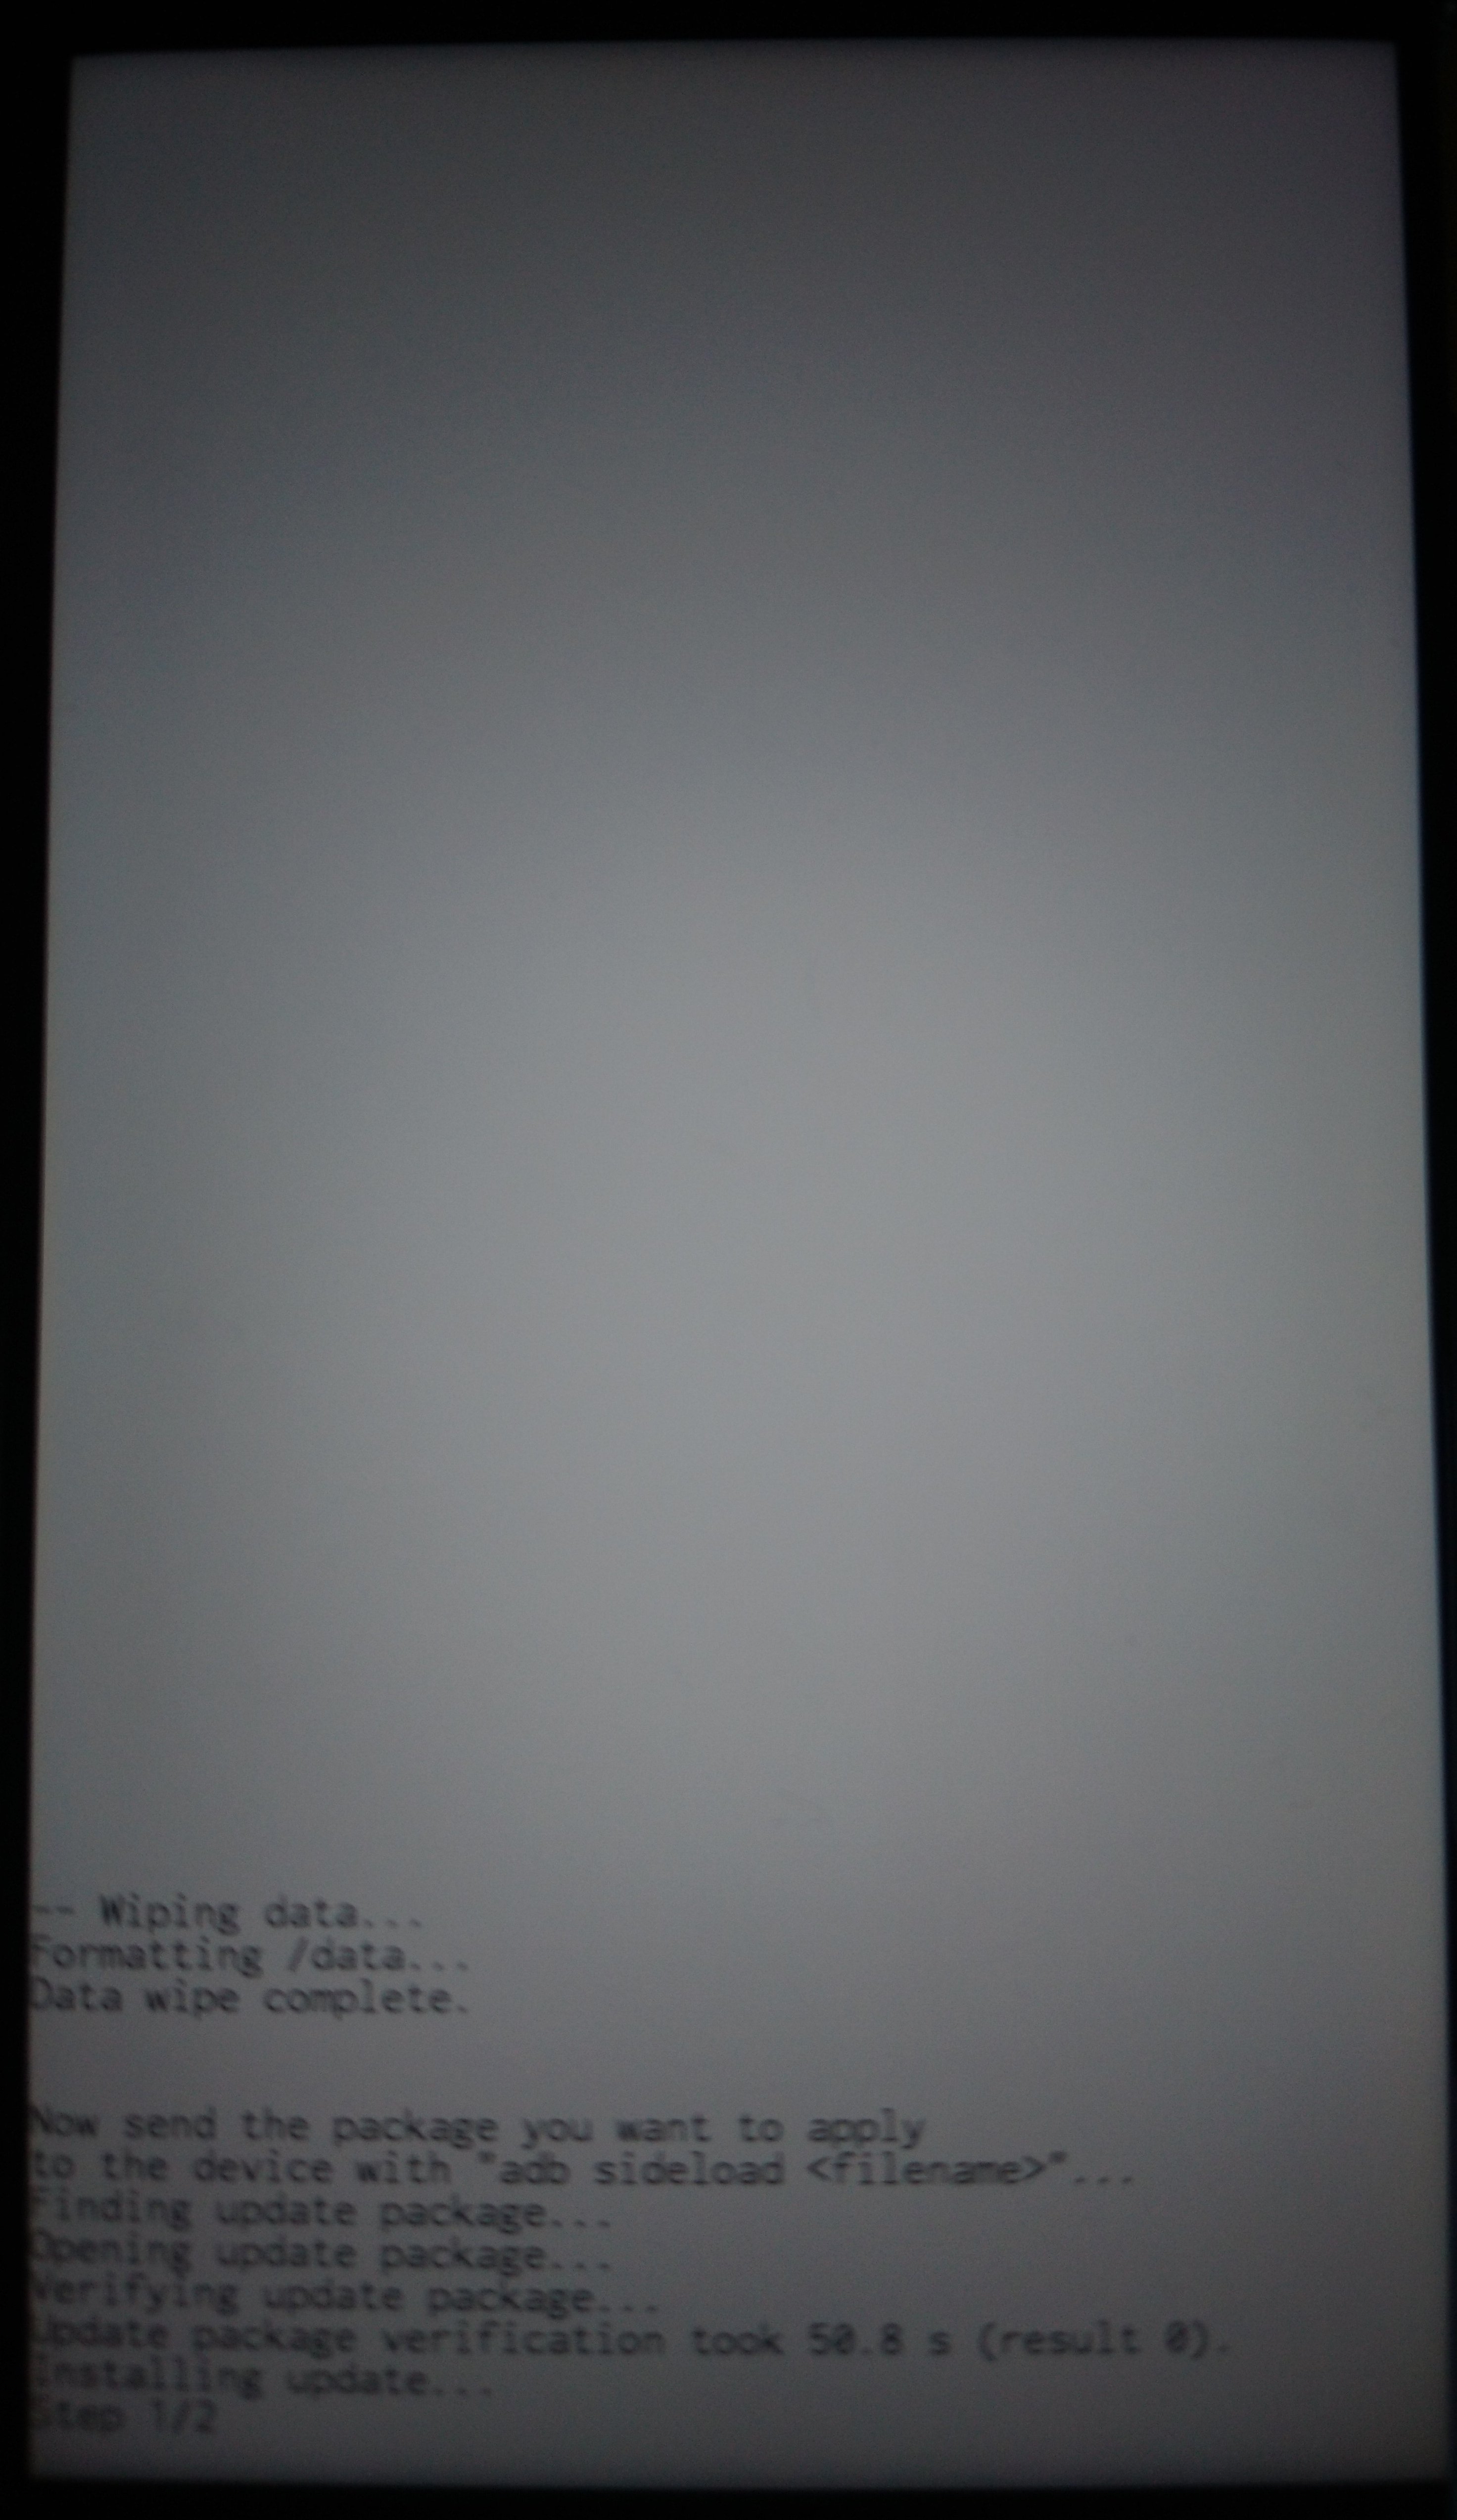
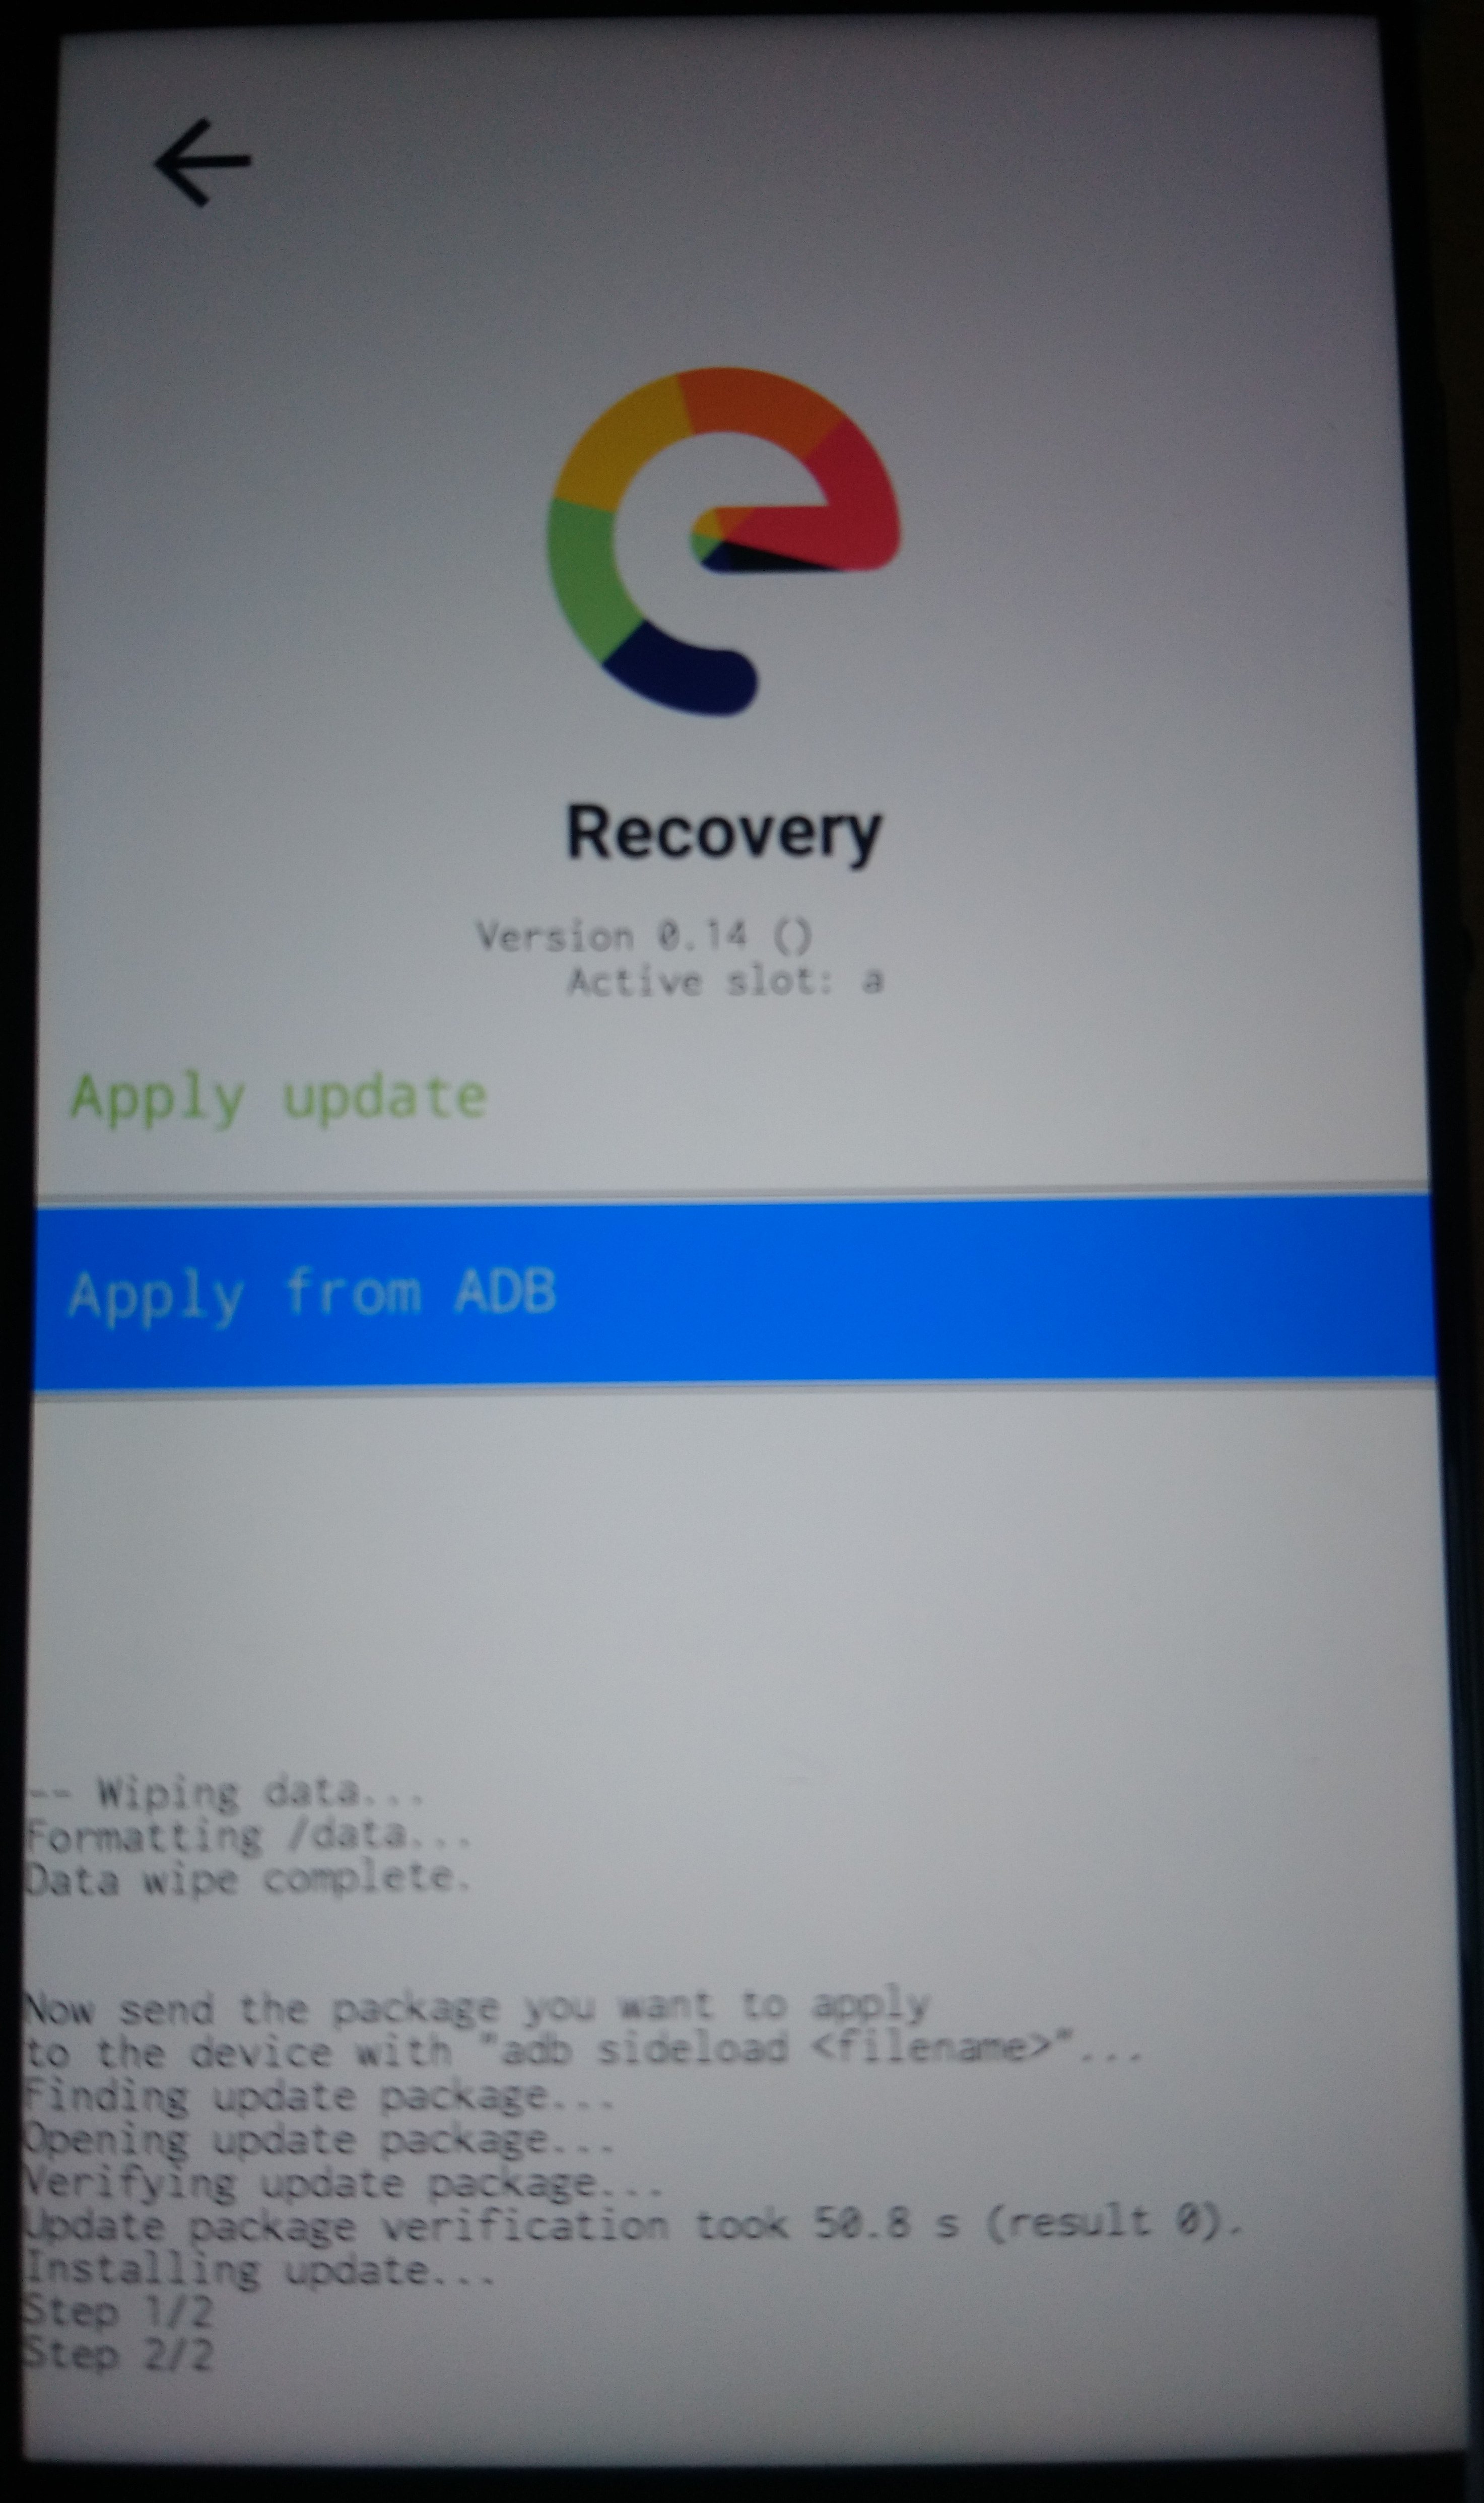
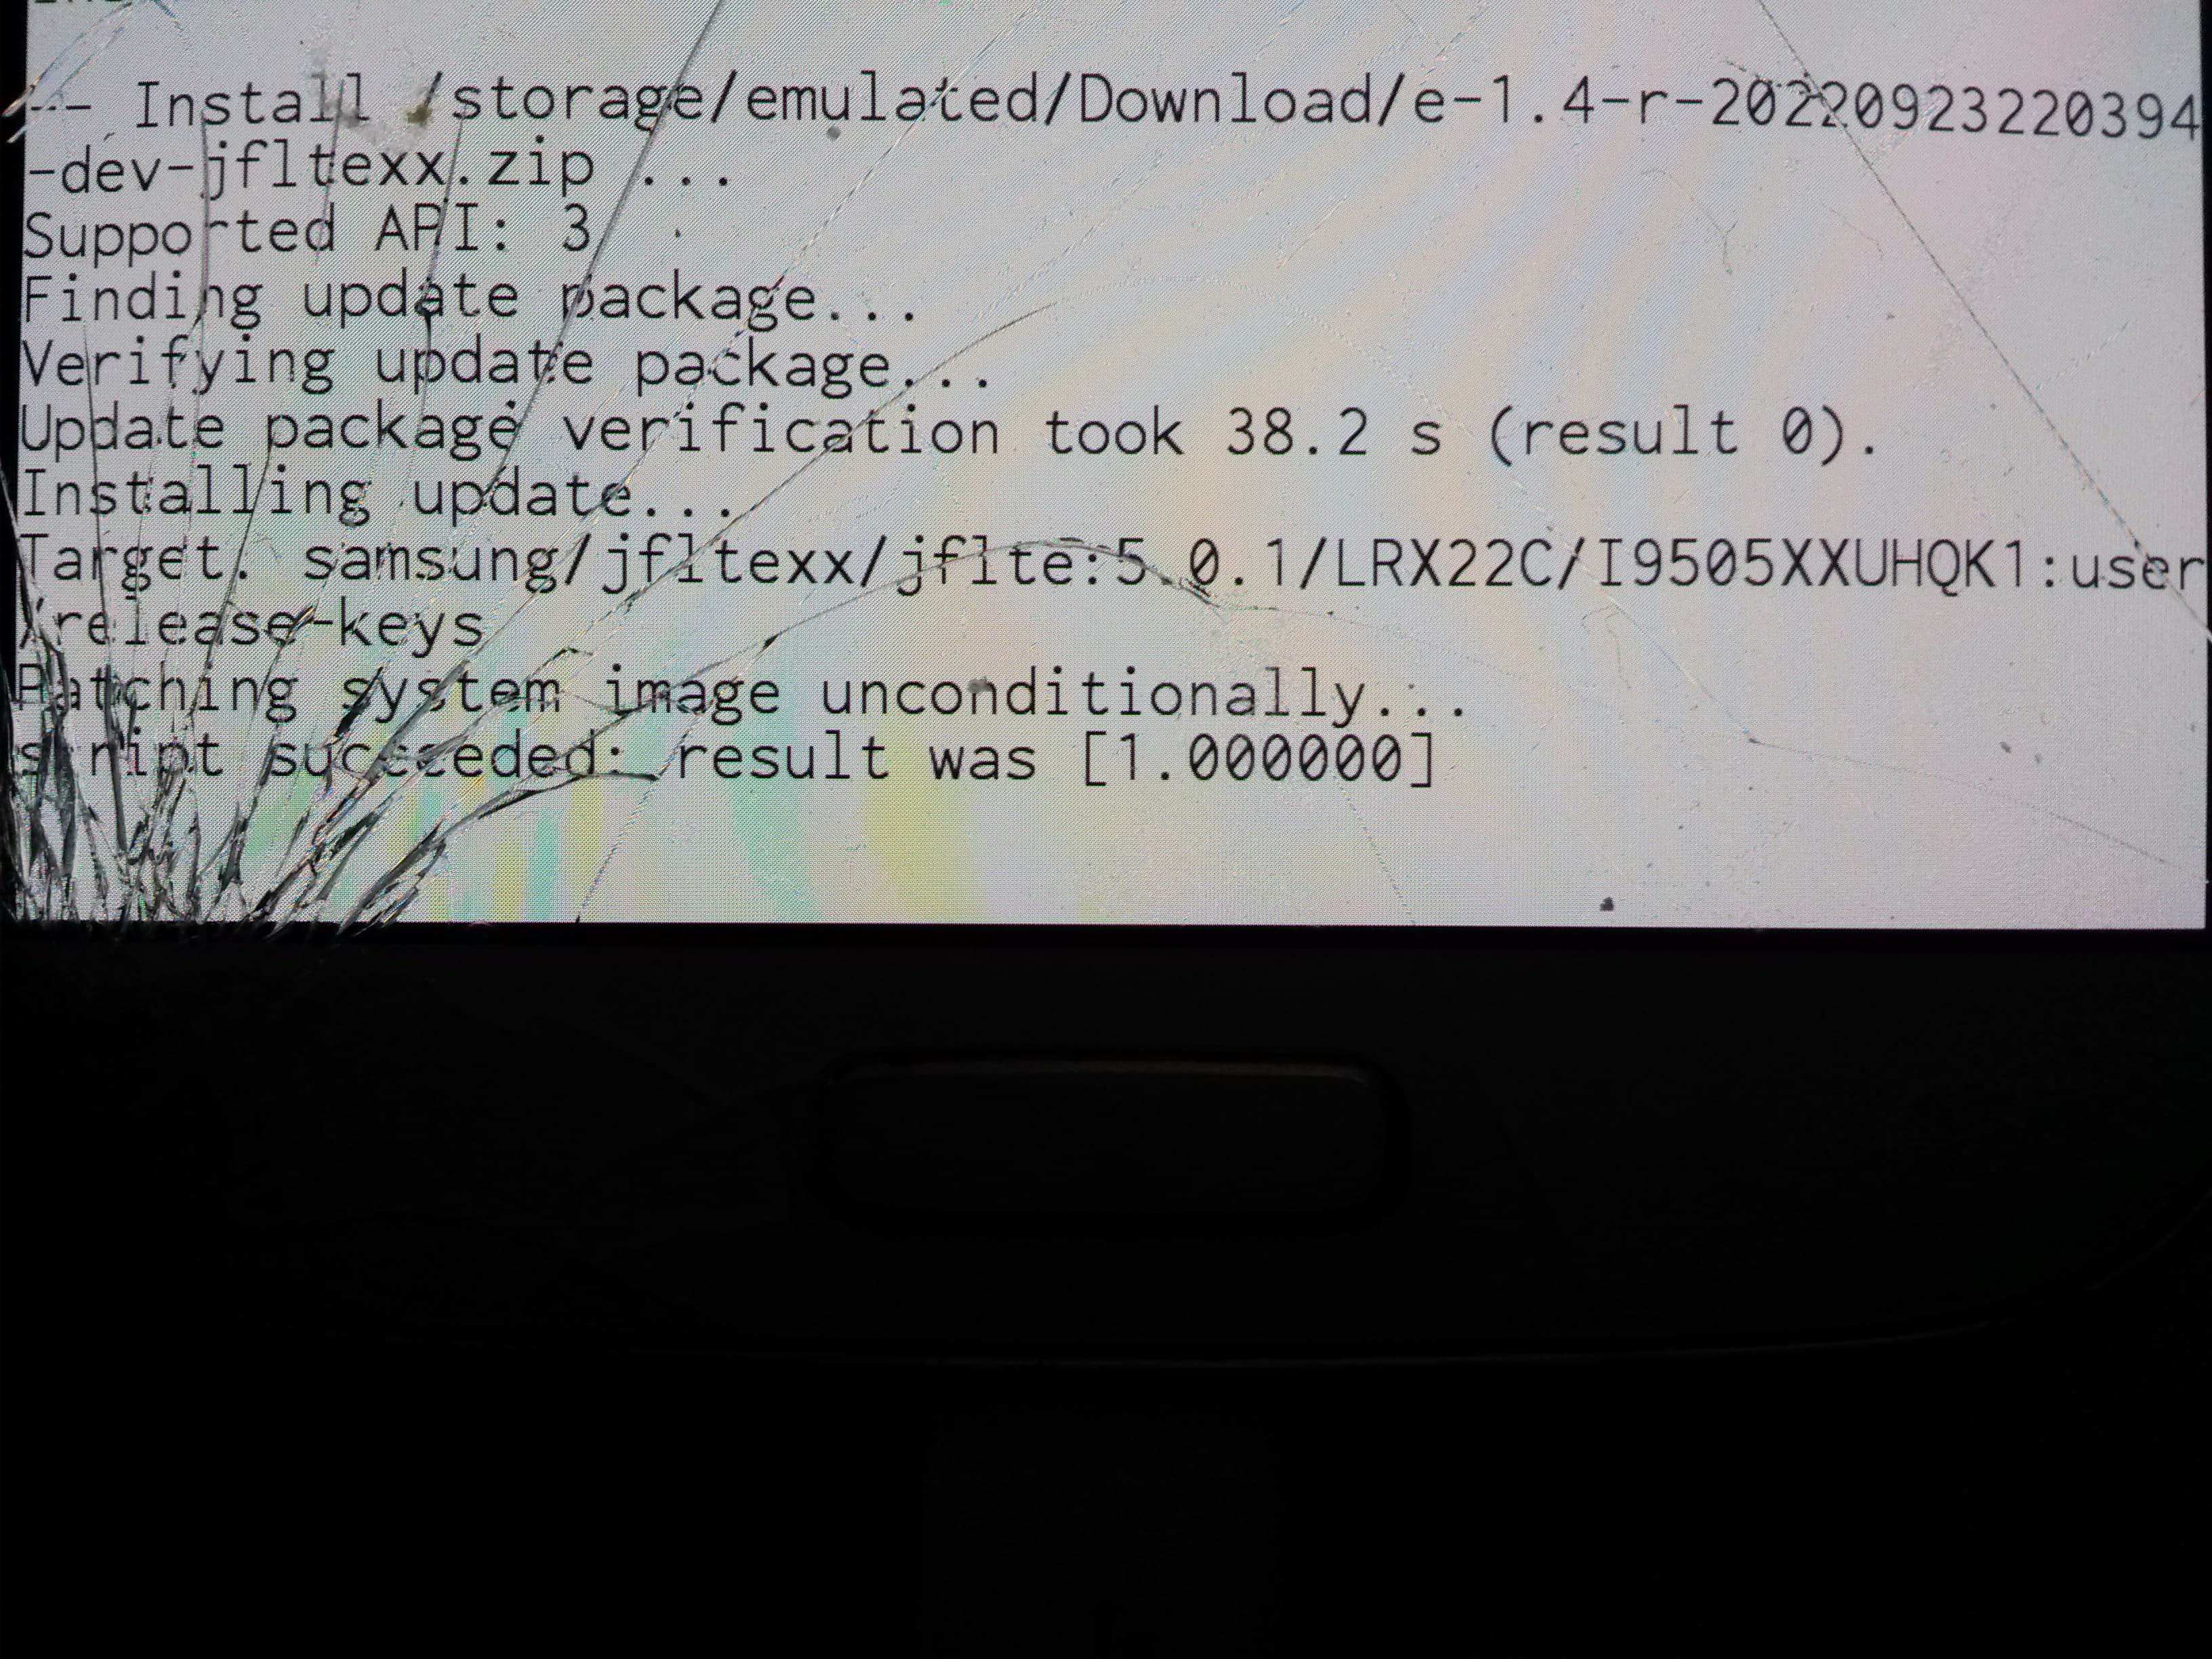
The screen should now change and the output at the bottom ask you to send the package from your computer.
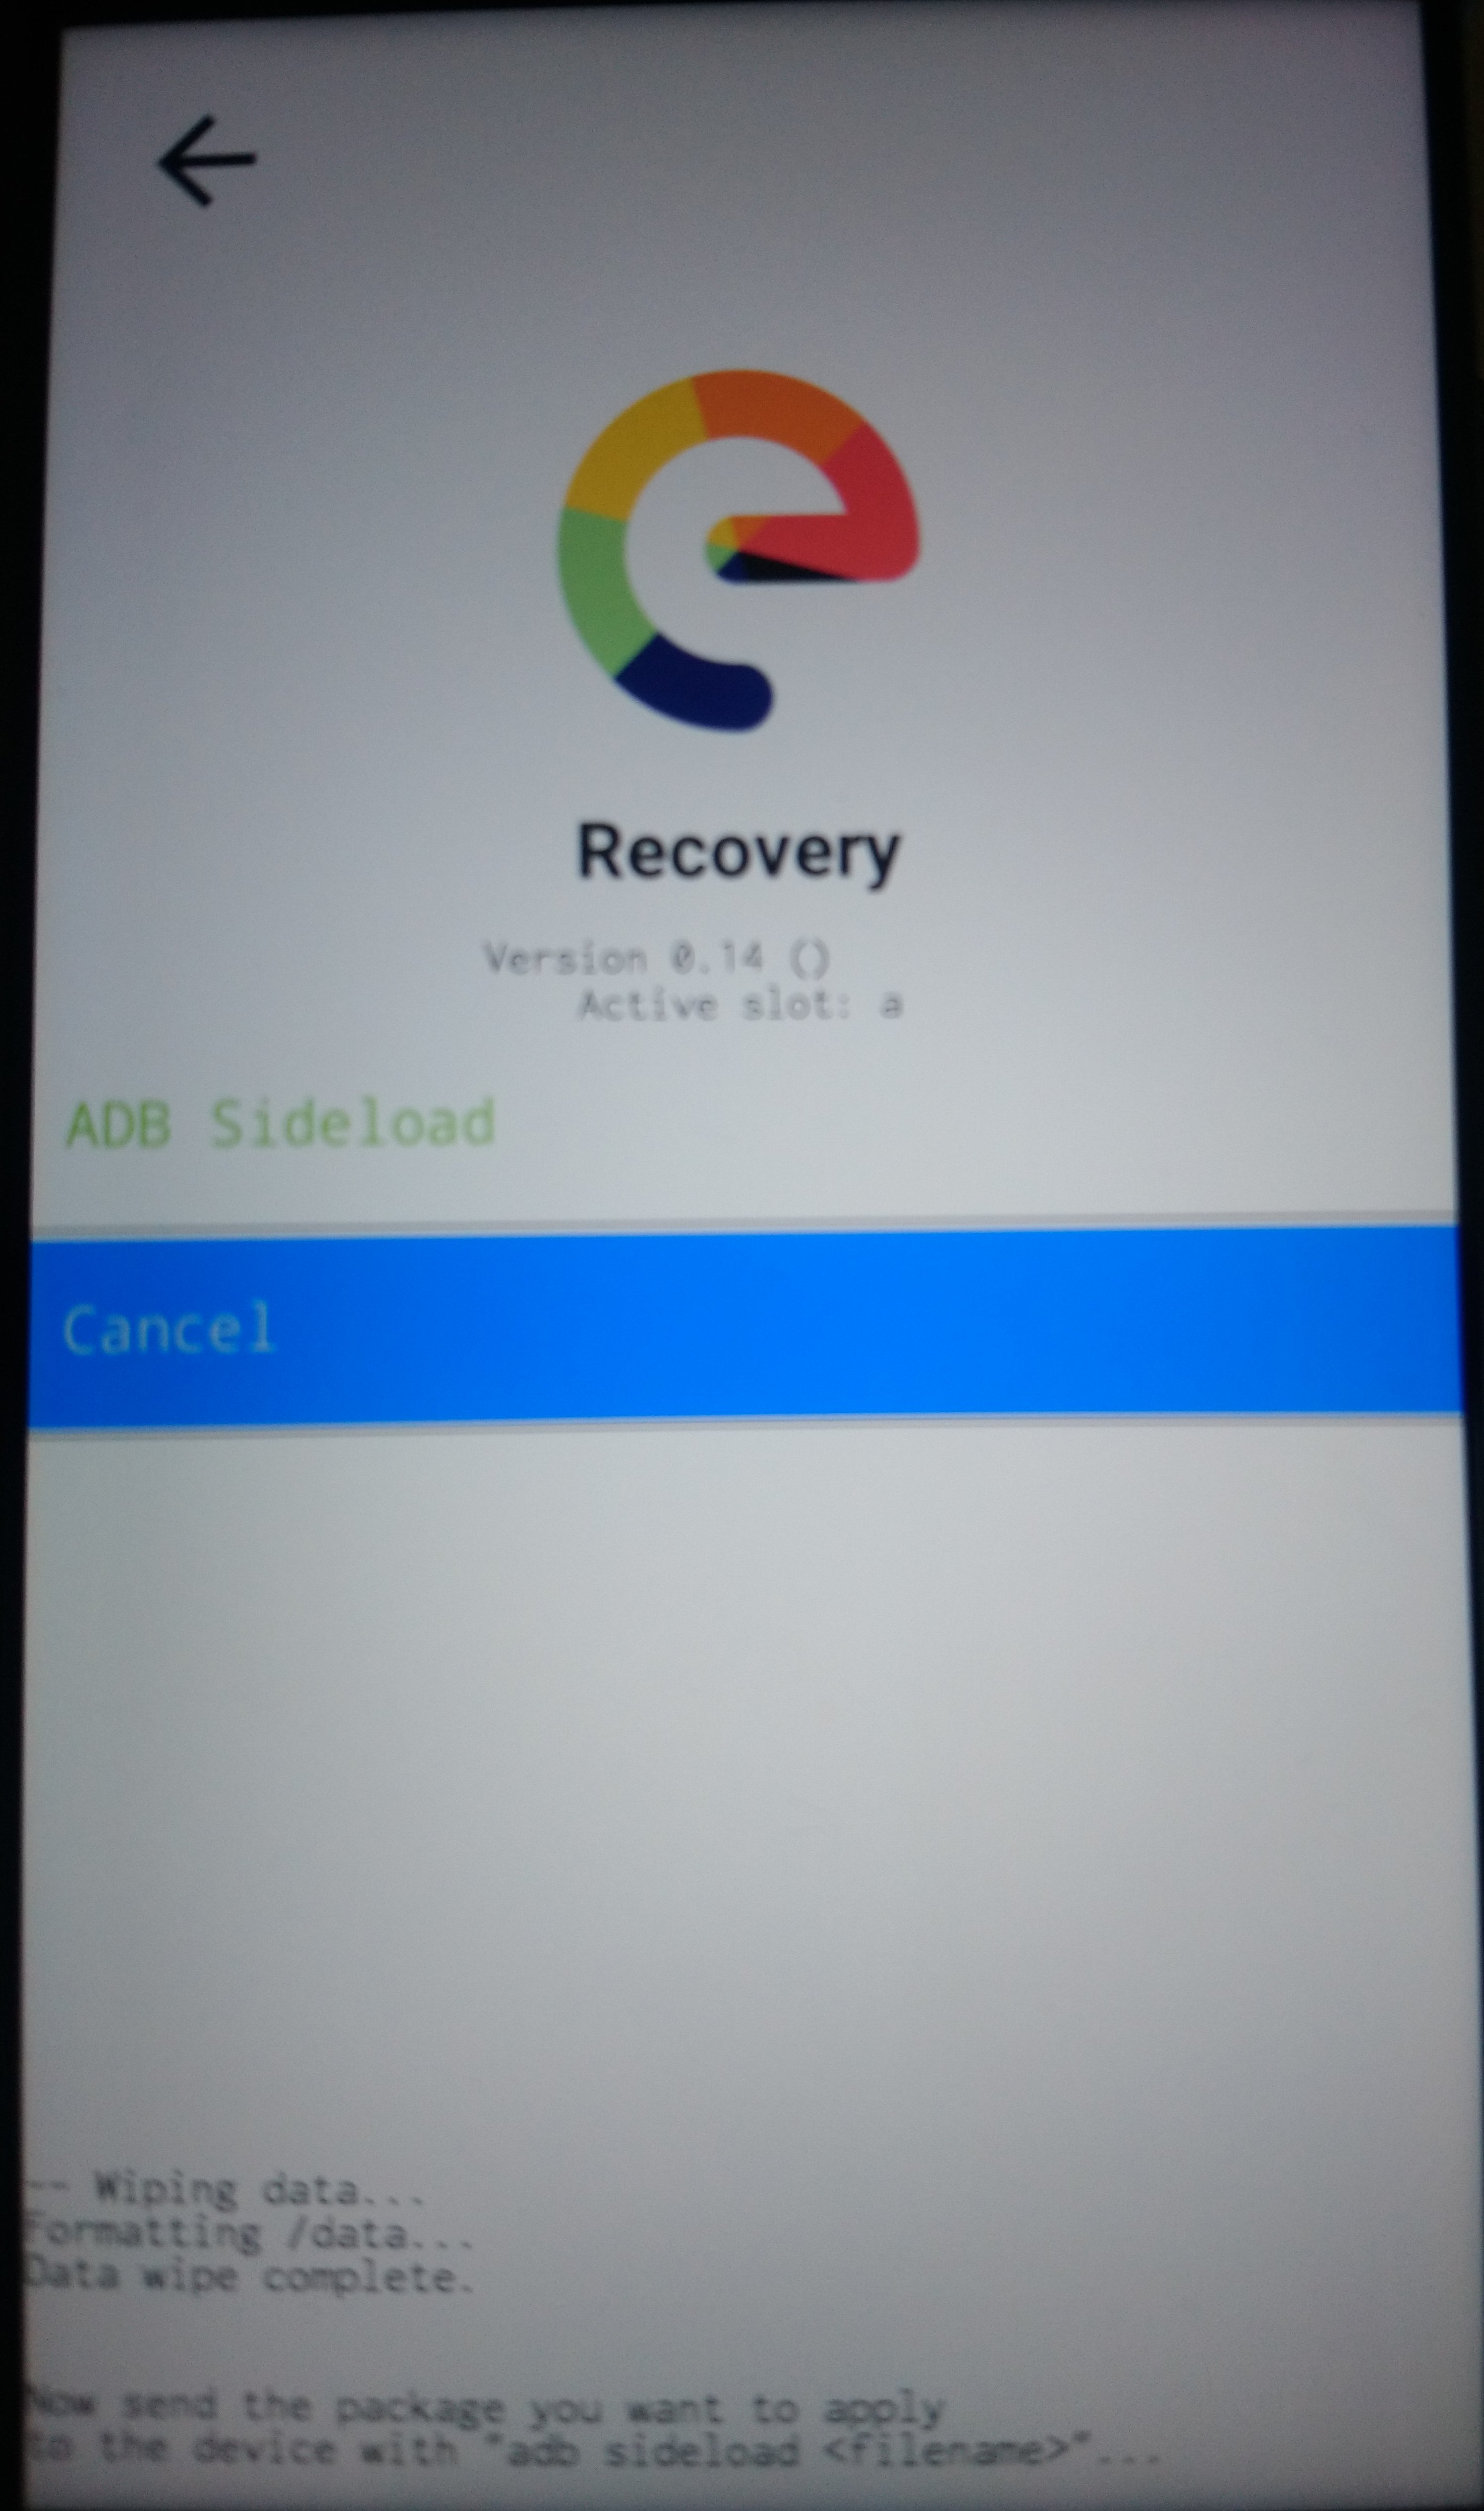
On the computer issue command to sideload the eOS installation zip.
adb sideload e-1.18-t-for-your-device.zip
the phone screen will be mostly blank with just the output at the bottom showing progress.
On the computer the sideloading shows progress as a percentage figure that will stop at 47%. The phone will still be installing though (even though it might feel like nothing is happening sometimes!) and you can expect to see the following screens
Then press the arrow at the top of the screen to return to Home Screen
Tap Reboot system now to boot into eOS.
.
Thanks for reading !
Share your feedback.
.
9) Install the image of /e/OS on the ROM of your device without computer, from the “custom recovery manager” using the SDcard or internal storage method
(forked from @Anonyme)
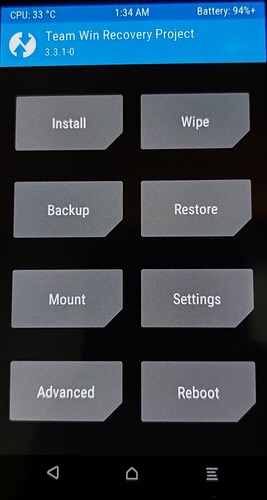
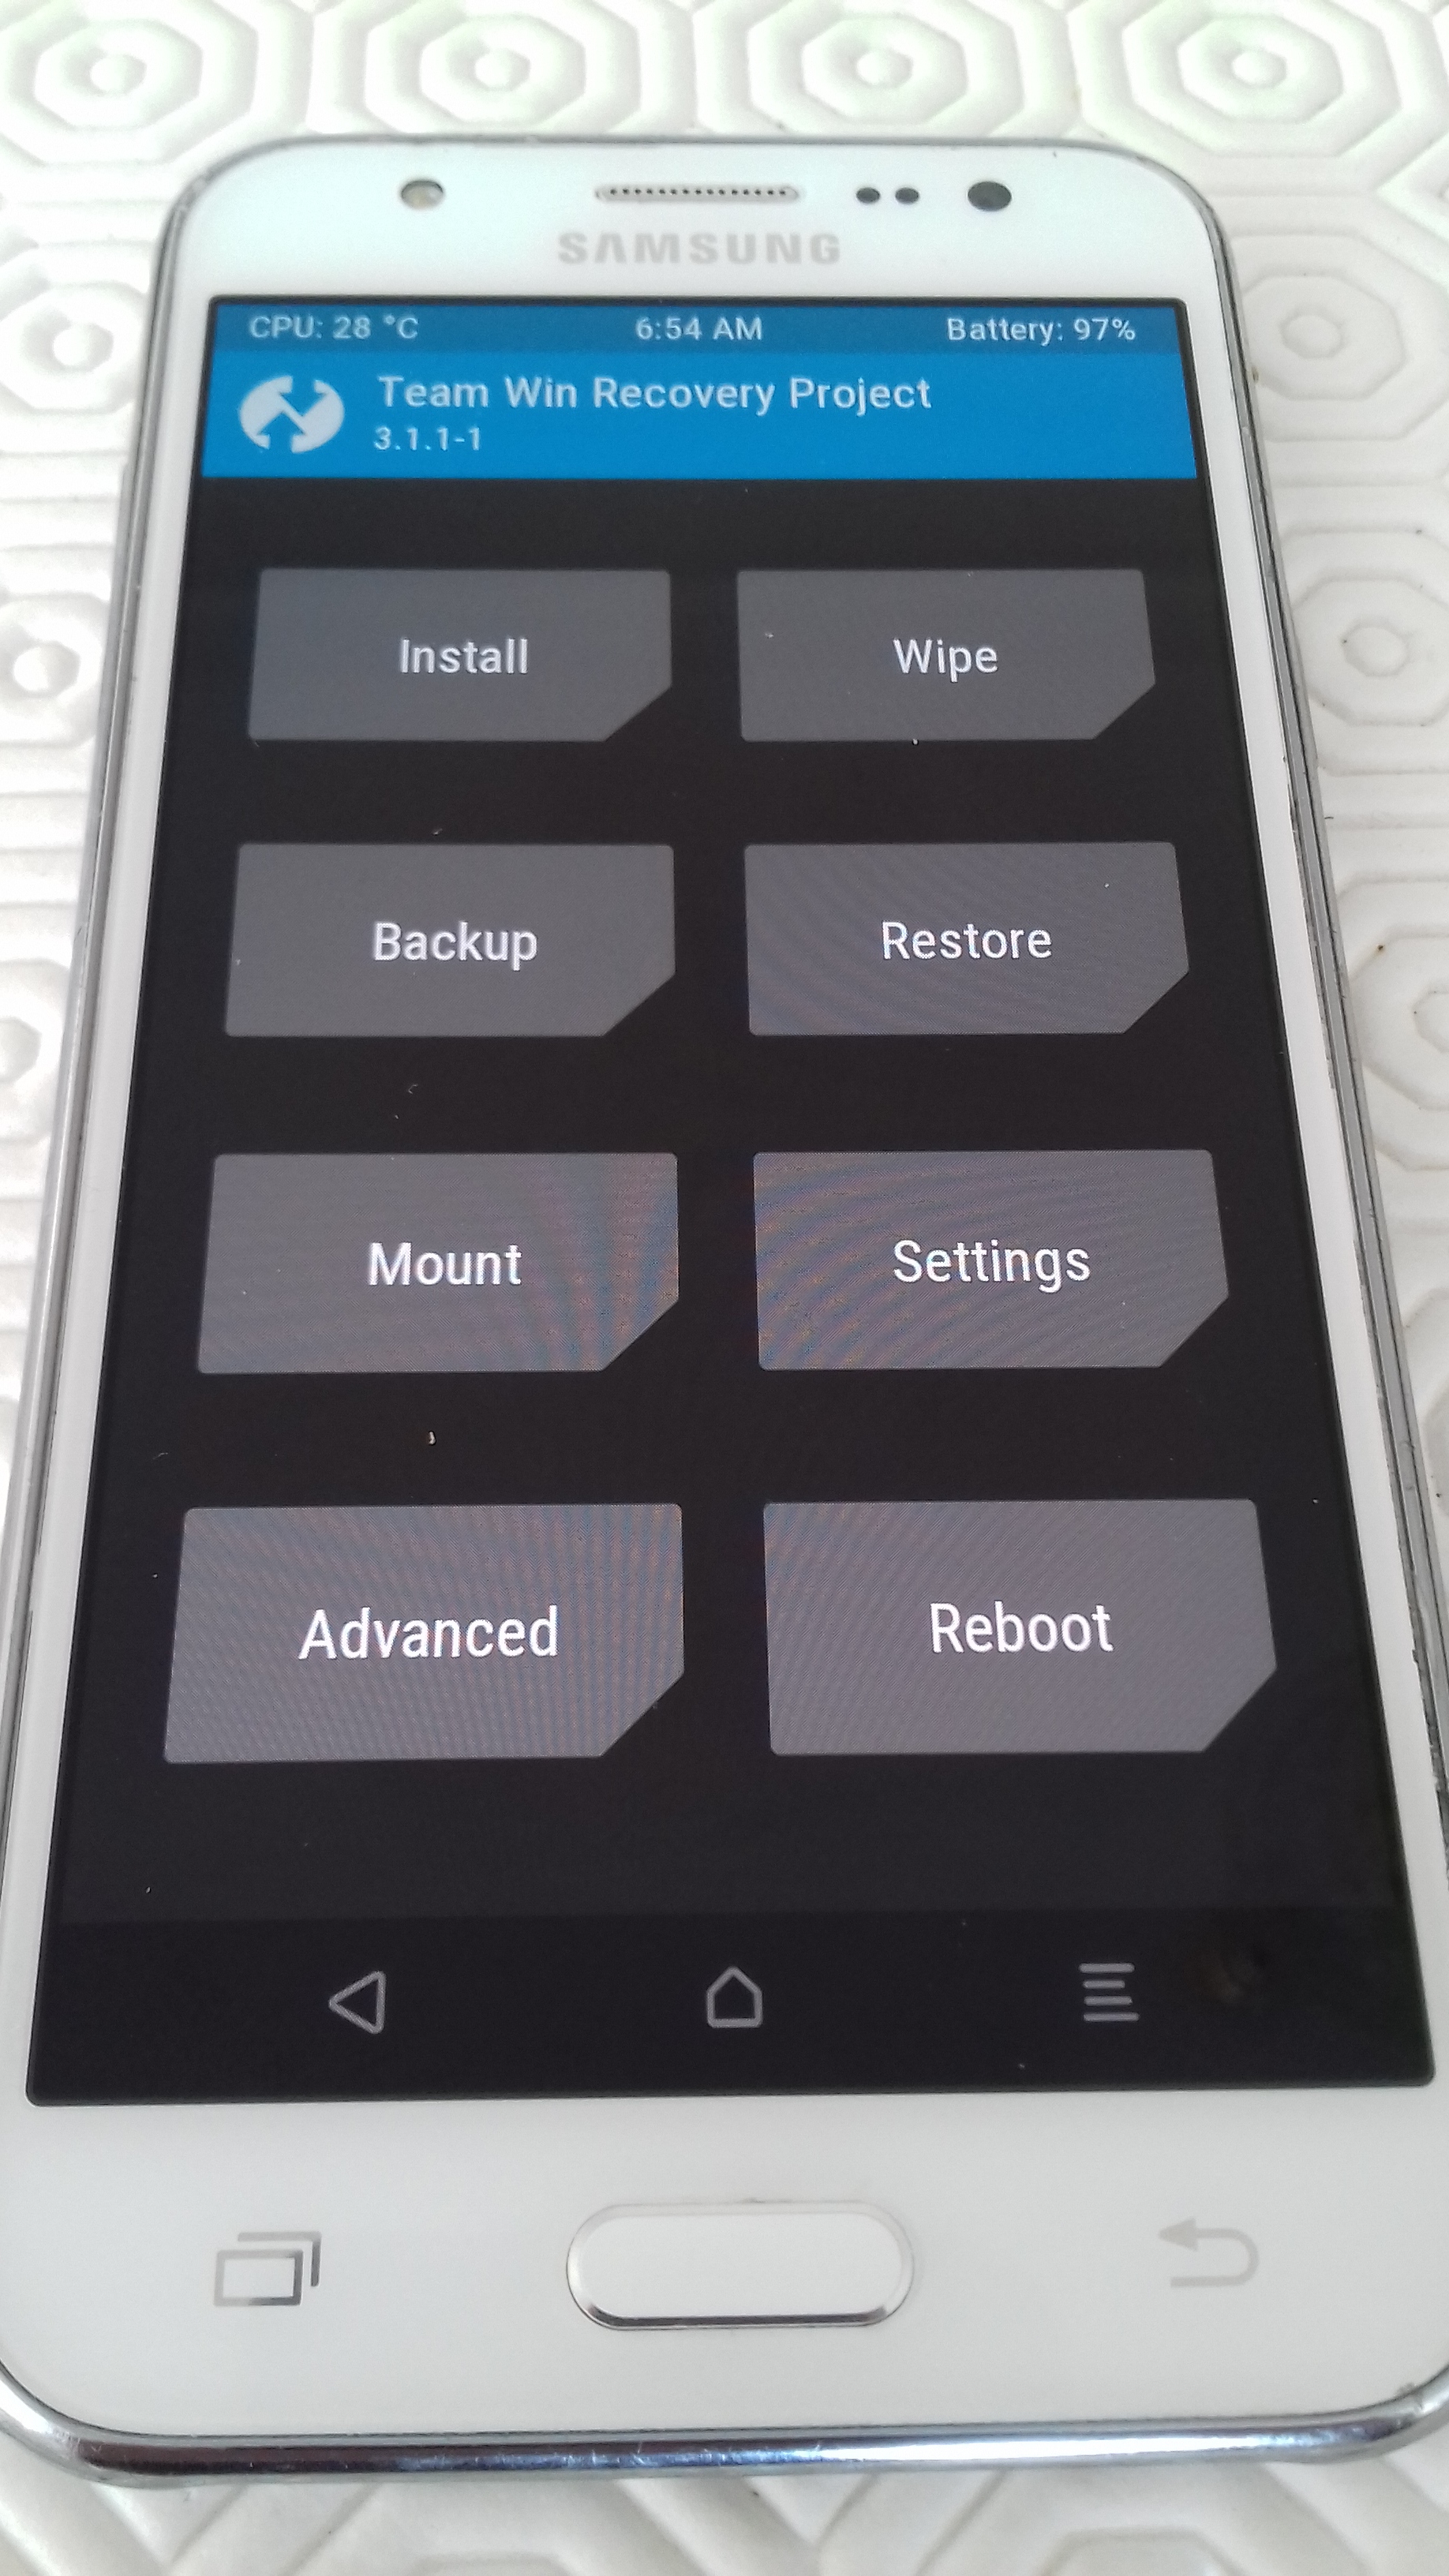
Now you’re in TWRP, congratulations, you’ve done the hardest part.
using TWRP
.
A) Delete existing smartphone content
-
Before you reach the main menu, a message may ask you if you want to open TWRP read-only (i.e. no risk of deleting or changing anything) or not. This option shouldn’t be chosen (since we want to install a new operating system). Slide the bottom arrow from left to right.TWRP may also ask you for a password, which is your phone password.
-
a)
.
-
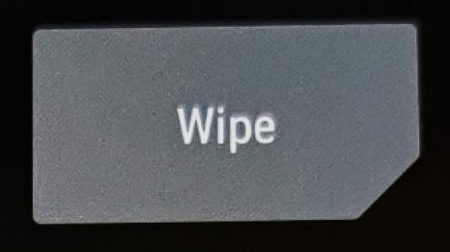
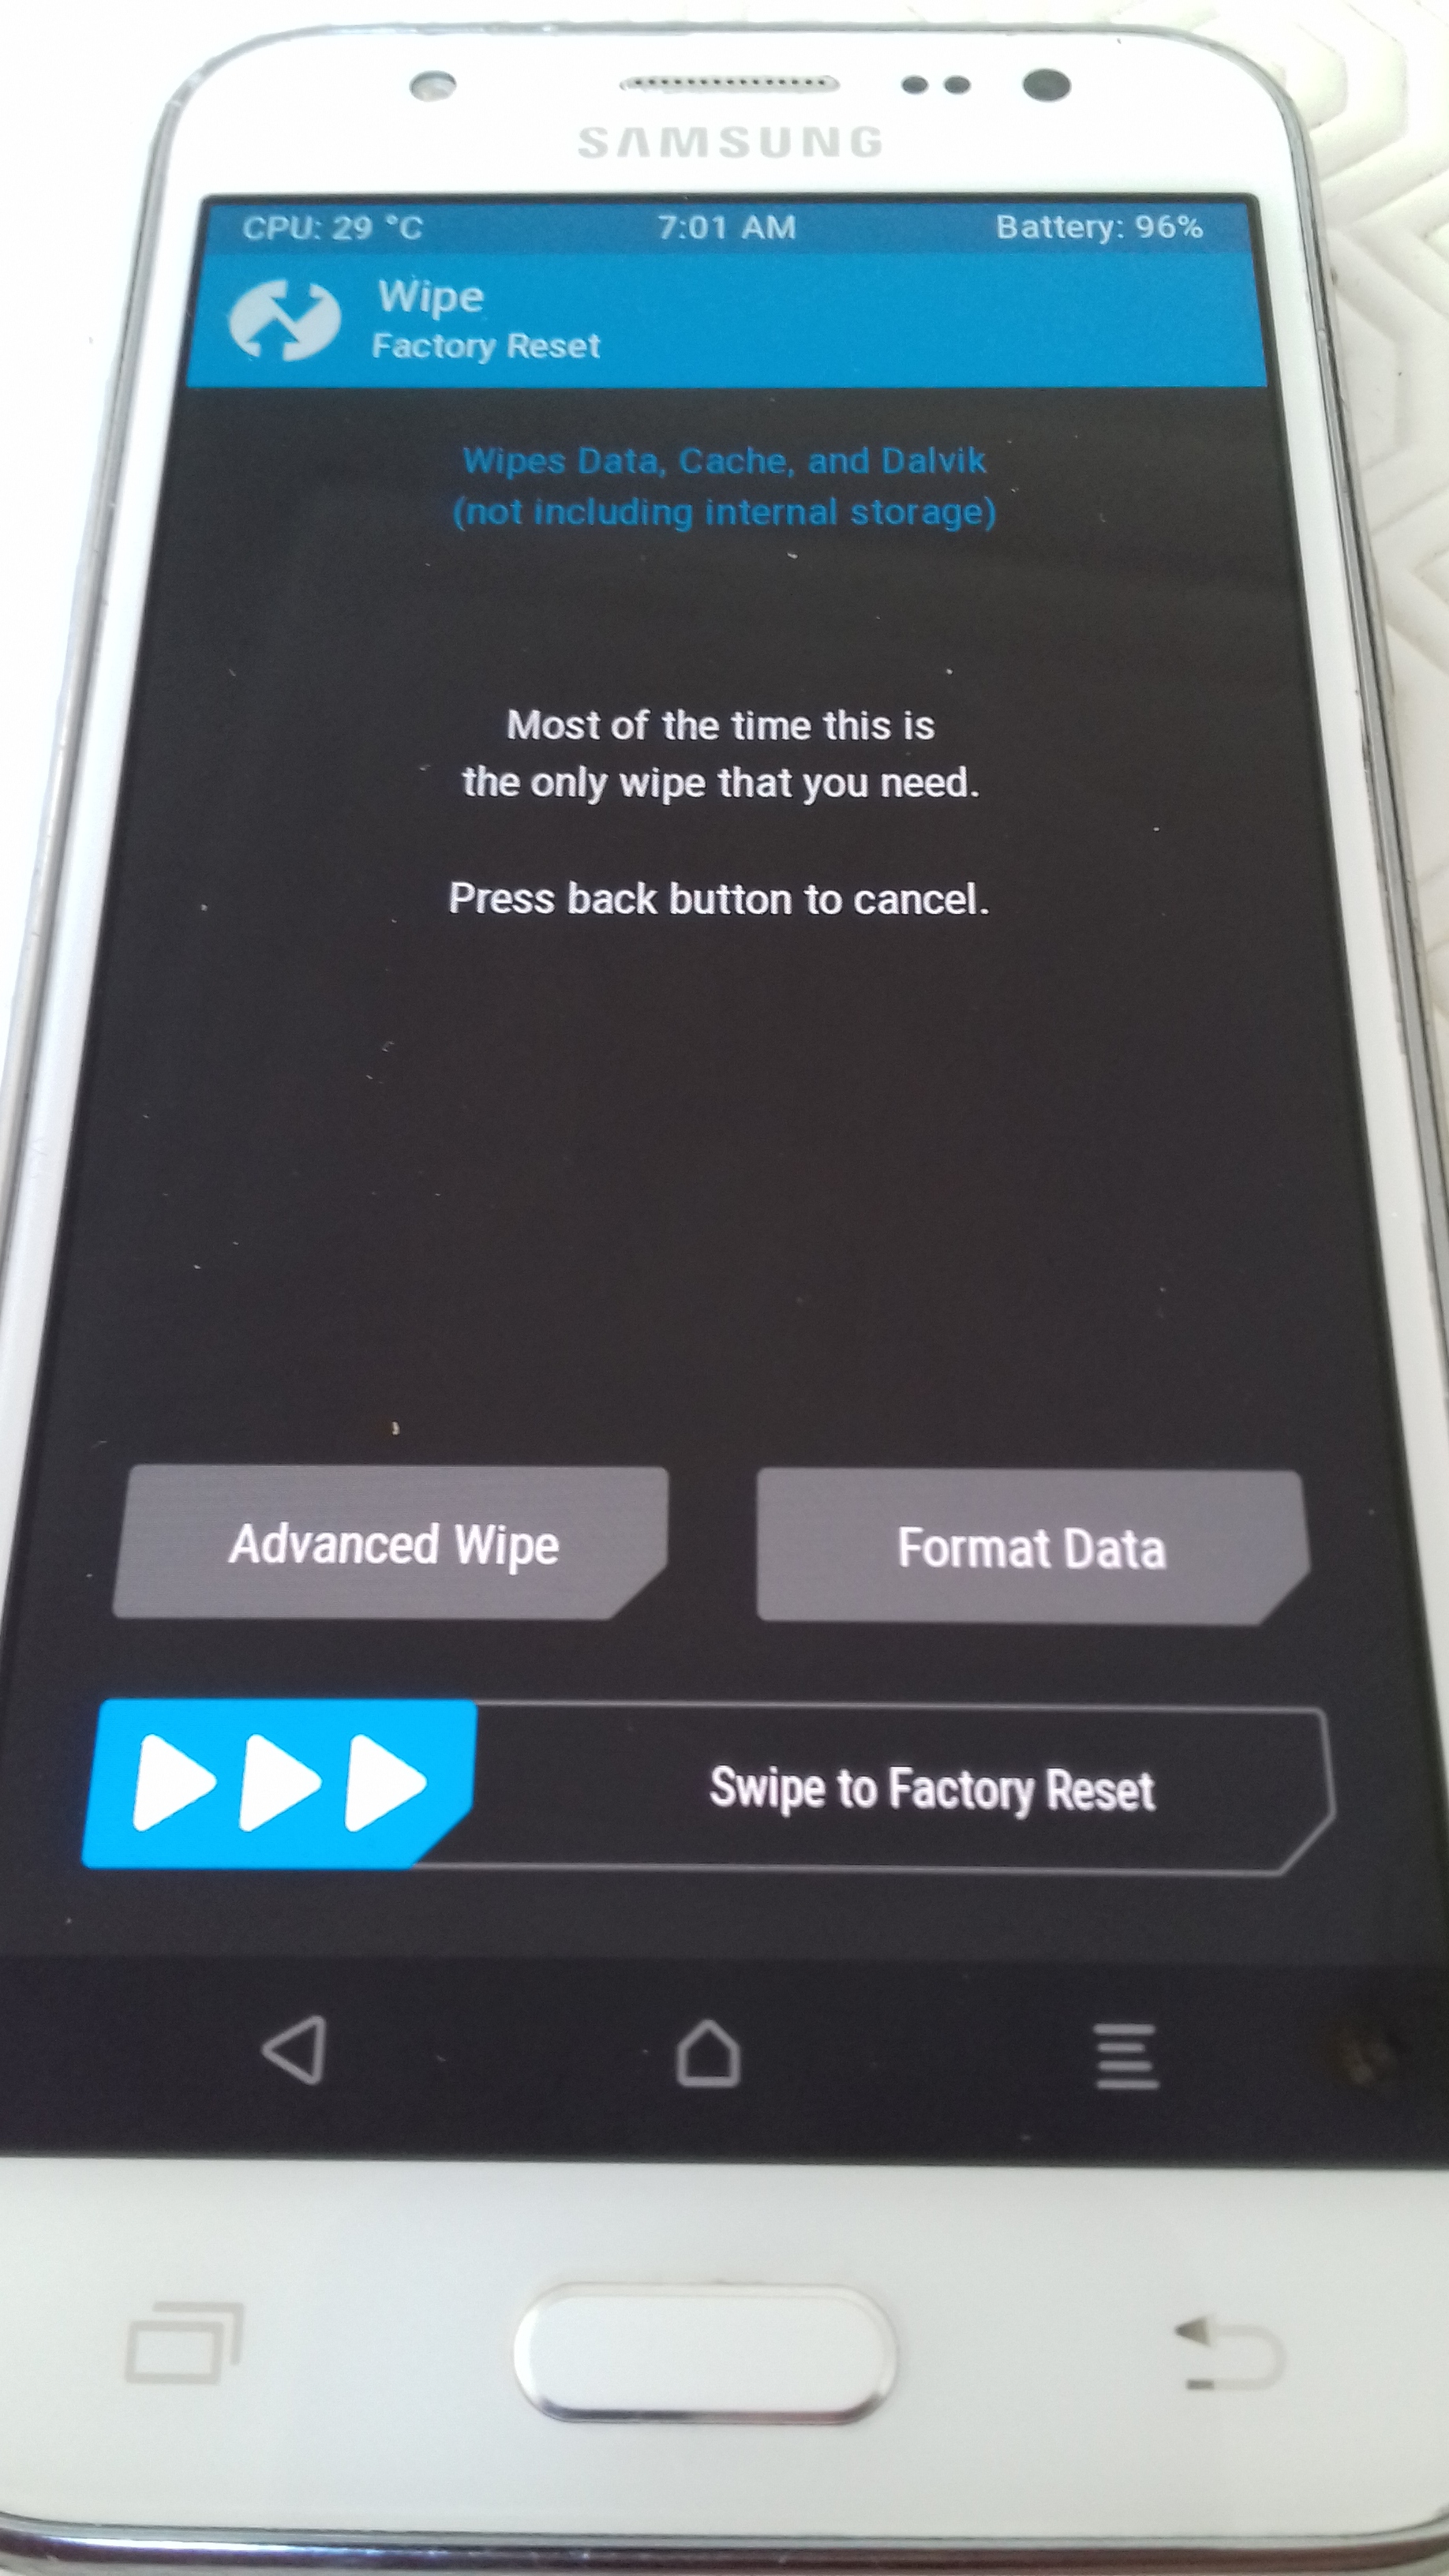
Tap Wipe from Main Menu.
. -
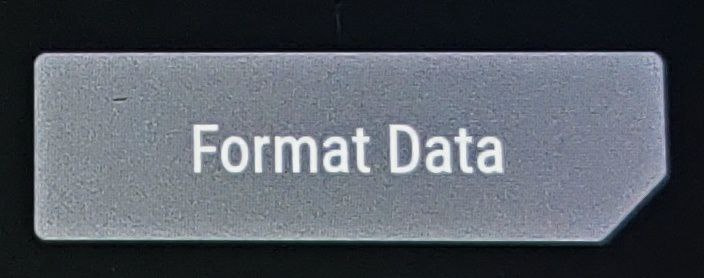
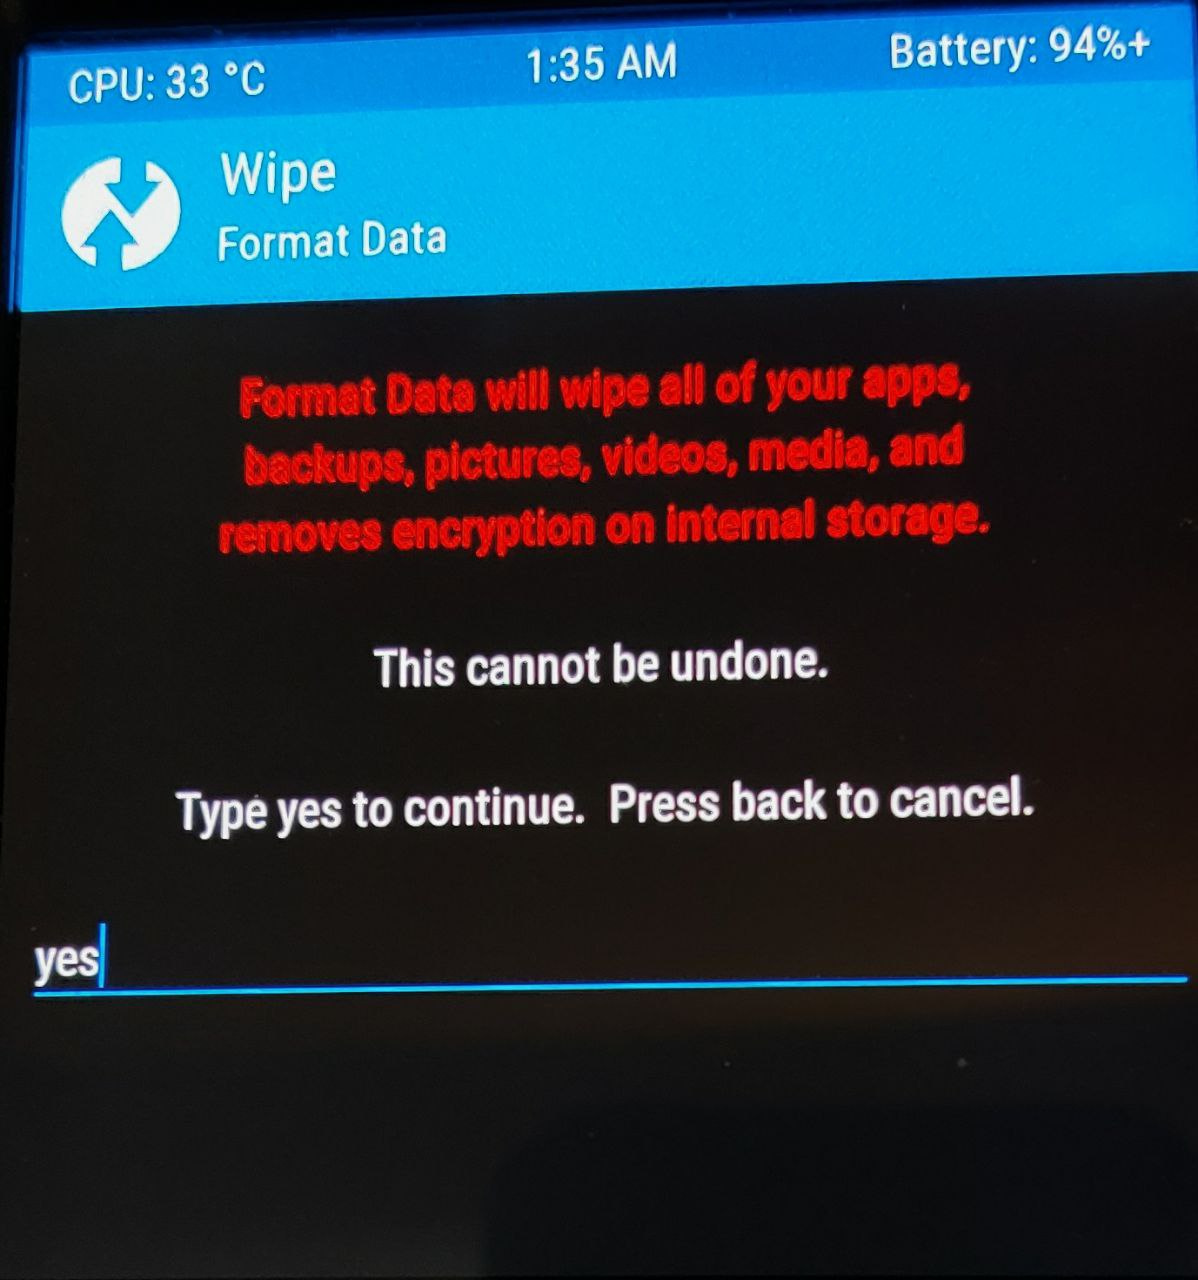
Ta.p Format Data (only for new install, not for Update)
. -
Type yes in the text field to continue.
.
- Once done a successful result as seen in the image below appears.
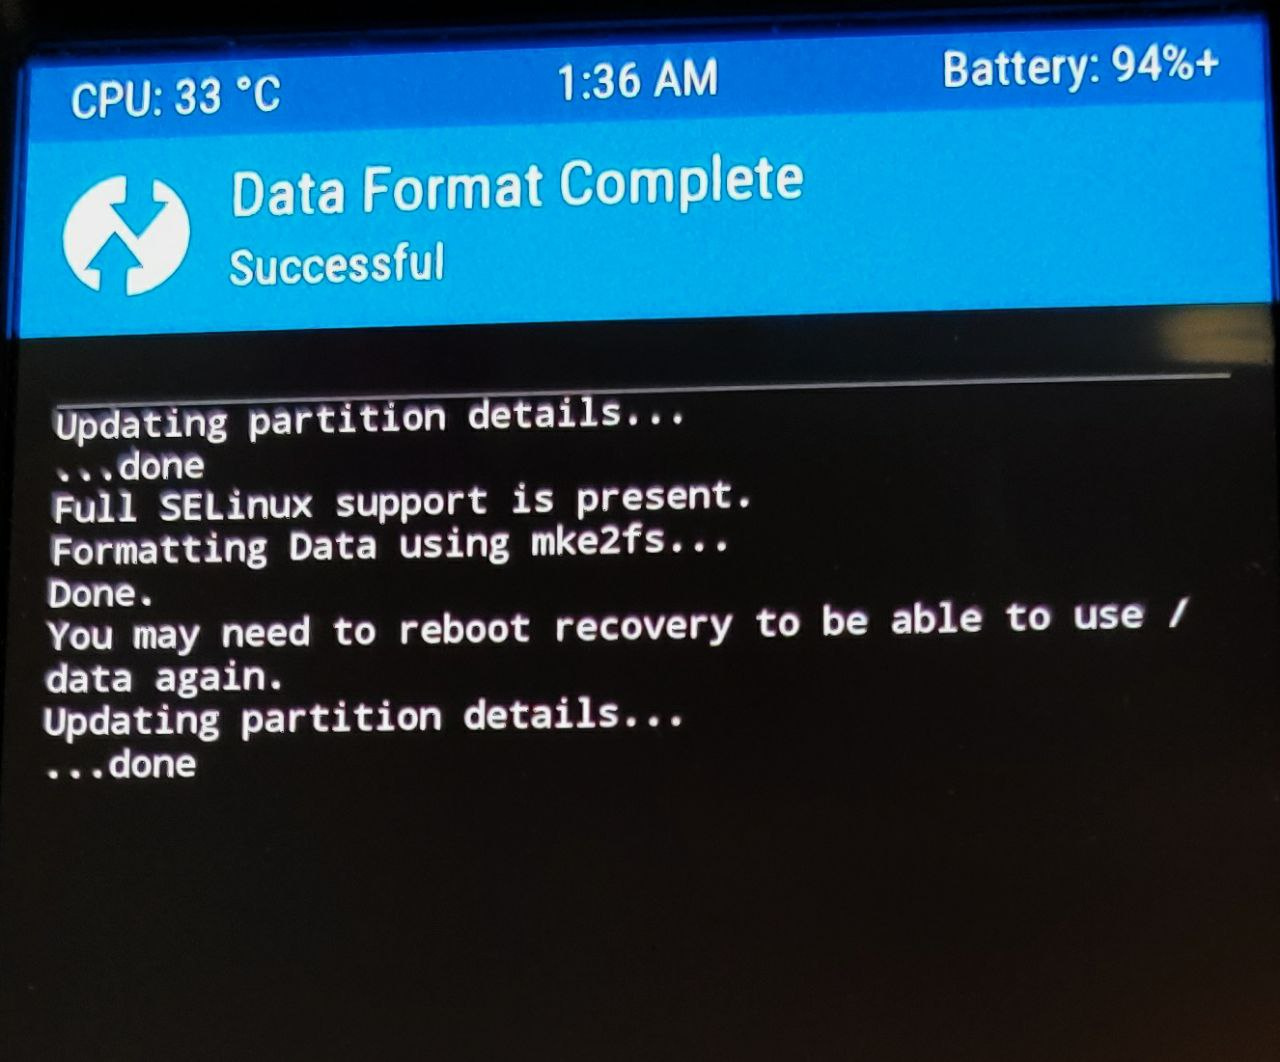
This will remove encryption as well as delete all files stored on the internal storage.
- T.ap Back, return to the main menu, choose reboot ,
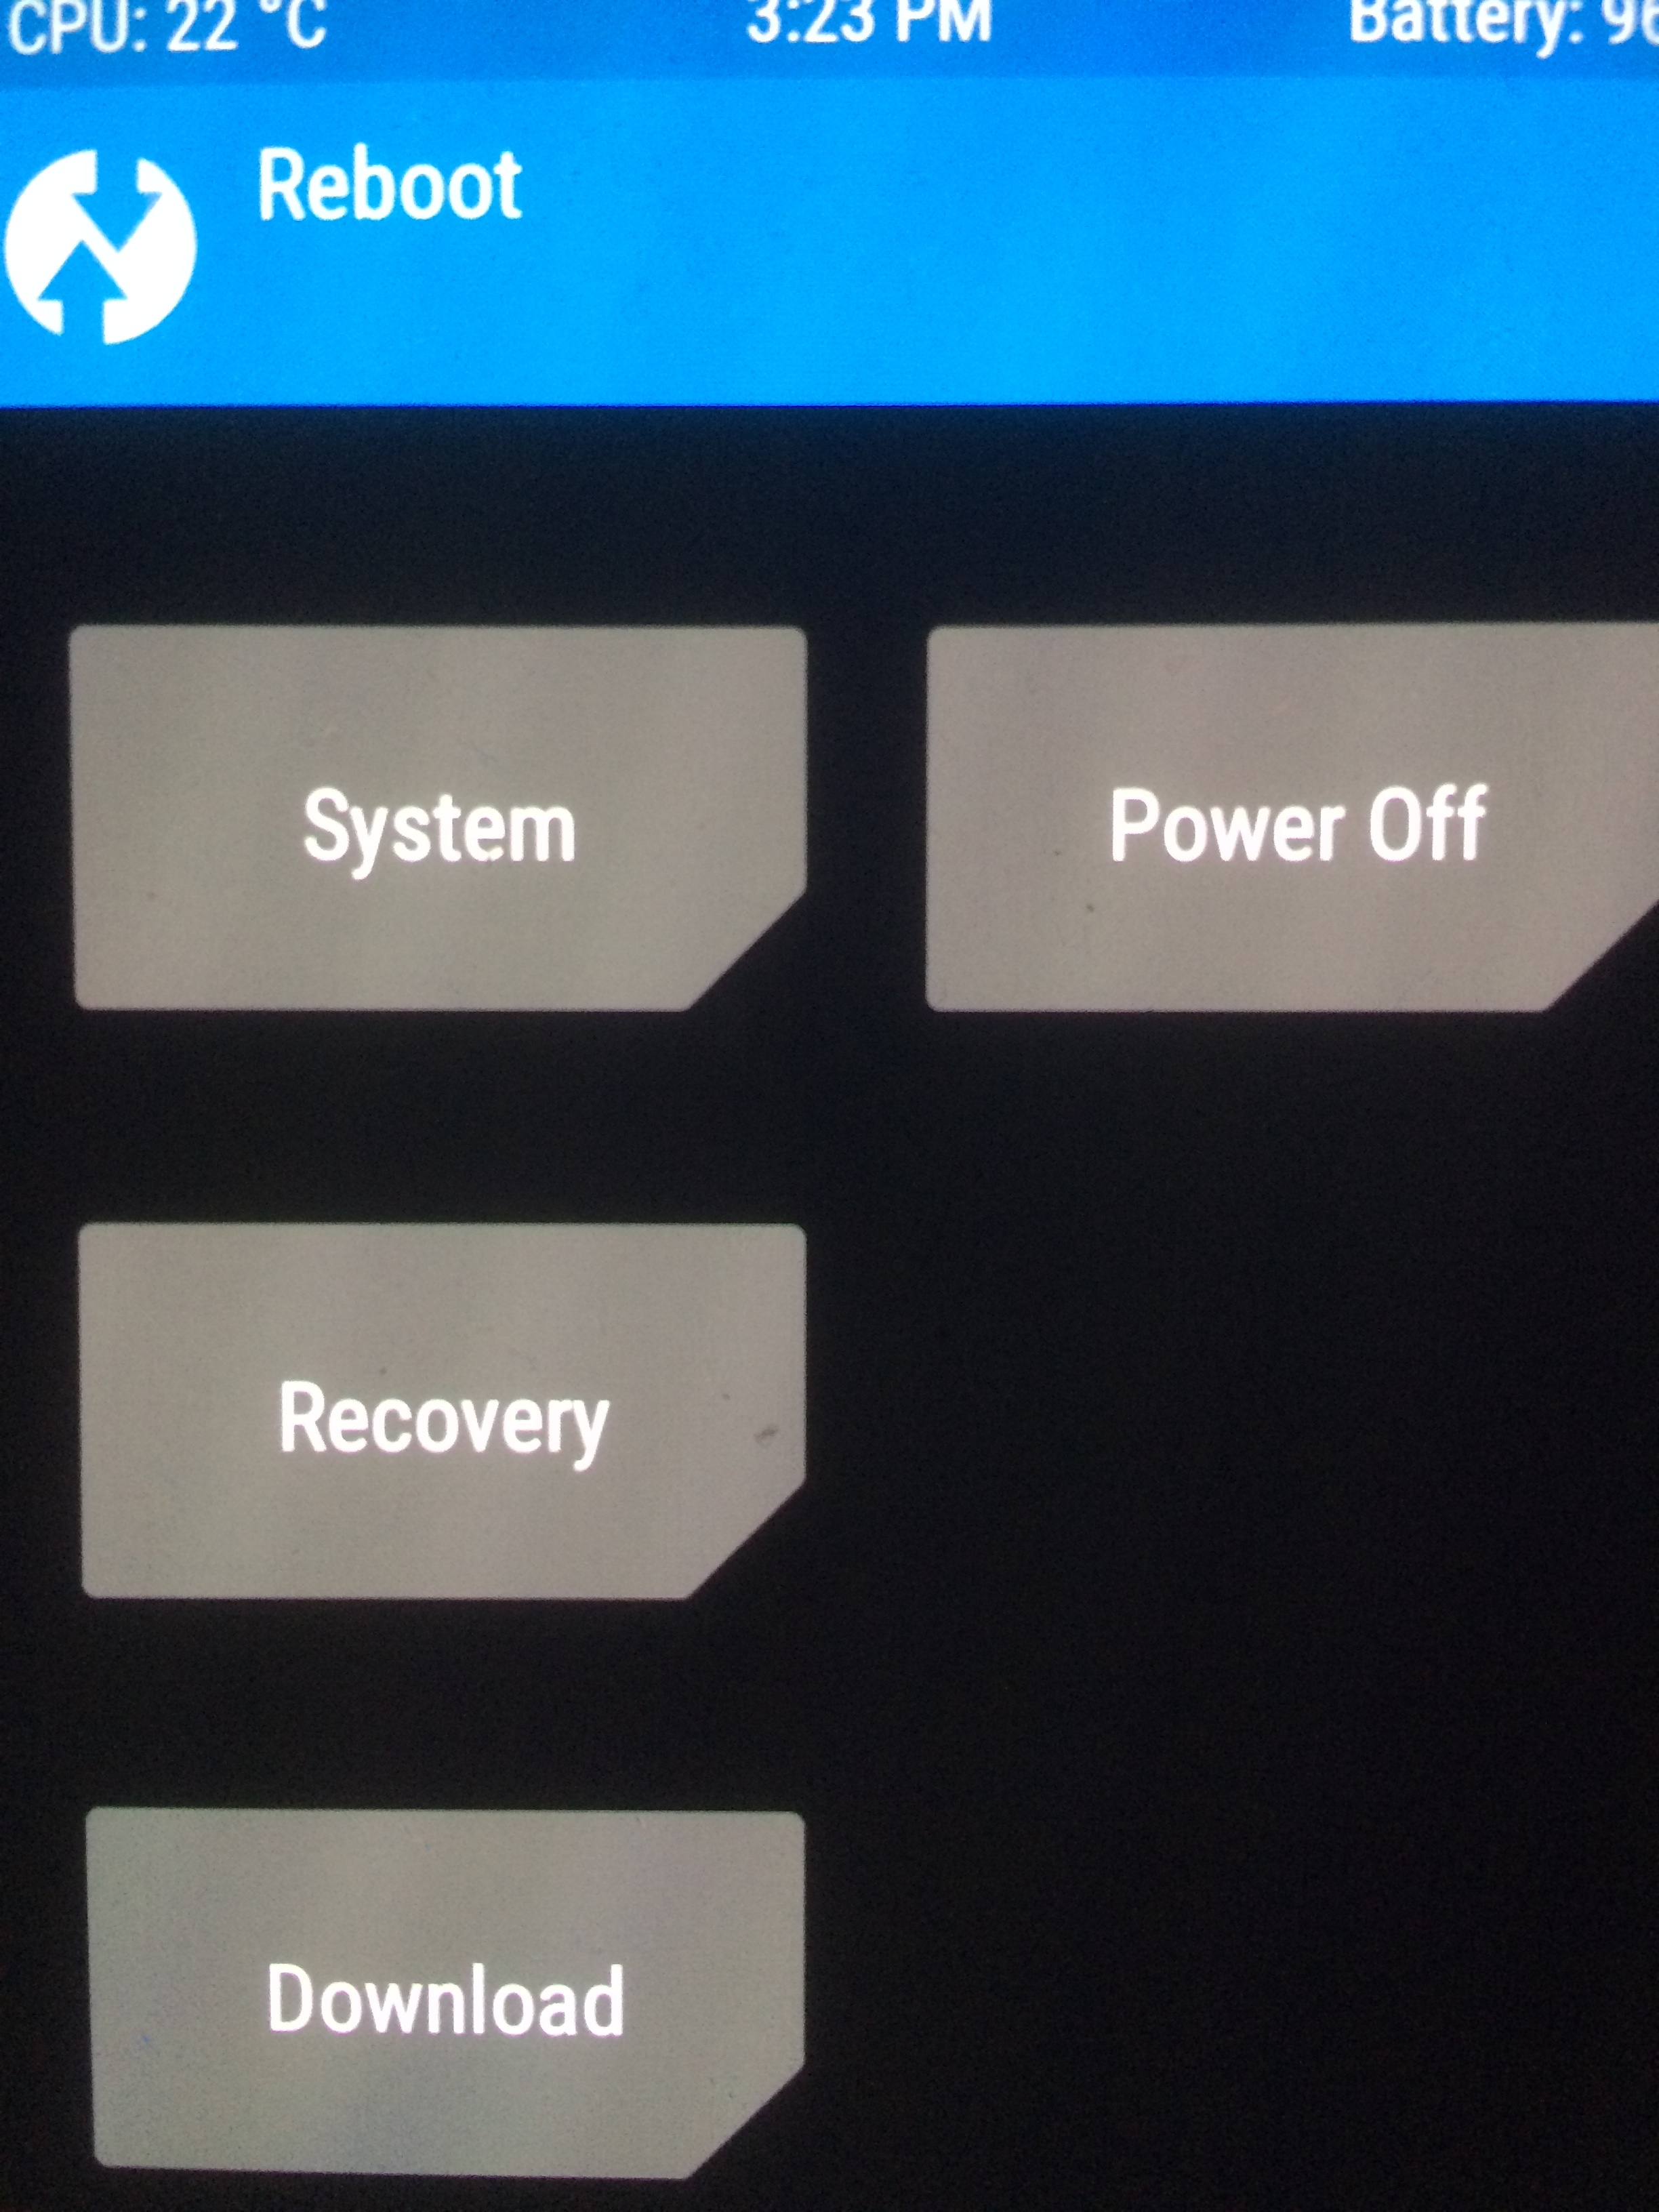
- and tap recovery

the device reboot to TWRP
- b)
- From the main menu, choose wipe ,
.
.
.
.
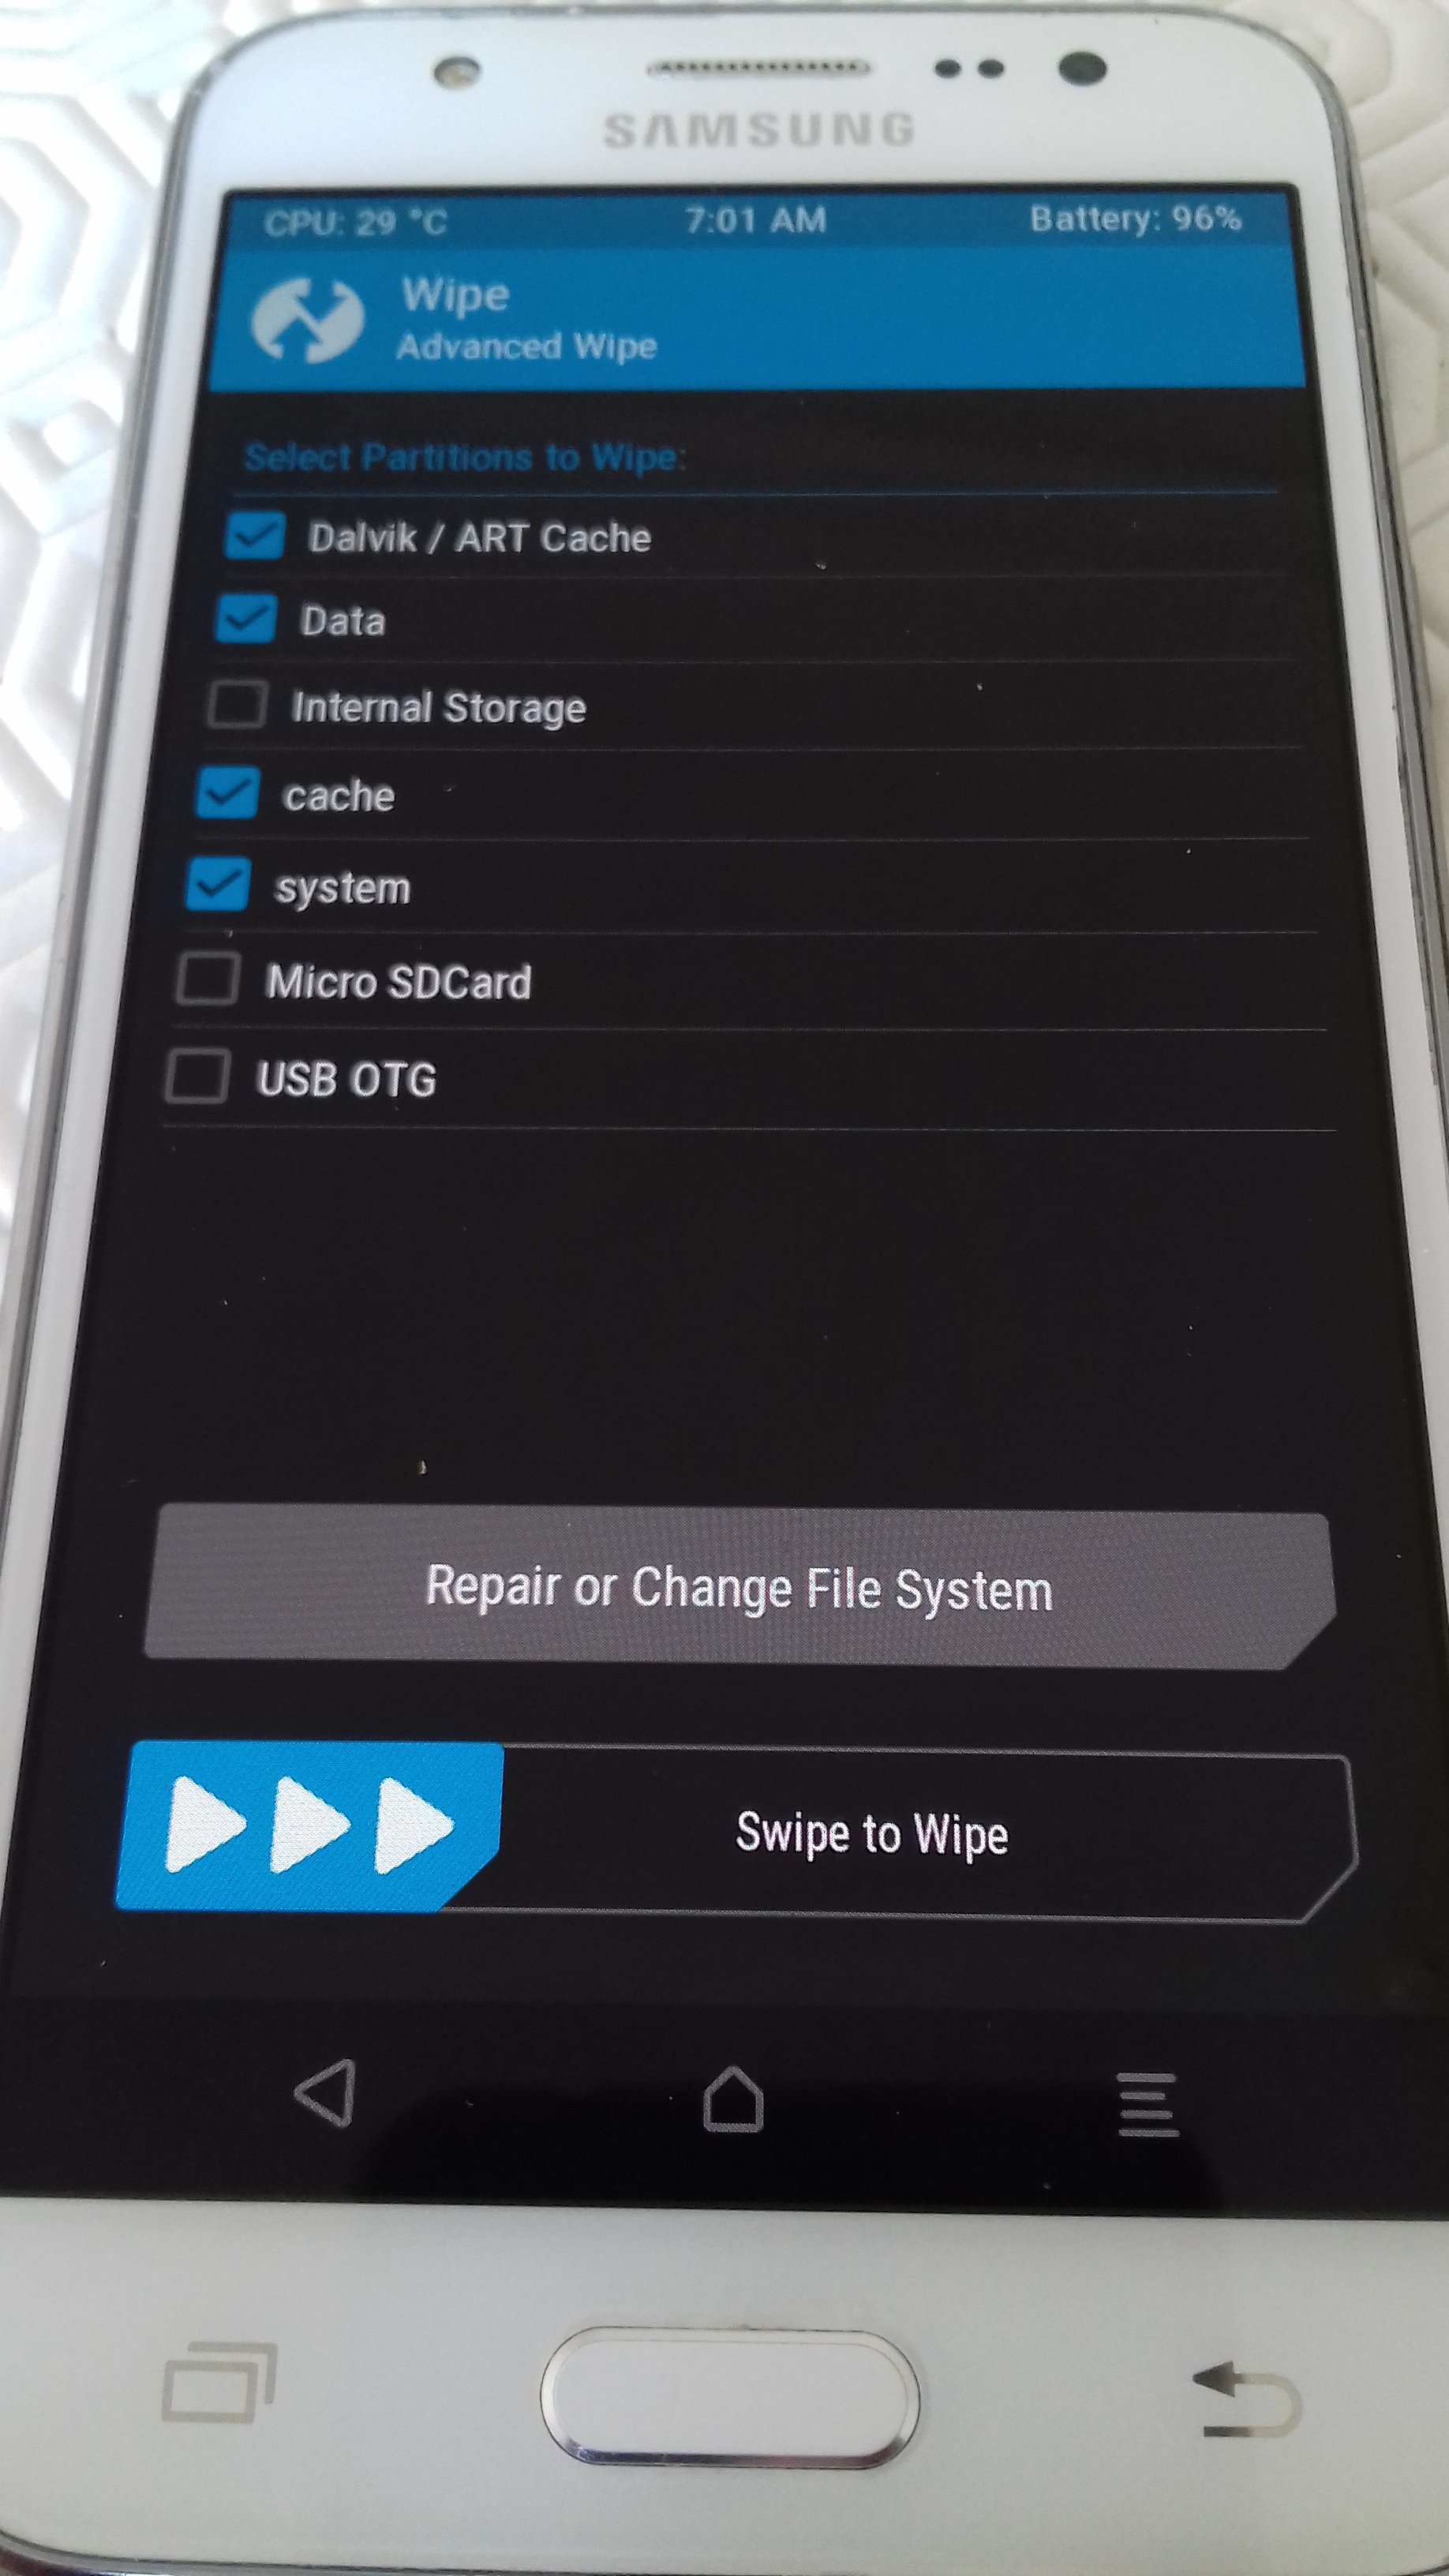
and tap Advanced Wipe .

- Select the following items to delete and nothing else :
- Dalvik / ART Cache
- system
- Data (only for new install, not for Update)
- Internal Storage (only for new install, not for Update)
- cache
.
4. Validate by dragging the “Swipe to Wipe” arrow from left to right.
If red error messages show up, your phone is probably encypted but TWRP can’t decrypt the /data partition (it’s a common issue on Samsung phones).To solve that problem, go to Wipe > Advanced wipe, select “data”, click on “Repair or Change File System”, then on “Change filesystem”. Select exFAT (or another one if it doesn’t work, it doesn’t matter), then swipe from the left to the right. Redo the manipulation but this time select ext4 (which is the original file system) then slide from the left to the right.
Go to the 8)A)1. part of the howto.
- Return to the main menu using the virtual buttons at the bottom of the screen.
B) Transfer the /e/ ROM to the internal storage of the smartphone
The previously downloaded /e/ ROM is waiting in the warm on your computer, so you need to transfer it to your smartphone’s internal storage so that TWRP can use it.
- Connect your smartphone to the computer.
- Copy the ZIP file of the /e/ build (without unzipping) (right click on it and then “Copy”).

.
3. Paste it into the internal storage of your smartphone. To do this, in the file explorer you are in, clic.k on “This PC” then on your smartphone, then on “Internal storage”. Paste here, next to the “TWRP” folder (not inside).
- Unplug your smartphone once the transfer is complete.
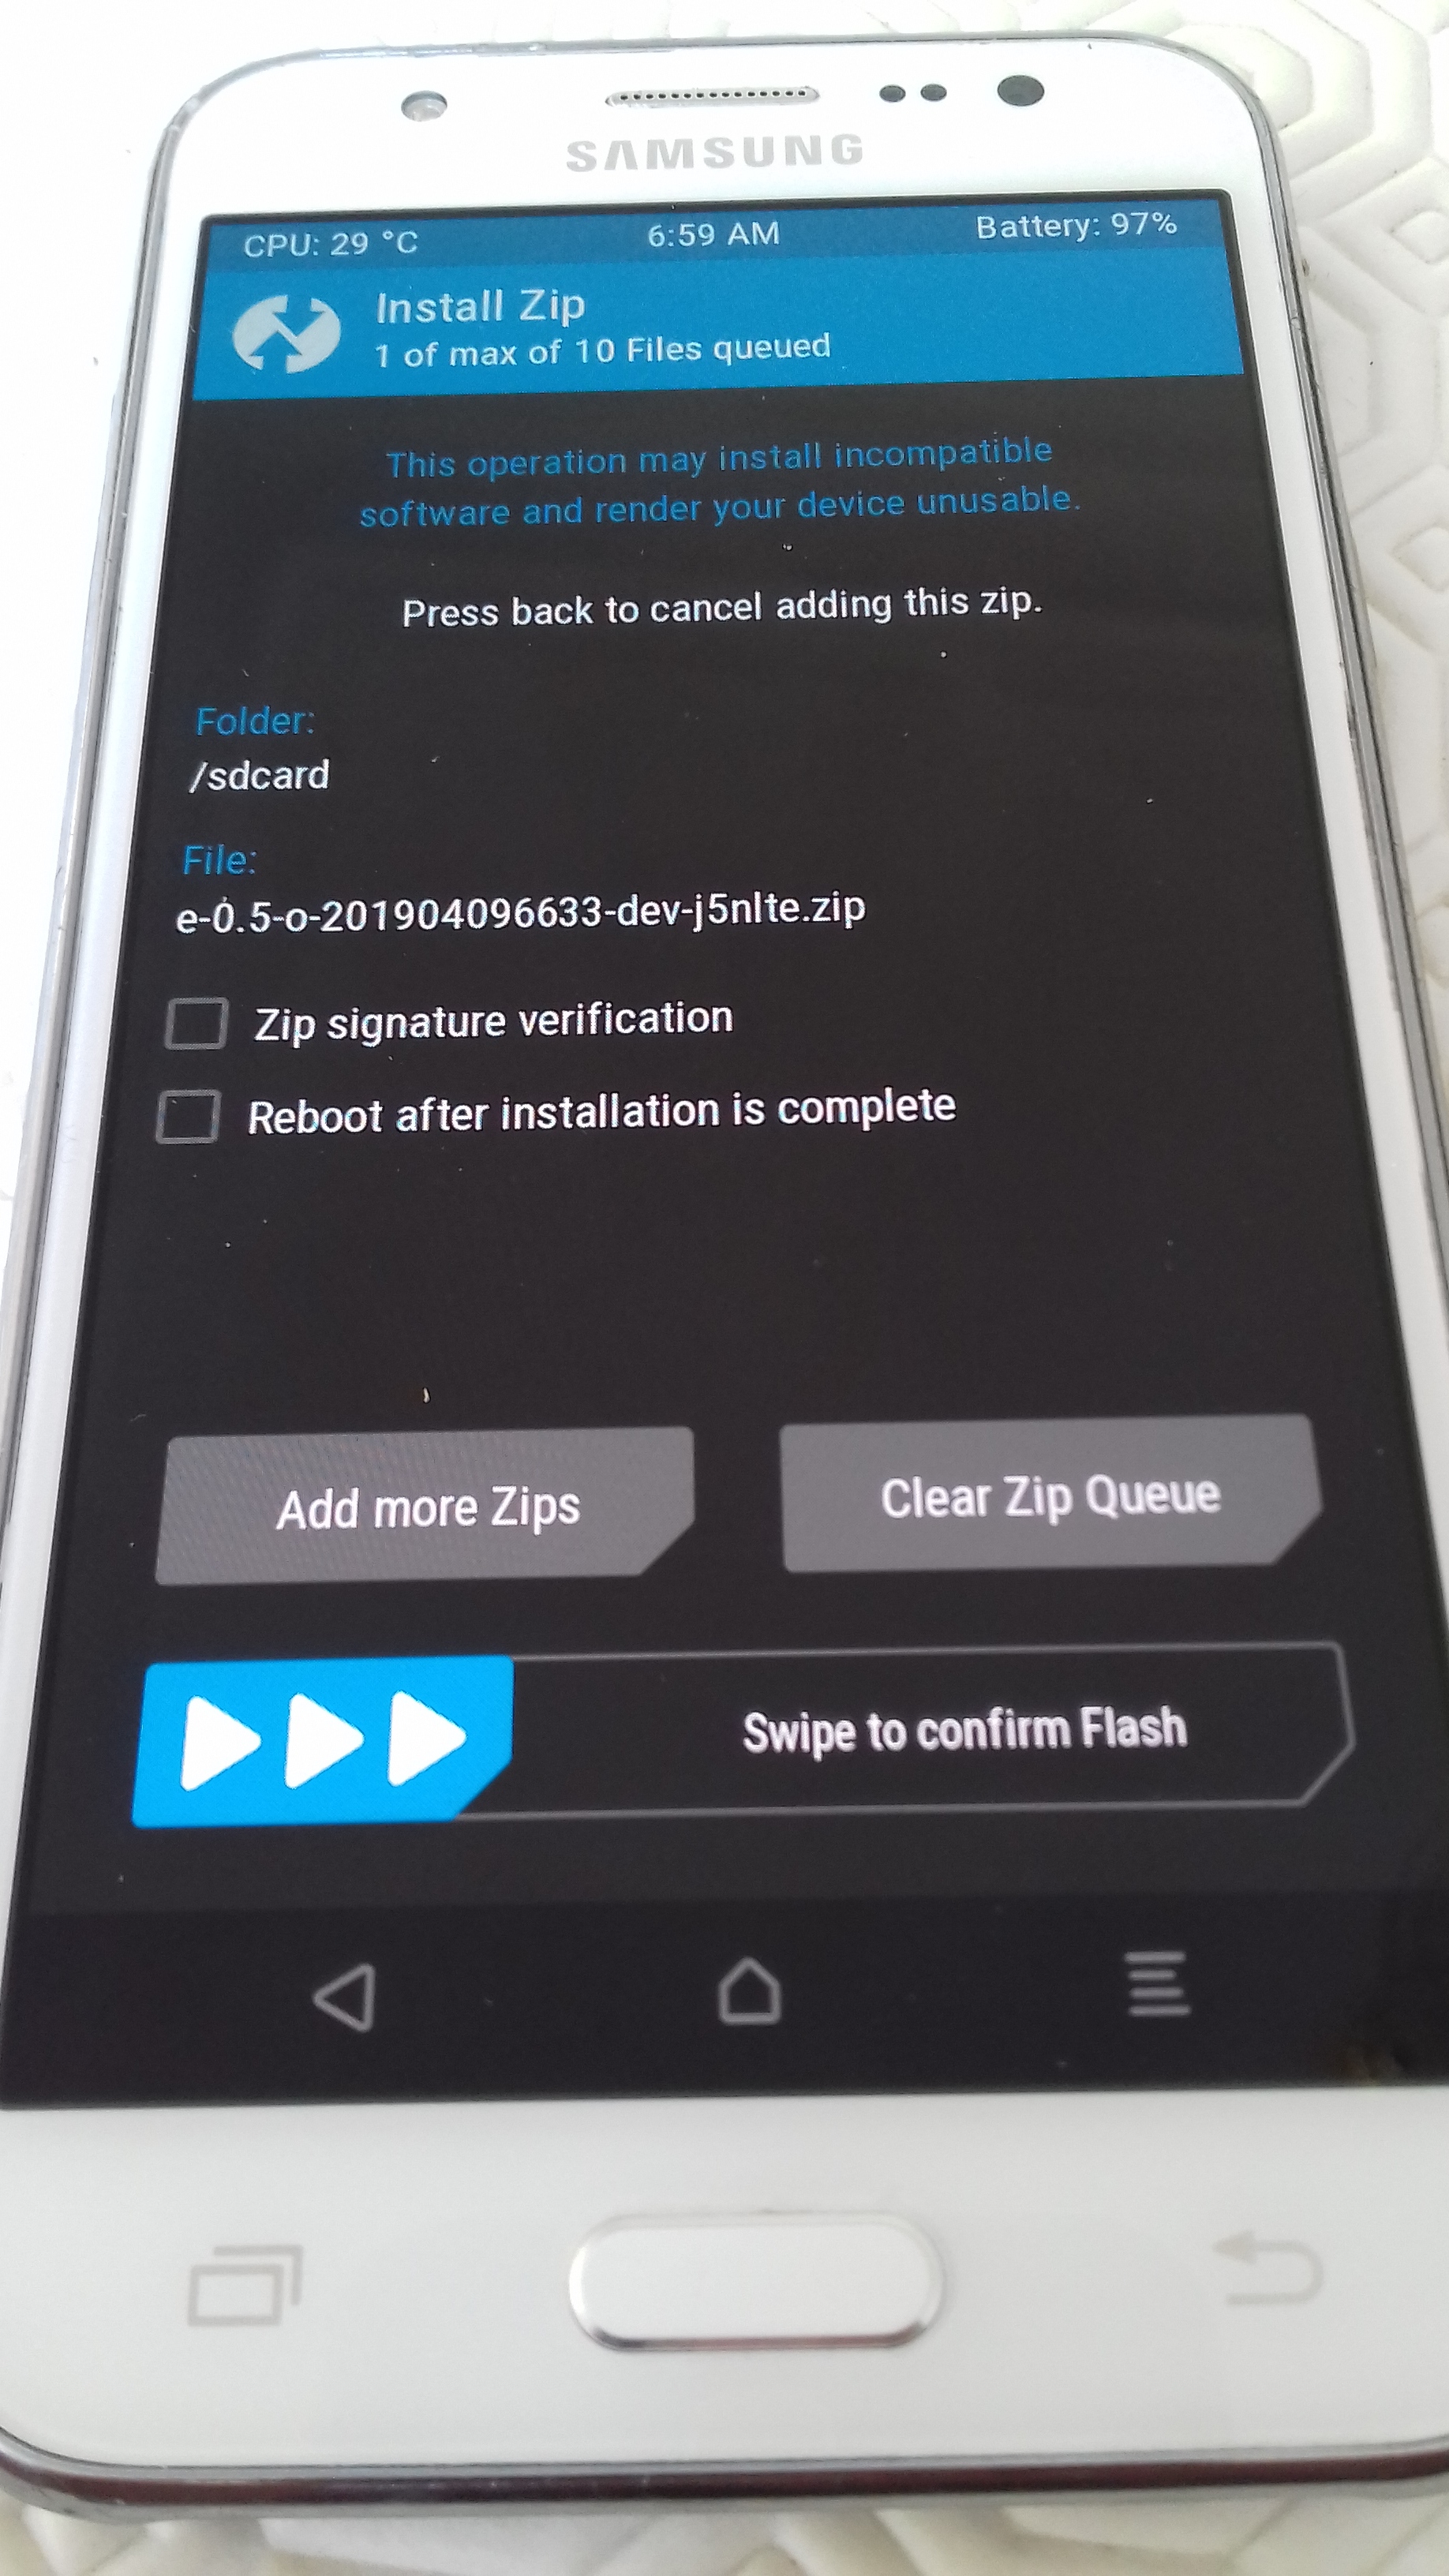
C) Install /e/
Everything is ready, all that remains is to install /e/.
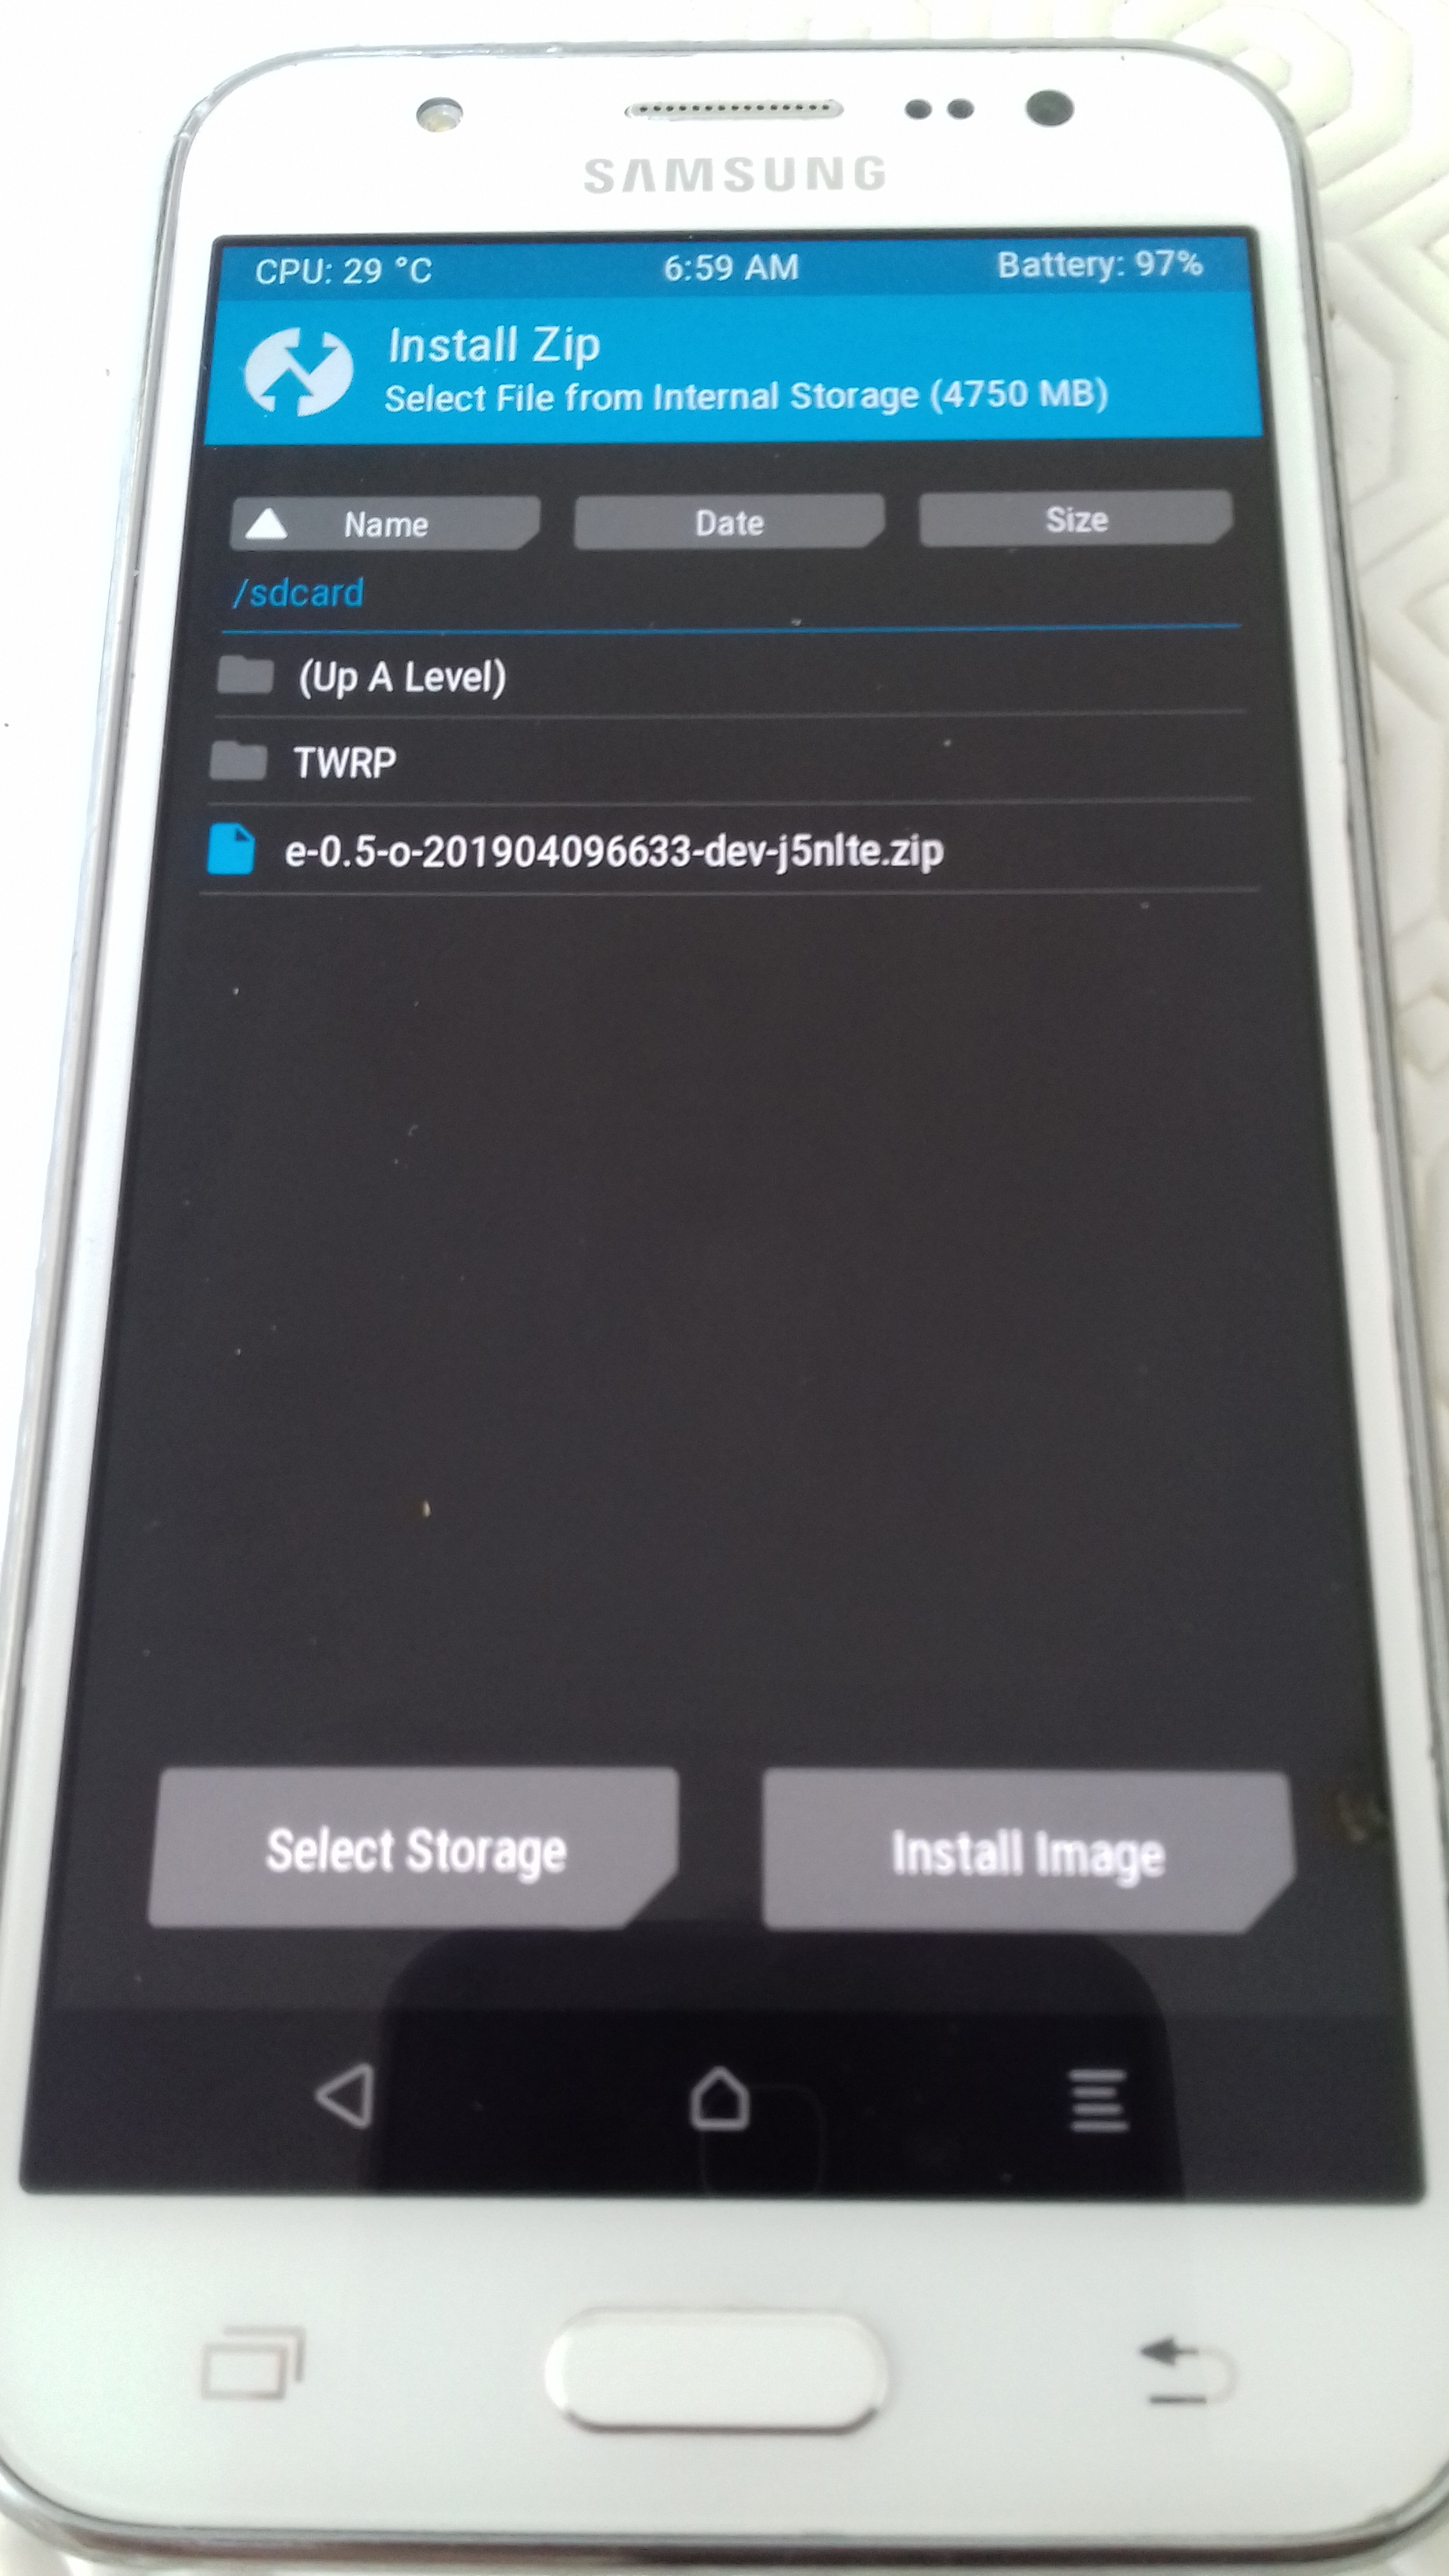
- In the TWRP main menu, click on “Install”.
.
2. Select the .zip file you just copied/pasted. It should appear directly if you have pasted it at the right place.
.
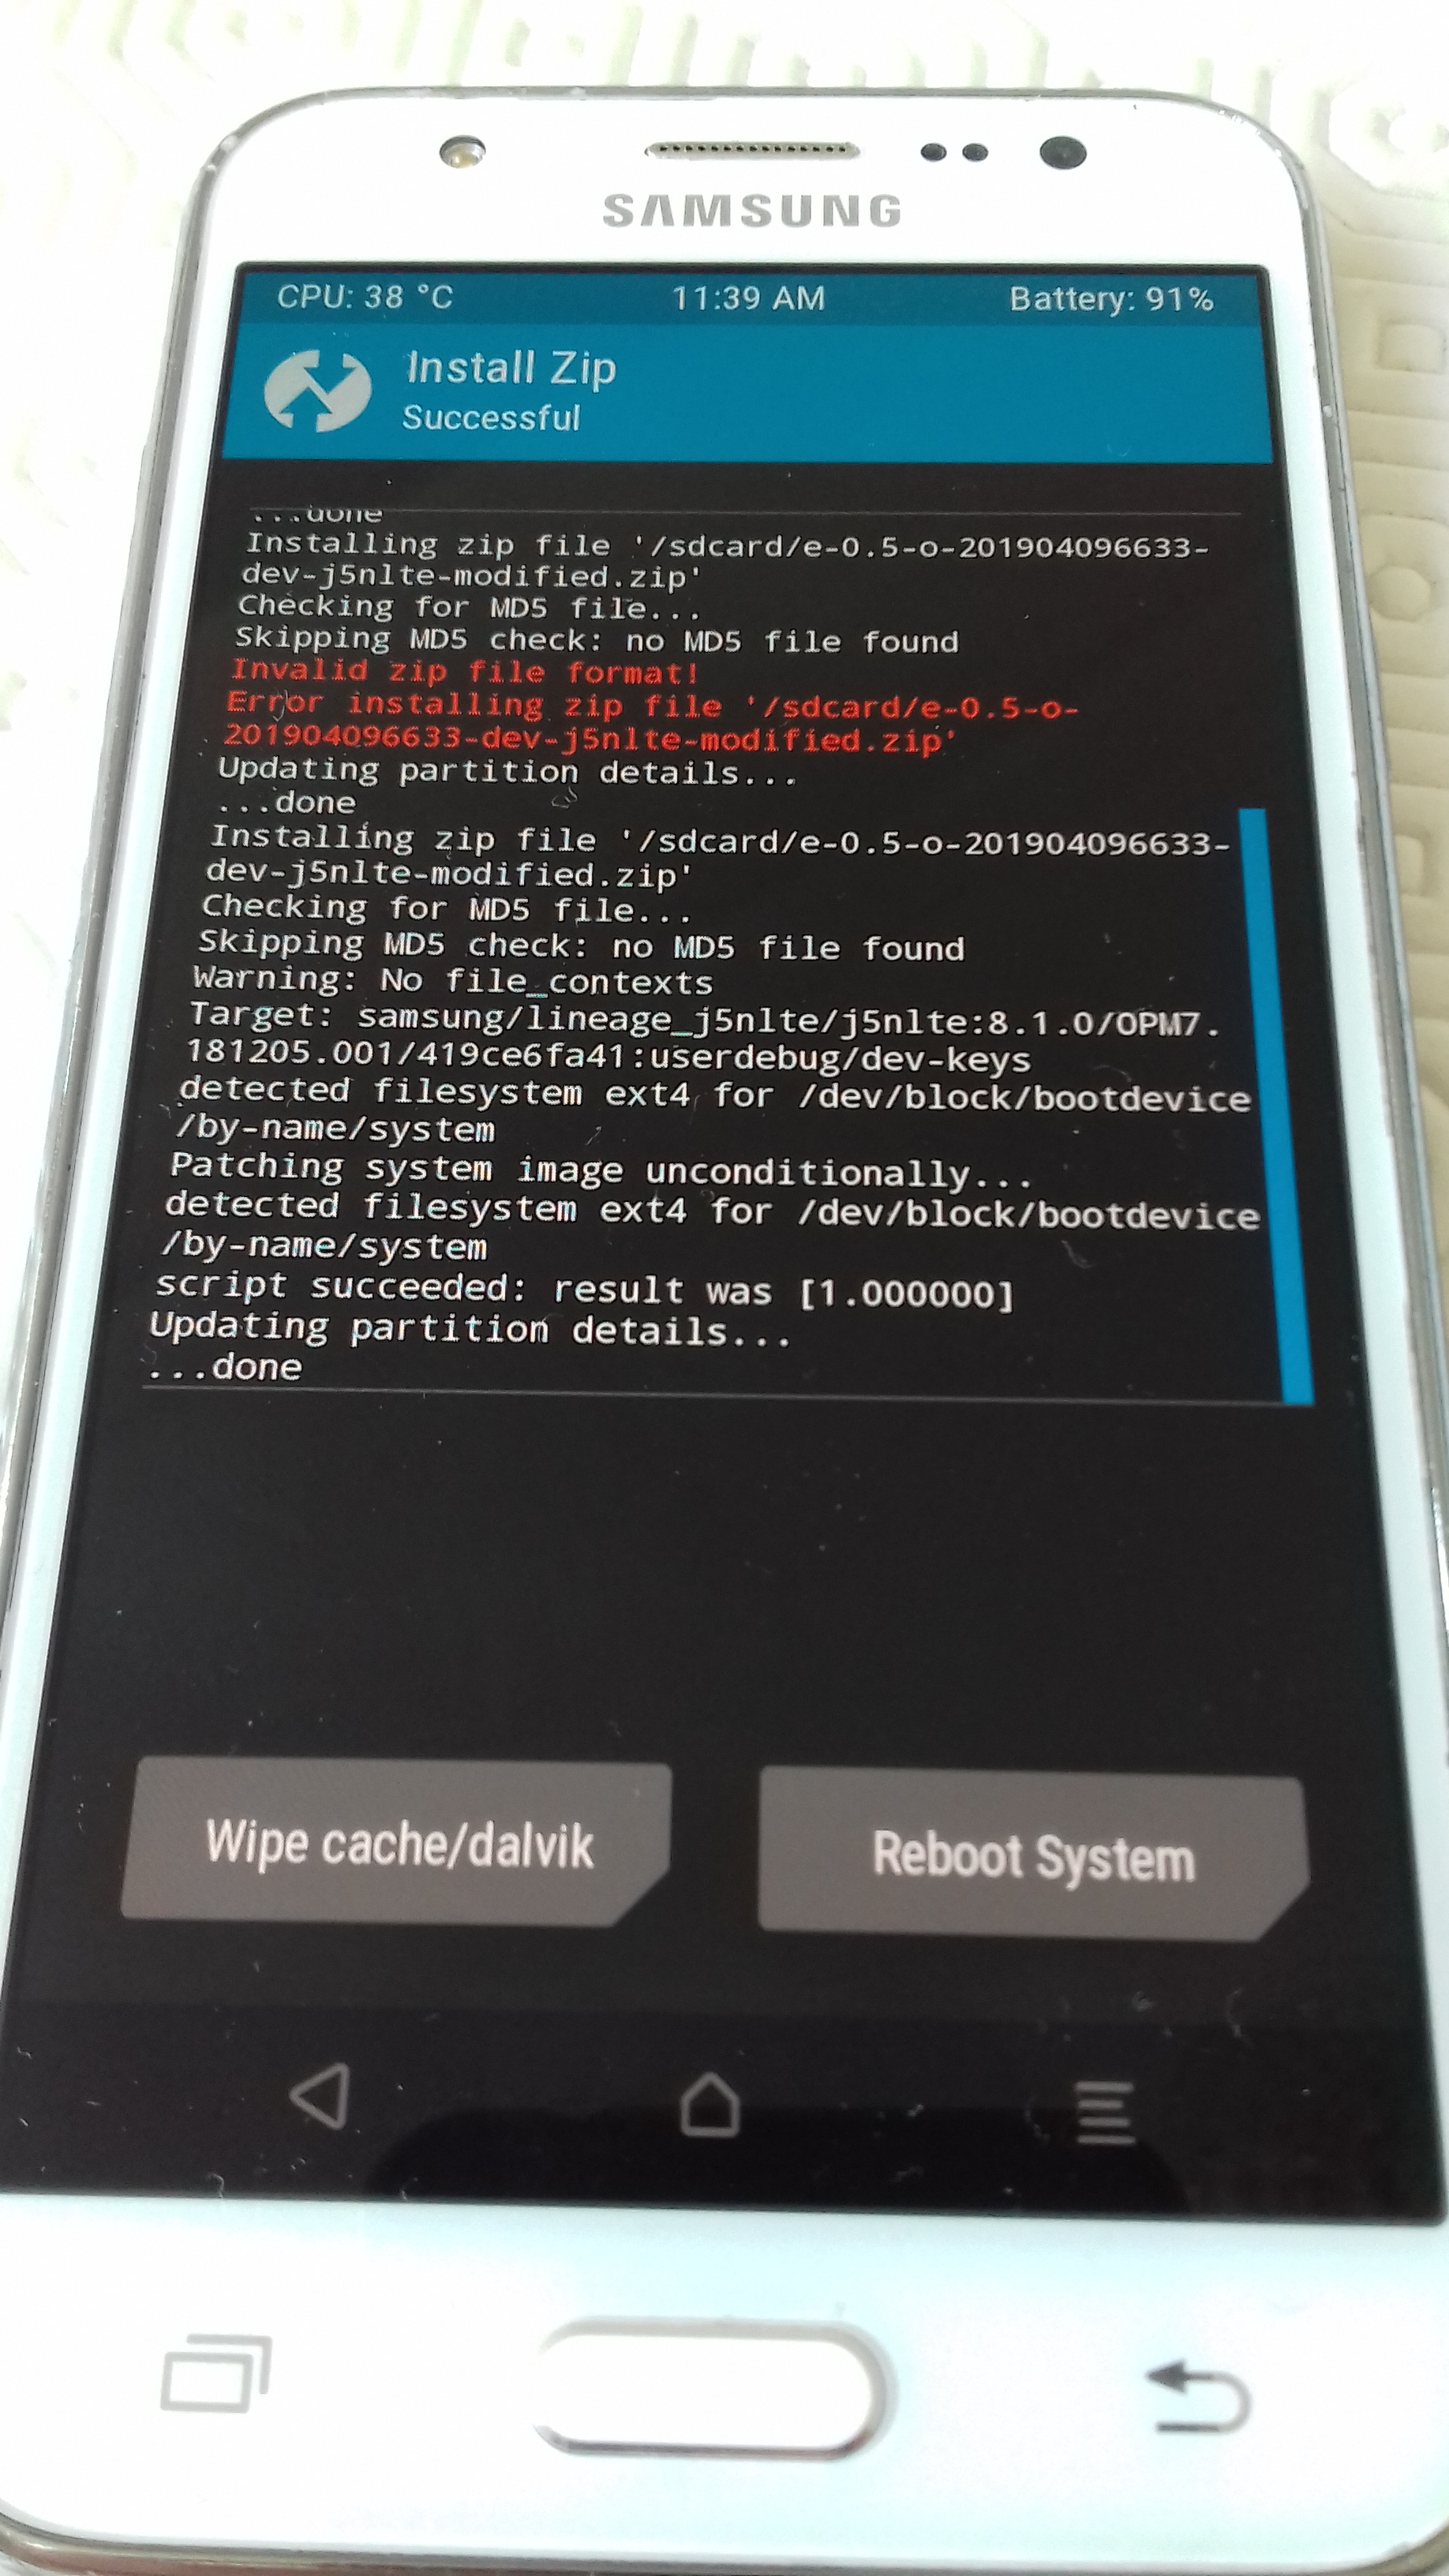
3. To confirm the flash of your smartphone, slide the “Swipe to confirm Flash” arrow from left to right.
- A blue loading bar or a shiny empty bar should appear. After a few minutes at most, the installation is completed.
If you encounter an “error 7”, refer to this topic .
This could also be due to the fact that :
- your TWRP version isn’t compatible with the ROM you are trying to install,
- Click on “Wipe cache/dalvik” at the bottom left, confirm if necessary.
.
6. Click on “Reboot System”. You can choose whether or not to install the TWRP application on /e/ and choose whether or not you want this application to be a system application. Since it’s not useful, I preferred to click on “Don’t install TWRP App” and DO NOT INSTALL drag the arrow from left to right (this. would have resulted in its installation).
.
using recovery-e
Copy the “e…your-device-codename.zip” into your sdcard
Boot your device into " recovery mode"
and peform a “Factory reset” (only for new install, not for update)
Then select “Apply Update”
Then select “Apply Update”

Choose from internal storage
or
Choose from sdcard1
Select the folder where you put the downloaded file
Choose from sdcard1

Select the folder where you put the downloaded file
Choose the last /e/build
Choose the last /e/build
wait severals minutes …
Go back to the main menu
Using the “<–” bouton at the top left of the screen
wait severals minutes …
Go back to the main menu
Using the “<–” bouton at the top left of the screen
Choose “Reboot the device now”, it’s done !
Choose “Reboot the device now”,
it’s done !
.
.
Regain your privacy! Adopt /e/OS the deGoogled mobile OS and online services