GSI Installation on Redmi Note 9pro with Super Partition and root

BEFORE, I take NO responsibility what you do with your cell phone. I describe here how I installed my new Redmi Note 9pro with /e/ Android 10 based on a GSI image.

After the bootloader has been unlocked, it currently takes 7 days to get started.

Download the desired GSI, for the Xiaomi Redmi Note 9pro it is an a/b image. You can find it here on the page: https://reuthernet.at/GSI/

Unpack the file after the download, not just rename it. You will get a file of about 2 GB with the extension .img .

The procedure is unfortunately described under Windows, under Linux it didn’t work, I don’t know exactly why.

It is important to find a current SDK package, here: https://developer.android.com/studio/releases/platform-tools
I unzip the file in the user’s home area and copy all files needed directly into this directory, so there are no problems with extra folders.

I start the cmd.exe, either from the command prompt in Windows 10 or from the start menu. It is only started as “normal” user, not as administrator. Then I change to the sdk directory, with e.g. “cd plat*” for the “platform tools” folder.

Then let’s get started:

  1. start the phone in fastboot mode, press power + volume low key, then connect to the computer via USB.
  2. enter at the PC: fastboot devices
  • now the serial number should be displayed and a little bit further to the right it says "fastboot
  1. enter at the PC: fastboot reboot fastboot
  • IMPORTANT, the ORIGINAL recovery must be installed, otherwise the phone will boot into the recovery like TWRP, PitchBlack recovery or other…
  1. when the phone is restarted, fastbootd (look for the “d” at the end of fastboot) should appear.
  2. now type: fastboot flash system image-name.img (e.g. eOS-Q-Full-_arm64_bvS-20201017-.img)
  3. when all this is finished, type: fastboot reboot recovery
  4. in the original recovery, go to delete all data, then restart the phone.
  5. if everything worked, now /e/ Android starts on the mobile

Cell phone rooting using magisk

Download the last Magisk Zip file from https://magisk.me/zip/, at this time the 21.0. Copy this file to your cell phone, preferably into the top directory.
Download the PitchBlack recovery from https://forum.xda-developers.com/redmi-note-9-pro/development/recovery-pitch-black-recovery-t4145153, it is a ZIP file that unpacks and contains a recovery.img file in the TWRP folder. TWRP works too, but I used this one.
Copy the PitchBlack recovery.img into the sdk directory.

Start the cell phone in fastboot again, either via the extended cell phone menu or as described above press Power + Volume quietly and connect it via USB to the PC.

  1. control: fastboot devices
  2. if ok: fastboot flash recovery recovery.img
  3. input: fastboot reboot recovery
    Now PitchBlack recovery should start on your cell phone, go to “Install” and select the Magisk Zip file on your cell phone. Swiping to install, done.
    Then I delete the cache and restart the system.
  4. normally the phone is now rooted, I had Titanium Backup installed and could give the program root rights. So the phone is rooted.

If you want to update the system now, you MUST install the original recovery.
You can find it in the original firmware file for the phone, this is the big file, in my case today 3.7GB. That in itself is no problem, but the line… They seem to have only narrow lines, I could hardly get more than 300kb/s, which is very low with a 1GBit line. So I loaded about 3-4 hours on the file. Somewhere in the file is the original “recovery.img”. To install it, you have to proceed as if you would install the PitchBlack recovery, so I will not explain this anymore.
If you don’t want to download the whole 3.7GB, you can ask me, I can provide a link, the recovery.img has only about 130MB.
At the moment there is no other way to do it. If you don’t have the original recovery.img installed, you won’t get into the fastbootd, if you don’t have a custom recovery installed, you can’t install root…
Have fun with the installation.
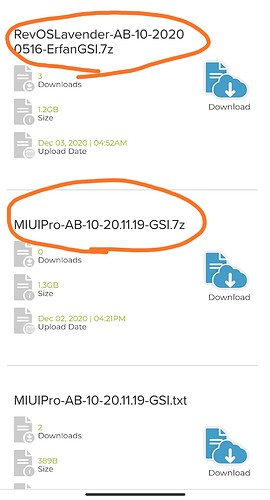
Since the link to the GSI’s does not work, here a new link.

Hello, are you able to install GSI ROM?

Yes, on Redmi Note 9pro

1 Like

I want to download and install using your same method?

If you have a cell phone with Super Partition, it should work as described above.
Normally the phones that came with Android 10 should have a Super Partition.

1 Like

For Redmi Note 9 Pro, I have to install gsi arm64 A / B IMG ?

Correct, you need the …bvS.img.xz

1 Like

I can install from the following files ?

We are here at /e/ Android, not MIUI or anything else.
I THINK, because it says AB, it would be for your cell phone, but I don’t know 100%. To other ROMs I can’t make a statement, only to “my” ROMs I linked here, BECAUSE we are here in the /e/ Android Forum.

1 Like

In the 2nd post is the link to the files. I will upload new files about every 10 days.
Stable? I would say you can use it every day.

Hello,

I think you can use the image for your phone, it is a Generic System Image, i.e. it is not for a specific phone, but for all phones that can handle GSI/Treble. See also the table. Device support (Project Treble)
You will have a super partition just like my Note 9pro, or did your phone come out of the factory with Android 9?
So you could also follow the instructions I posted. The important thing is that if you want to root it, get a recovery.img, which you can copy out of the original image file from Xiaomi (after unzipping it, you will find a folder with “Recovery”, there is the image file inside). Save this in any case, because with TWRP there were still problems regarding super partition. Therefore I had to switch again and again to the original Recovery.

Addendum: You need, if you want to use this GSI file, the …arm64_bvS.img.xz file.
Unzip it first and follow the instructions.

Works great, but brightness is bugged, and no gestures for navigation, any work around for this?

Sorry for the late reply, it may be that the errors are not present on other phones, I have no brightness errors on the Note 9pro. I do not do navigation on the phone.

1 Like

Addendum to install on the Redmi Note 9pro

Installation of PitchBlackRecovery

Meanwhile, you can leave the PitchBlackRecovery installed, you can then still install or update the system.
The official recovery for the Note 9pro can be downloaded here: https://pitchblackrecovery.com/joyeuse/
After downloading the packed file, go to the folder “TWRP”, there is a “recovery.img”. This image file I copy into the folder “platform-tools”, there I do not have to enter so much in the console, that’s all.

It is installed like this:

Boot the phone in bootloader mode, a picture appears and below it says “FASTBOOT”.

On the PC enter via the console

fastboot devices

Now the serial number should be displayed and a bit further to the right it says “fastboot”.

This is just to check if the phone was also recognized!!!

Now you can enter:

fastboot flash recovery recovery.img

After that you can enter

fastboot reboot recovery

Now PitchBlackRecovery starts, if the phone is encrypted, you must enter the PIN, then you come to the main menu.

Install or update the system

If you want to reinstall the system or install a system update, you have to enter the bootloader (fastboot) mode again. If one is there, one enters:

fastboot reboot fastboot

So, now for the difference as in the original instructions at the top, no fastbootD mode appears, but the phone starts into the fastboot mode of the PitchBlackRecovery, this takes a few seconds longer as with the original recovery.
I also copied the system image to the “platform-tools” folder, saves unnecessary entries in the console.

The image is installed with:

fastboot flash system GSI.img

When all this is installed, you can simply go to “reboot” at the bottom right of the phone.

Procedure after installation of an update - In the next screen you can select “System”, after that a new screen opens, there you can move the “slider” from left to right. The phone now reboots into the system, the update is installed.
System has been reinstalled - In the next screen you select “Recovery”, in the next screen you simply move the “slider” from left to right. Now the phone reboots into PitchBlackRecovery. After entering a possible PIN to unlock, you are in the main menu. There you select “Erase”, in the next screen you go to “Format data”, enter “yes” and follow the instructions on the screen to format the phone, more precisely the data. This should do the same as if you go to “Erase data” in the original recovery. I have not tested this yet.

Of course you can also install the system update without the PitchBlackRecovery, just like in the first tutorial above. Only with the difference that you do NOT delete the data at point 7, but simply reboot the system.

The images can still be found at this address: https://android.l1nux.org/index.php/s/tNyG9ZcrjGBPrdH

Okay, thank you… But will you consider building this as a proper custom rom for miatoll devices?

No, because I really have no idea about it :-).
I have only the text file that I start to create the image. If there are errors, I always have to look for how I can fix that.

I have redmi note 9 pro (joyeuse). I have install full-bvS- 20210408 and WiFI don’t work, SIM-Carte too.
Why? What did i wrong?

And before to install rom, i flashed stock boot.img

Hello, since you have not provided any details, I do not know how the phone was from you before. Was it in original condition? Had you already flashed another ROM before? Flash the original Xiaomi Redmi Note 9pro ROM, then follow the instructions on this page.

I have now flashed 2 Note 9pro (joyeuse) according to the instructions, everywhere works WLAN and mobile Internet.