This is an editable document a wiki and the document is Work in Progress. Users who have tried out other working methods of Backing and Restoring data can add / edit to this document. This includes the images - add screenshots where you have them and help make this document better.
Backup and Restoring of Data
One of the biggest issues new users have when switching to custom ROM’s is figuring out how to backup and later restore their current smartphone data.
This backup could include contact, images, music files or documents stored on the device.
In this guide we will cover some of the options available for users.
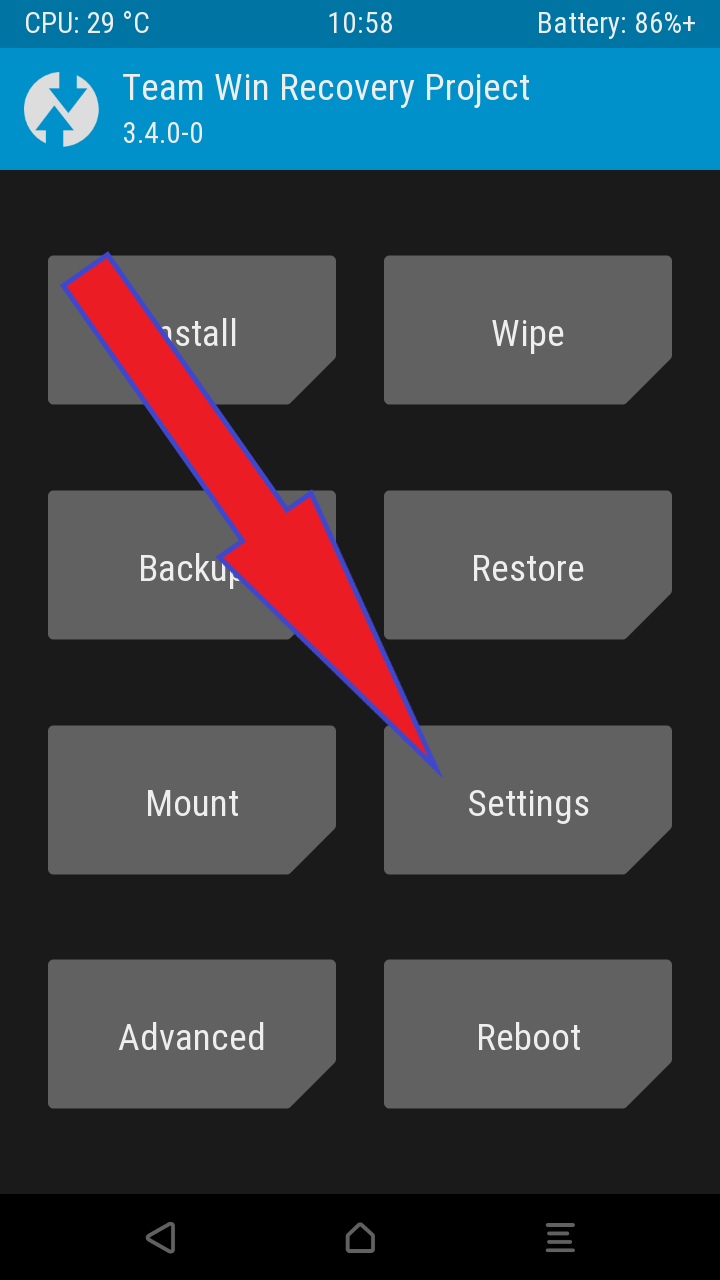
Backup and Restore using TWRP
TWRP cannot decrypt the data partition of devices that have Android 12+ (/e/OS S+) installed but did originally come with Android 11 and below. (E.g. Fairphone 3 originally came with Android 9.) Thus you cannot backup and restore the data on such devices with TWRP any more.
What is TWRP
TWRP is a custom recovery used for installing custom software on an android device. This custom software can include smaller modifications like rooting your device or even replacing the firmware of the device with a completely custom “ROM” like /e/OS
Get TWRP for your device
Check for the TWRP build for your device on this page
You would need your devicecode to get the correct TWRP image for your device.
(Note: add link on how to get DeviceCode )
Understand the TWRP backups
TWRP makes nandroid backups, which are near-complete images of your system.
You use nandroid backups to restore your phone to exactly the state it was in when you backed up: the version of Android, your wallpaper, your home screen, right down to which text messages you had left unread
Please be aware that most TWRP images won’t include your data (Documents, Pictures, Music, …) in backups, as explained here
Also, if you have installed Magisk, Shelter or some other rooting tool, TWRP backups may fail with a #255 error
Flash TWRP on your device
For this document we will assume you have TWRP on your device. If not please refer this document
(Note: add link to document on installing TWRP)
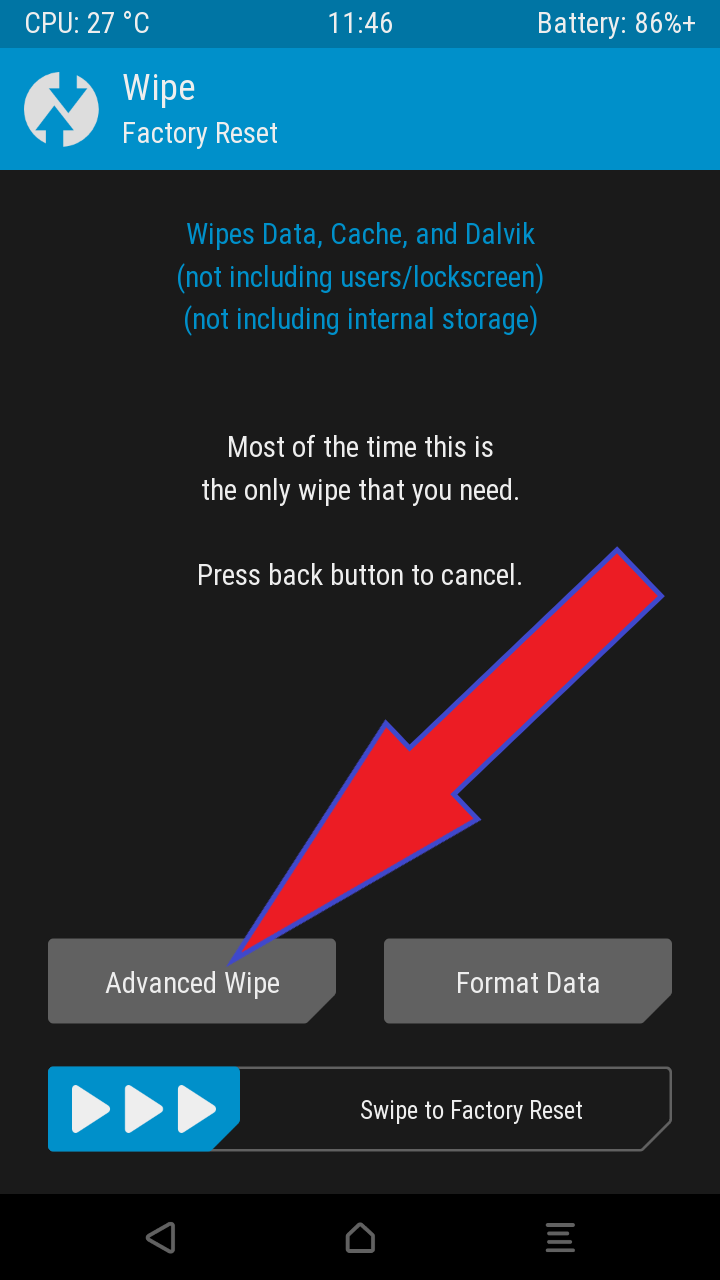
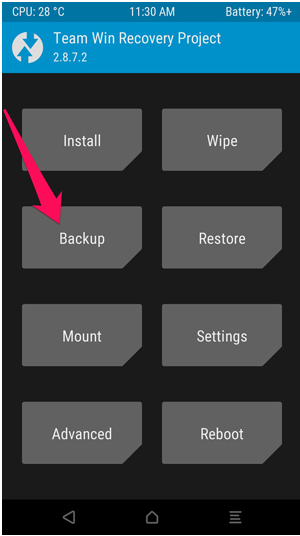
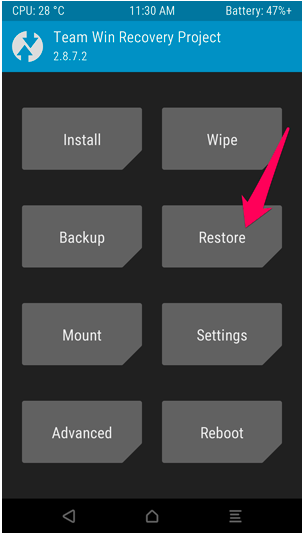
Making a nandroid backup of your device
Boot into TWRP recovery
To get in the recovery the Key combination may be different for each device. Refer the section on the particular device info pages for boot modes
For some devices it could be
Power and Volume Down buttons simultaneously then use the volume keys to boot into “Recovery Mode”
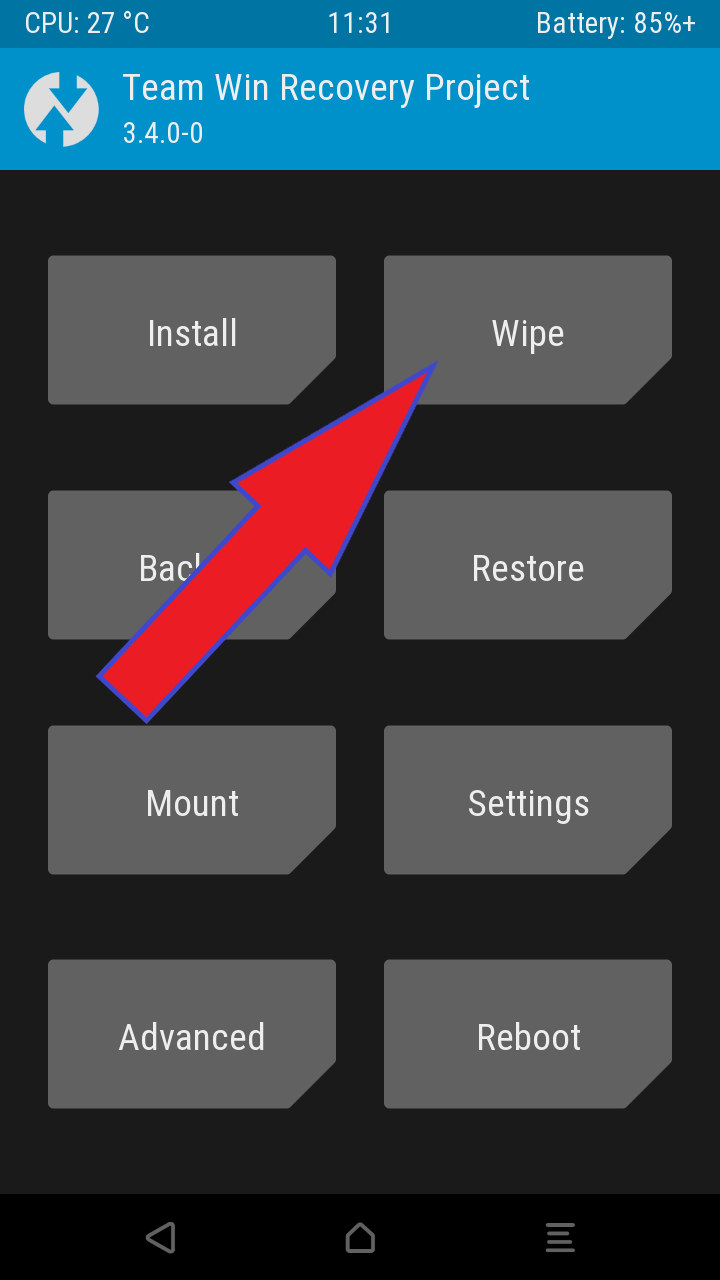
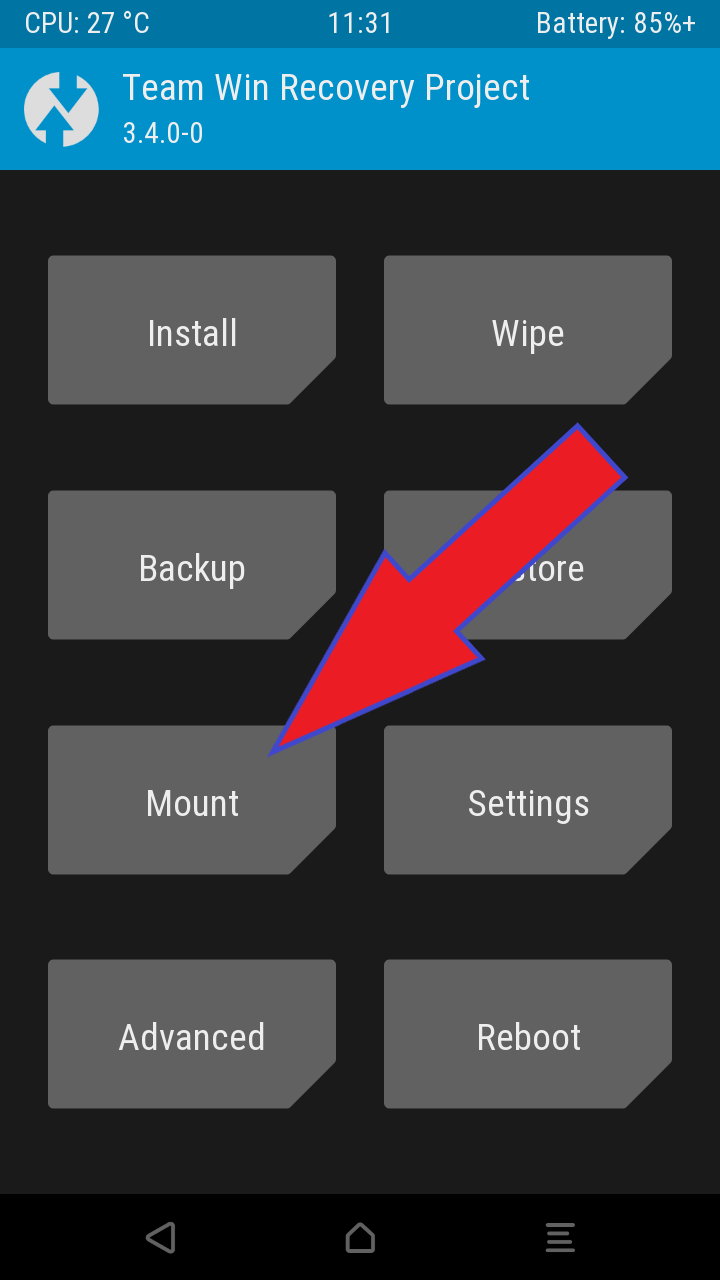
Once your device has reboot it should be in the TWRP main screen as shown below
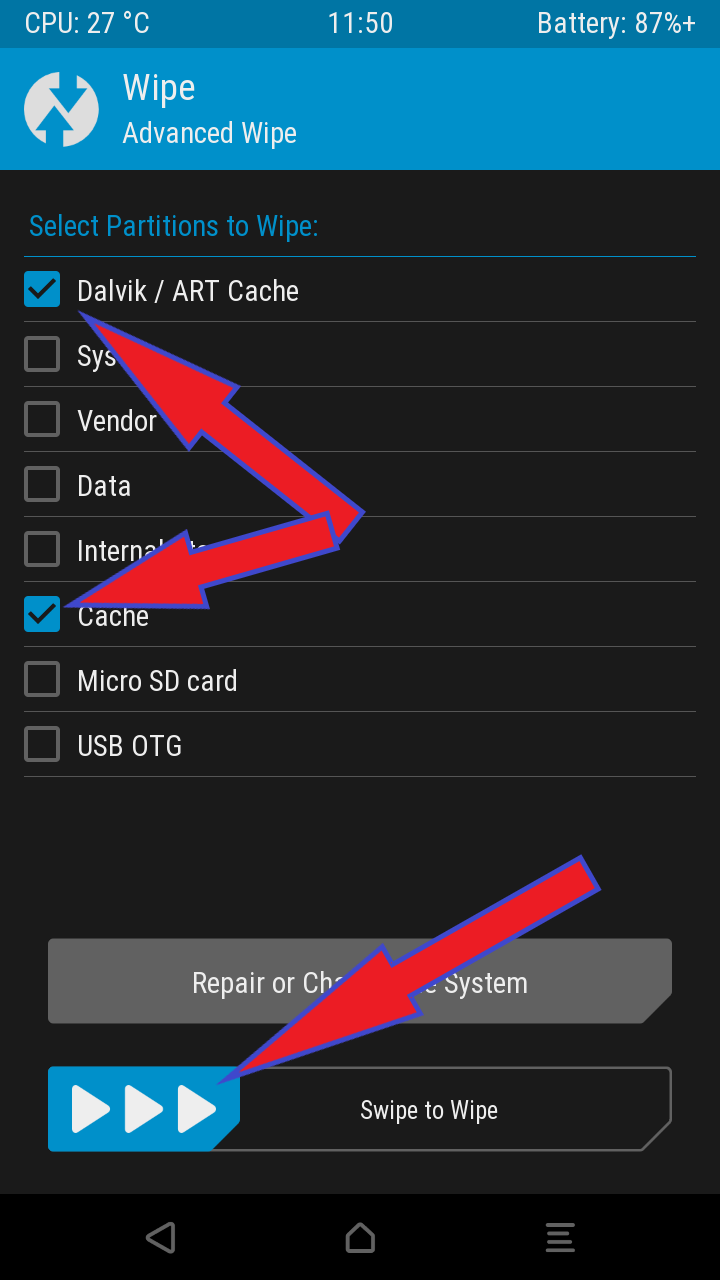
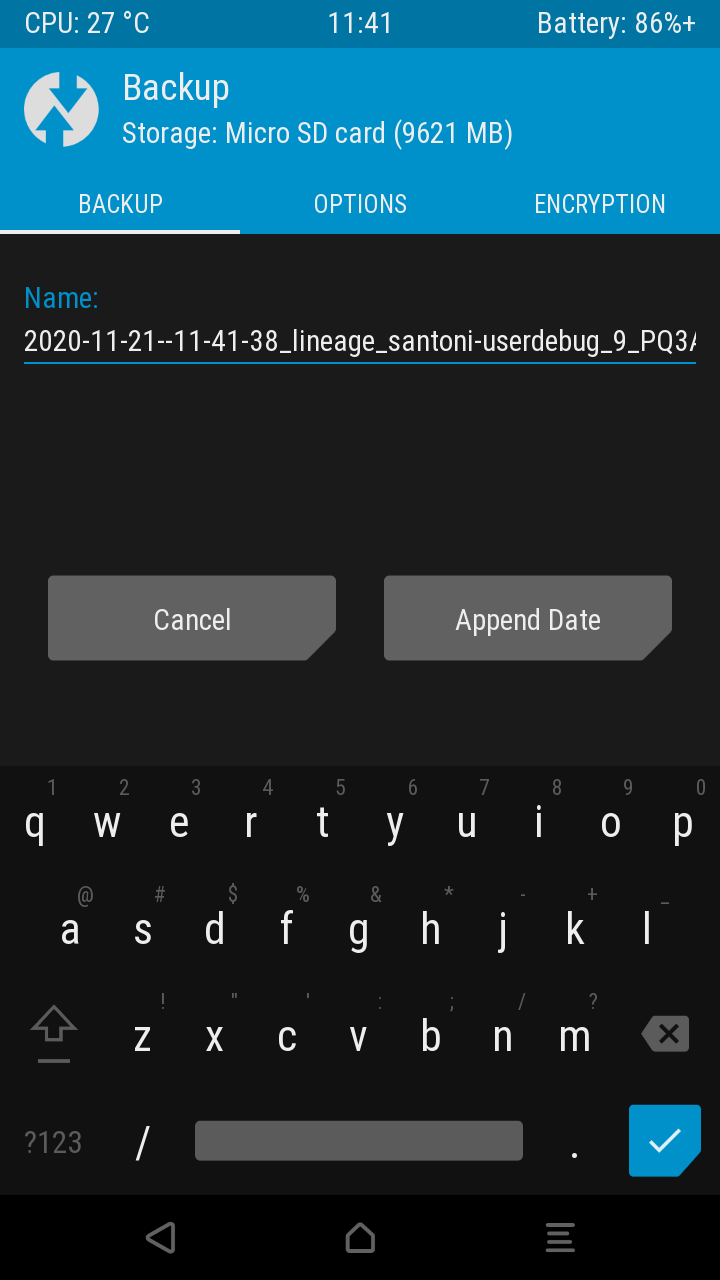
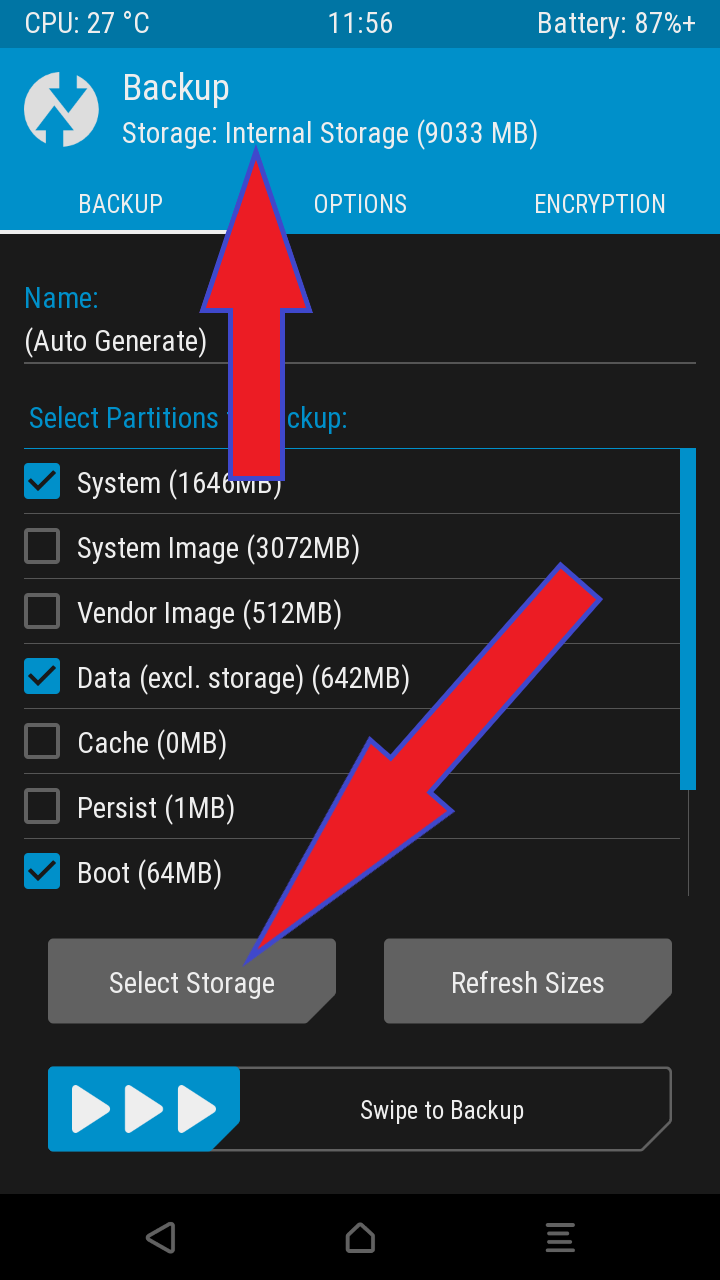
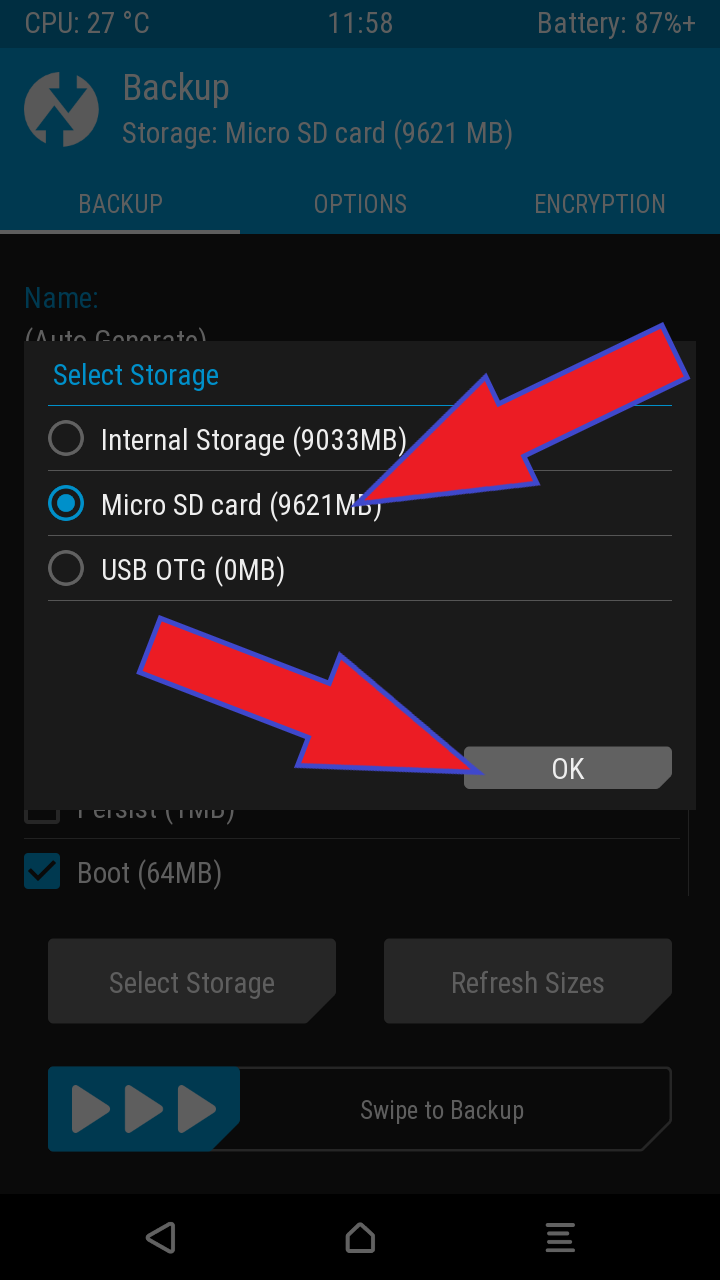
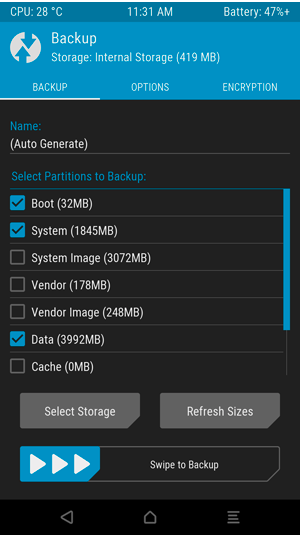
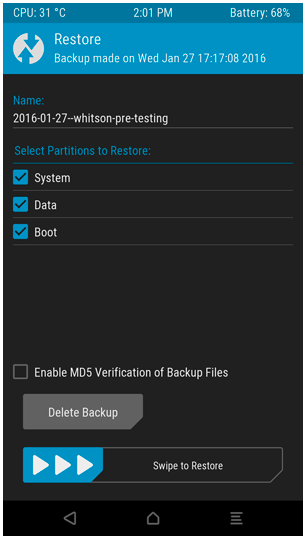
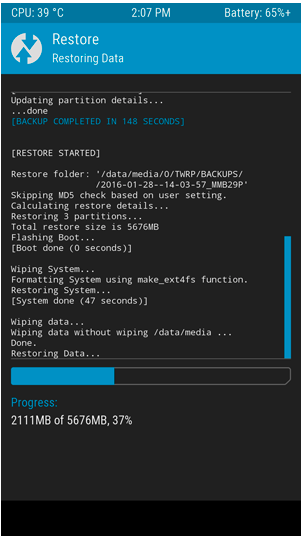
Check the Boot, System, and Data boxes, and then swipe the bar along the bottom to back up.
Backups are fairly large, so if you get an error about there not being enough space, you may have to delete some things on your internal storage or SD card before continuing
The backup will take a few minutes to complete, so be patient.
Once it is finished, you can tap “Back” to go back to TWRP’s main menu. Alternately you can tap “Reboot System” to reboot back into Android (please read below before rebooting).
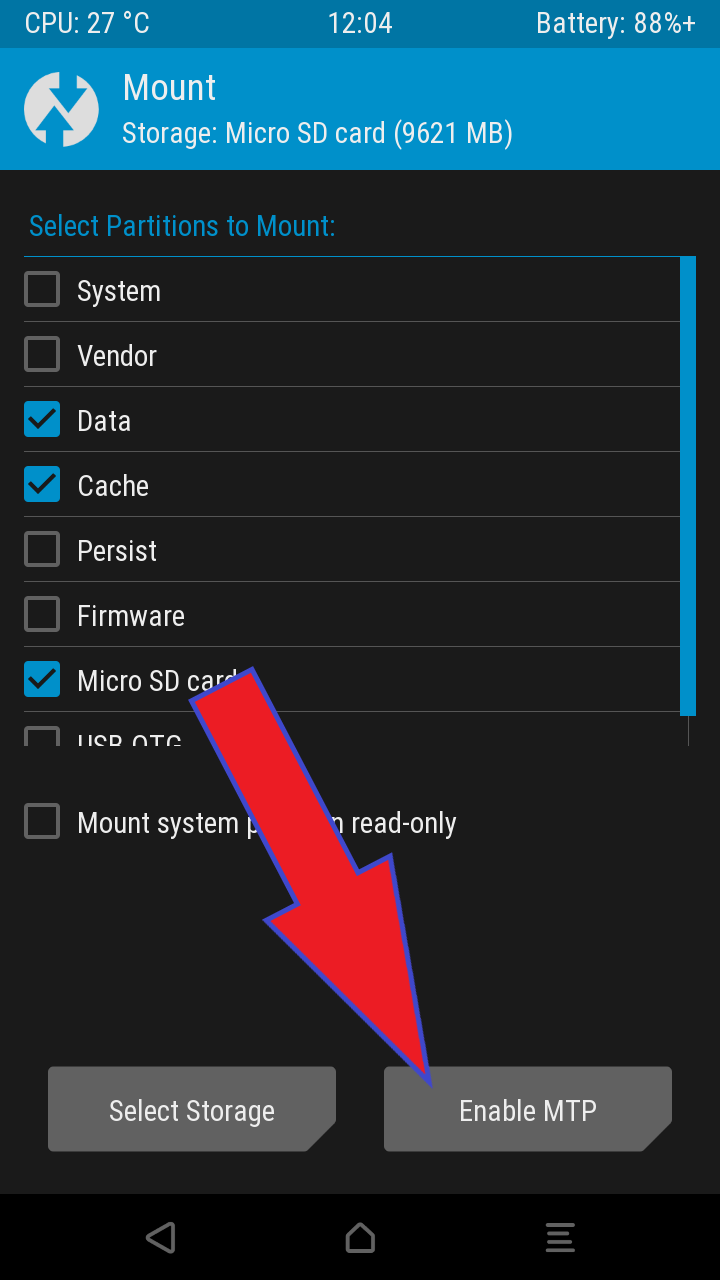
If you want to backup your personal files (documents, Music, Pictures, …), it’s a good time to do it ! First tap on the “Mount” button, then “Enable MTP” (if the button shows “Disable MTP”, it’s already activated) :
(note : this may not work with your device as some TWRP’s MTP are buggy, sorry)
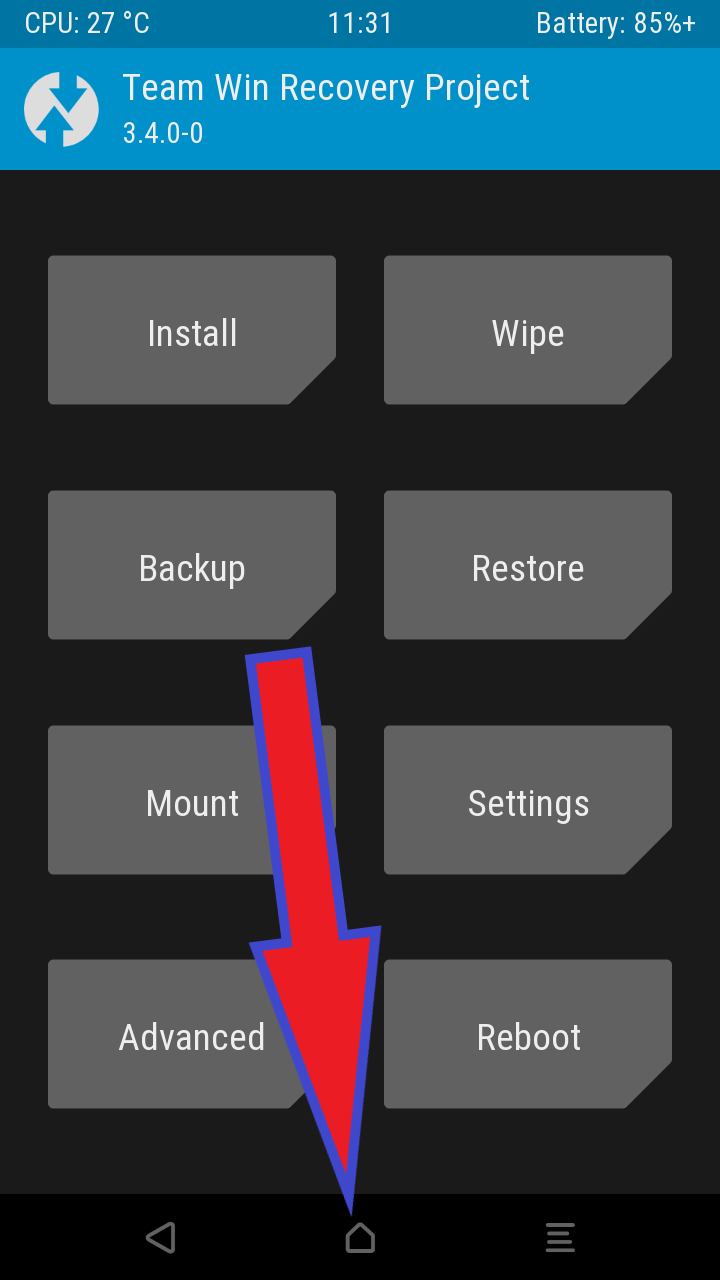
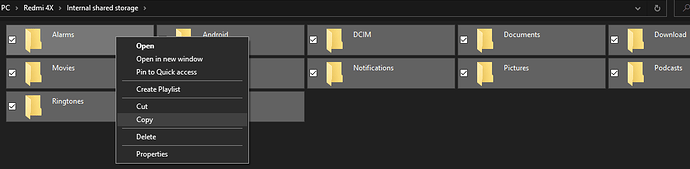
→ Alternatively, you can copy the files to a folder (on SD-Card or OTP storage) using TWRP’s File Manager, tap the “Advanced” button to launch it.
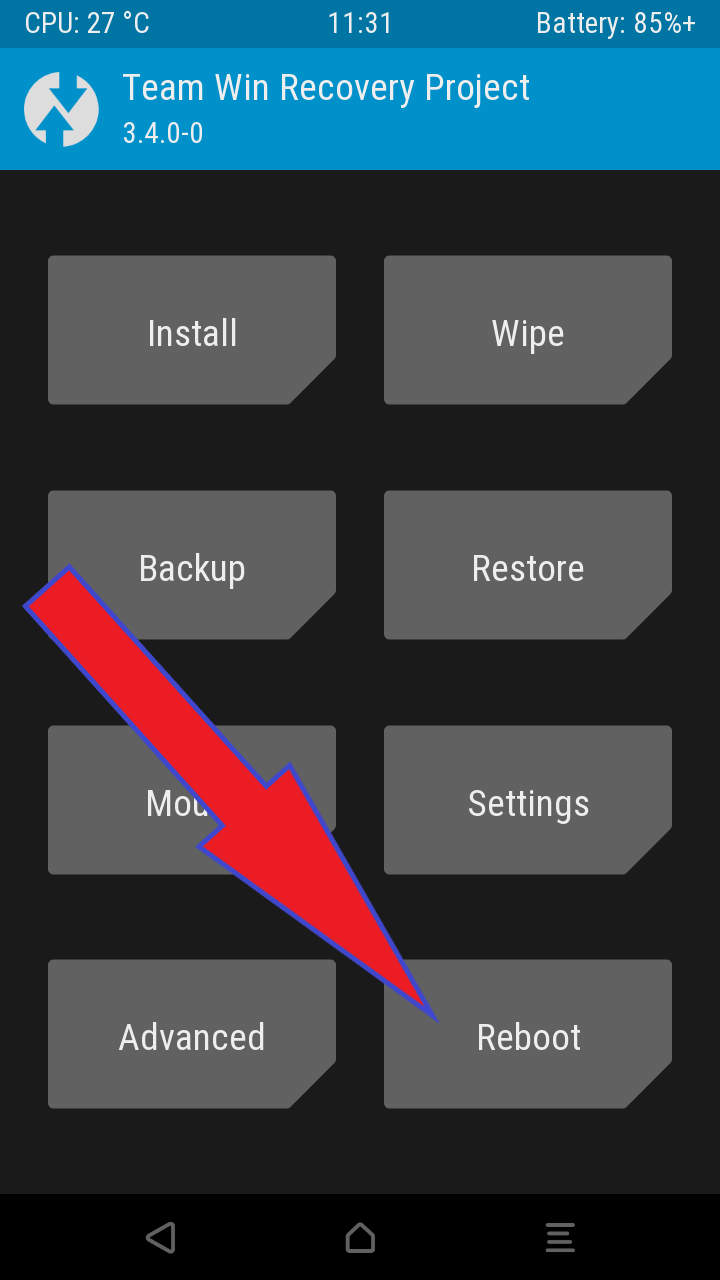
Reboot your device to “System” with a tap on the “Reboot” button :
Just to support @smu44 's point of view: my aim is to have a complete (and by complete, I mean a full backup, not a partial one, where a part of my information stored in the device is not included) image of the system, just in case something goes wrong while updating /e/OS. And, as @smu44 said, the documentation from TWRP is not clear enough to the unexperienced newbie I am… let alone that A/B slots that my device seems to have…
Is there a simple way to have such a complete backup, even better if saved externally? Not having had such a parachute (or having one beyond my possibilites/skills/knowledge) is what refrains me from updating /e/OS …
But that’s absolutely no reason to give up on TWRP, which is an excellent tool.
Instead, I think we should try to complement it with a simple solution for backing up user data.
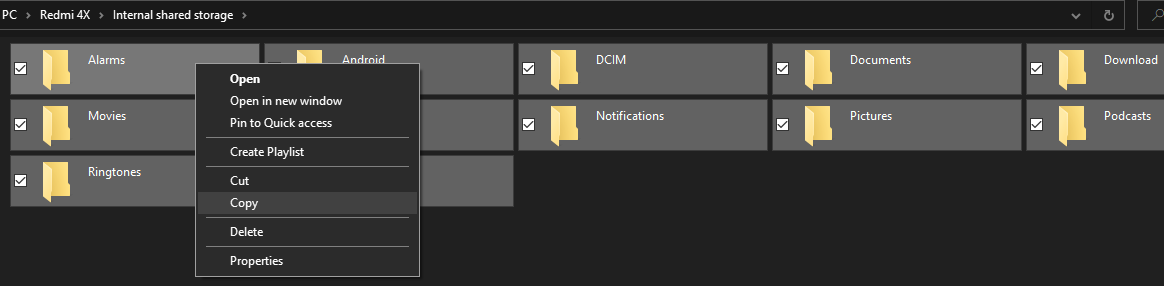
The most obvious (and probably the easiest for beginners) solution would be to copy the files directly to a PC :
You don’t need Android for this, TWRP supports MTP mode, so you can copy the Internal Storage via a USB connection while TWRP is running.
In case the computer doesn’t recognise it right away, TWRP has buttons to switch MTP off and on.
Also, a point of attention that I forgot to mention : TWRP backups may fail when Magisk or Shelter are installed (giving a unclear “error #255” message …).
So we may add, as a per-requisite to the HowTo, to uninstall them.
There once was a promising app called Tipatch (Play Store link) that would patch TWRP to also backup internal storage.
Last updated back in 2018 so I figure it might not be useful/usable in this age of A/B twrp-is-part-of-boot-image devices.
But for “legacy” devices it may be an option, especially if one’s TWRP doesn’t have the ability to create a system image (a feature I have yet to try).
F-Droid link is not working, however I could find the dev home kdrag0n and the xdalabs link.
Unfortunately, last post in xda-devs thread reports it is obsolete with TWP 3.4
However, browsing the xdadevs thread, I found something interesting. Also flagged as obsolete, but may lead to a solution … currently investigating !
Edit : hack above is not a solution for us, as it involves patching TWRP image.
I found some “newbie-proof” solutions, involving temporarily renaming the “media” directory : here and here.
Thanks for the updates @smu44… that is the whole point of having these editable documents so that all users can add edit and update as per their own findings.
Hello,
I had TWRP on my FP2 and I guess the installation was easier back then, because now with my FP3+ I am struggling to install it. Even reading a couple of guides and explanations, like this topic, this or this, I am not prepared to make it. Can you recommend a more detailled step-by-step installation guide for “beginners”? Thanks!