posts are editable as a Wiki.
Here is the summary :
(1) install the appropriate Flashing Tools
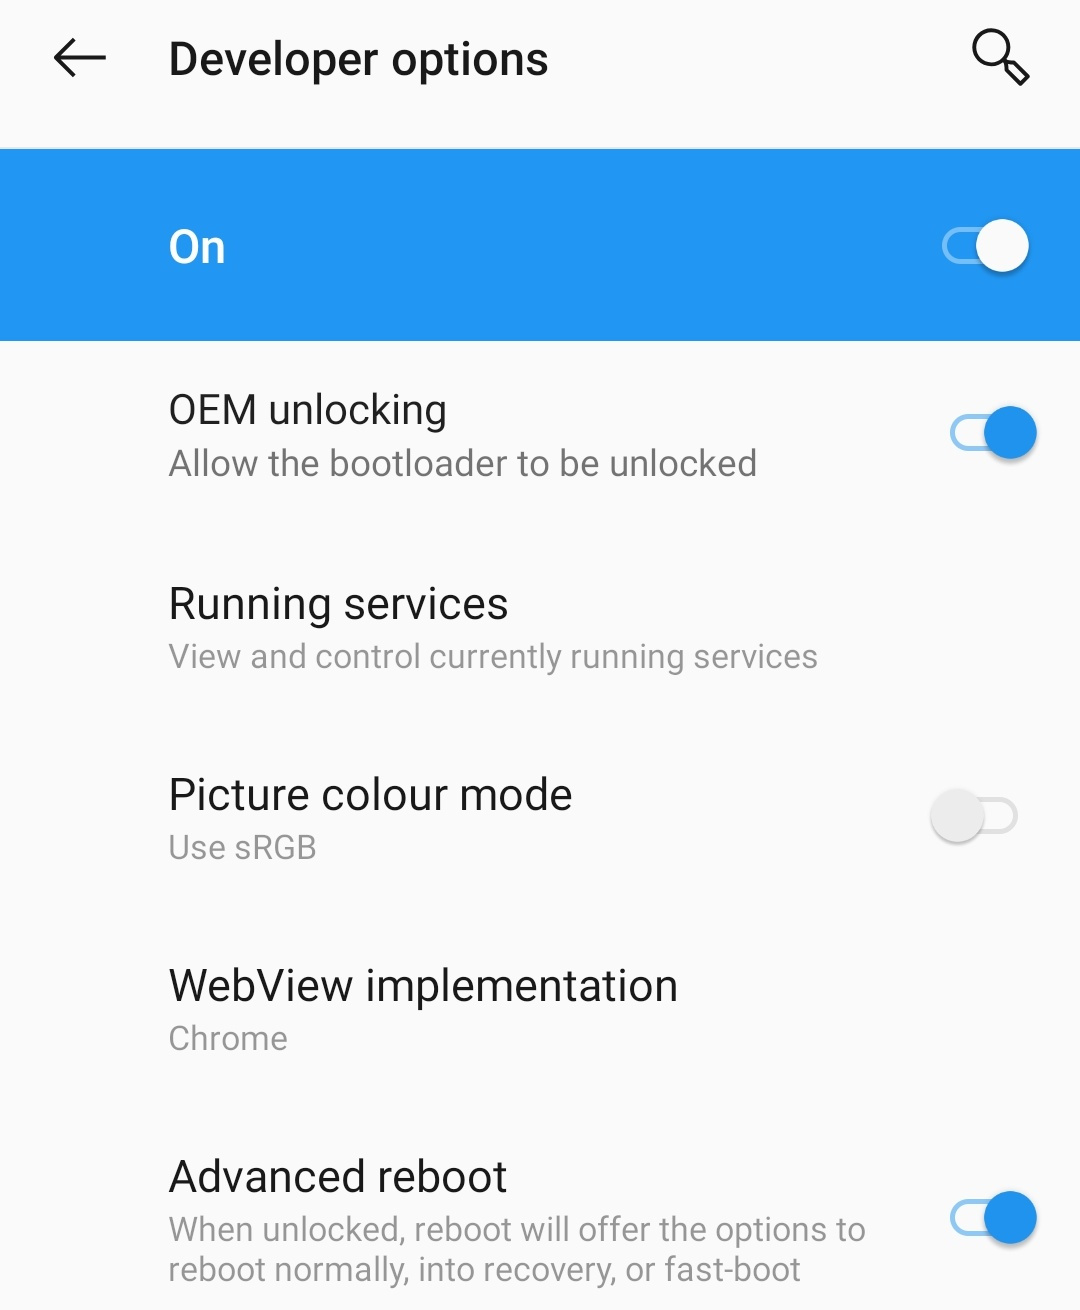
(2) allow “Non Vendor OS” to be installed on the device
(3) Check the communication between the PC and your smartphone
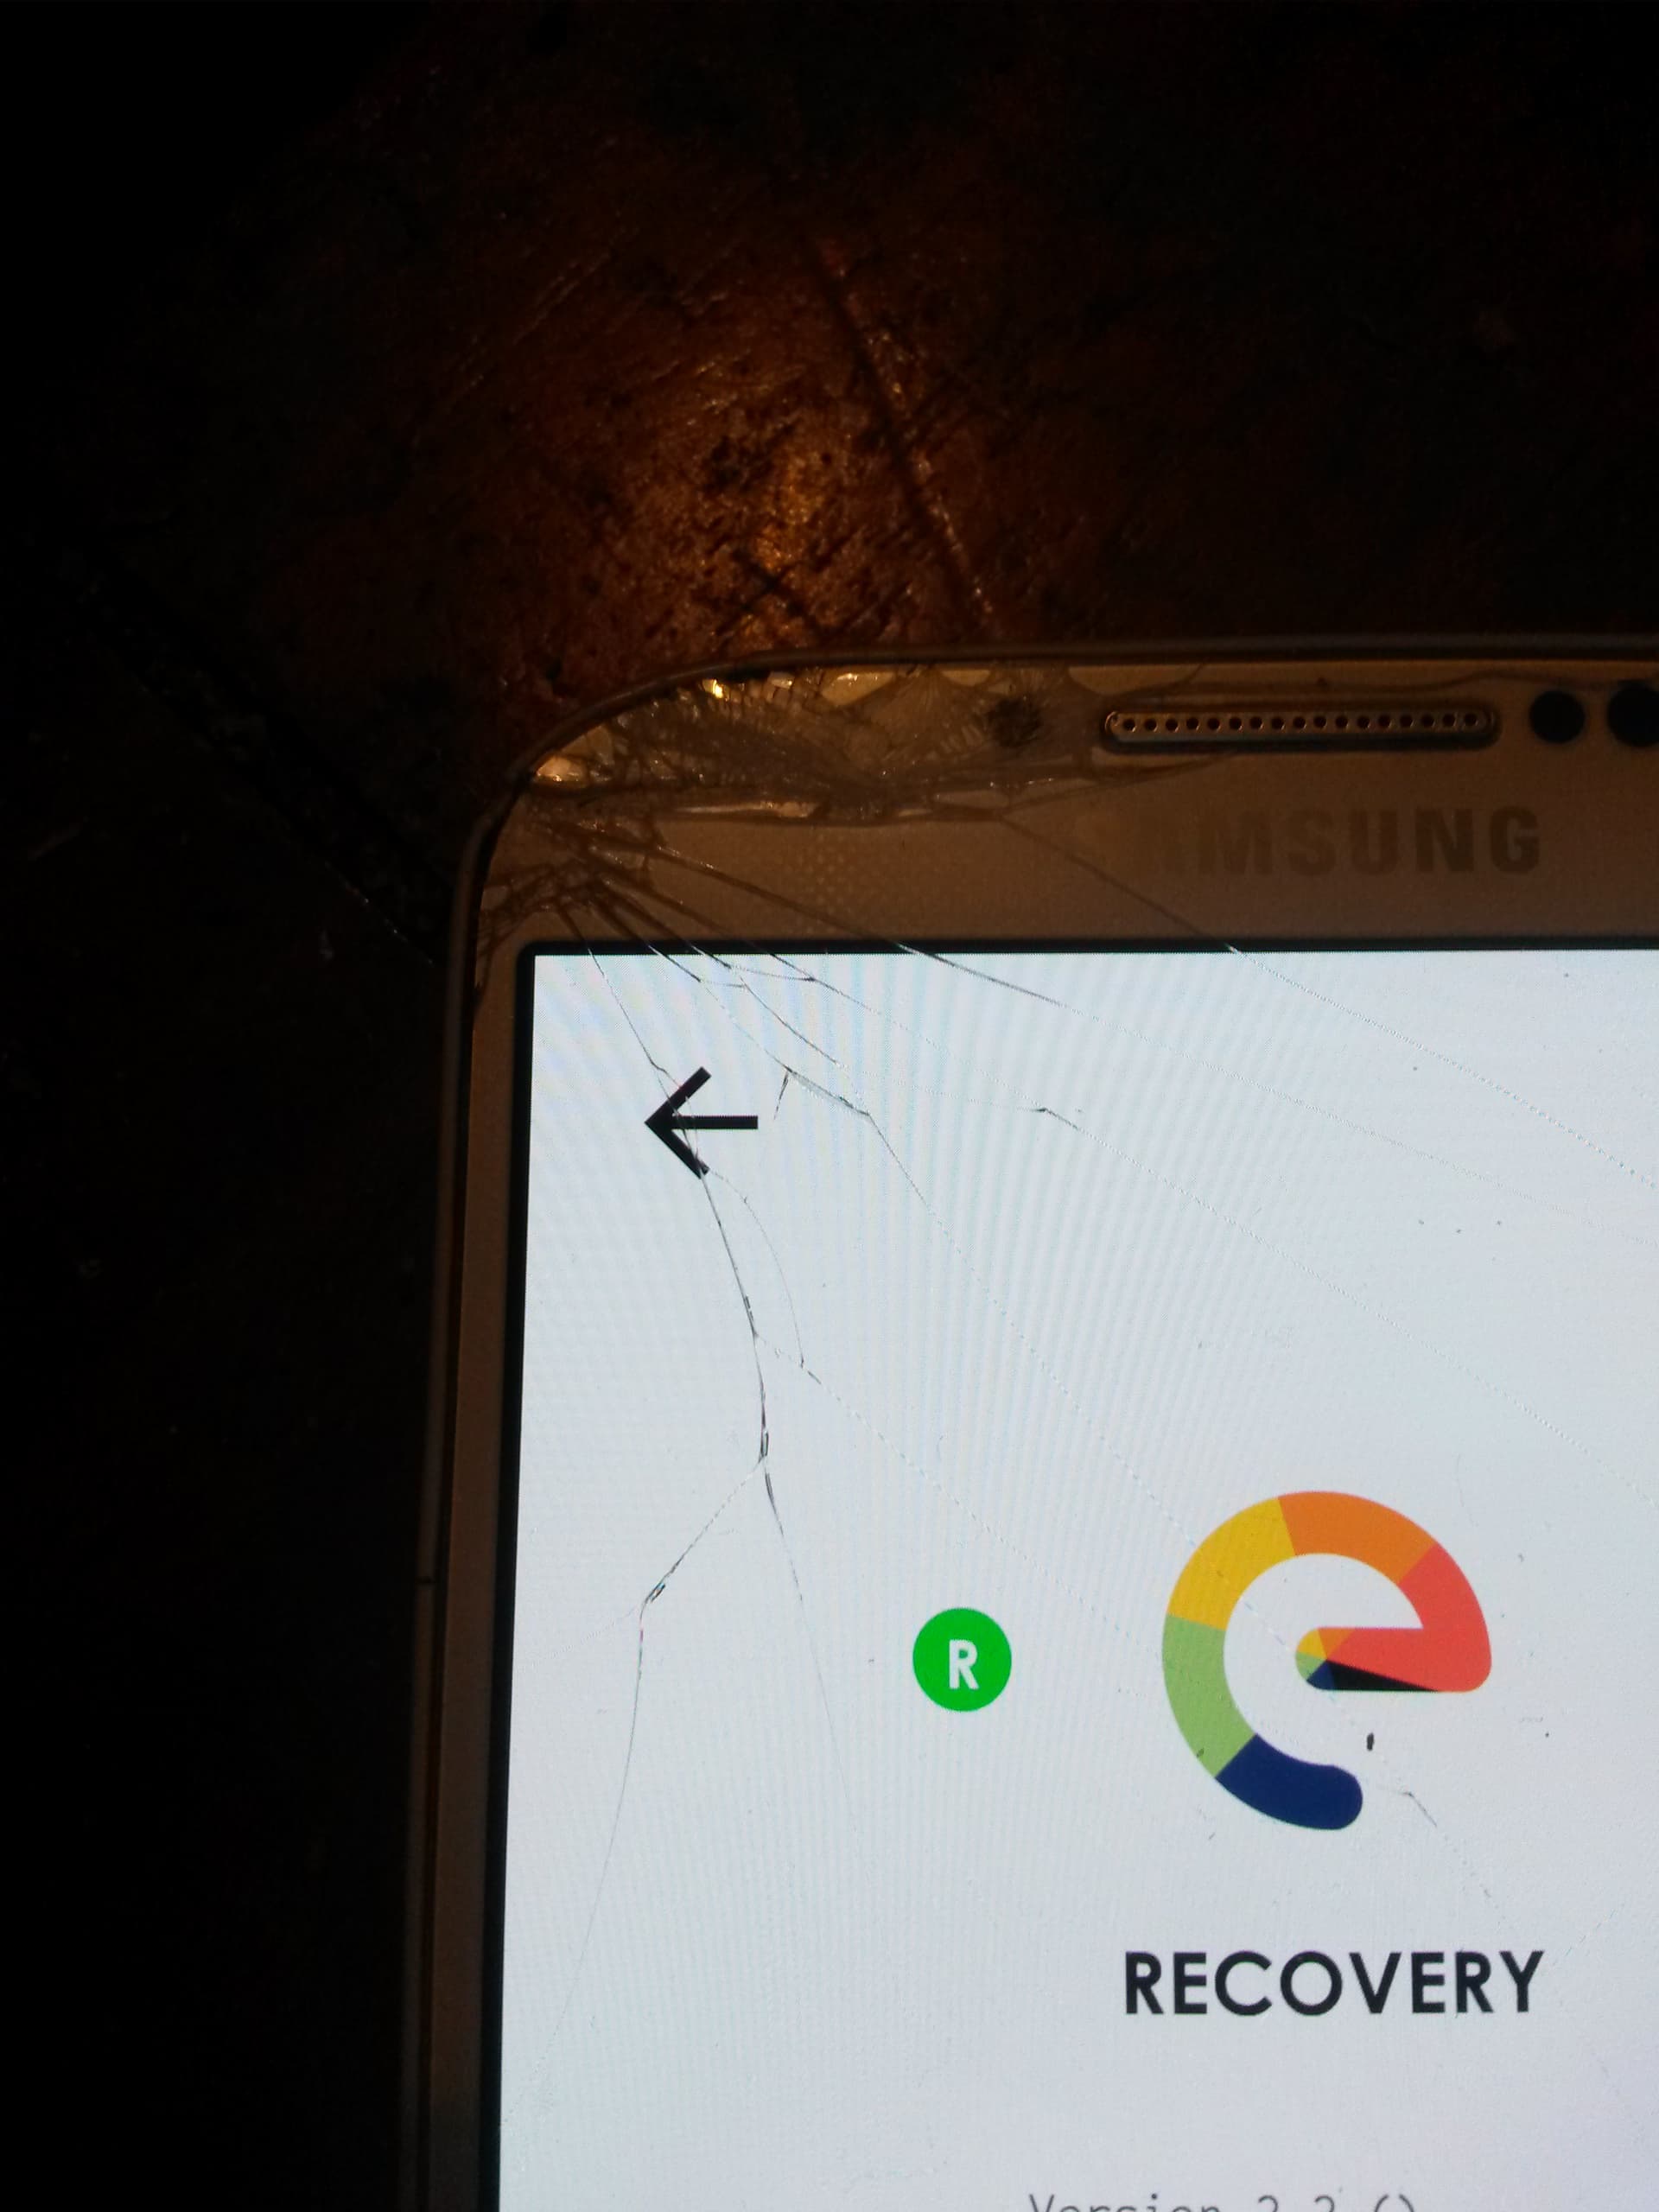
(4) Download a custom recovery manager
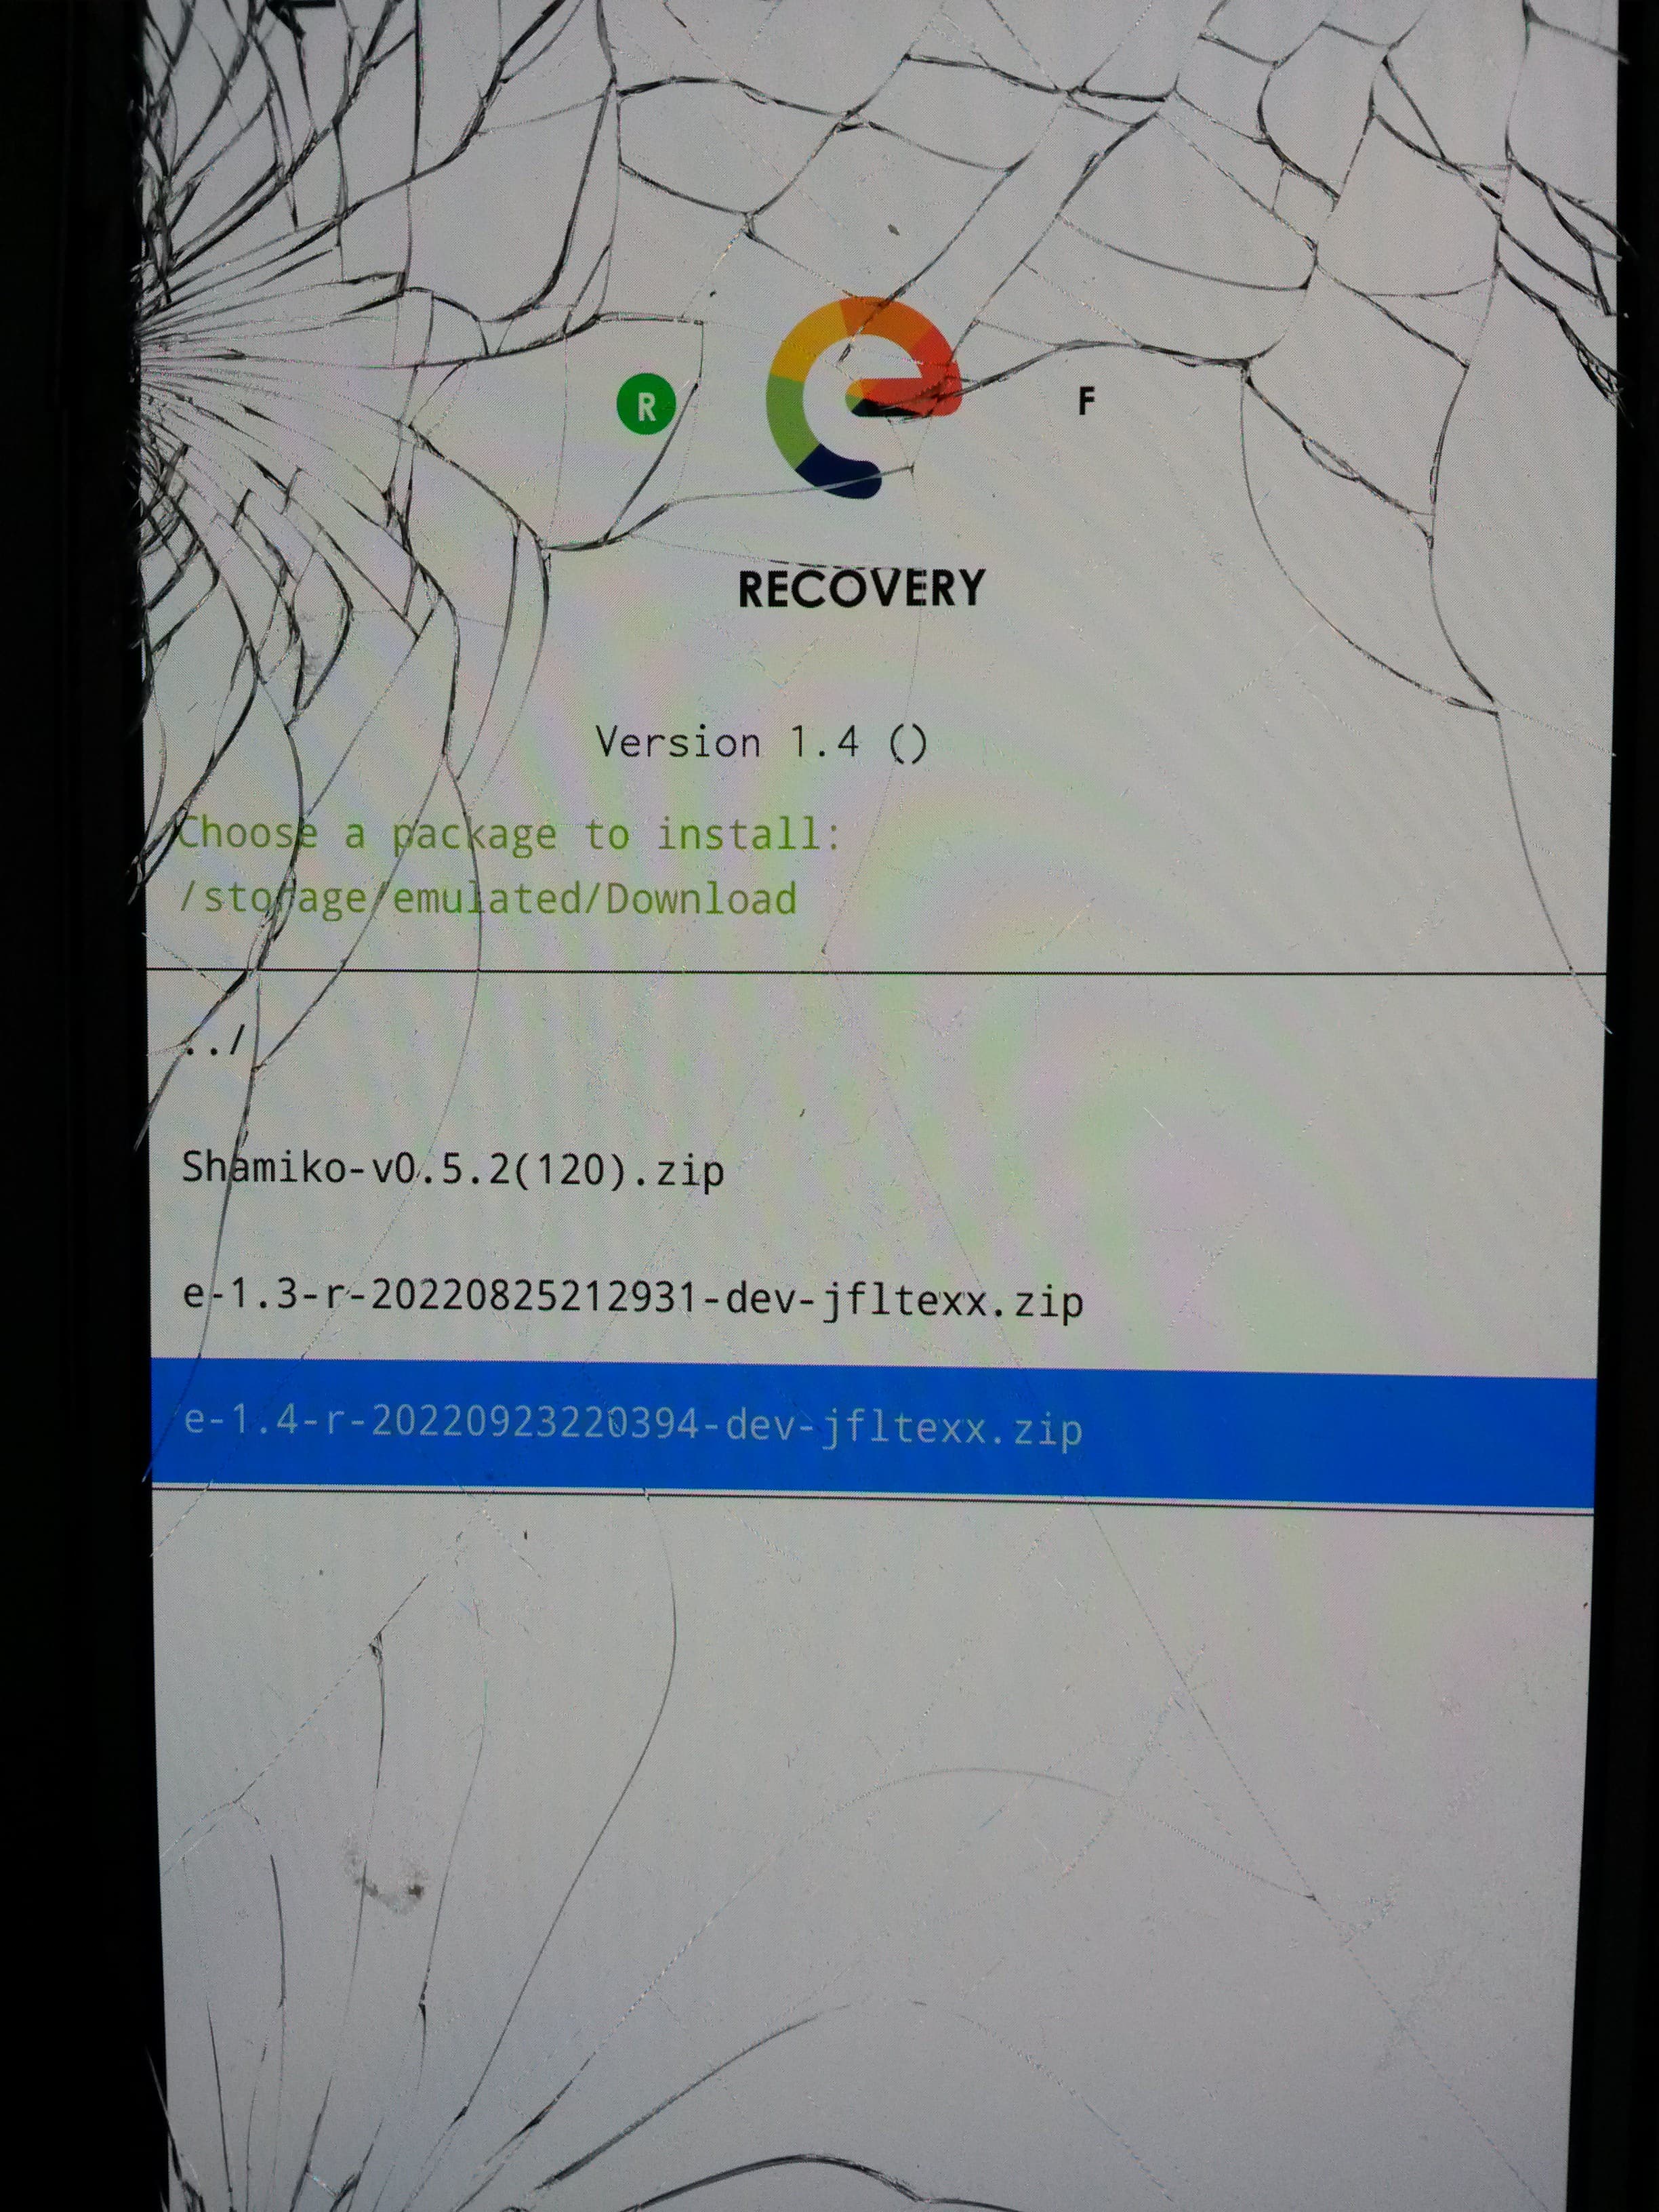
(5) Download an /e/OS build
(6) Unlock the Bootloader
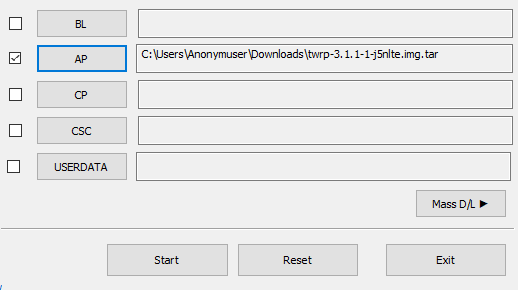
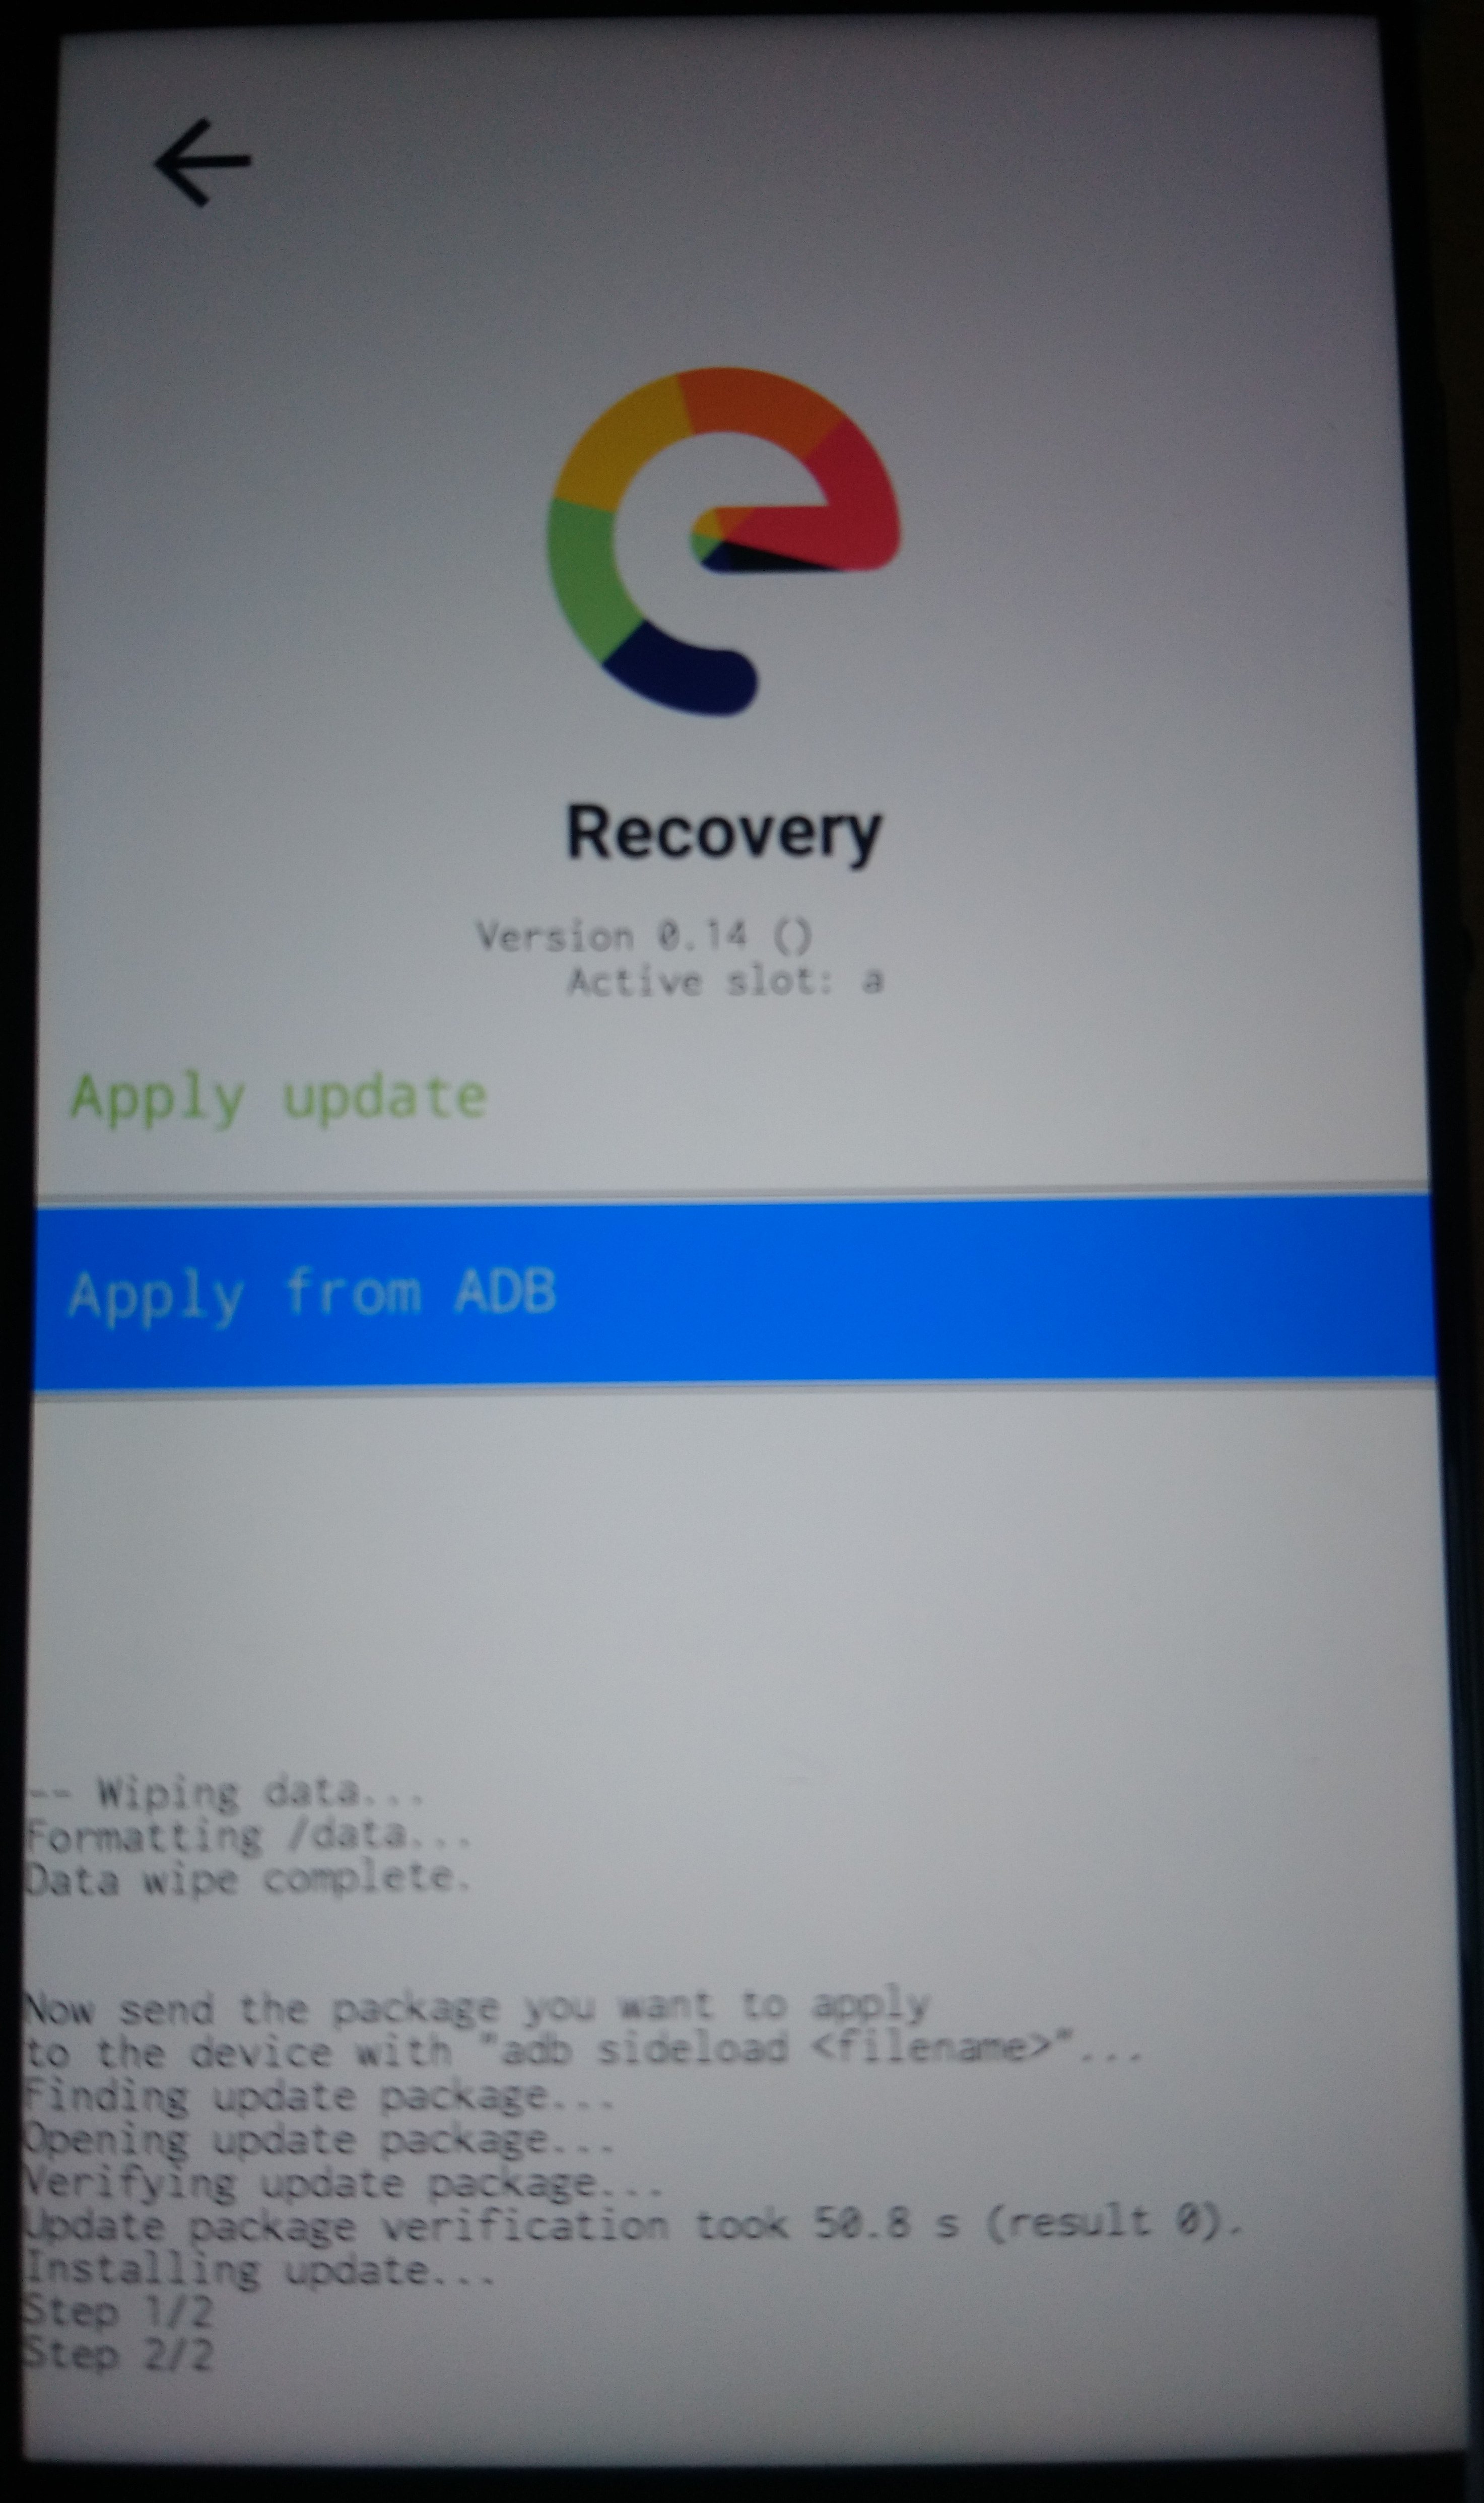
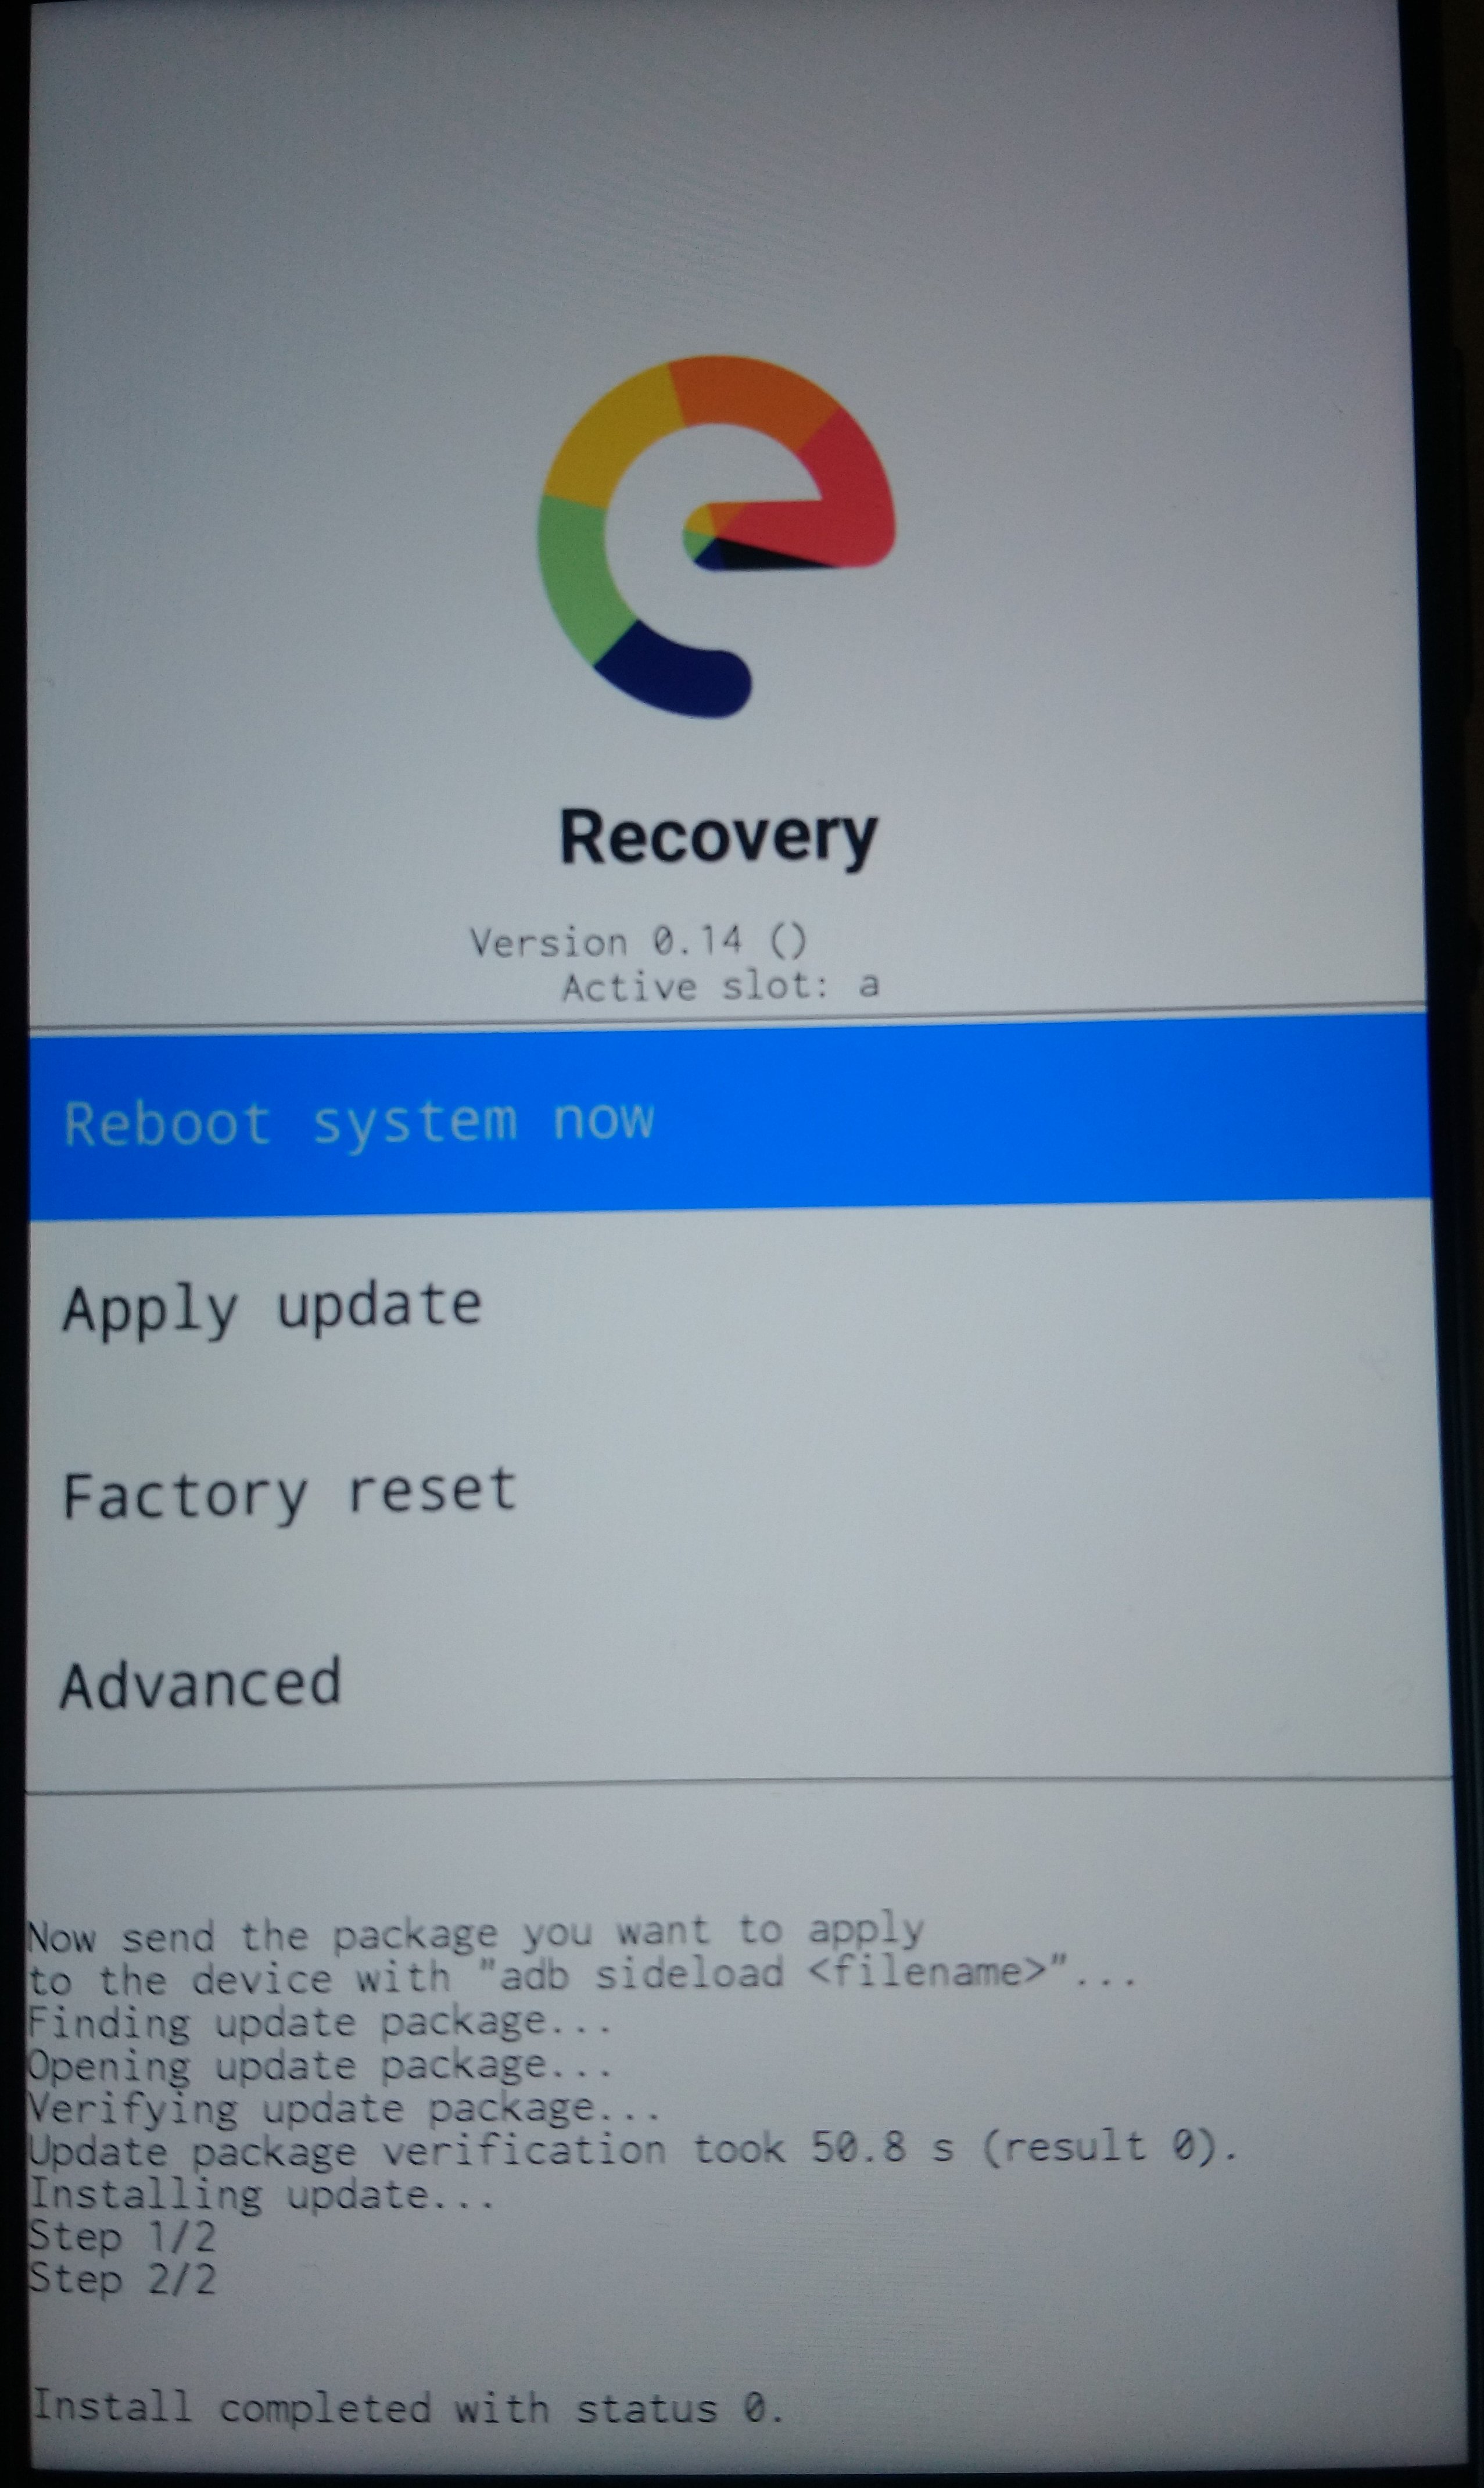
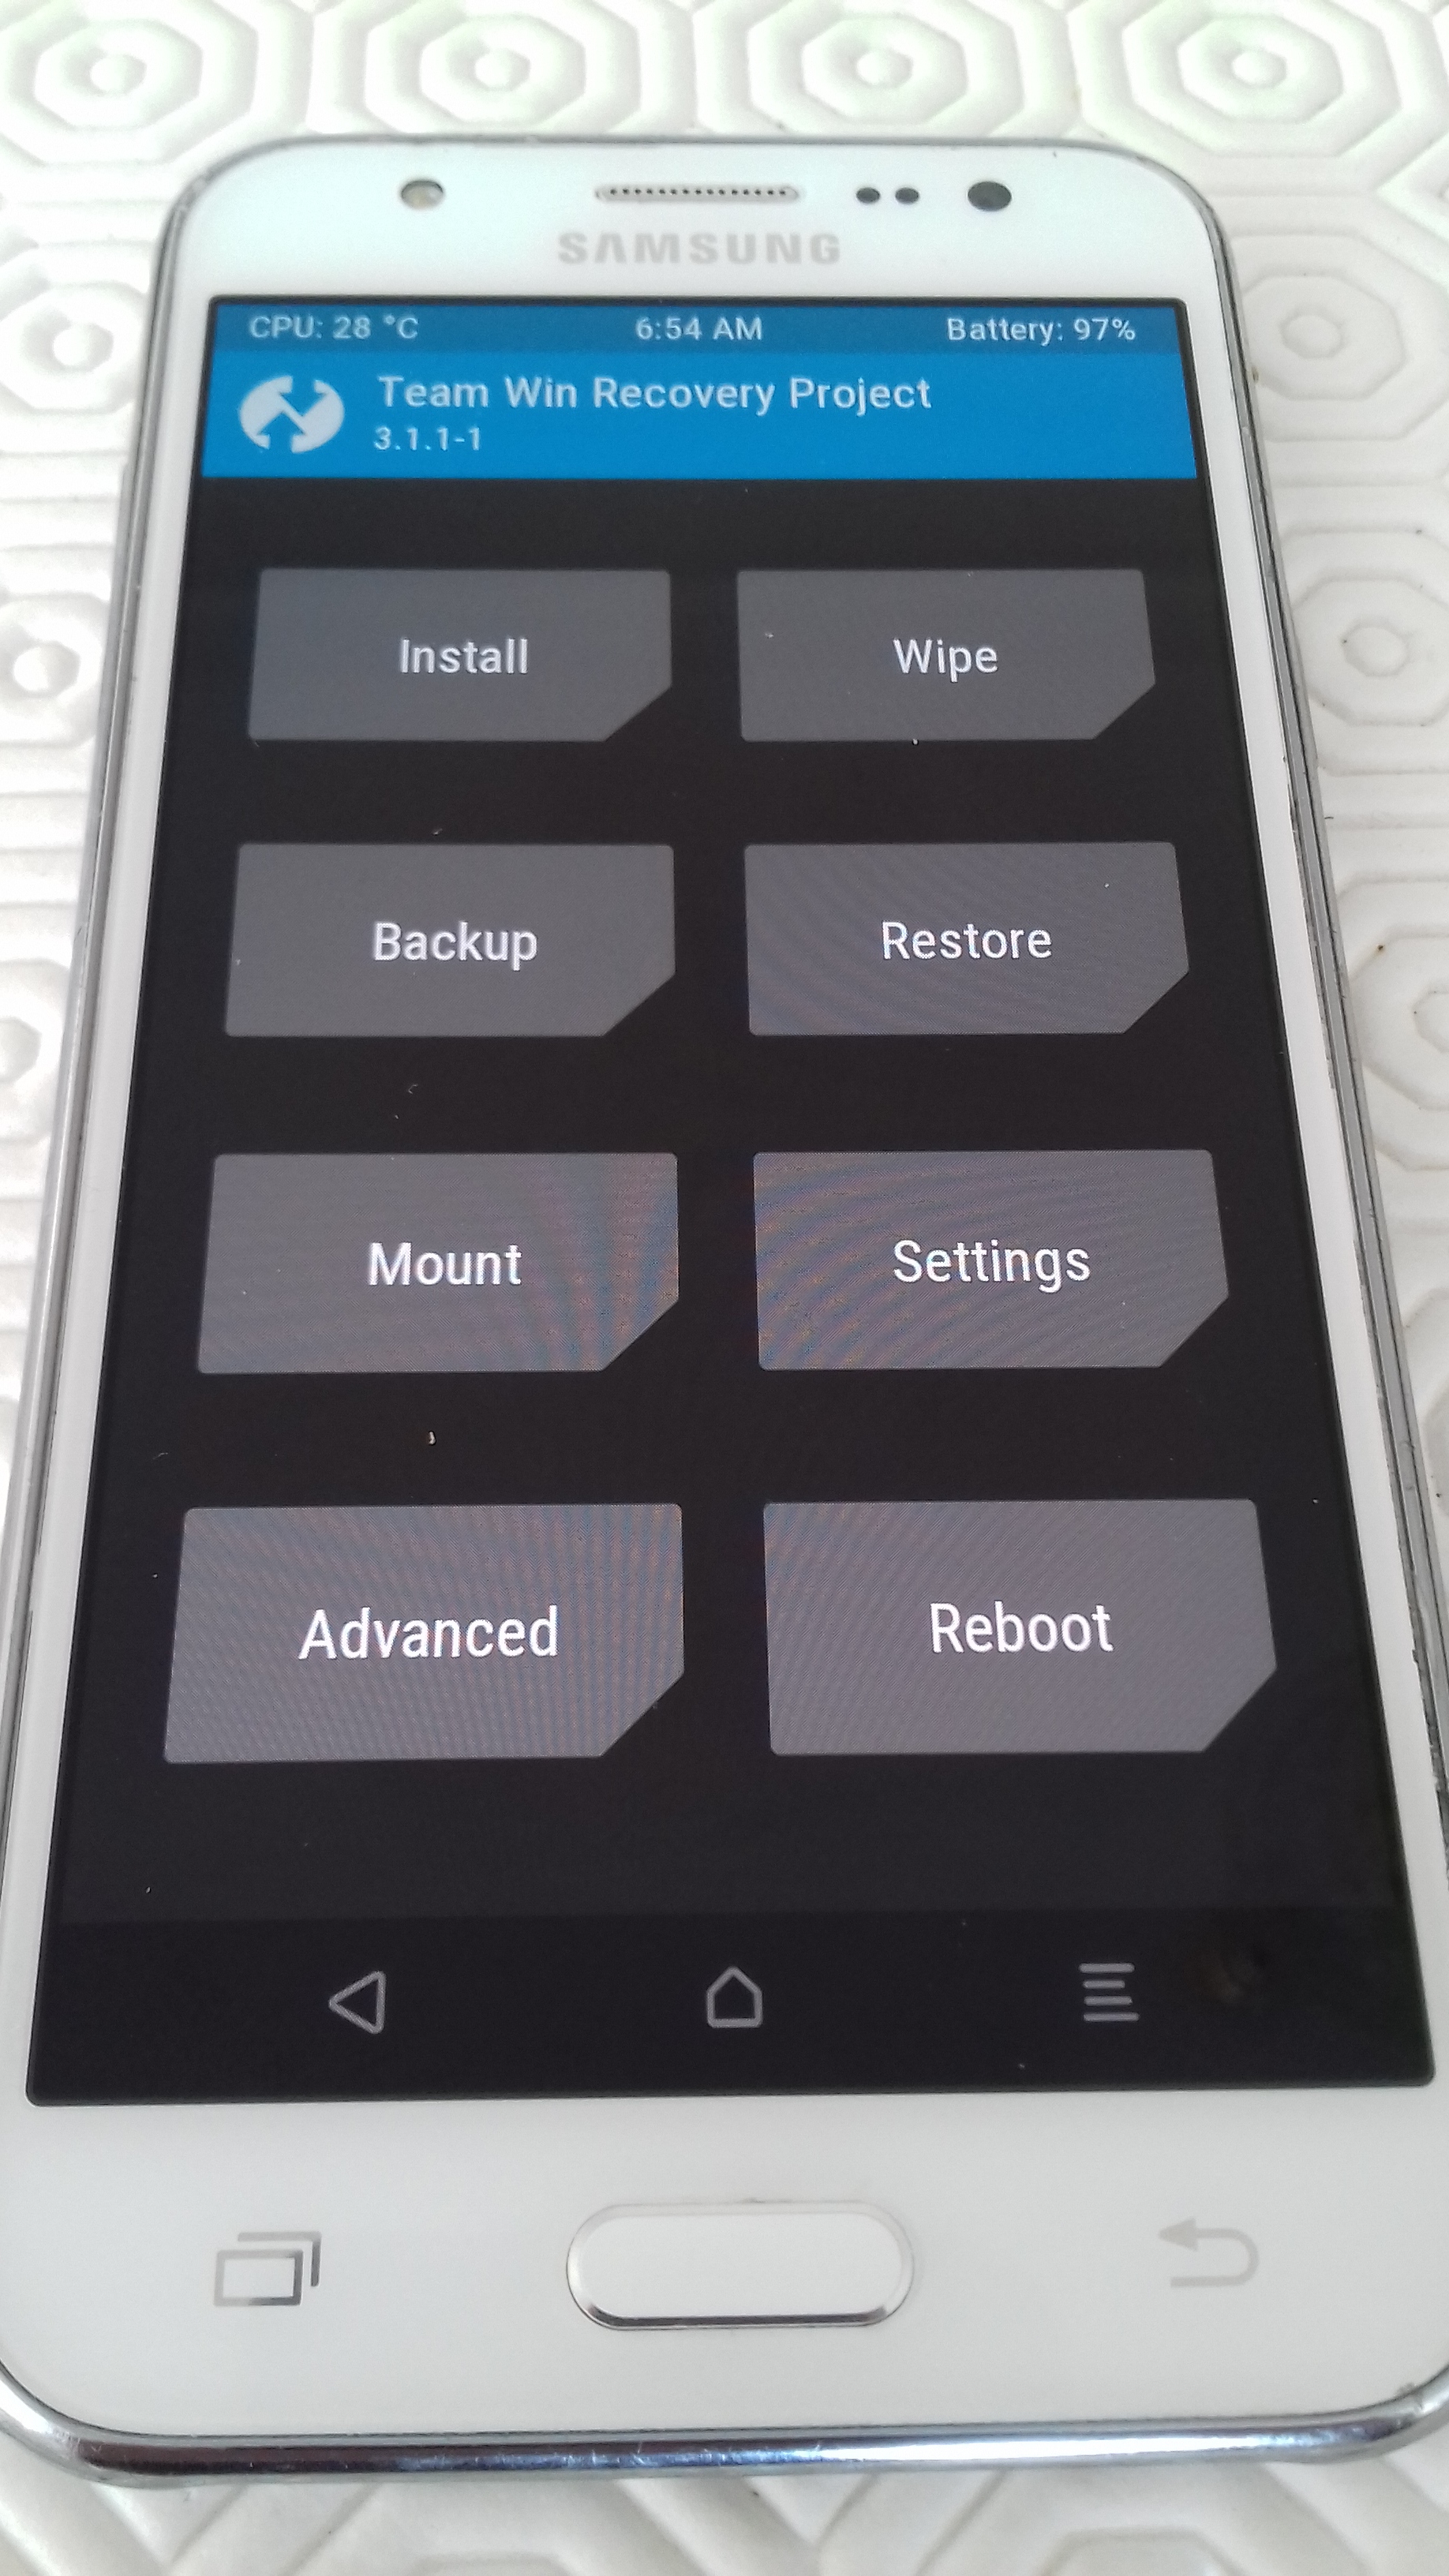
(7) Flash a custom recovery manager on your device
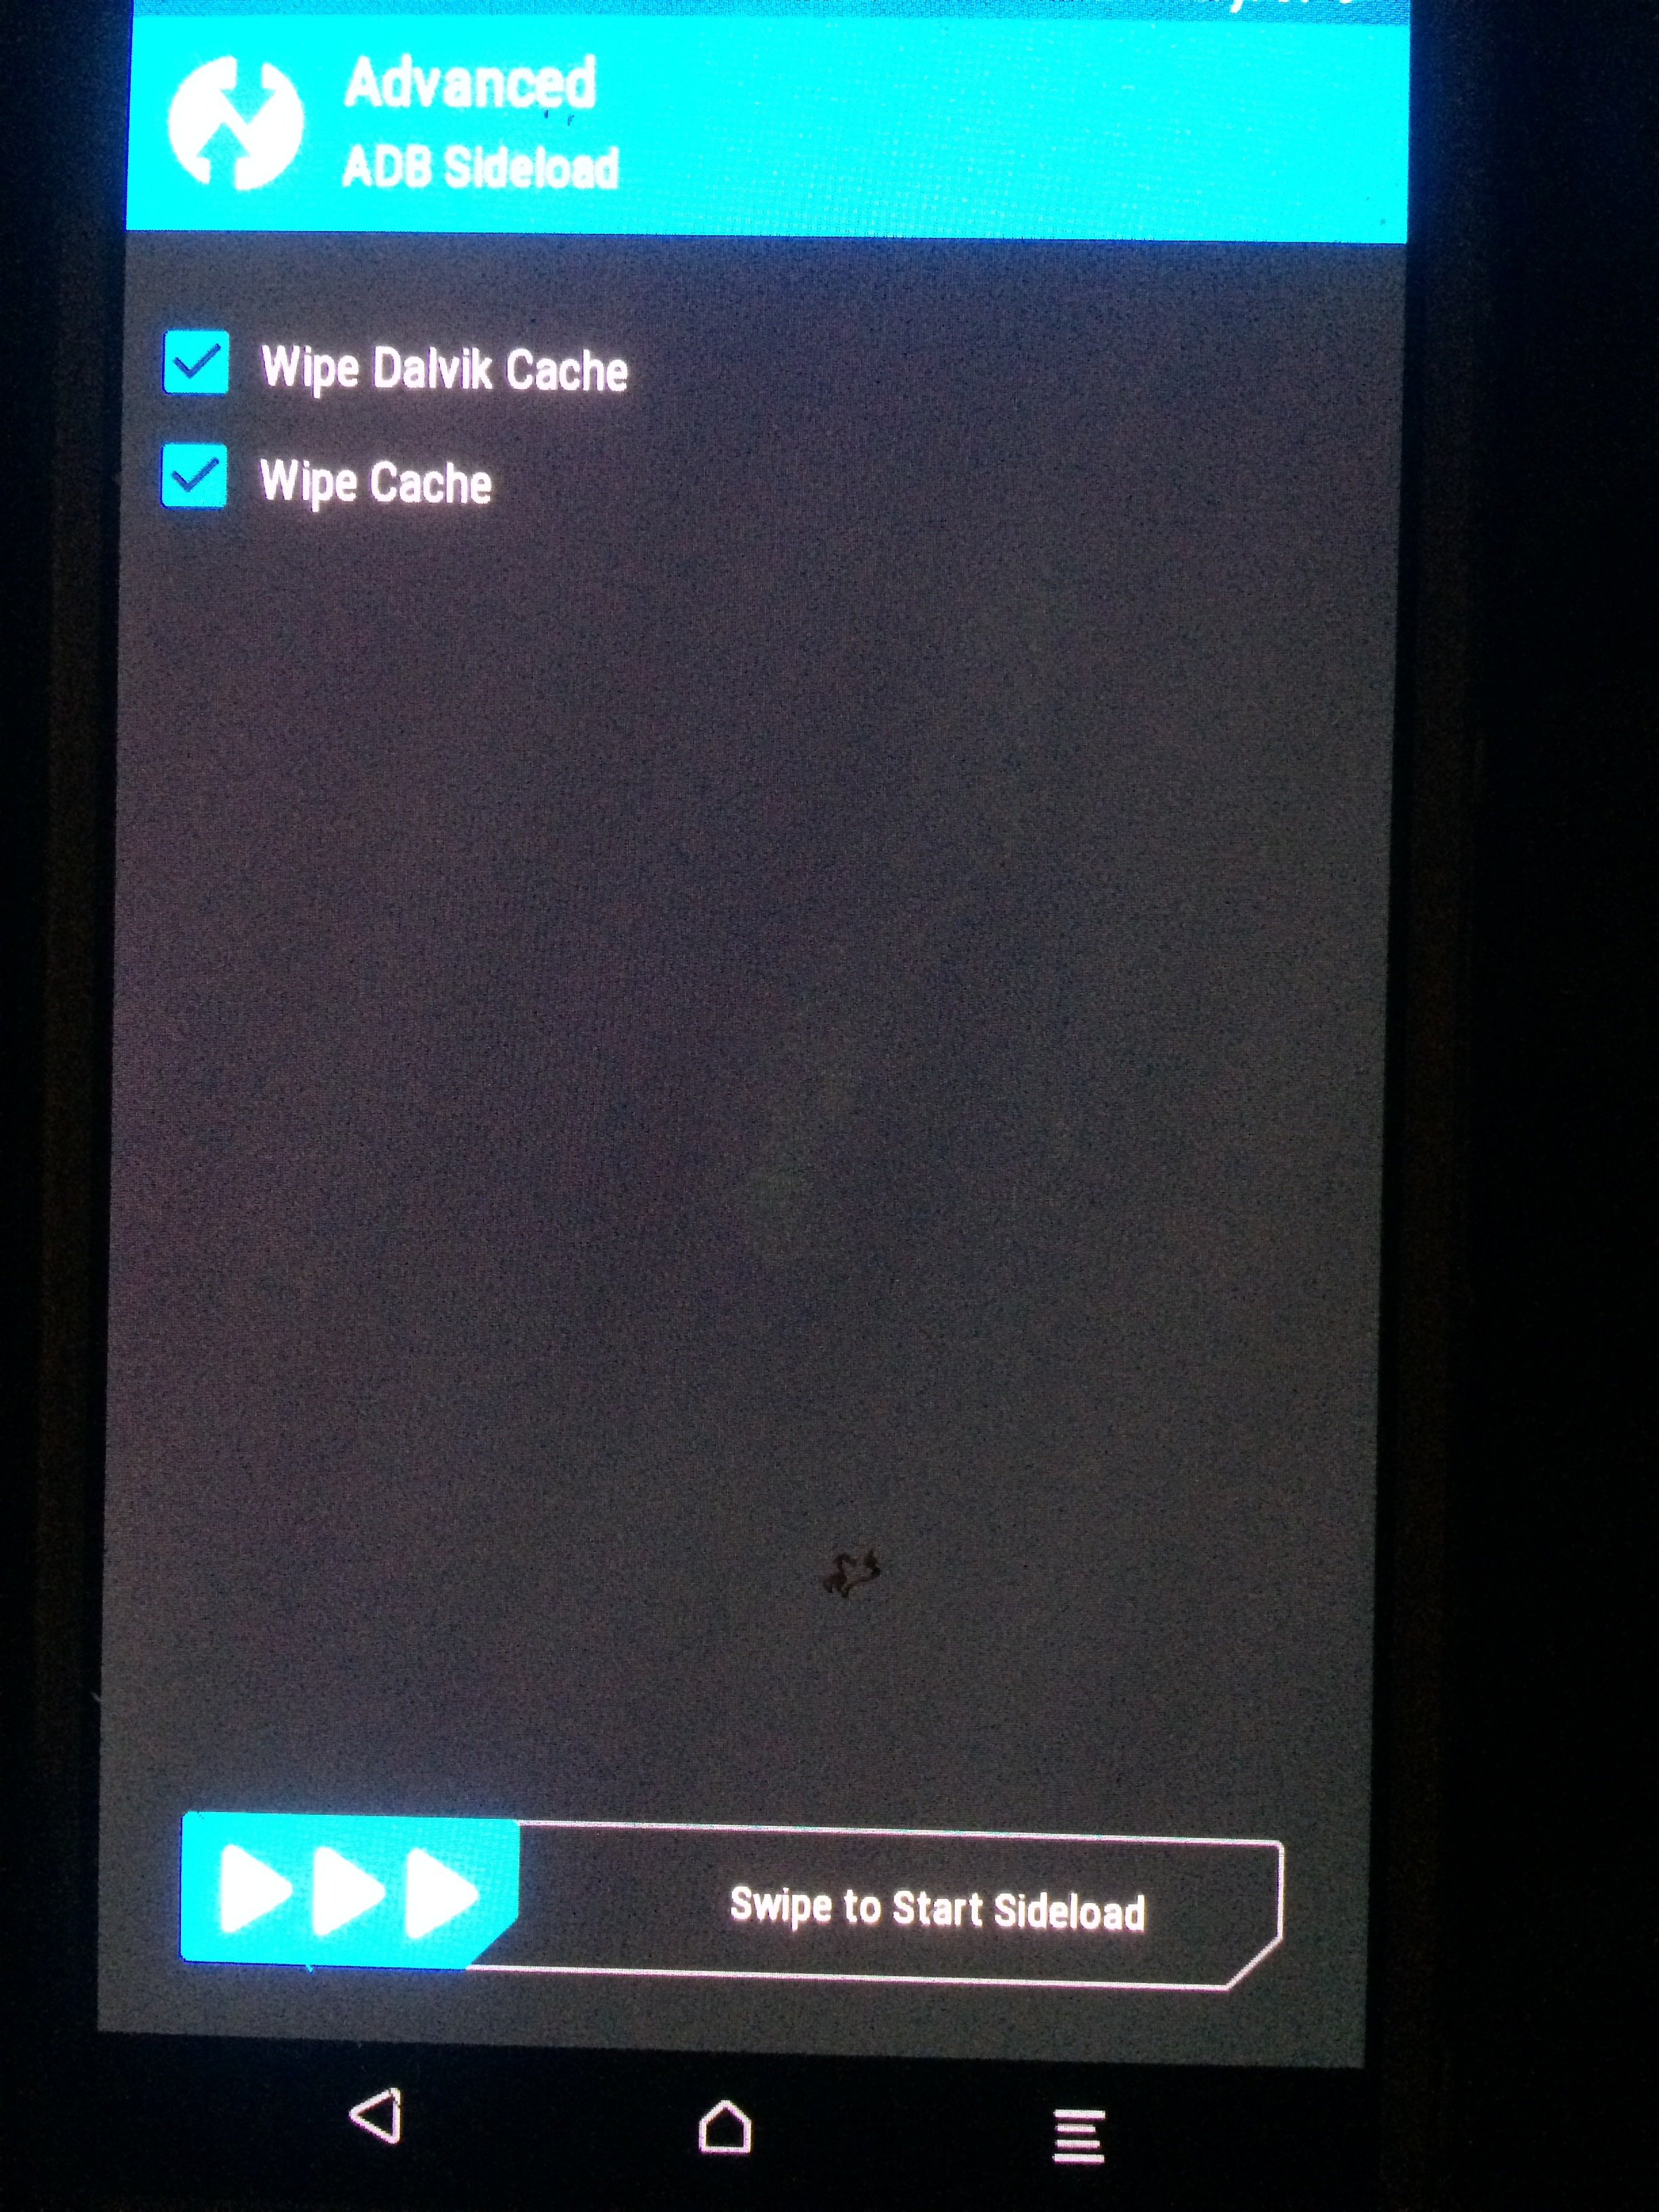
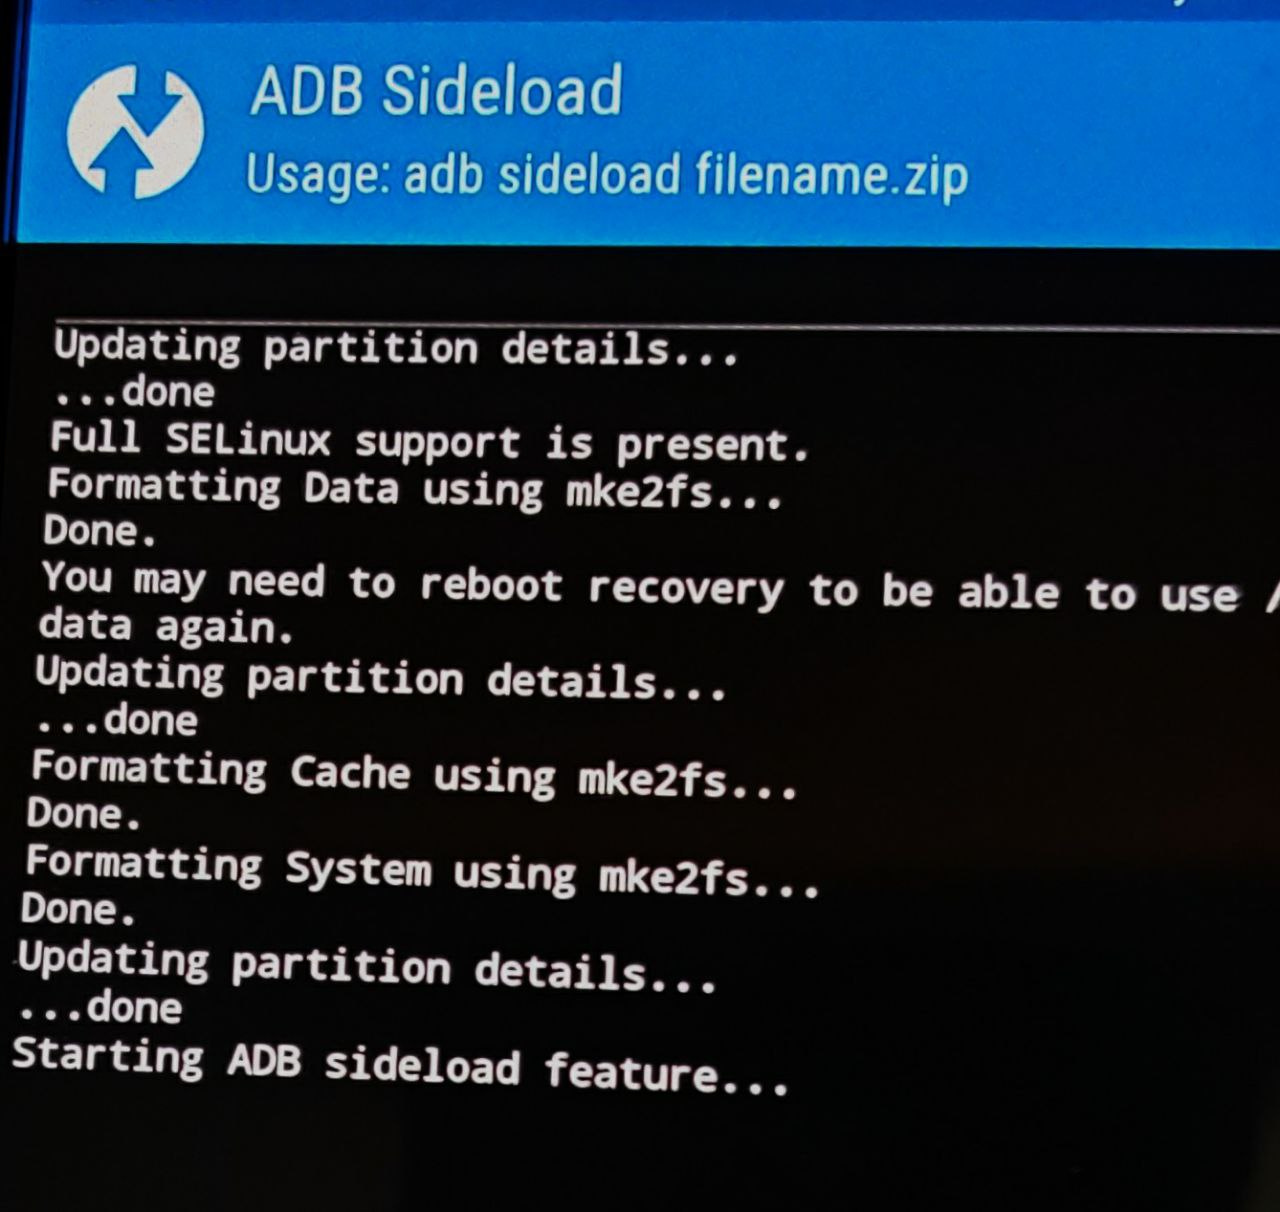
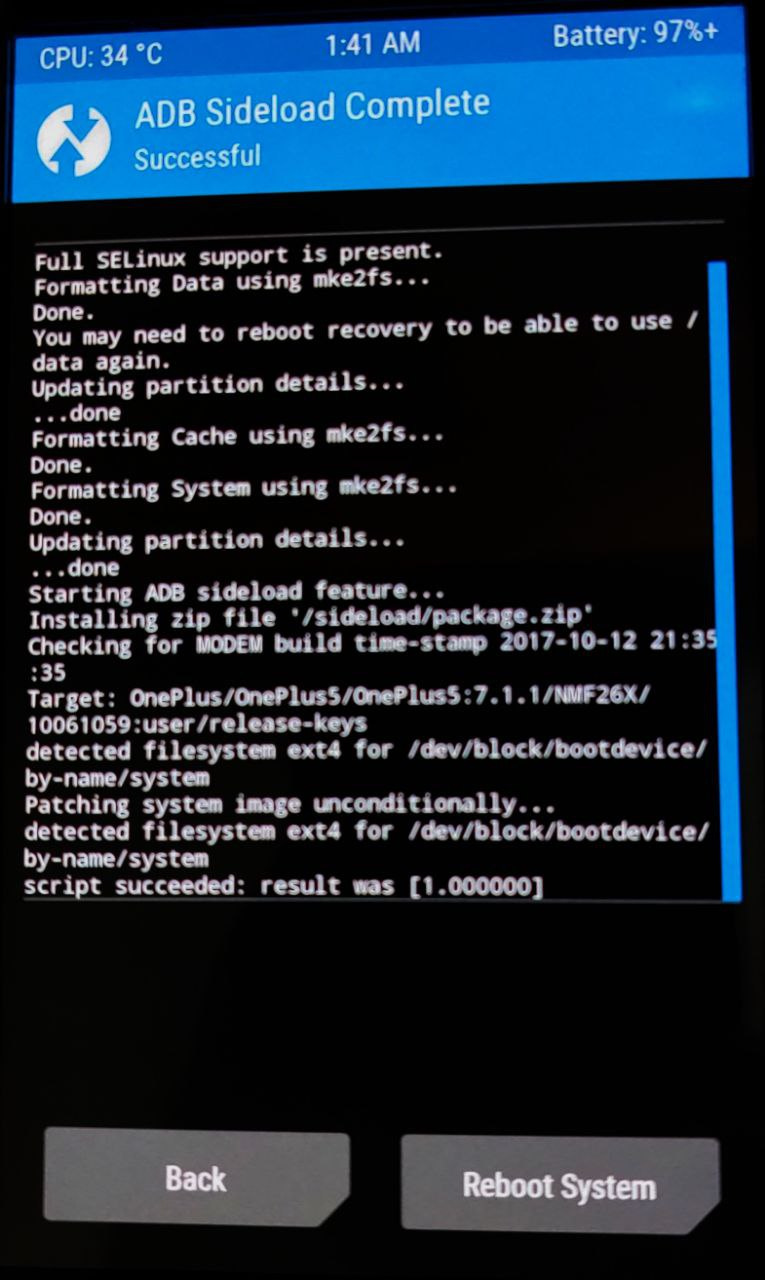
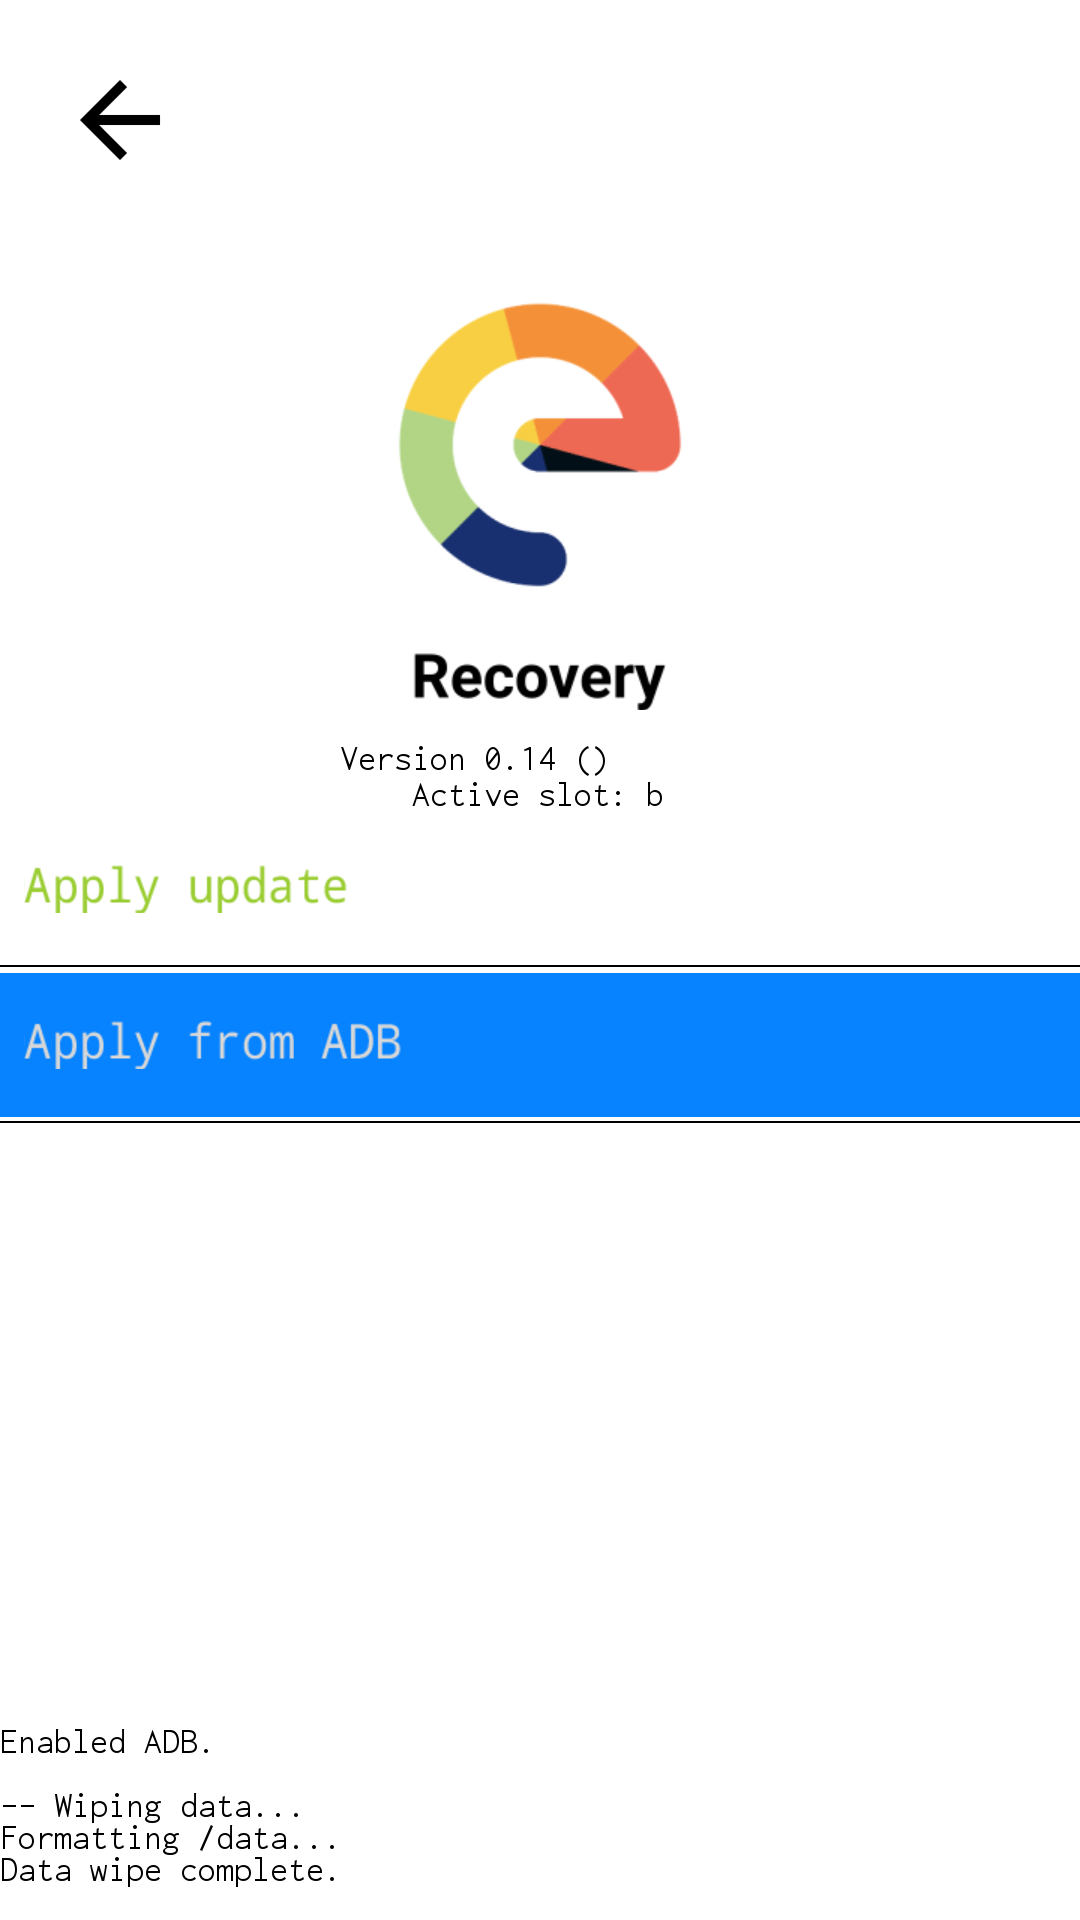
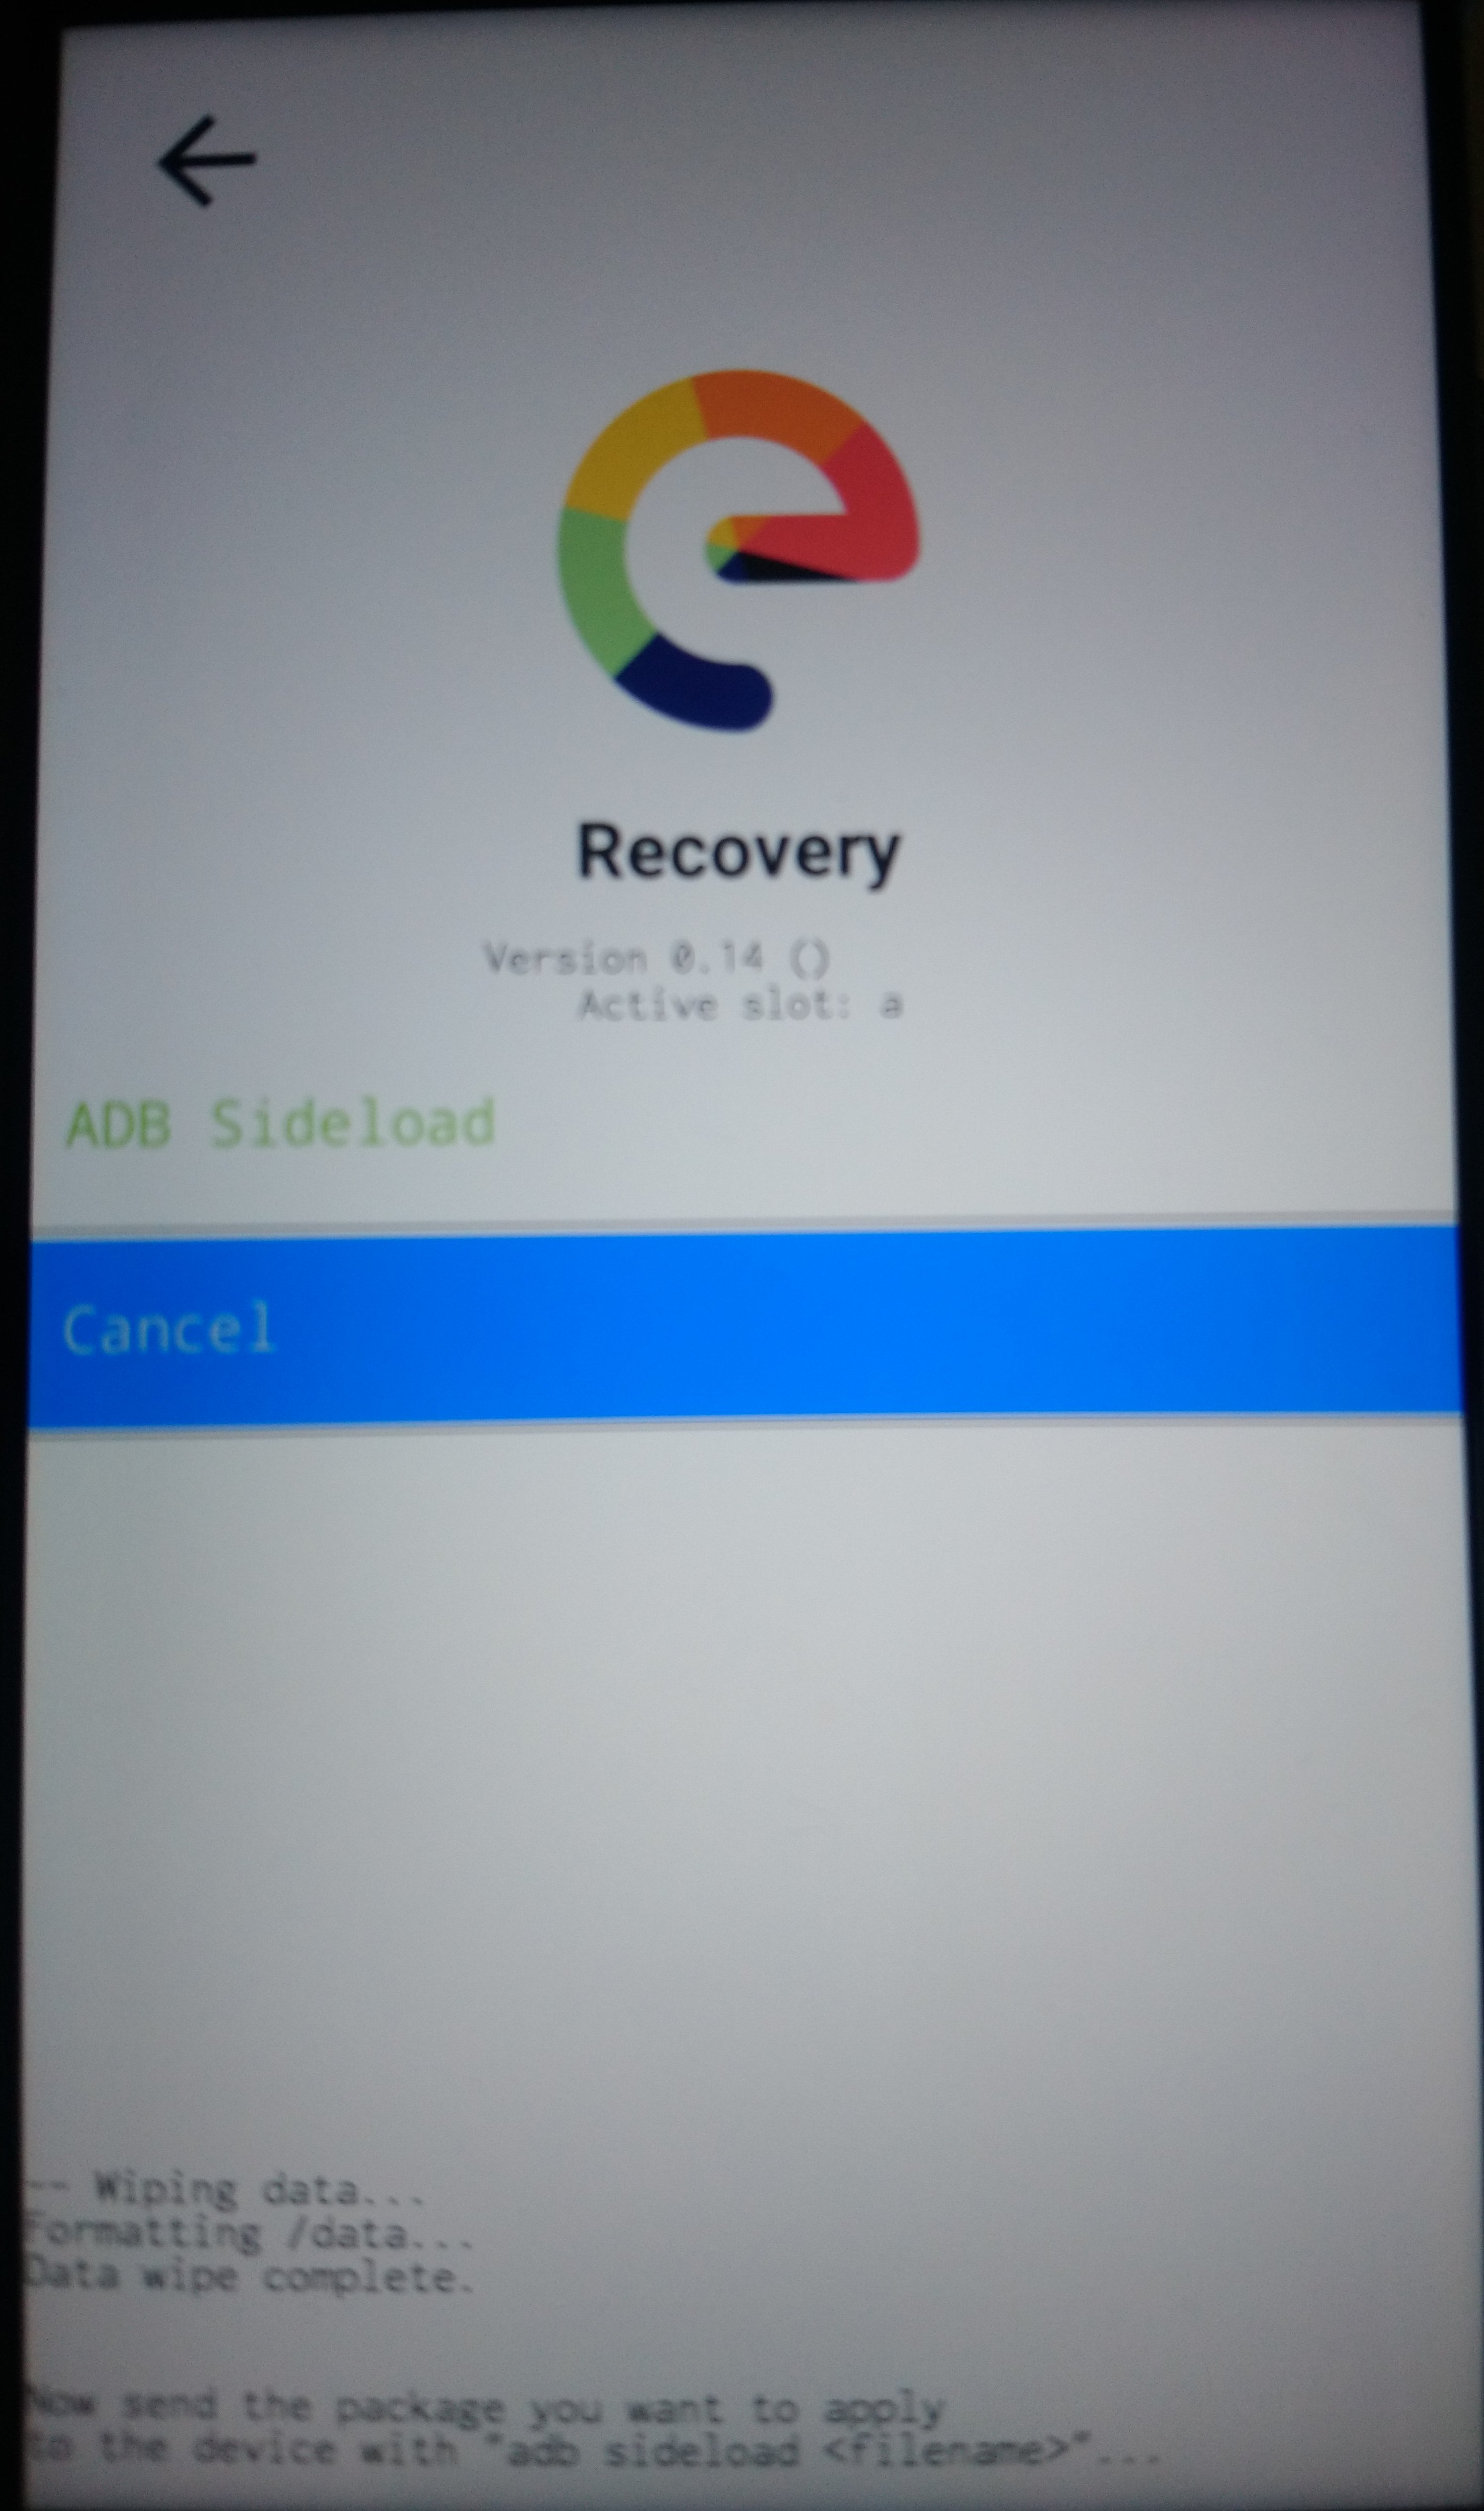
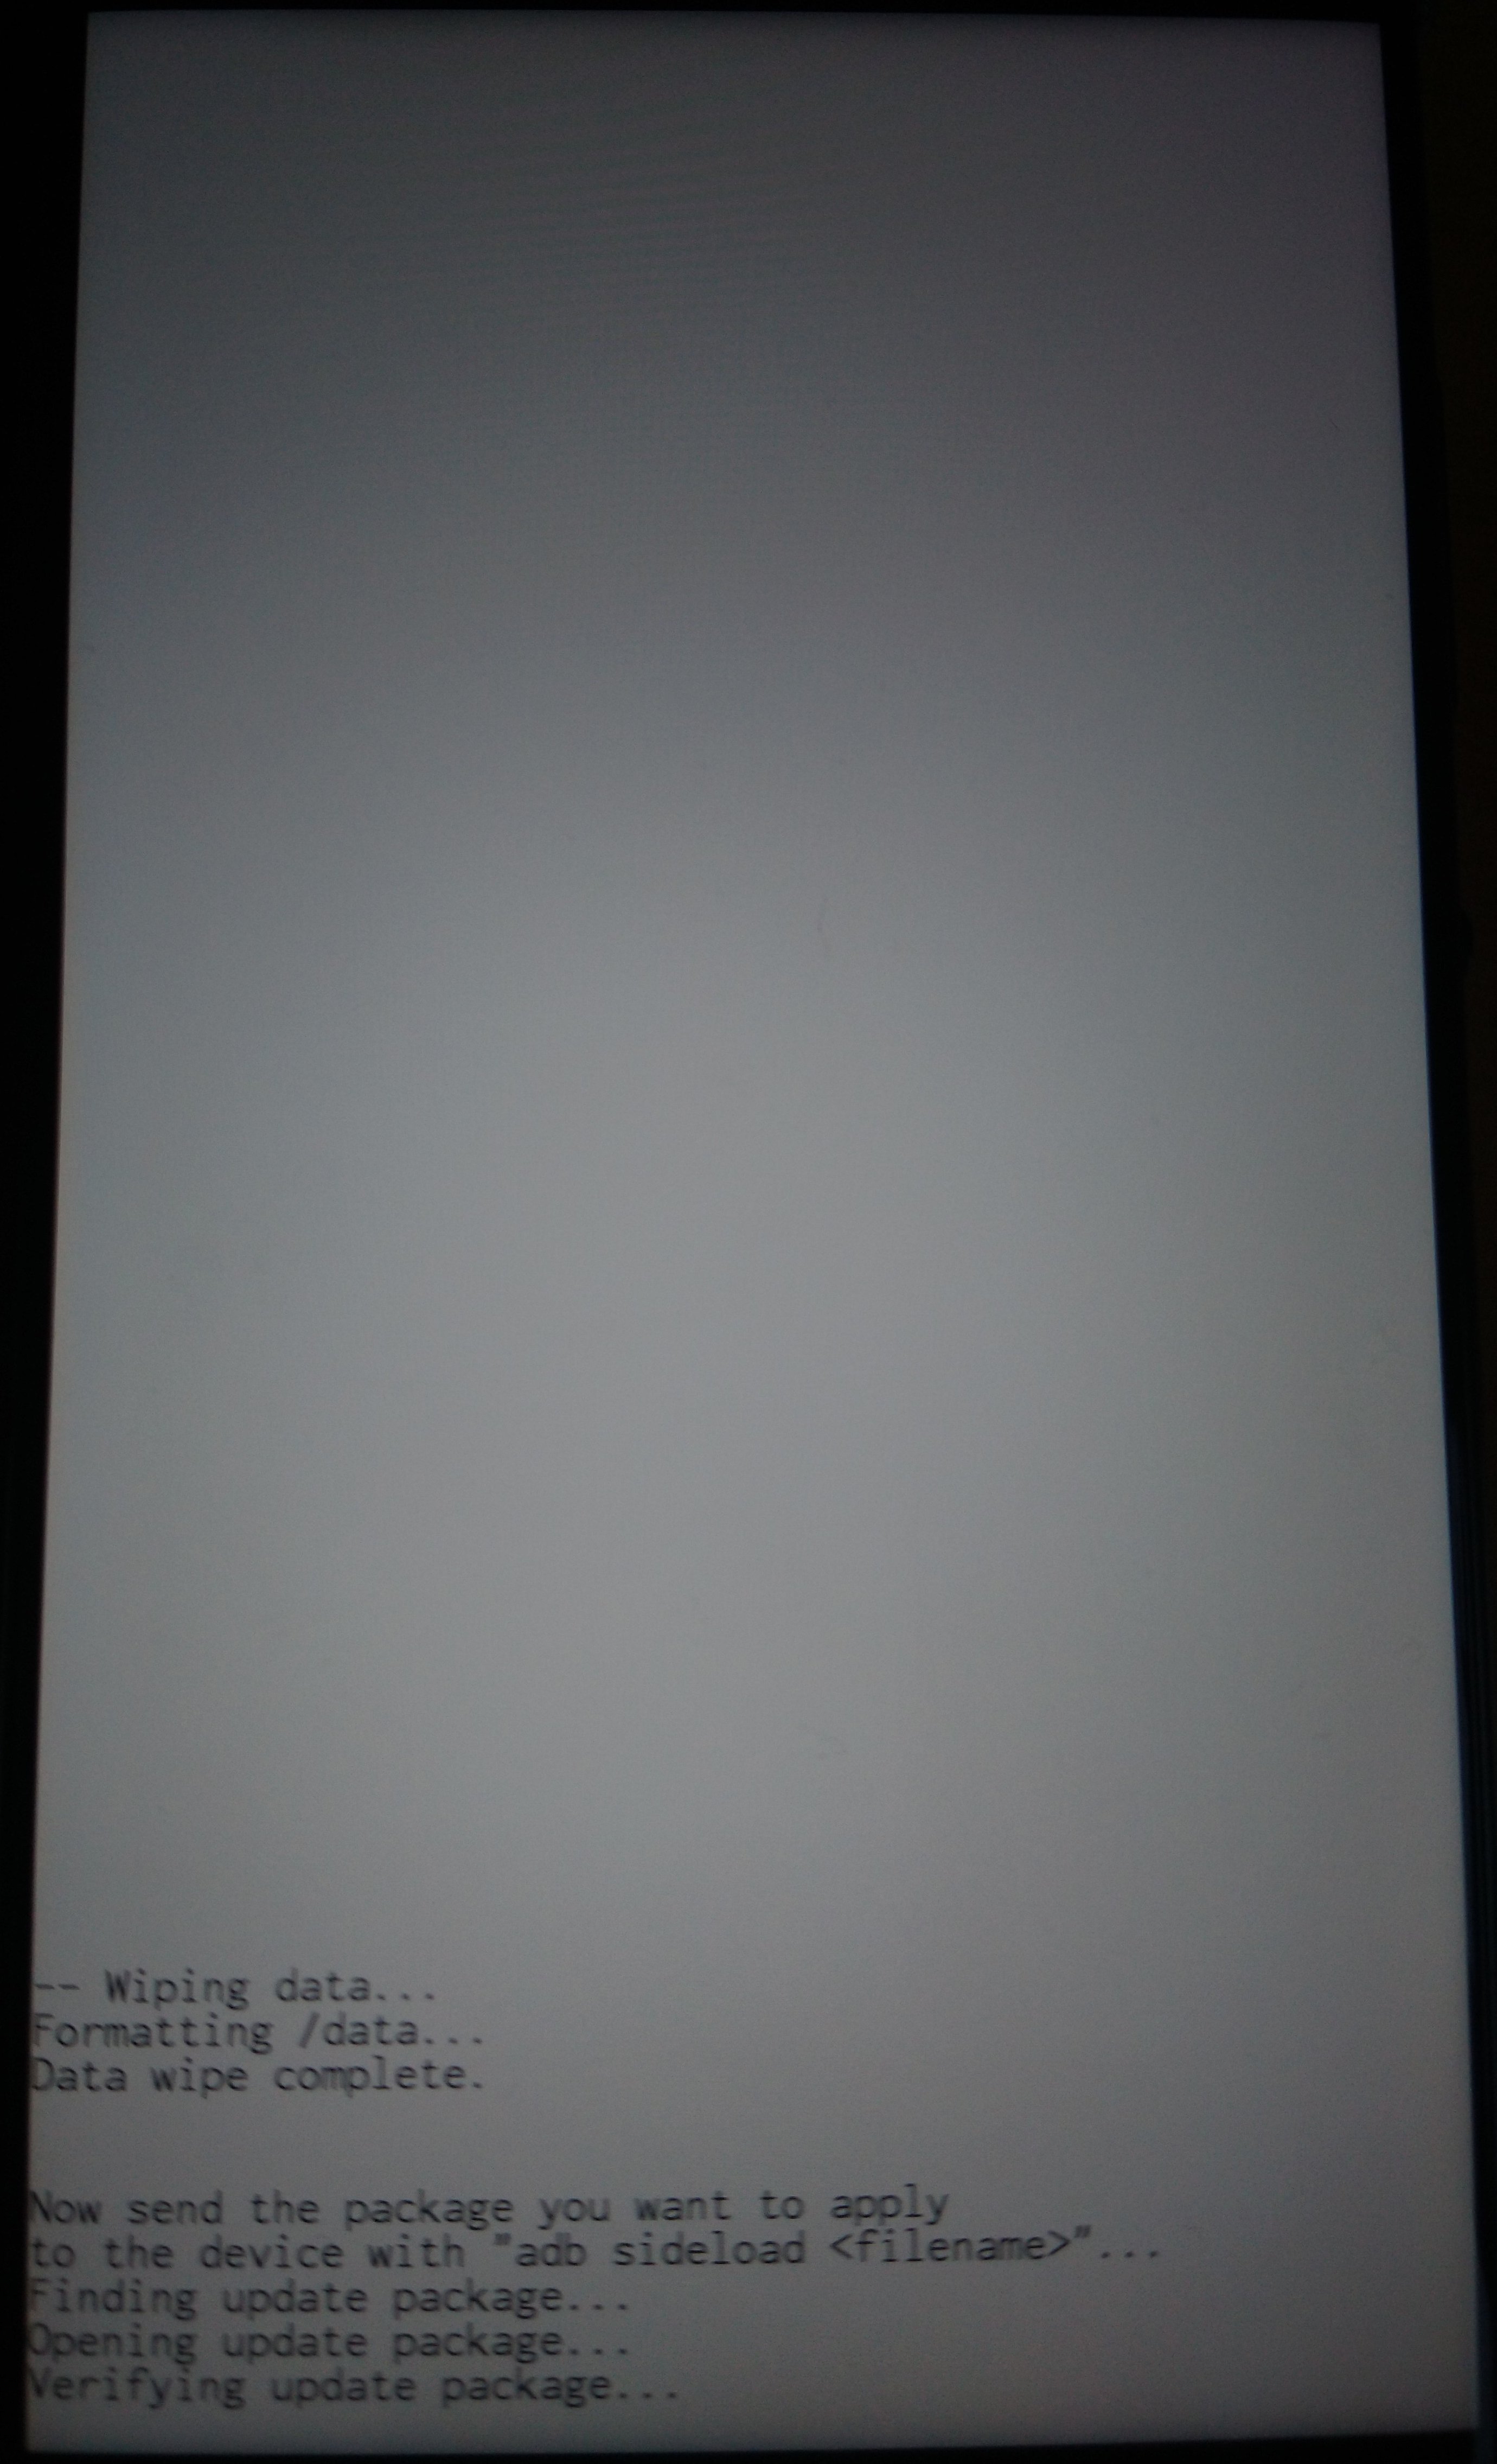
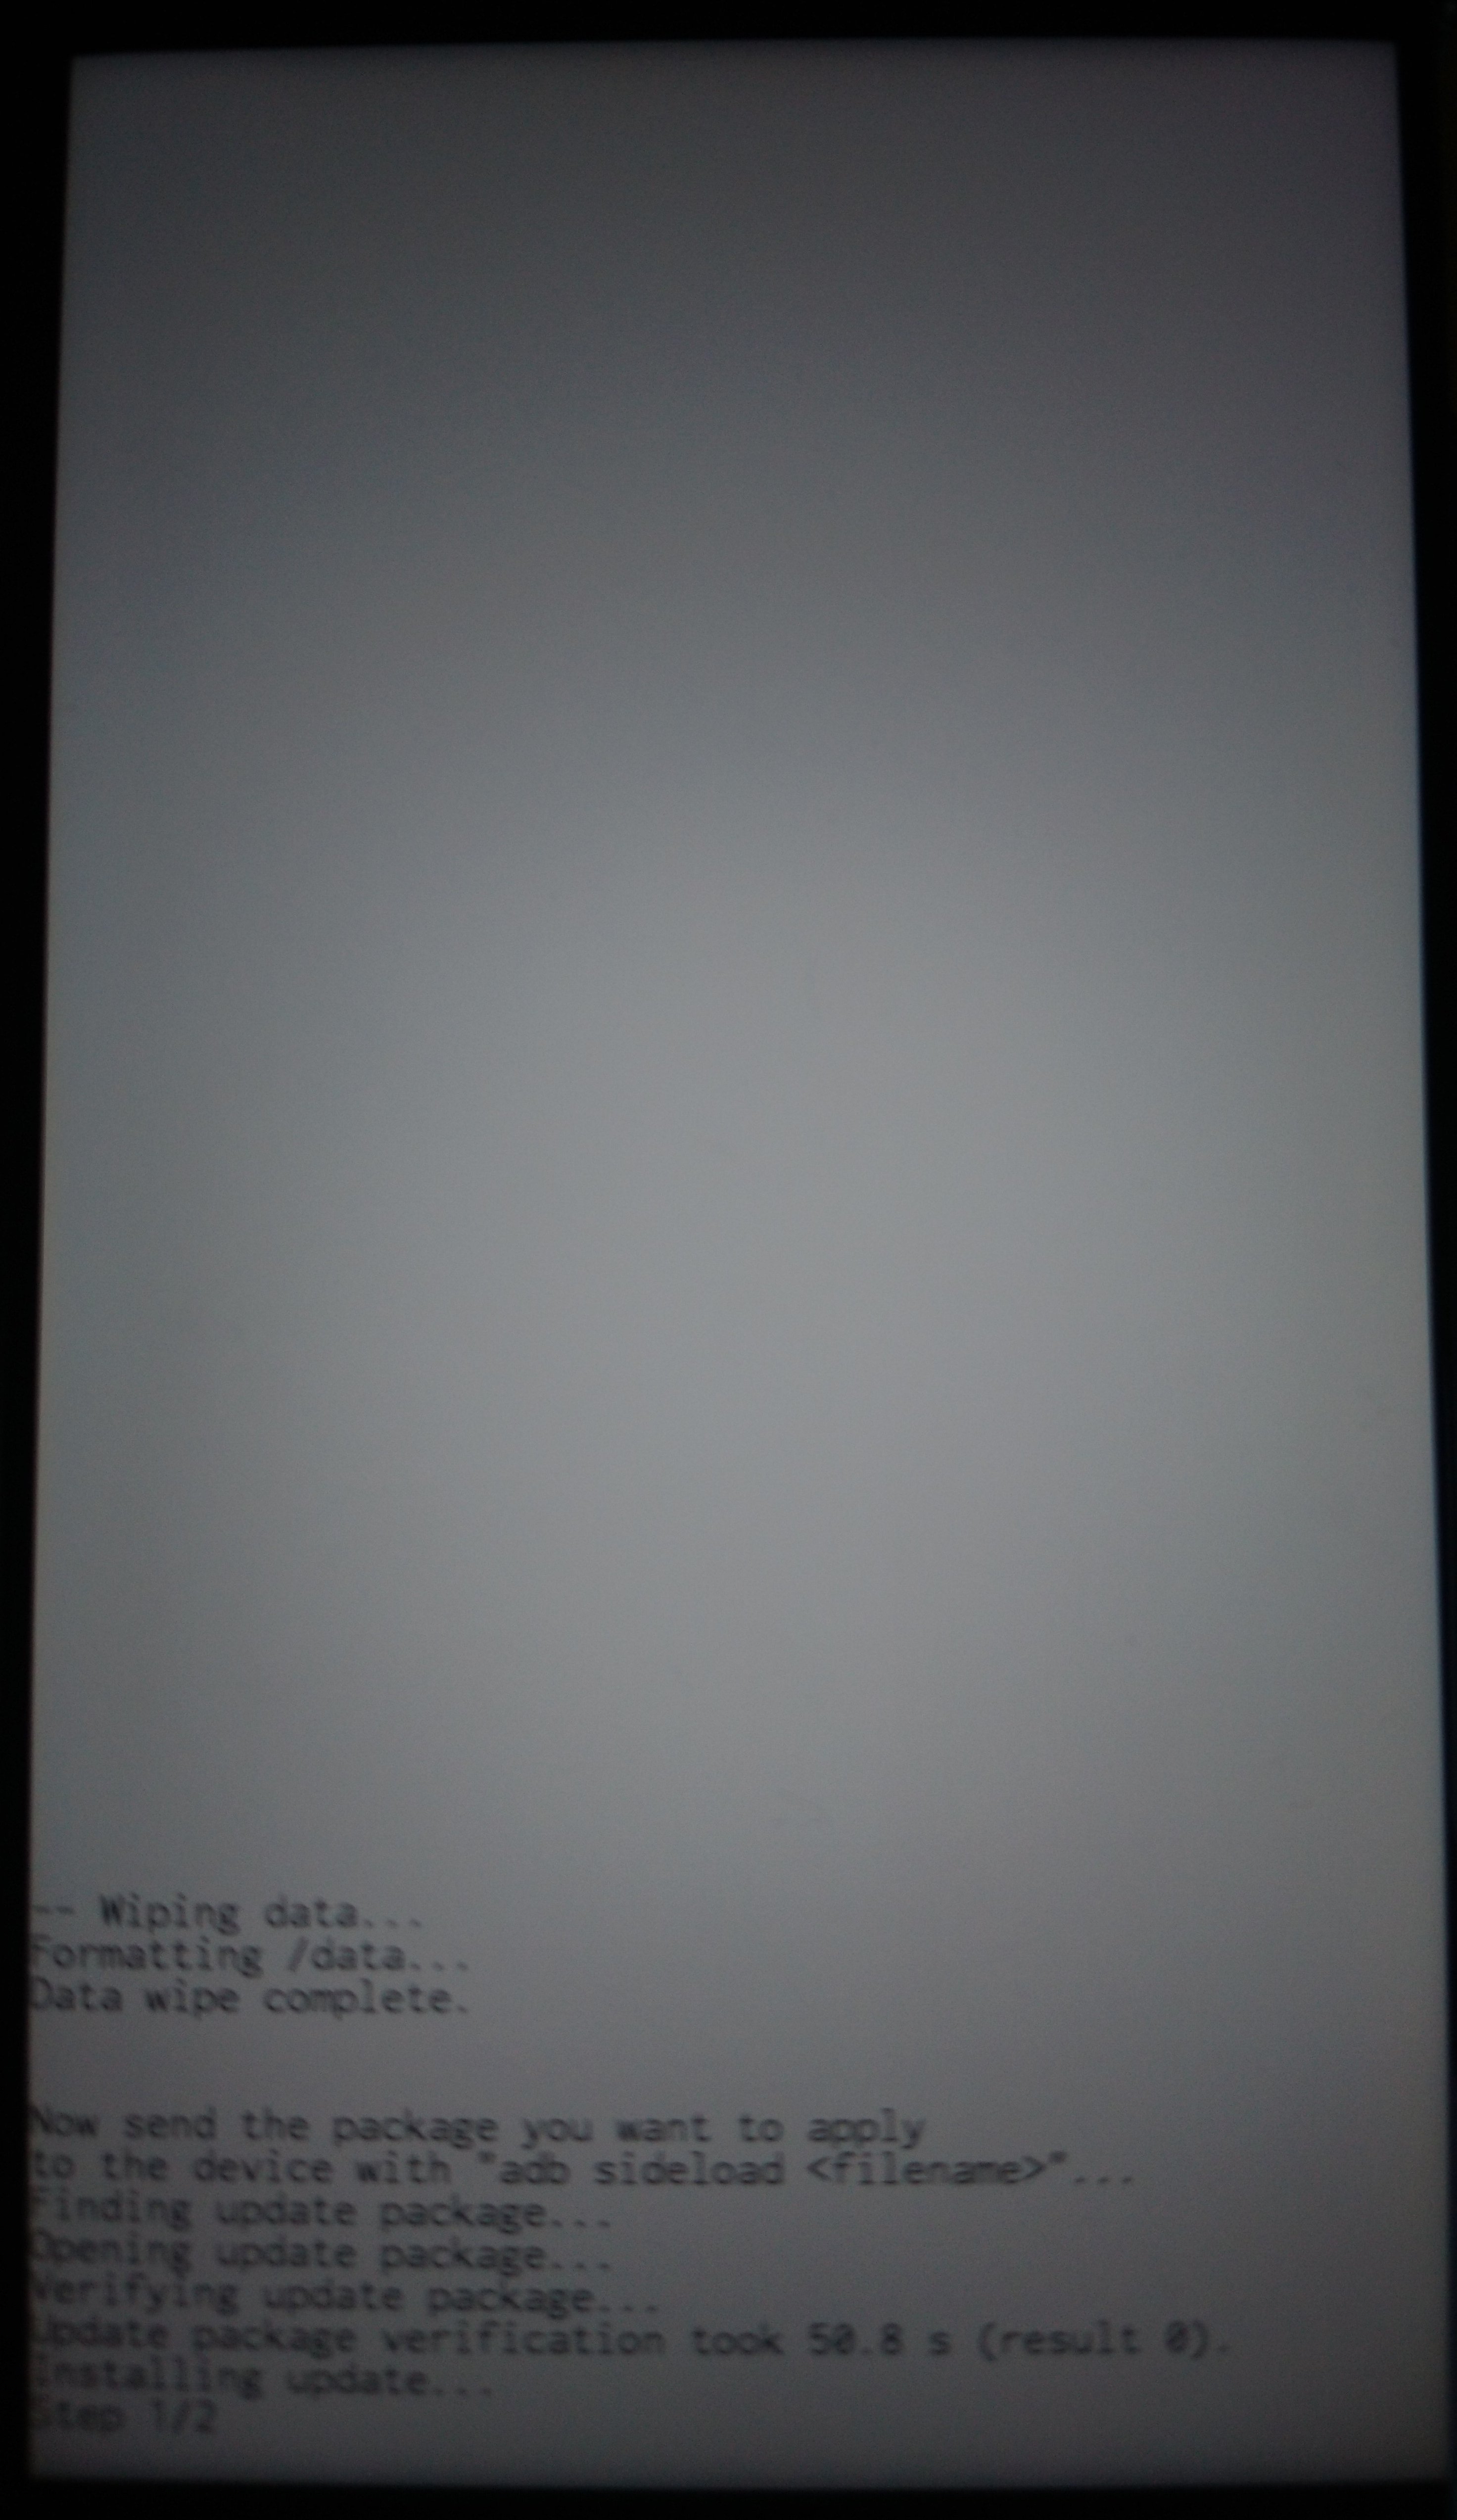
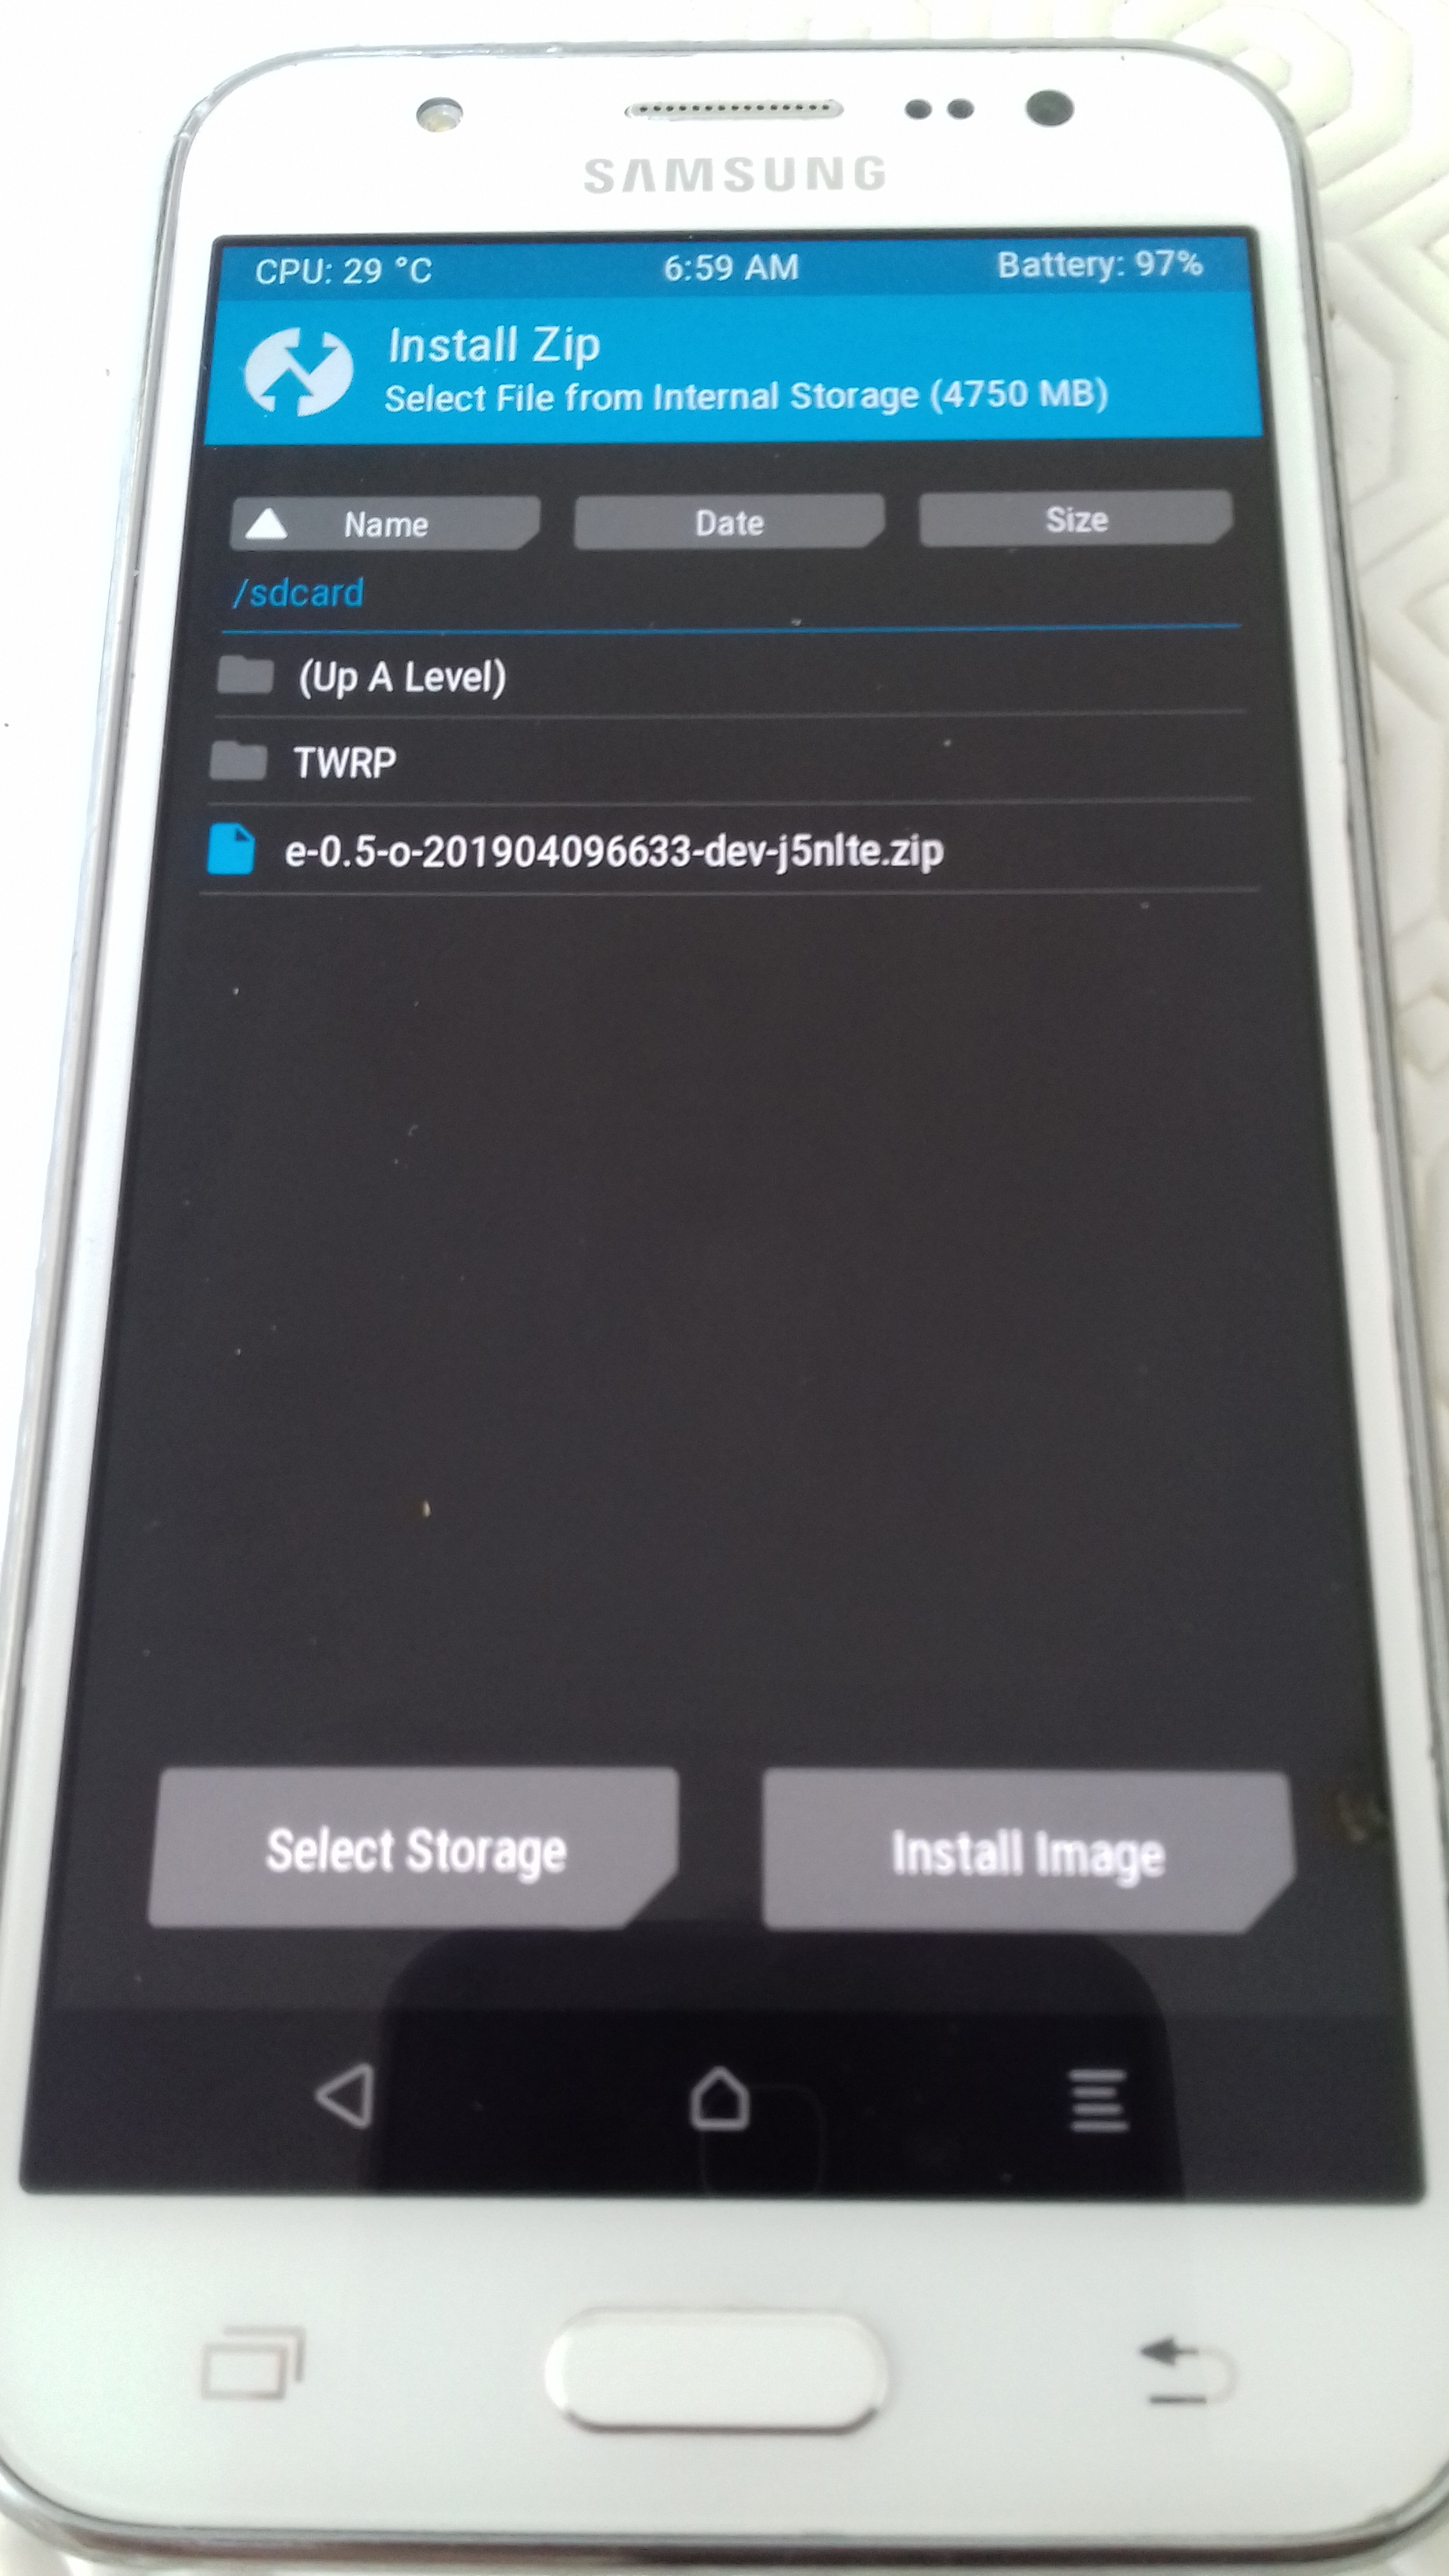
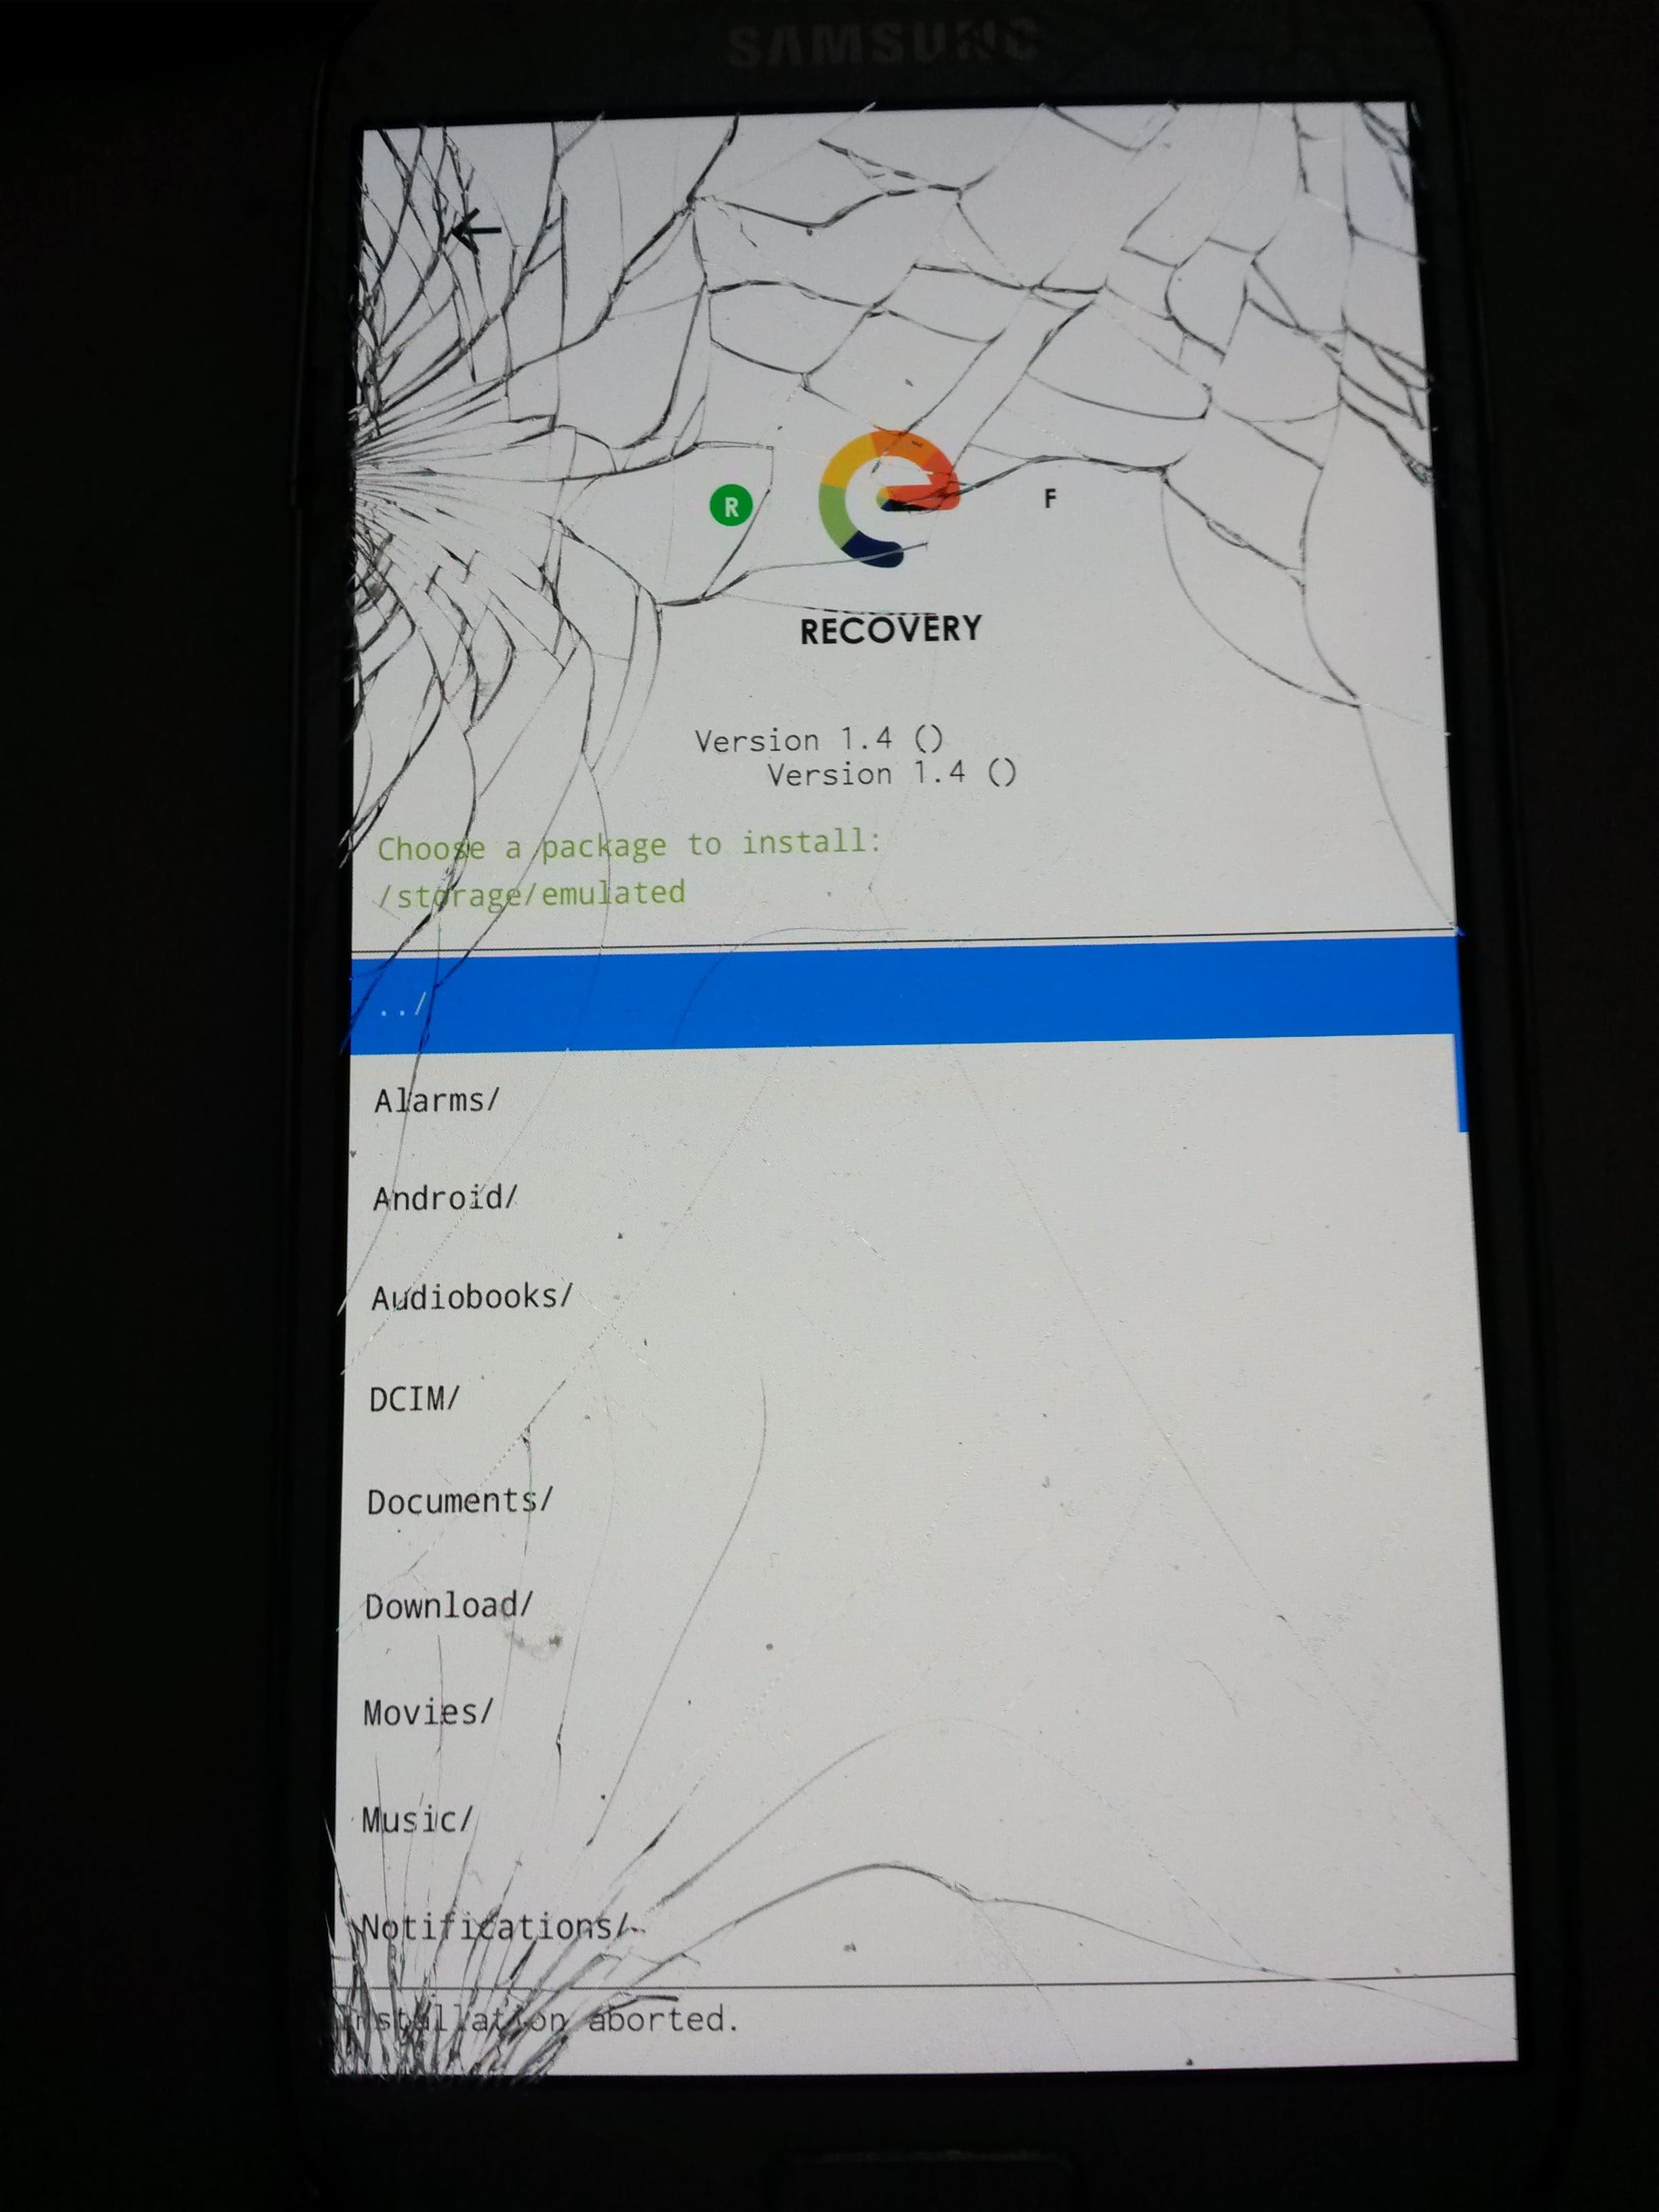
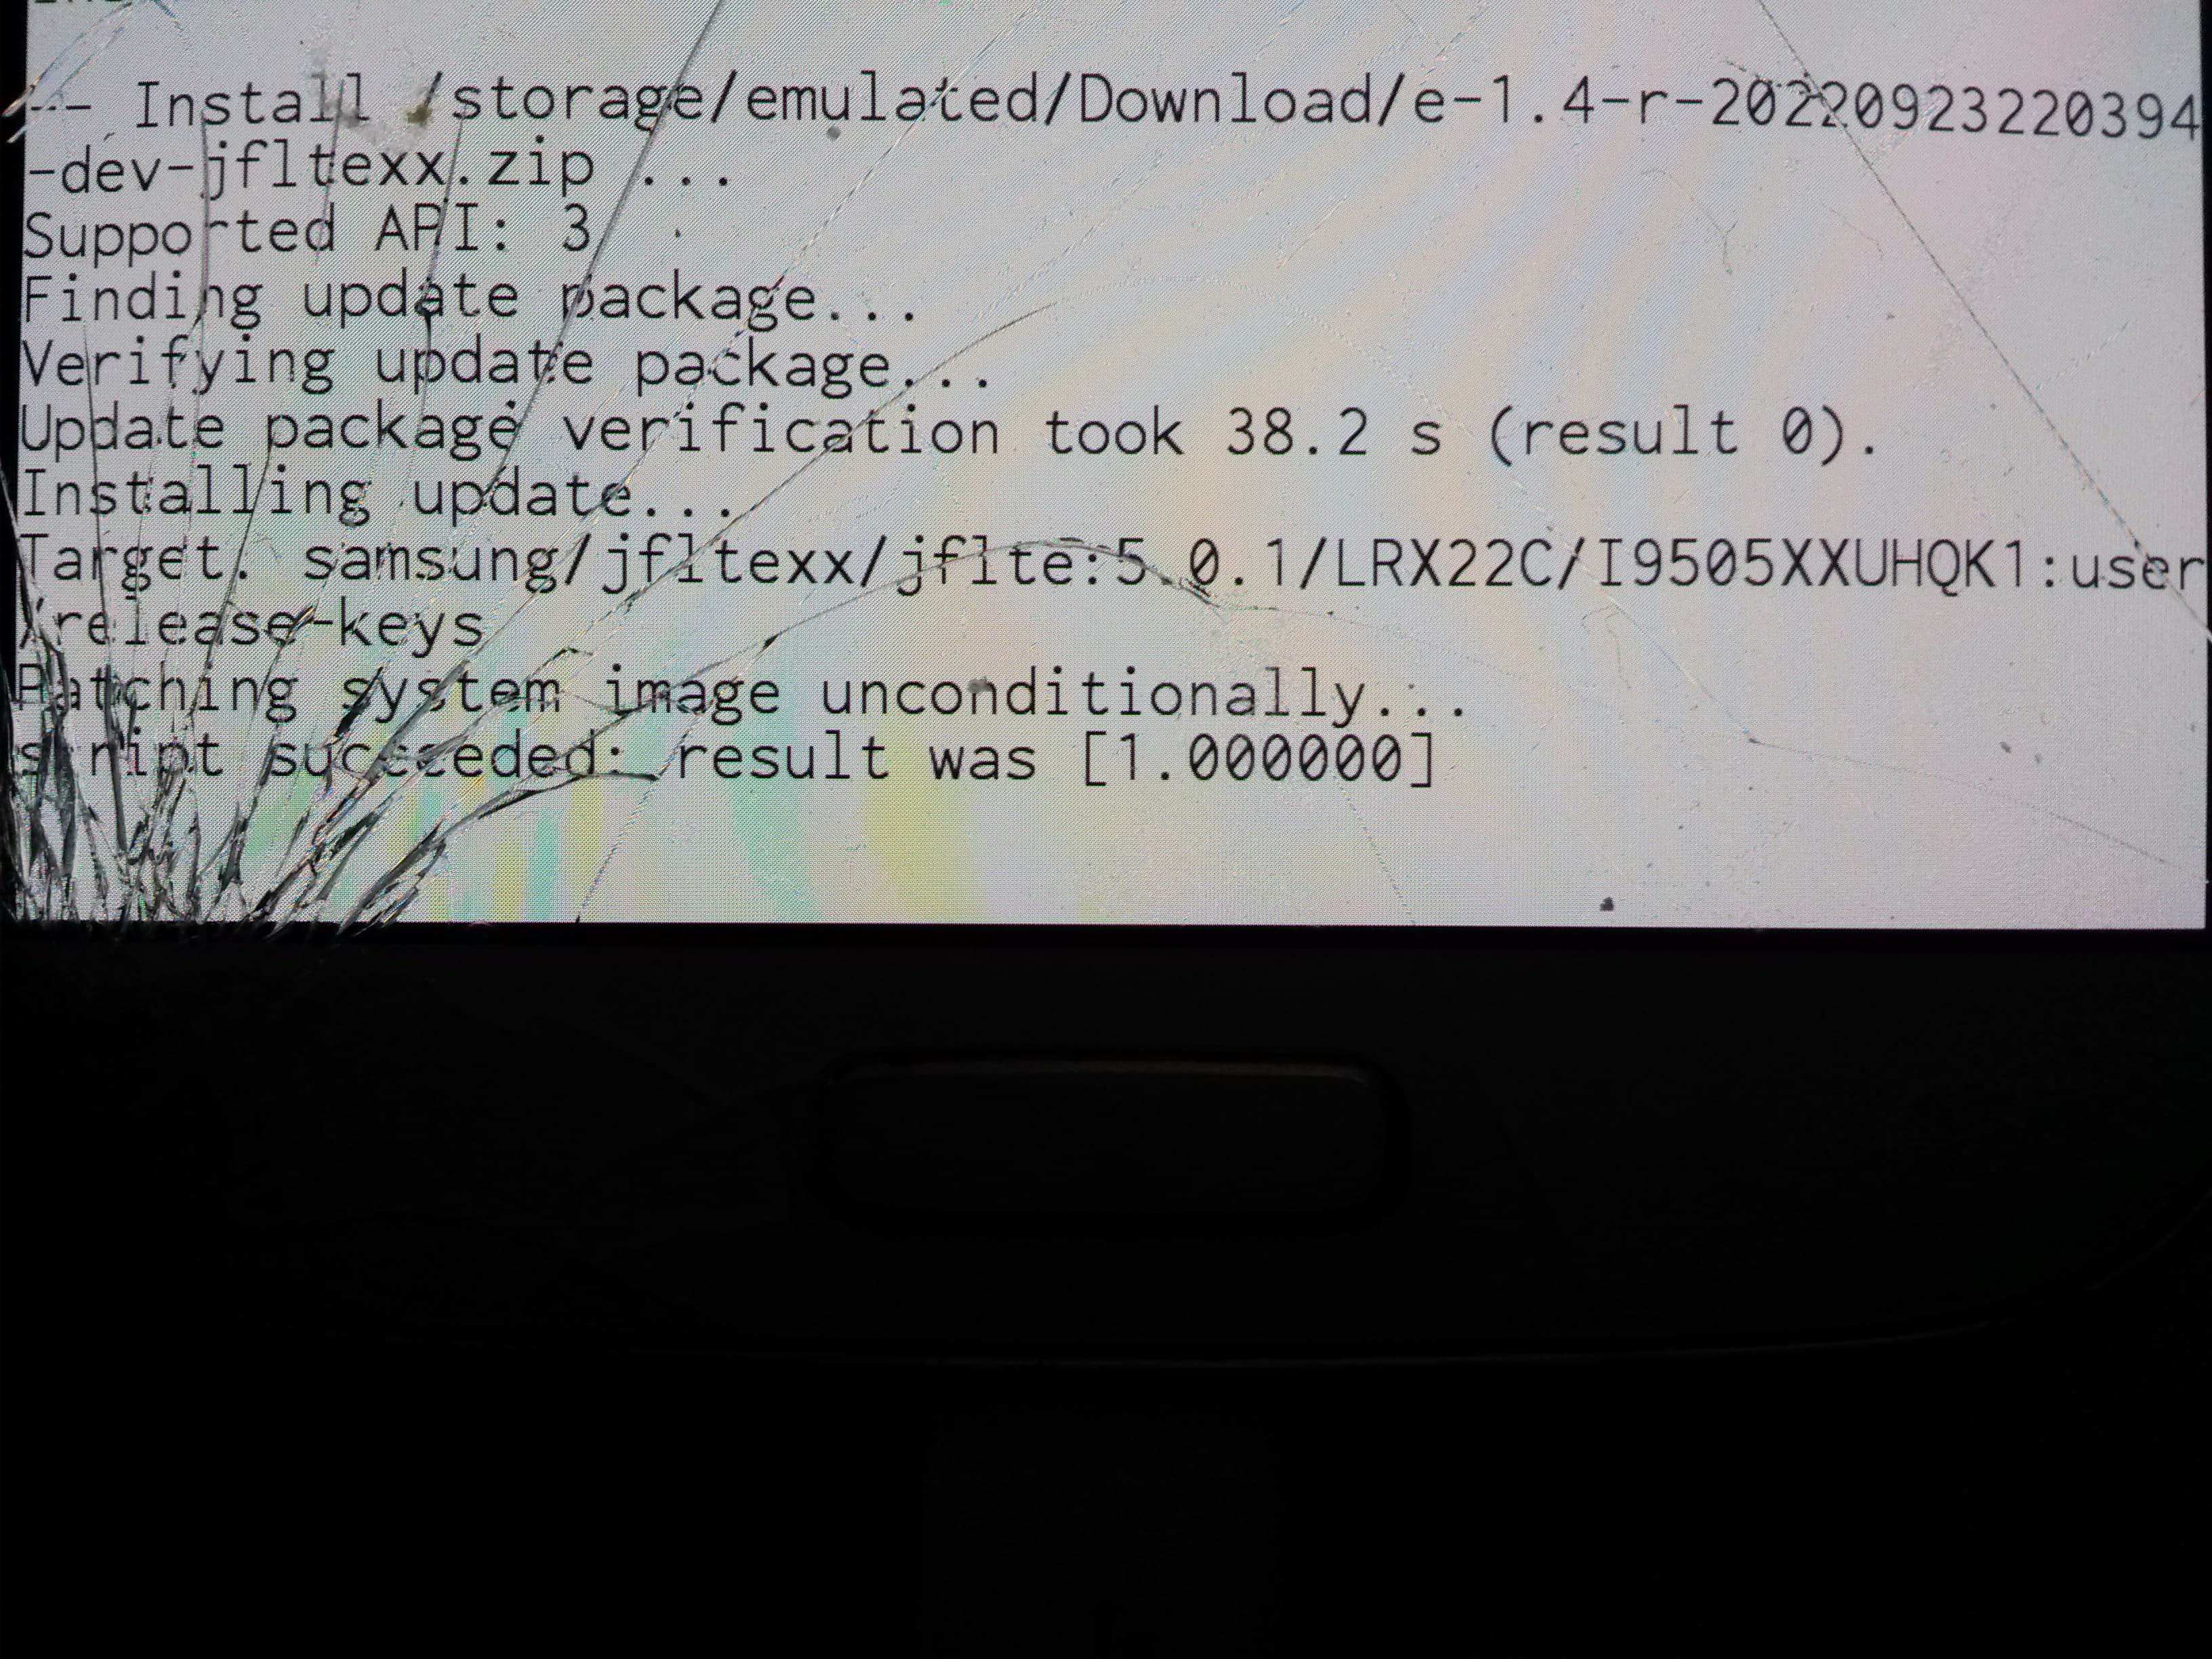
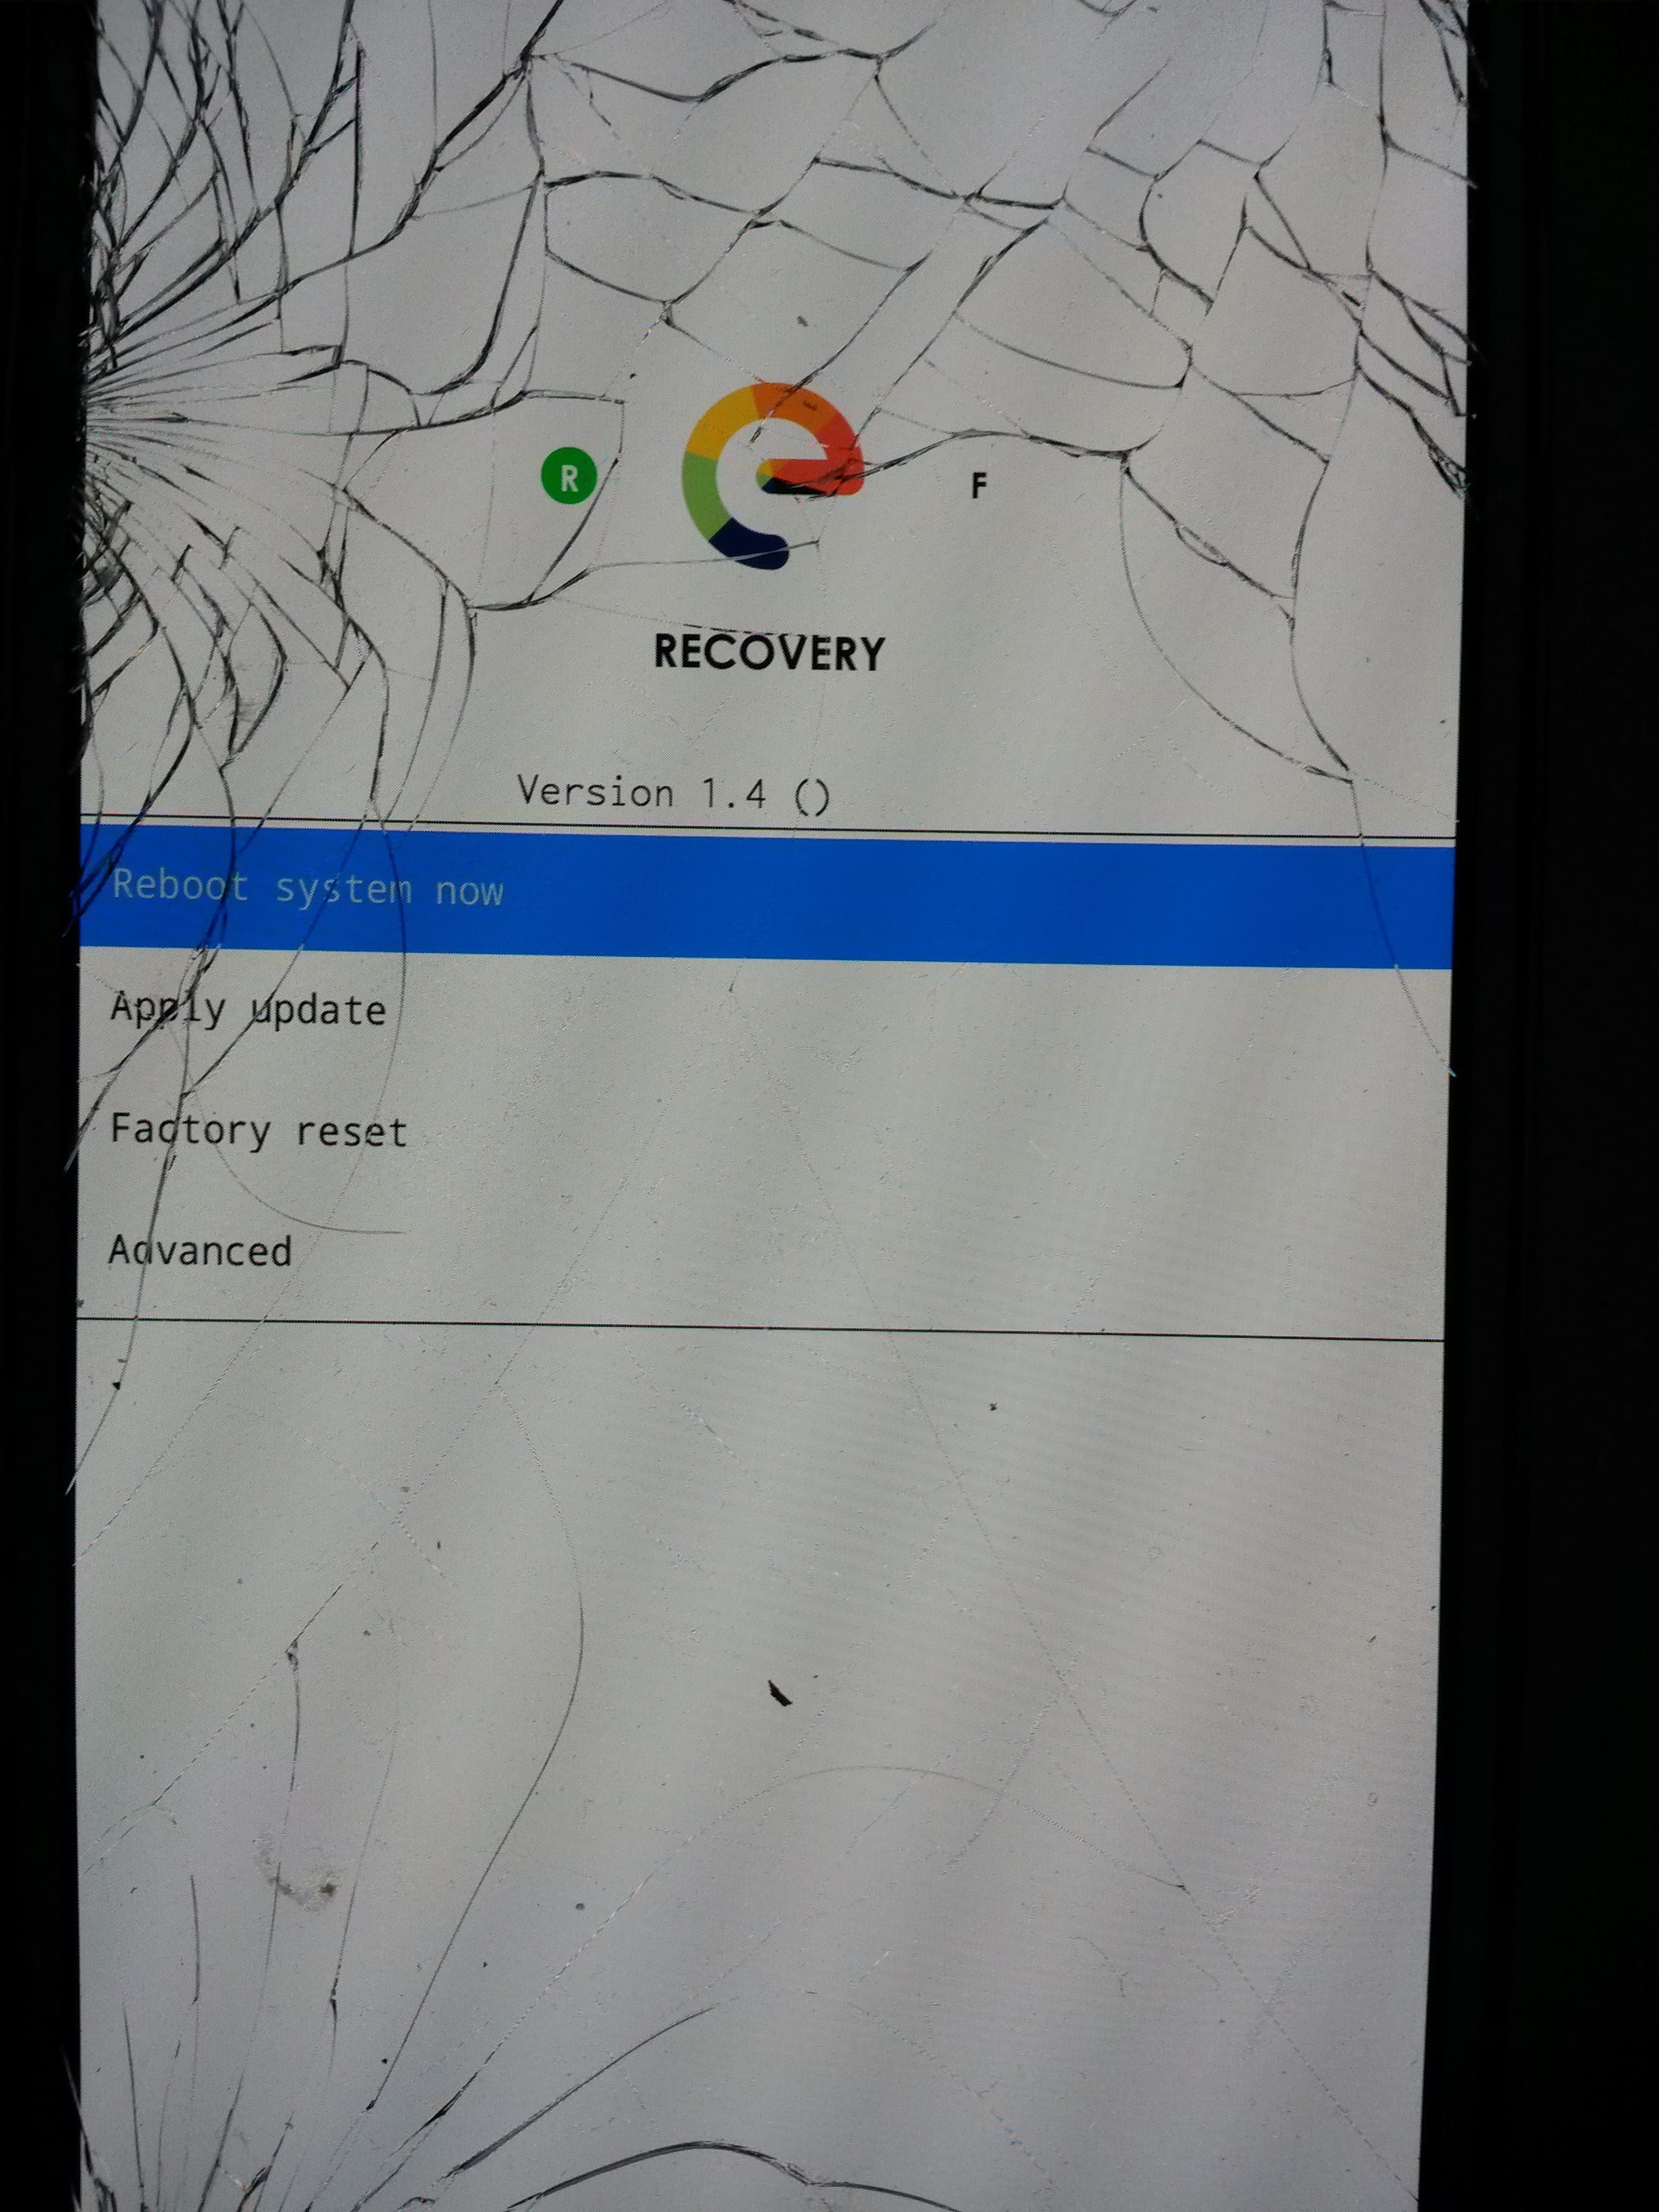
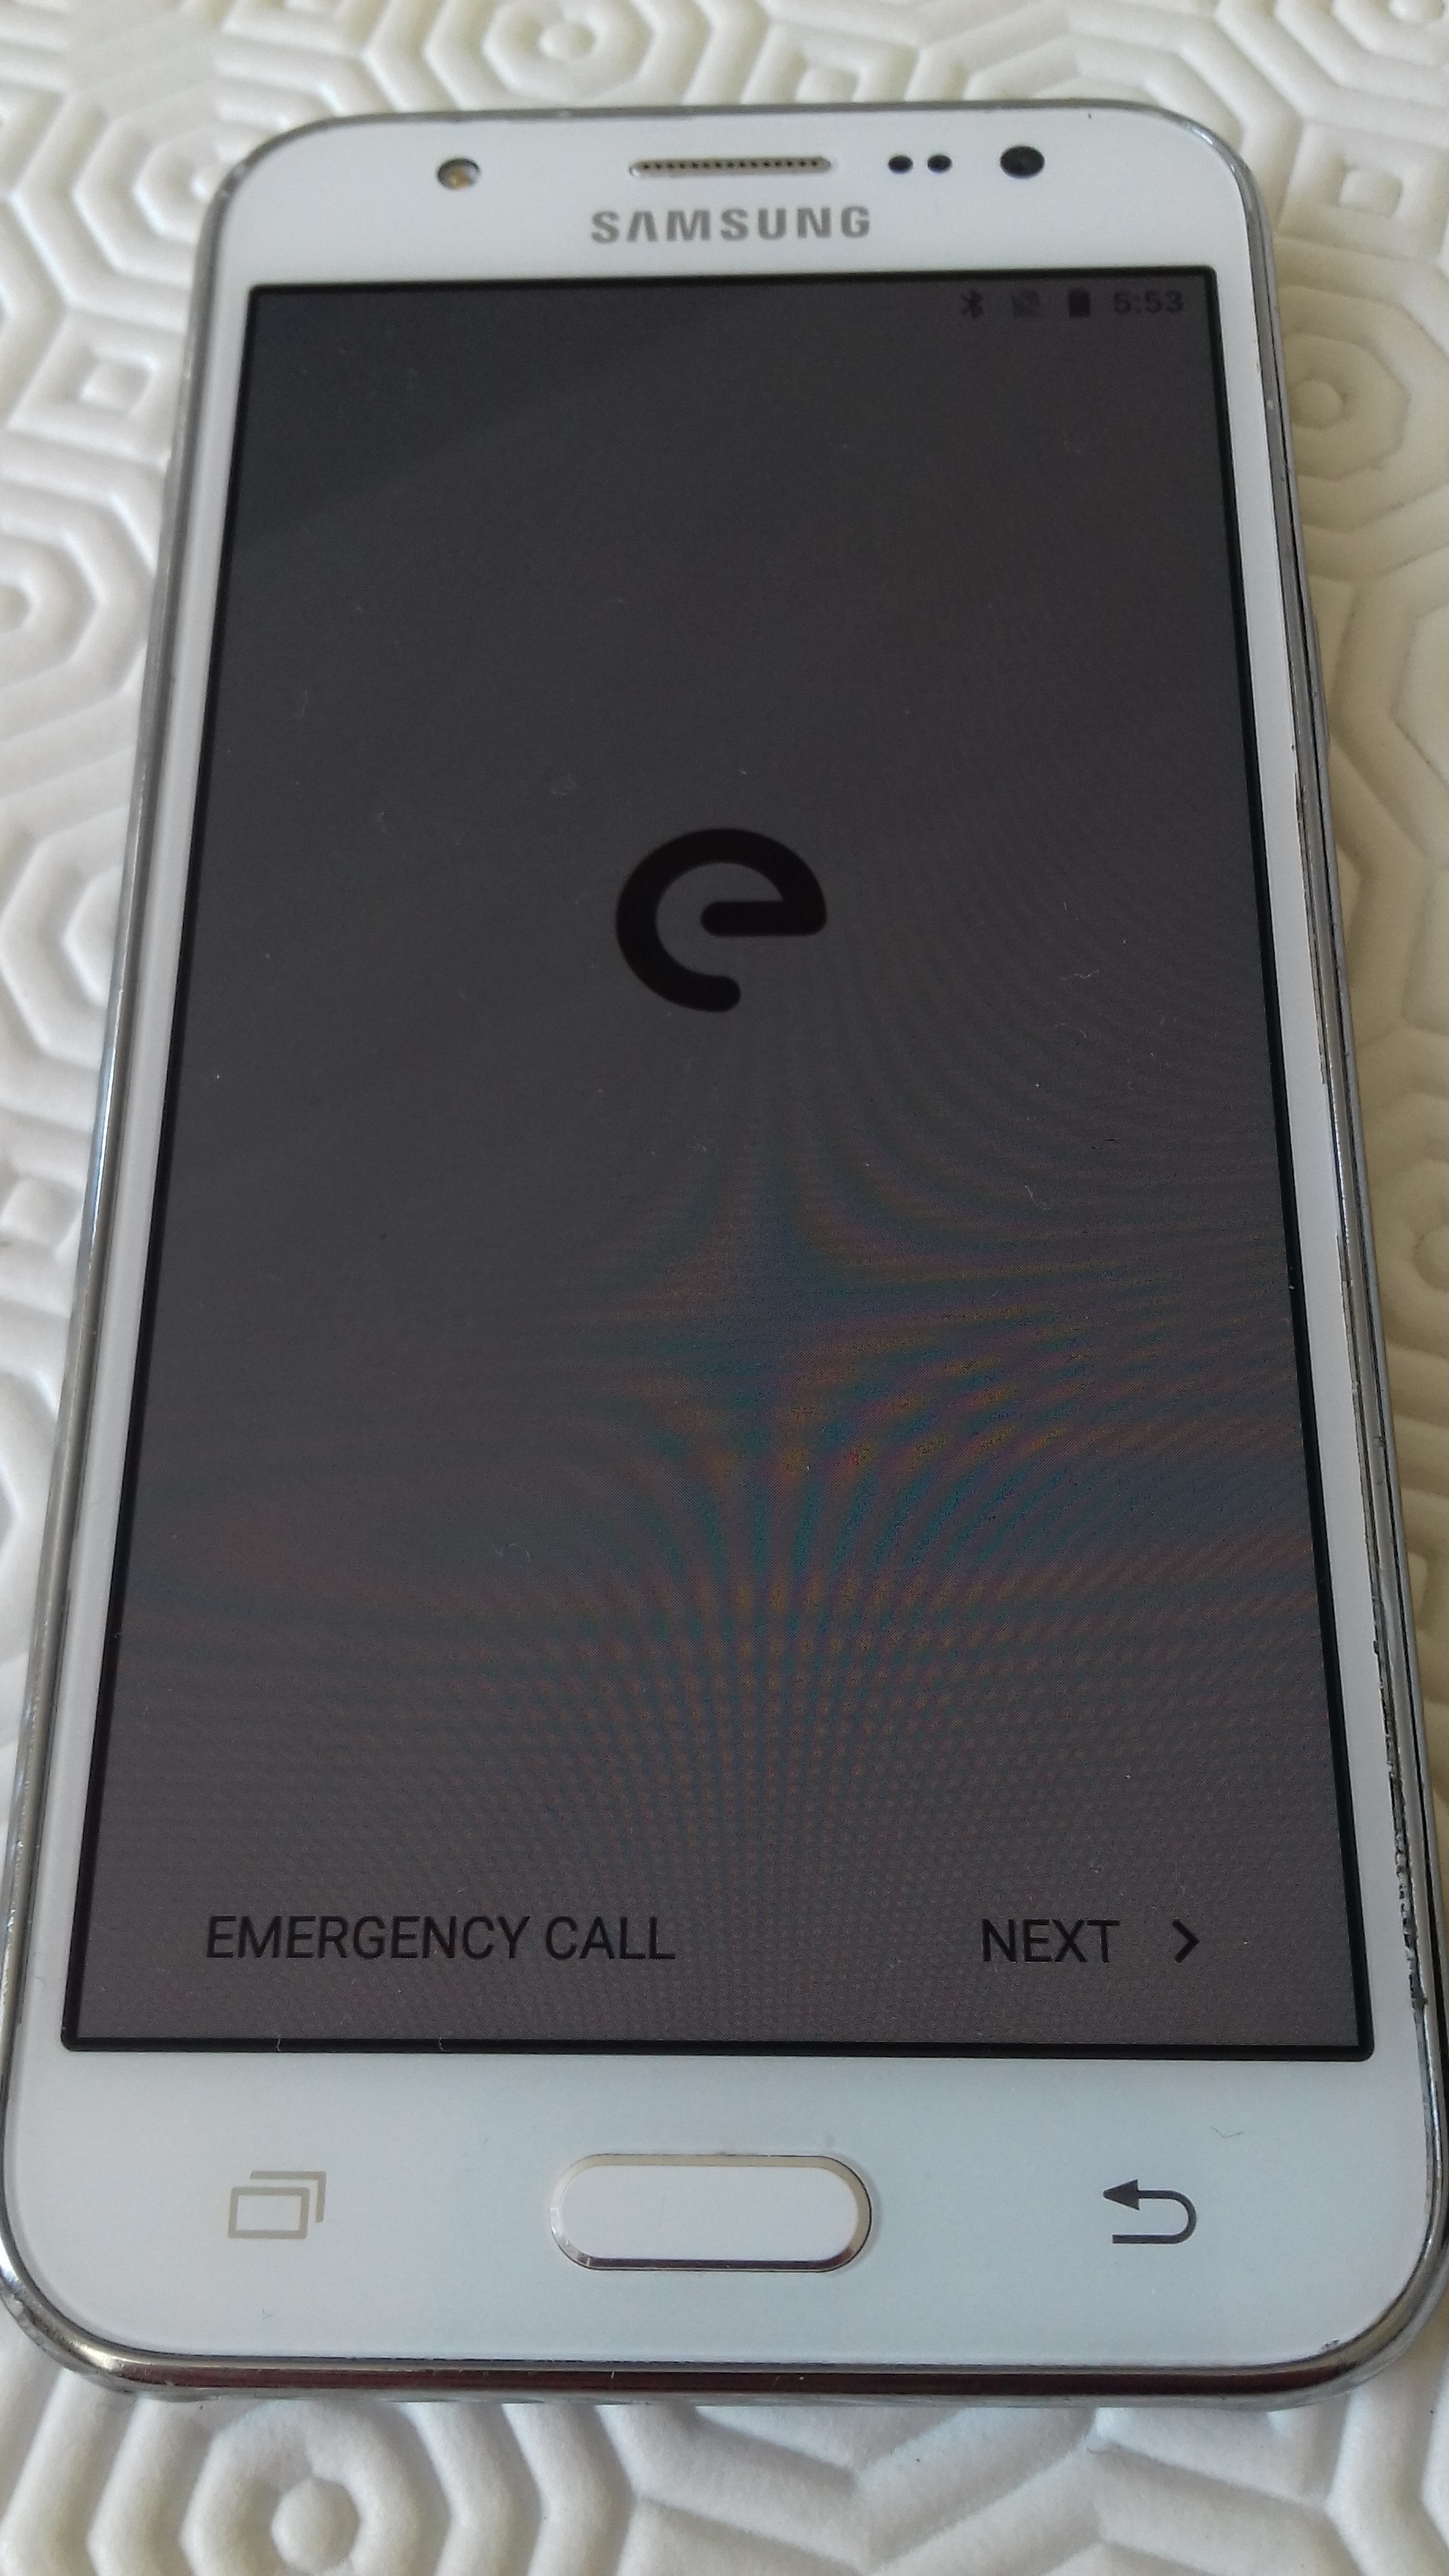
(8) install /e/ from your computer, using the “adb sideload” method
or
(9) Install /e/ without computer using the “Device-Storage” method
(10) post installation settings - root -
.
une version en français est disponible (elle n’est pas aussi complete…)
.
an Unified Install Guide Project
.
For all devices that have
- a
"e-xxxxxxxxxxx.zip"file on their download page.
and
- a
"recovery-e-xxxxxxxxxx.img"file on their download page.
or a"recovery-IMG-e-xxxxxxxxxx.zip"file on their download page.
.
it is a collaborative and open project, you can help !
- should work for Official and Community supported devices (by the /e/ foundation)
- should also work for Unofficial supported devices (by the /e/ forum’s community)
if you know some "device specific" details or additionals steps like in the documentation suggestions categorie
Please check if it is notified here, if not, feel free to add it properly, (Original Post are editable) or ask us to edit !
- @piero (French language, skilled on Samsung, Fairphone, Pixel, and more…)
@aibd (English language, skilled on Samsung, Oneplus, and more…)
@mihi (German language, skilled on Pixel, Fairphone, Motorola and more…)
@Didou (French language, skilled on Samsung, Oneplus, Motorola, and more…) - and more…
( : the non written under plan priorities could be : )
- presentation of the steps,
on the computer, on the device
- type exceptions
old school device, a only device, a/b devices
- brand exceptions instructions
- common instructions
- device specific steps
- platform specific instructions
.
for other devices that have :
- only a
"IMG-e-xxxxxxxxxxx.zip"file on their download page,(non exhautive device list)
Fairphone :FP3,FP4,FP5,FP6,
Gigaset :GS290,
Murena :one,two,
Nothing :tetris,
OnePlus :avicii,
Google :panther,
Shift :axolotl,otter,
Teracube :sapphire,
Volla :mimir,
- you will need to follow the simplified :
[HOWTO] a Clear Guide to install "IMG-e-builds" when /e/ web installer fails
.
Mission :
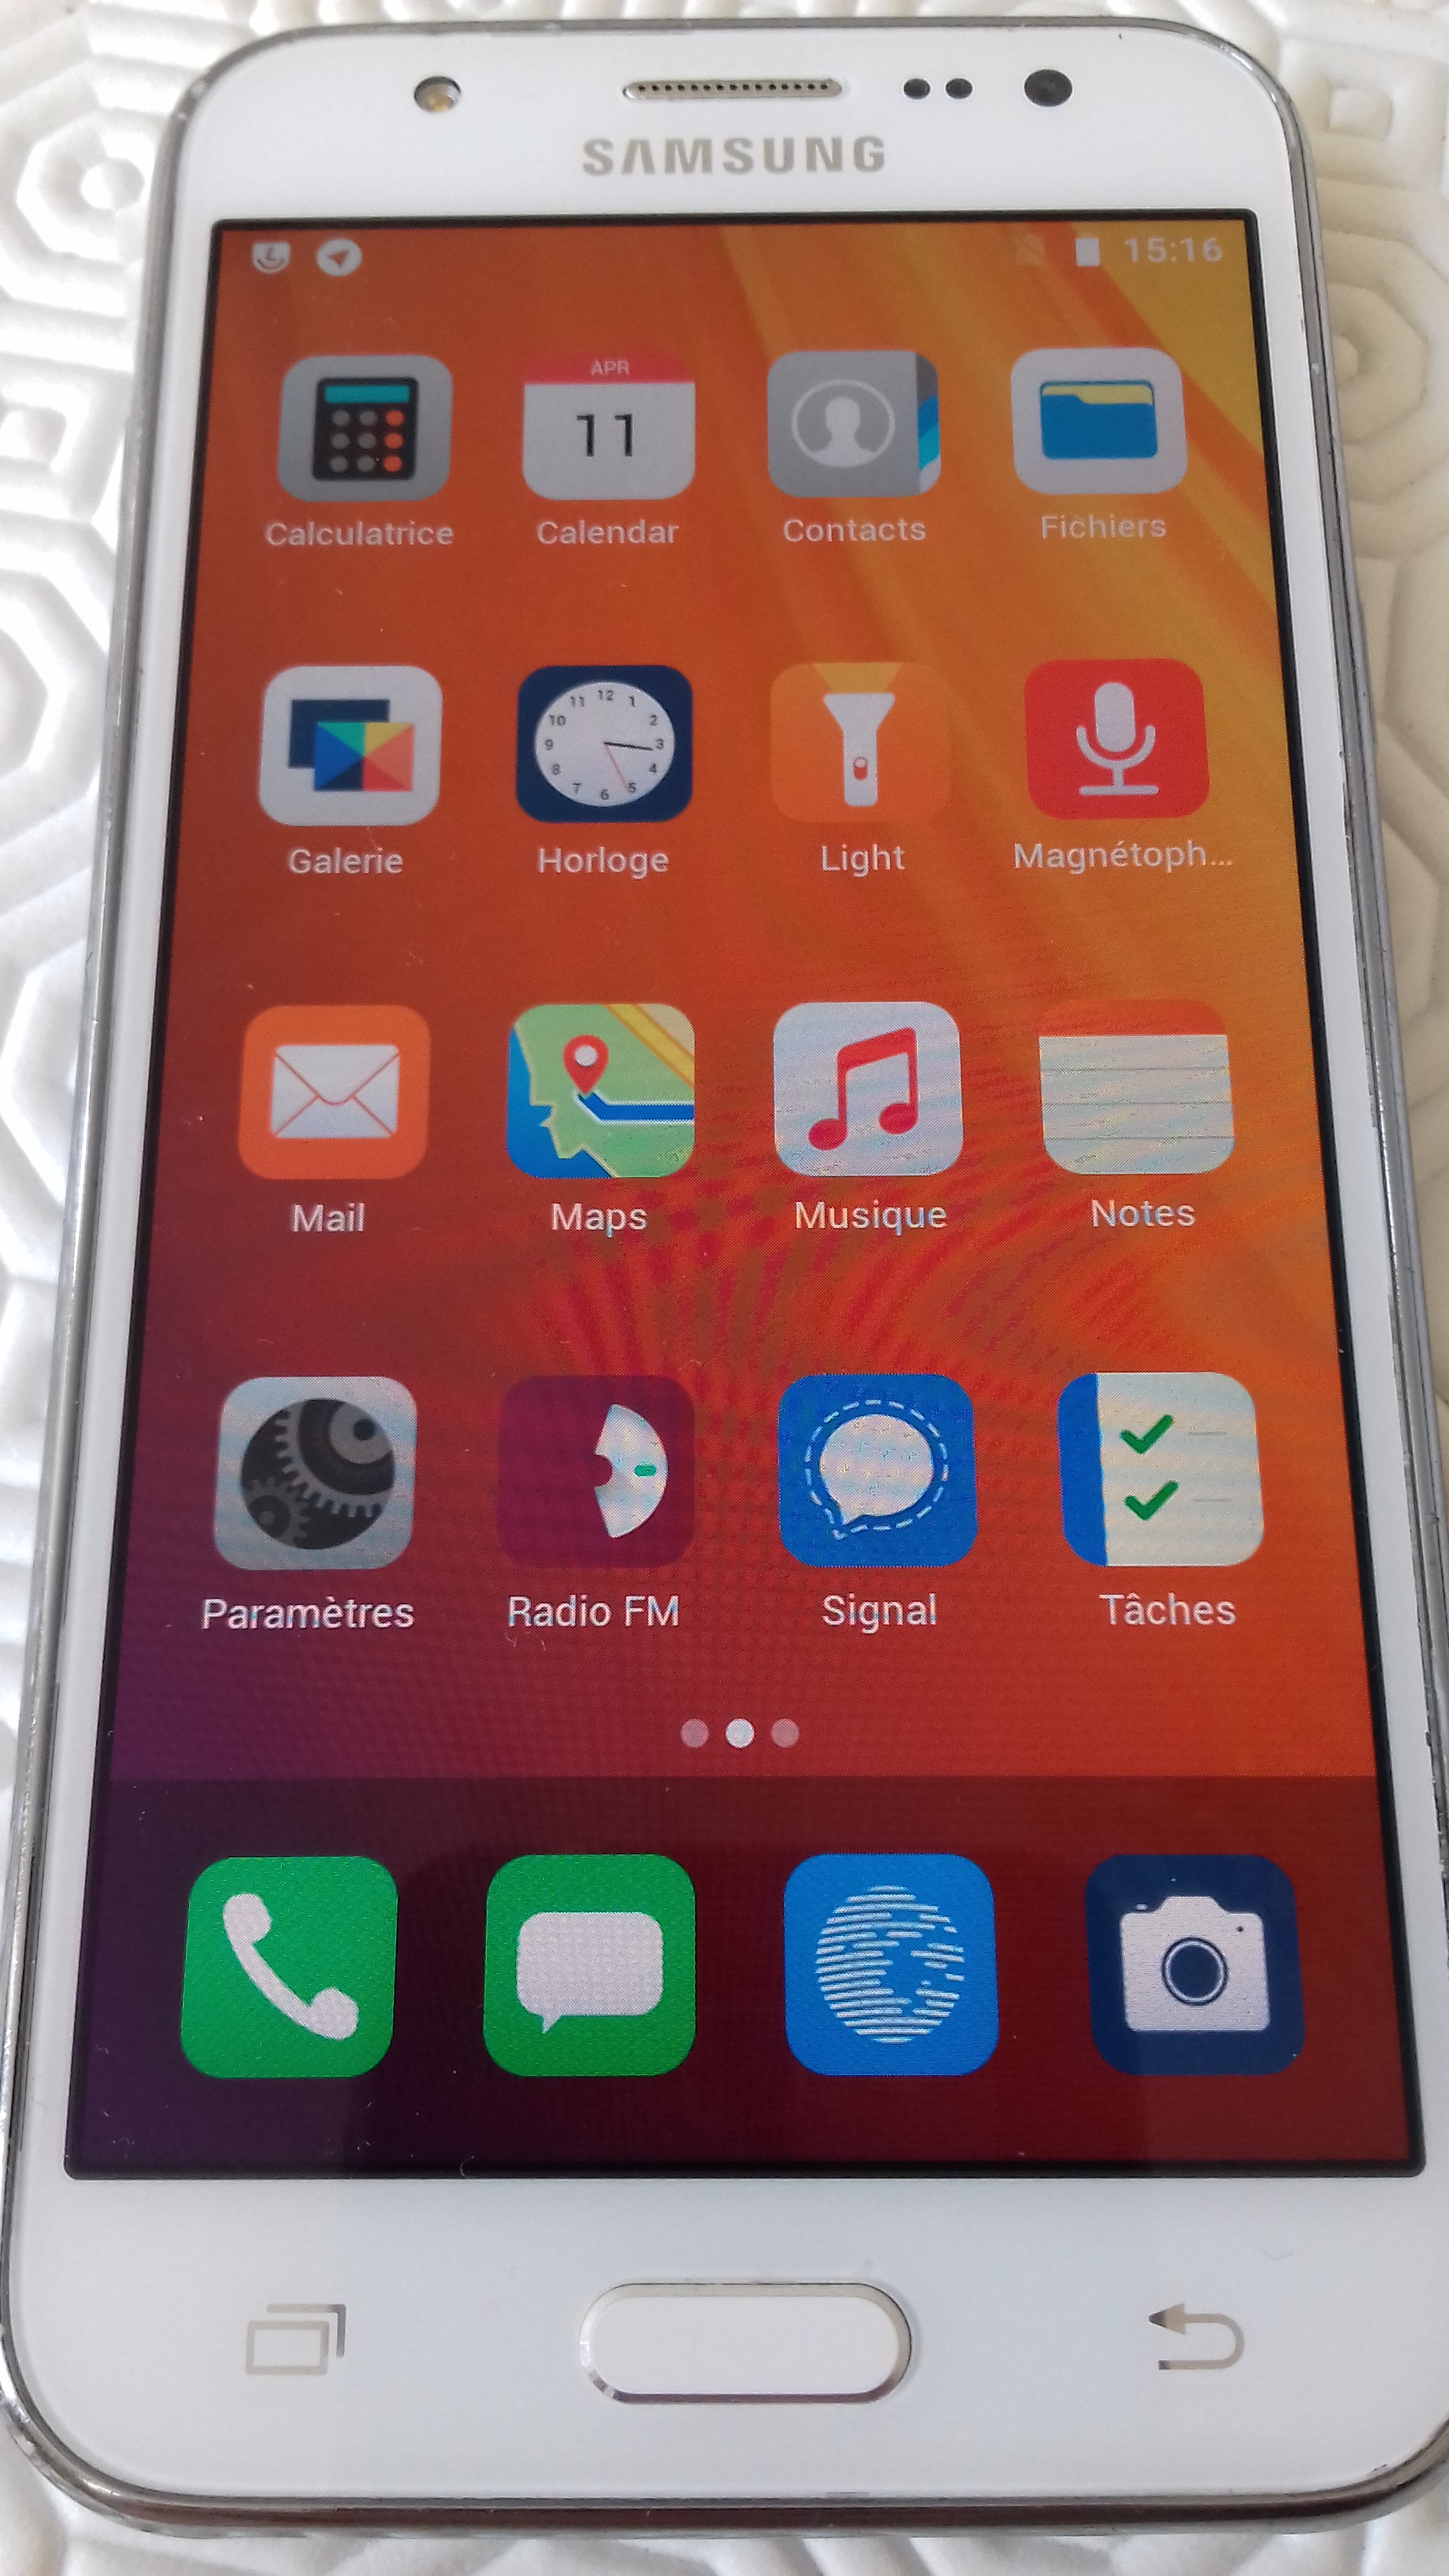
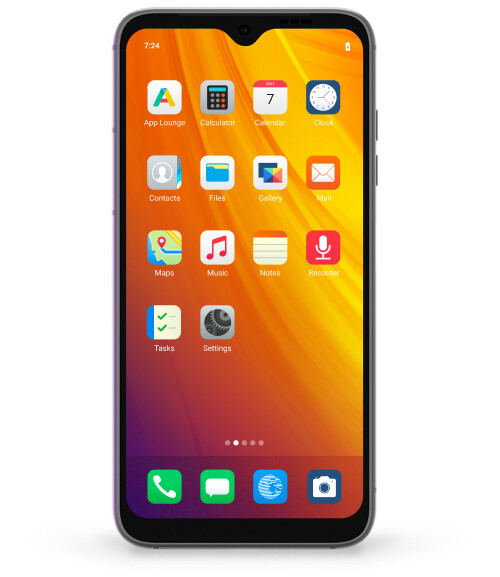
Install /e/OS into the ROM of your compatible device
.
- from a Terminal on the Computer, using the adb sideload recommended method
or - from the Recovery-manager on the Device, using the SDcard or internal storage preferred method
.
Prerequisites:
- an Android device,
- compatible to become a smart /e/ phone or an /e/ Tab, with more than 50% of battery charge.
-
- upgraded to latest relative to /e/ based version of the stock vendor firmware or the latest Stock Vendor Firmware available if not officially maintained anymore.
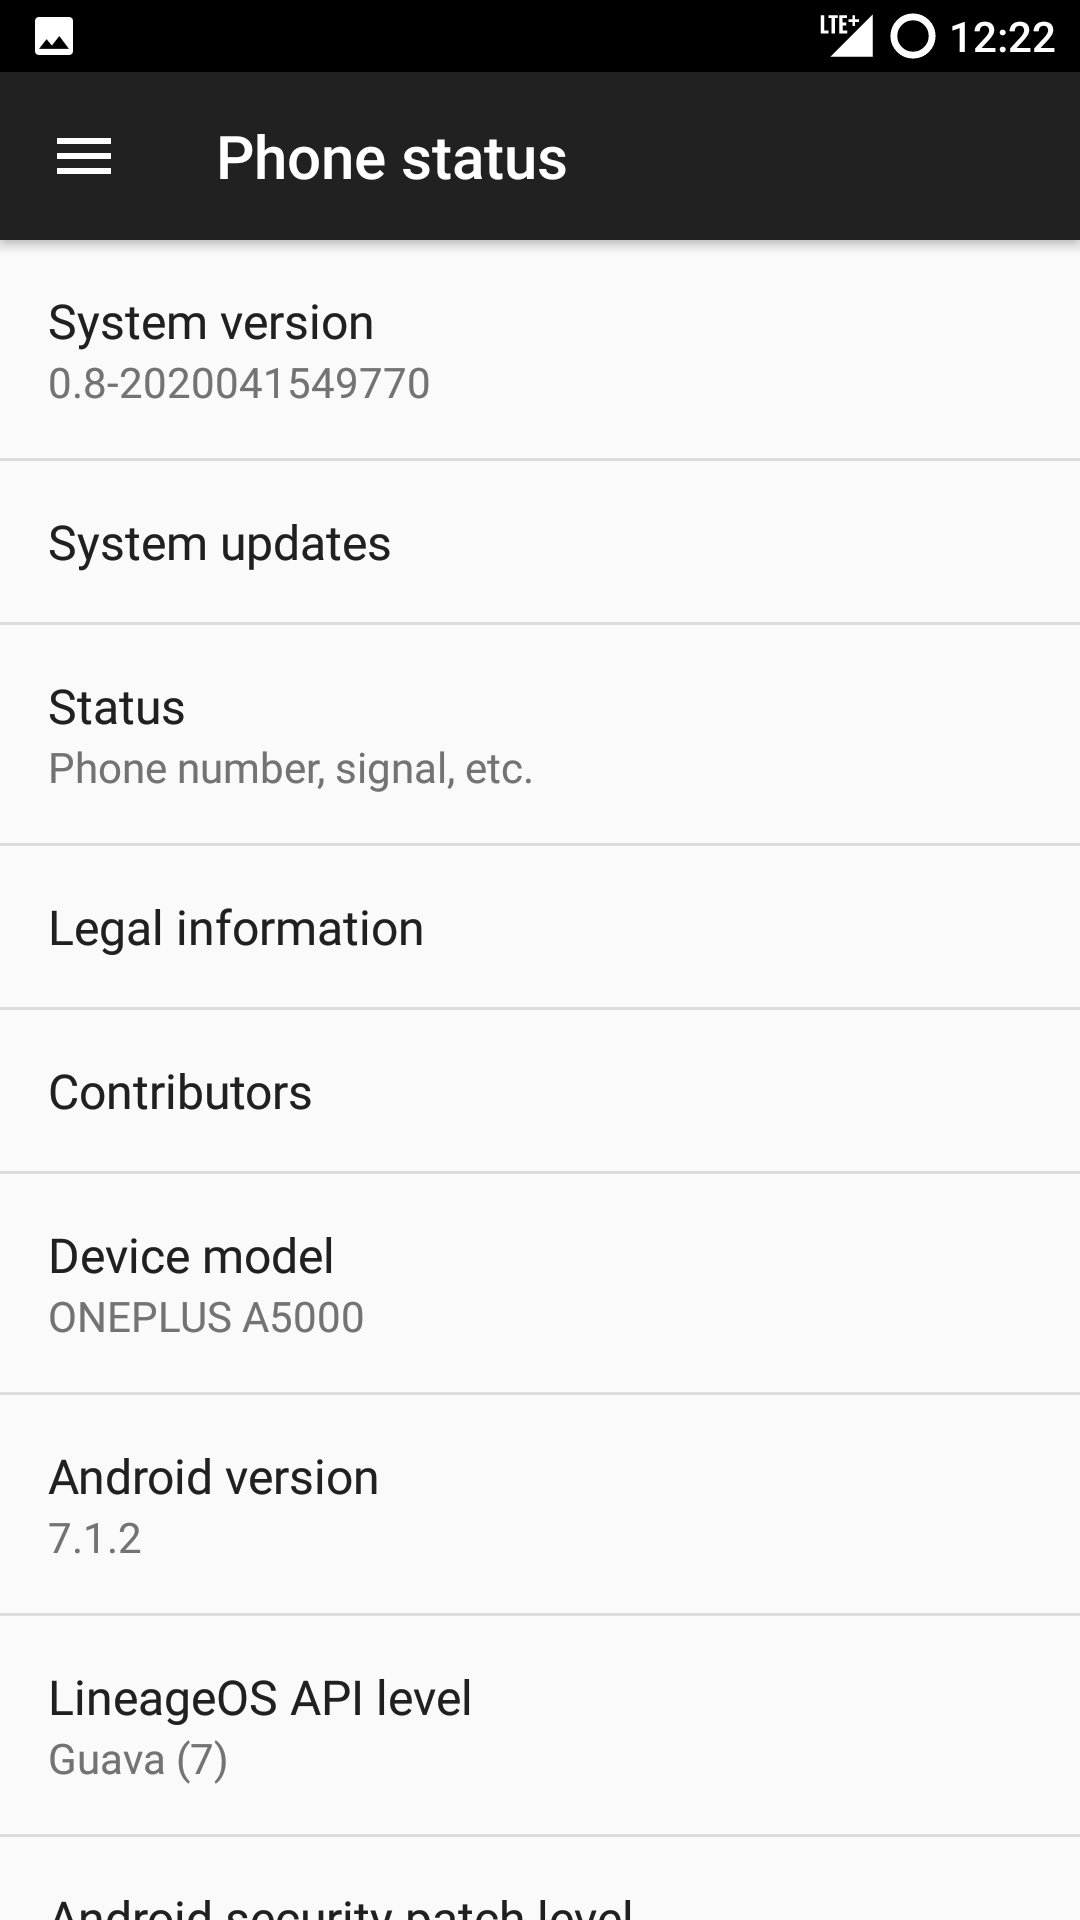
But /e/'s related “Android Security Patch Level” must be newer than the one currently installed on the device.
- upgraded to latest relative to /e/ based version of the stock vendor firmware or the latest Stock Vendor Firmware available if not officially maintained anymore.
-
- or already running a Custom android OS ( or simply a custom recovery )
- With complete backup of important data on a PC or an external drive or source.
- Without PIN code, or password, or gesture, or connected to a gogol account or SIM locked from a carrier
-
a Personal Computer
running Windows, or MacOS, or Linux,
a connection to the internet ( could be on the phone itself ),
and a data functional USB cable. ( USB.3 port is not recommended ) -
Patience to follow the steps …
unlock the boot-loader,
flash a custom recovery manager,
and finally the user / privacy friendly /e/OS
into the ROM of your android device
.
Presentation
.
clic here to see details
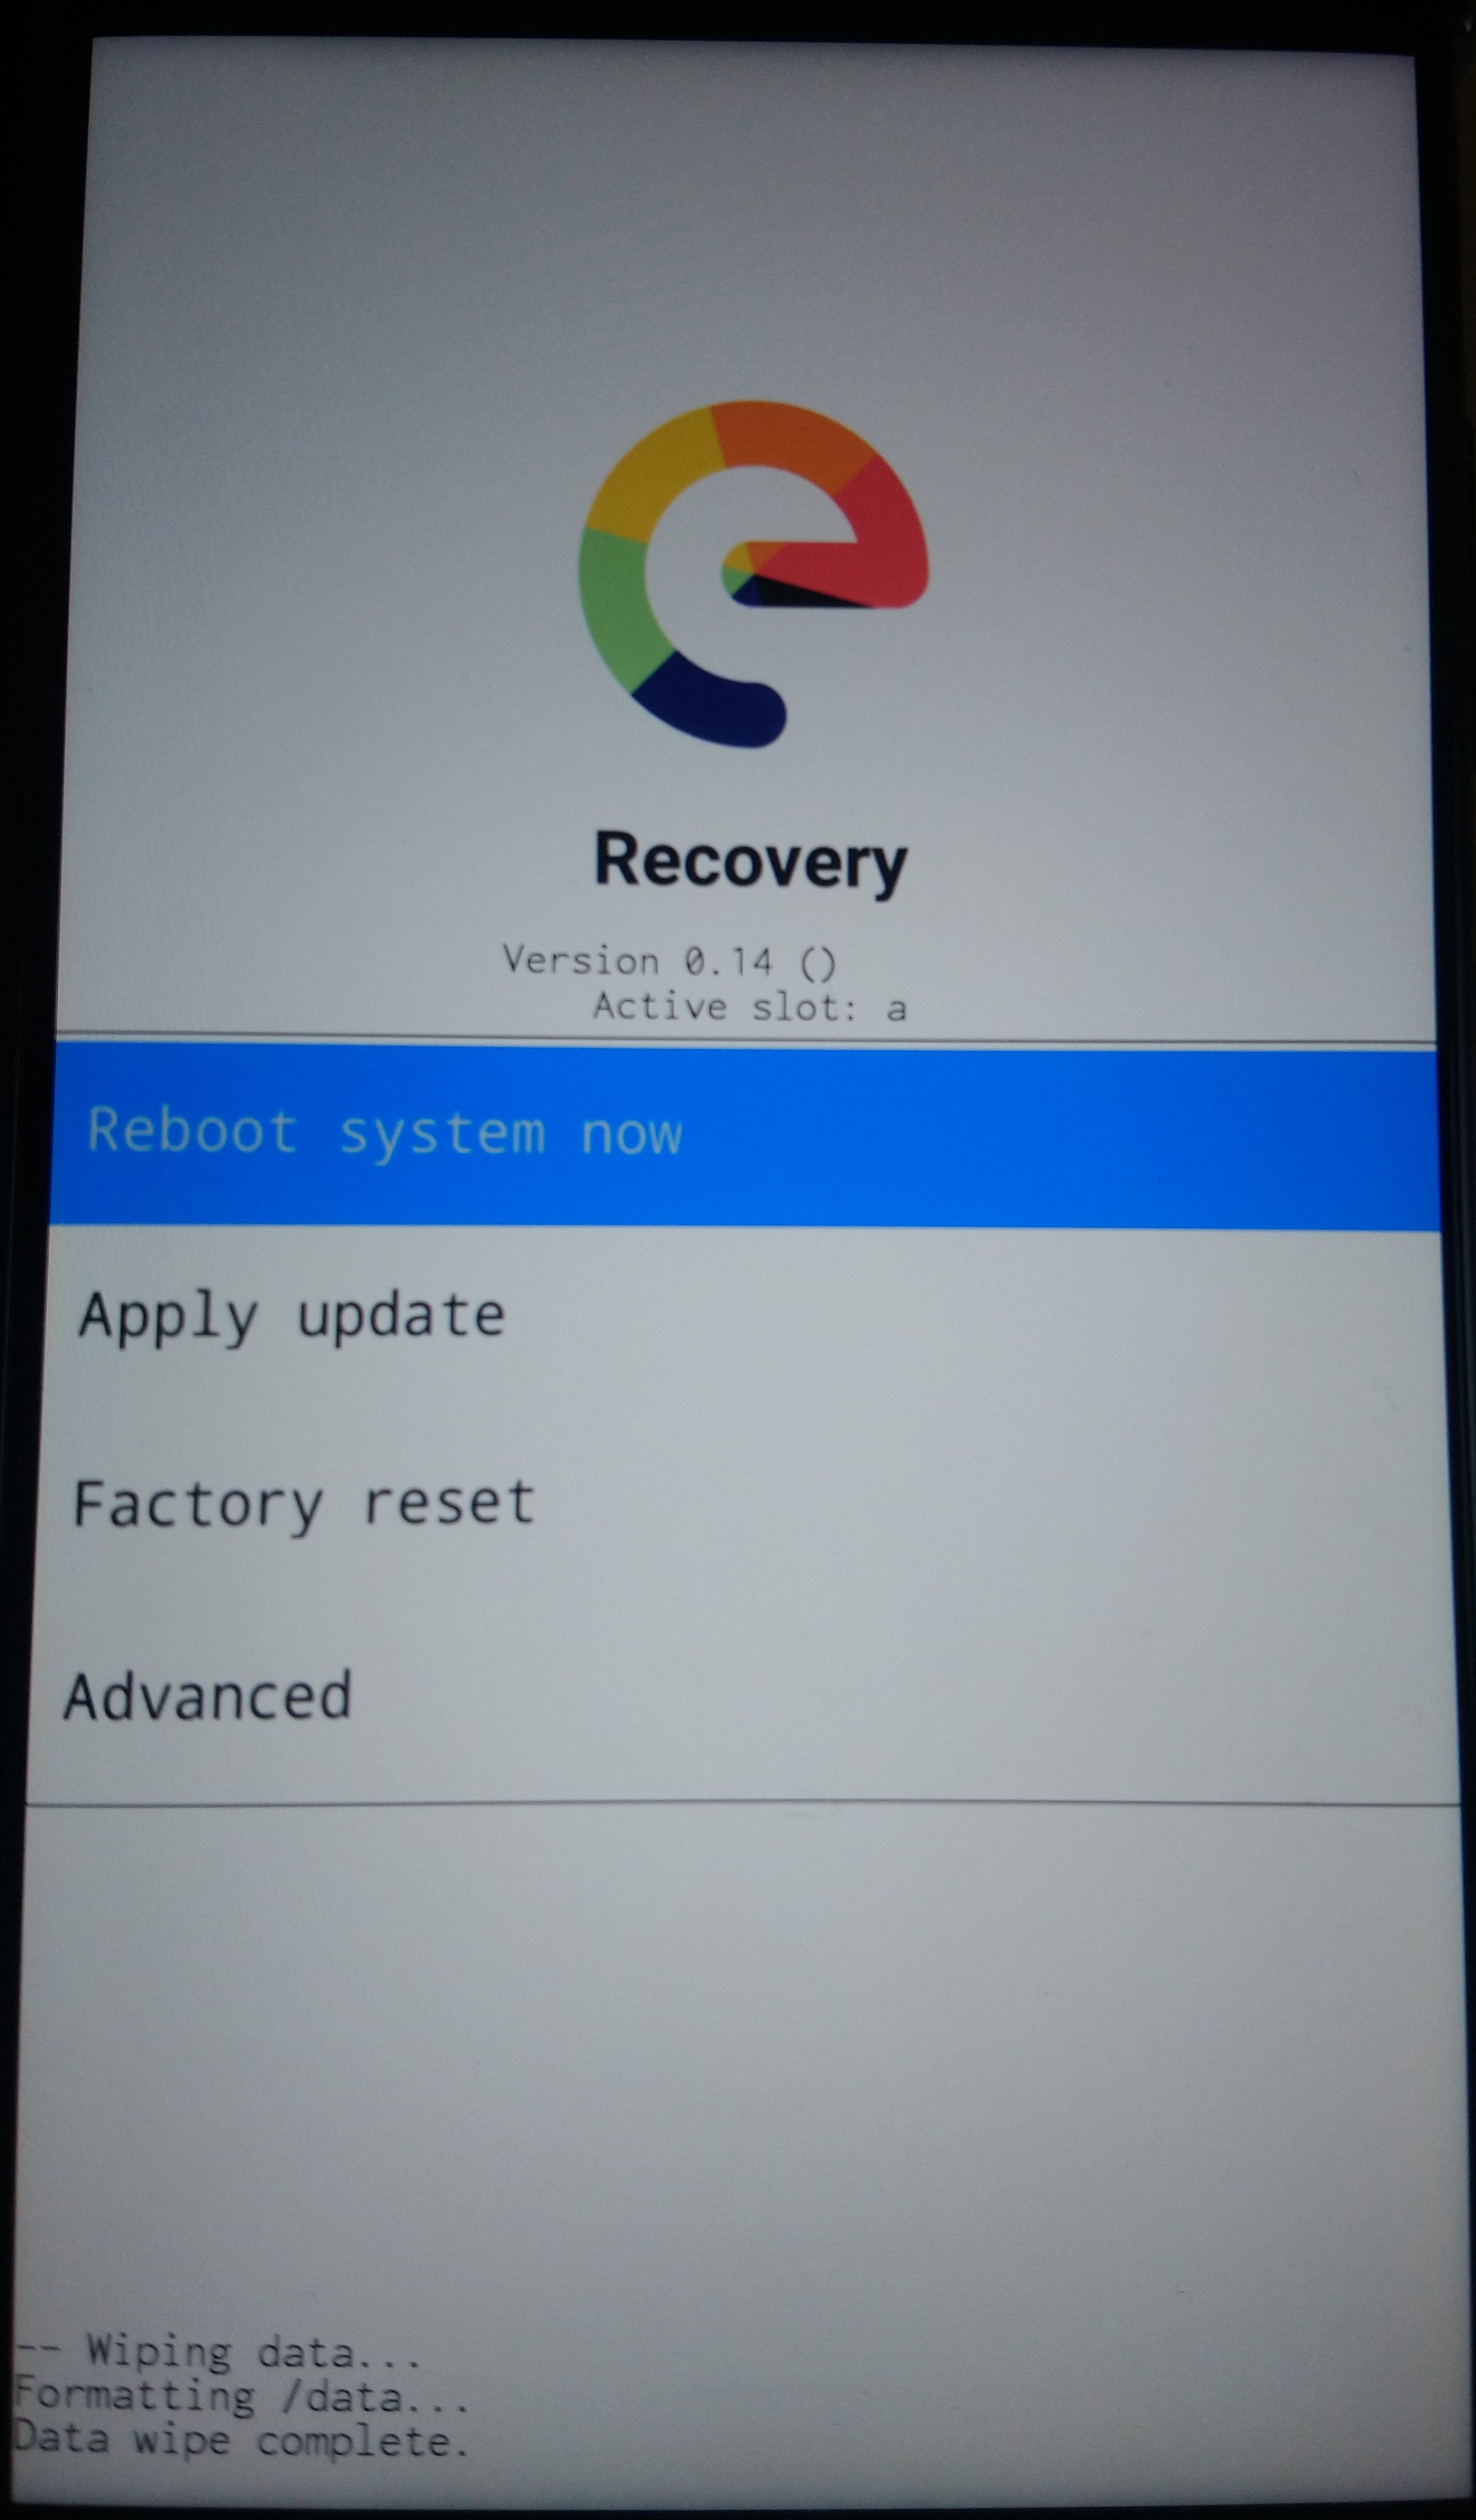
if your device already run another custom OS, you may have TWRP ( or another custom recovery ) already installed, so go to step .(8). or .(9)
if your device already run /e/ version R(a11), S(a12), T(a13) and you want to update or upgrade
without data loss to /e/ version S(a12), T(a13), U(a14), see this thread : Dirty upgrade to /e/OS-T is possible ! (But not for all devices)
if your device run an Official-Android Stock-Vendor Firmware version, ( realized by your Carrier / Vendor / Gogol )
so, this step by step guide is for you.
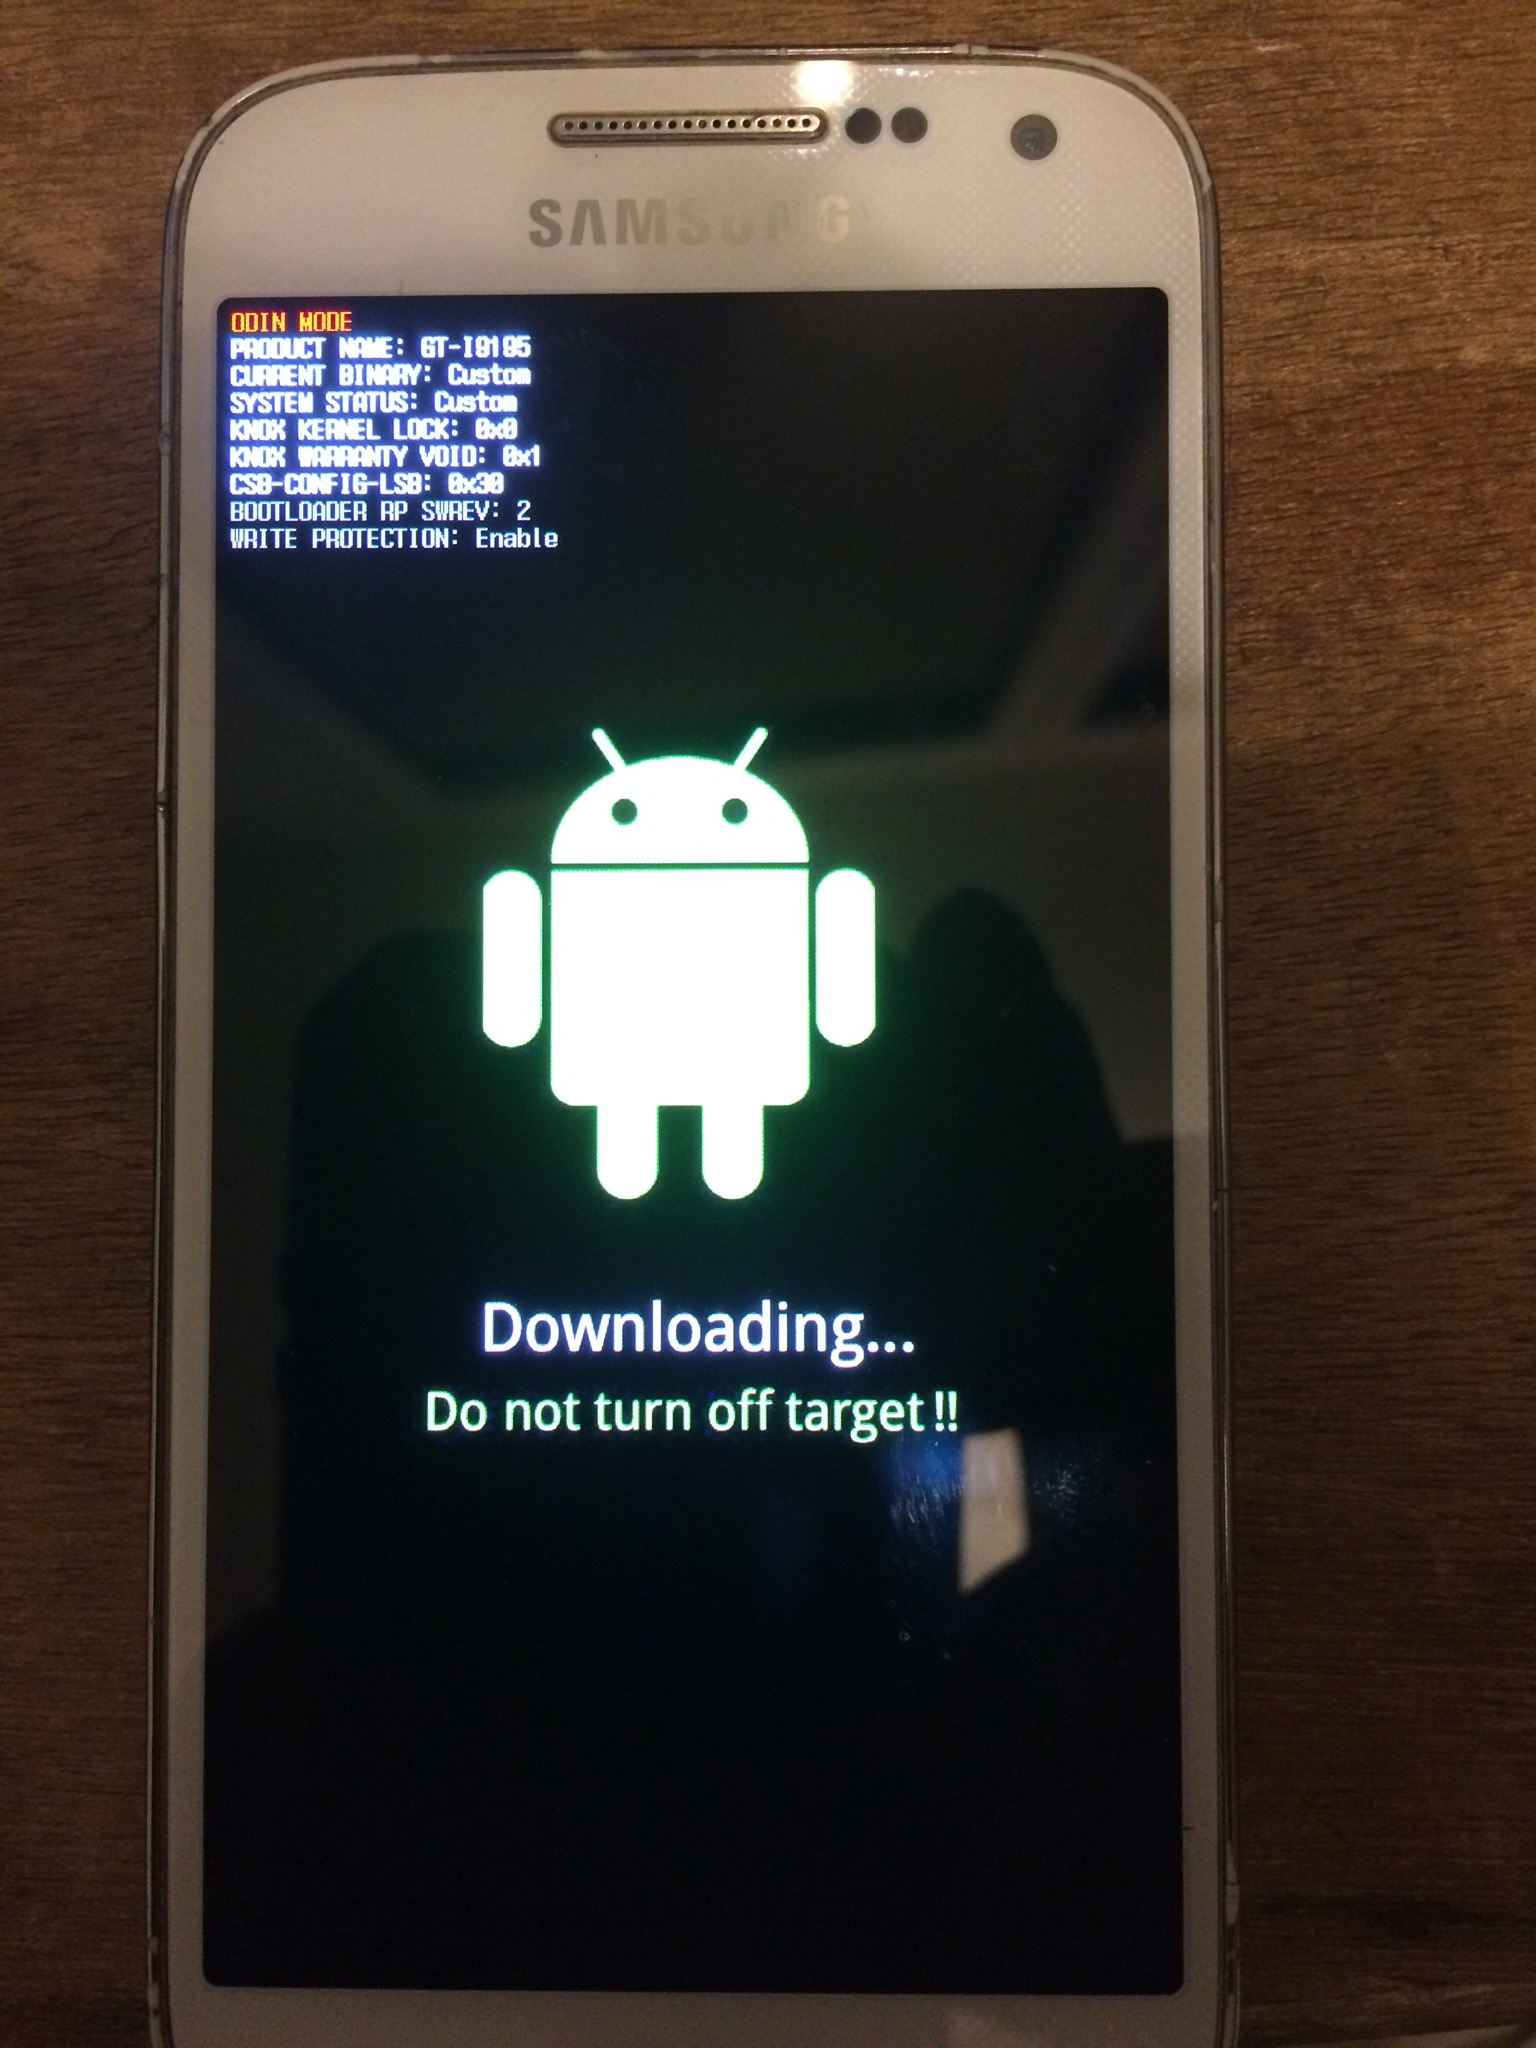
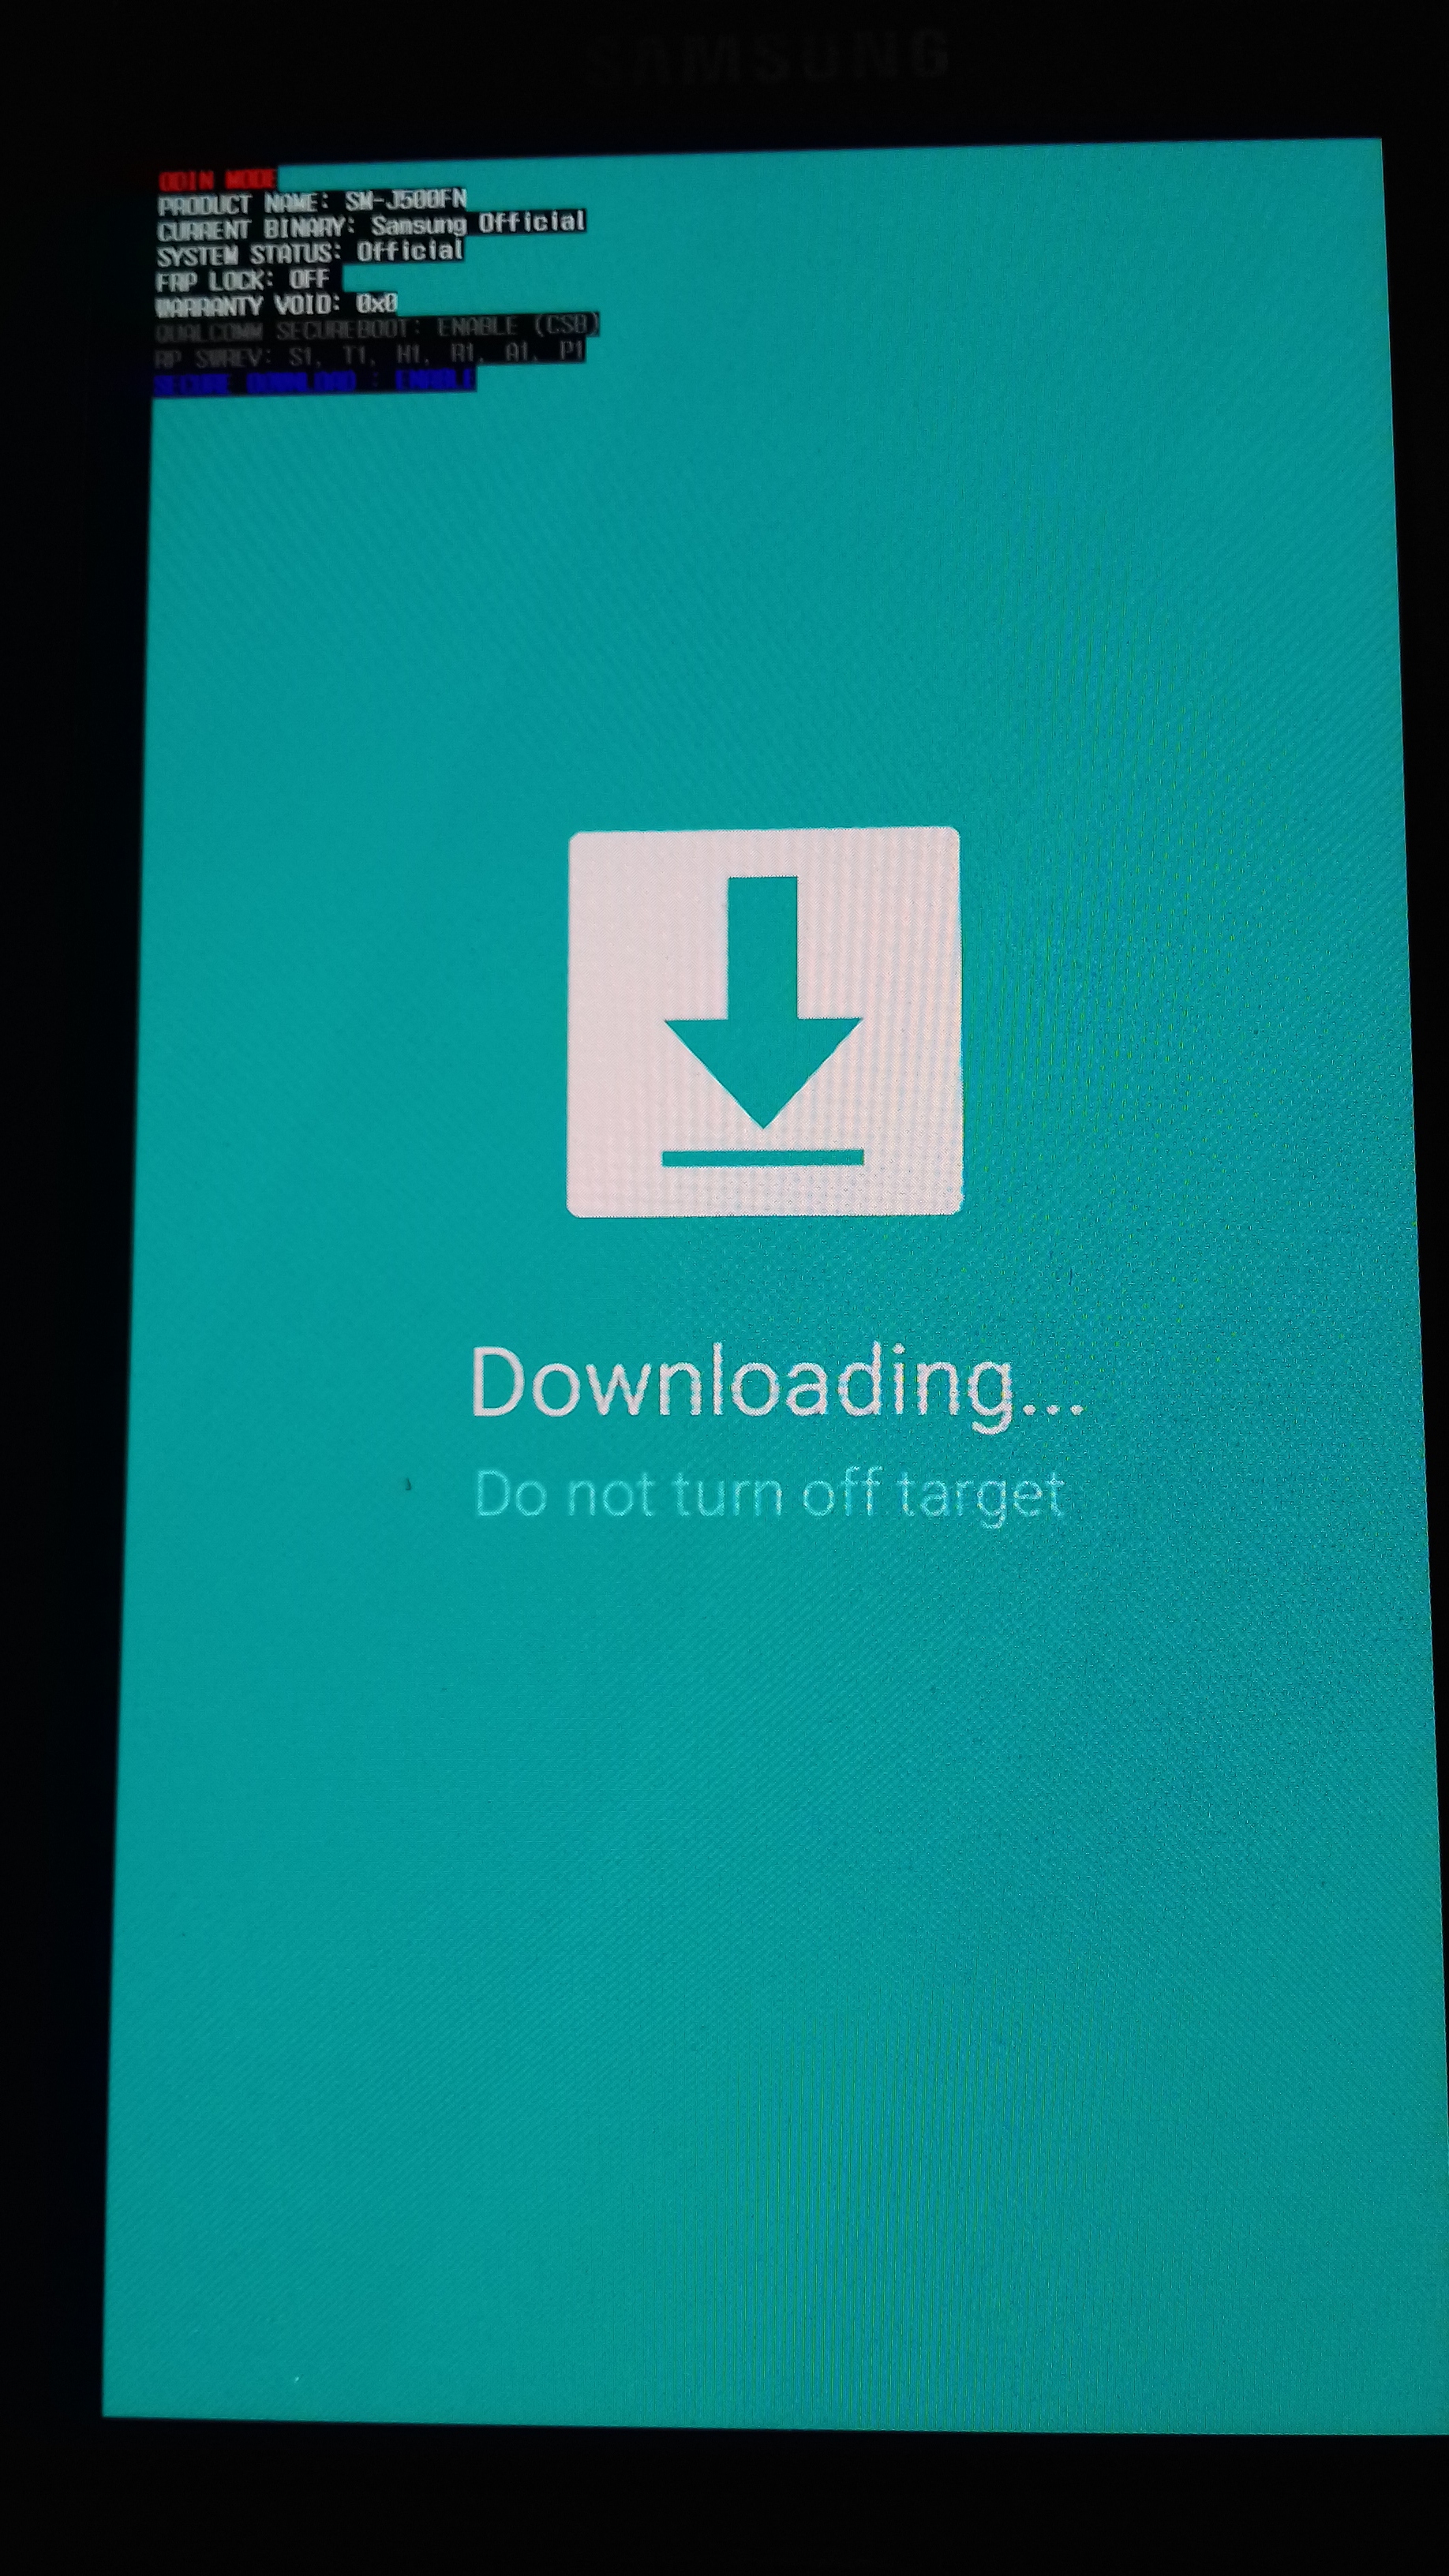
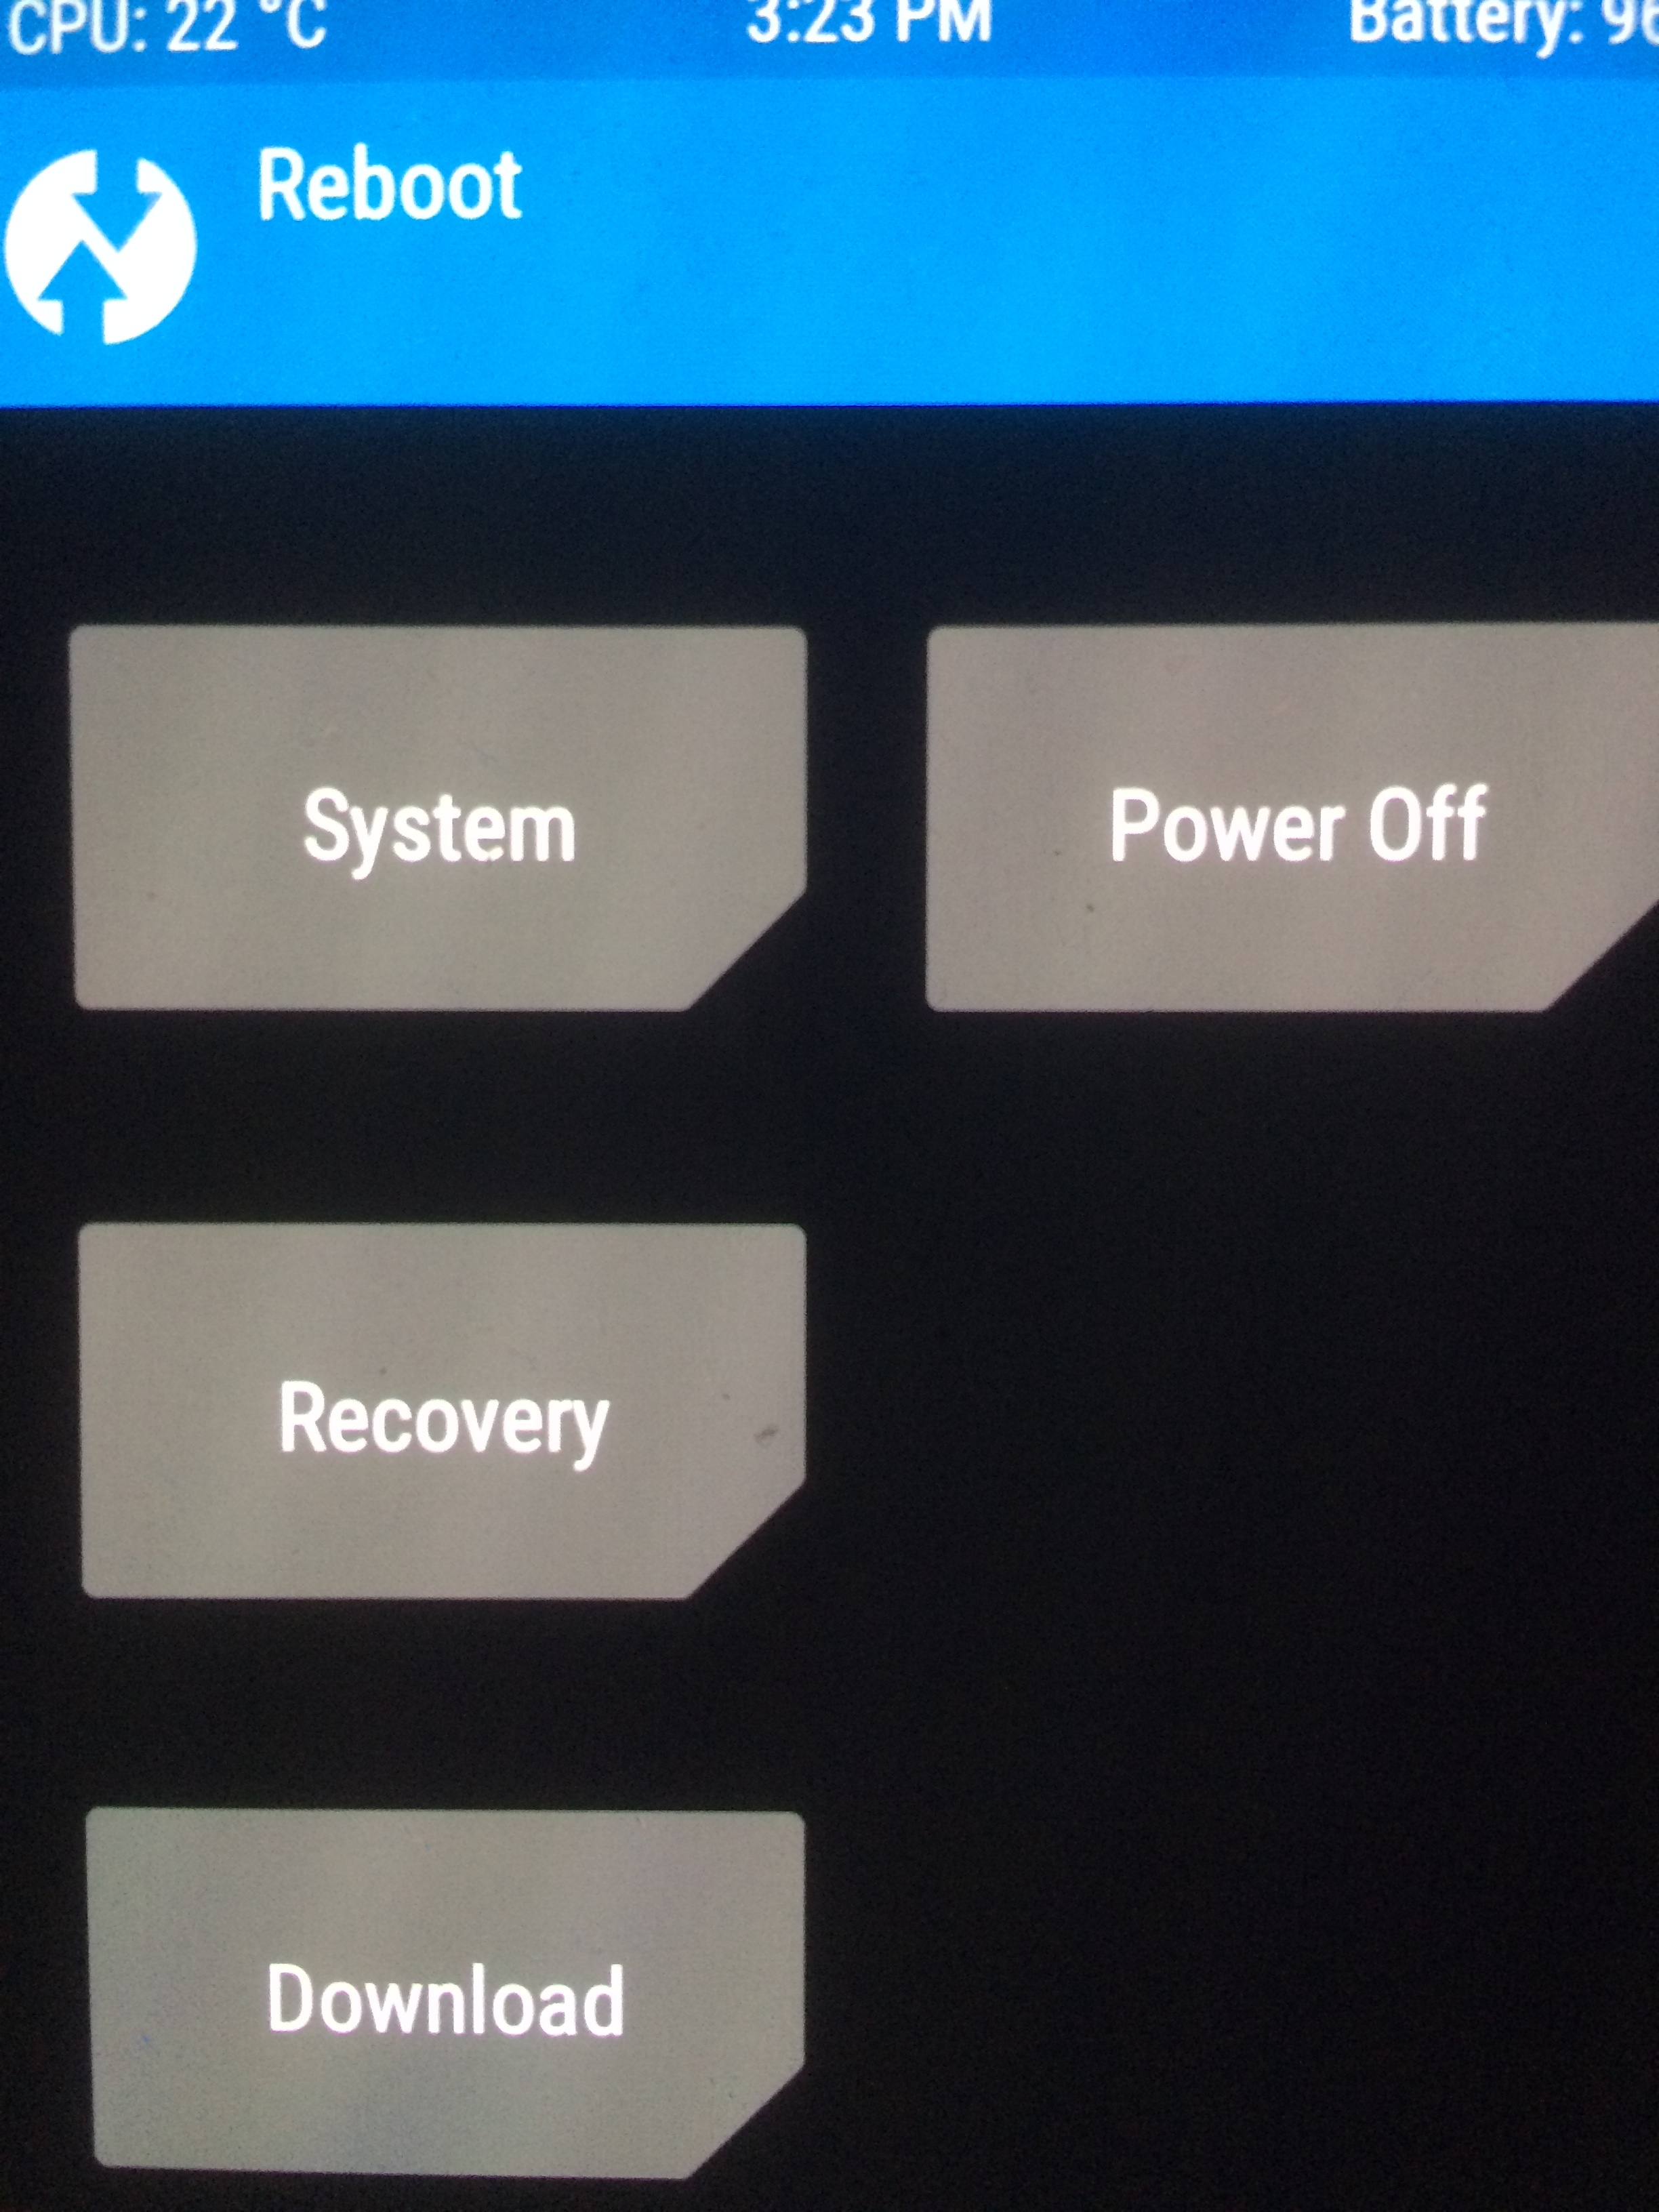
most devices comes with three booting modes
- boot to system mode.
- boot to recovery mode.
- boot to boot-loader mode = download mode = fastboot mode
.

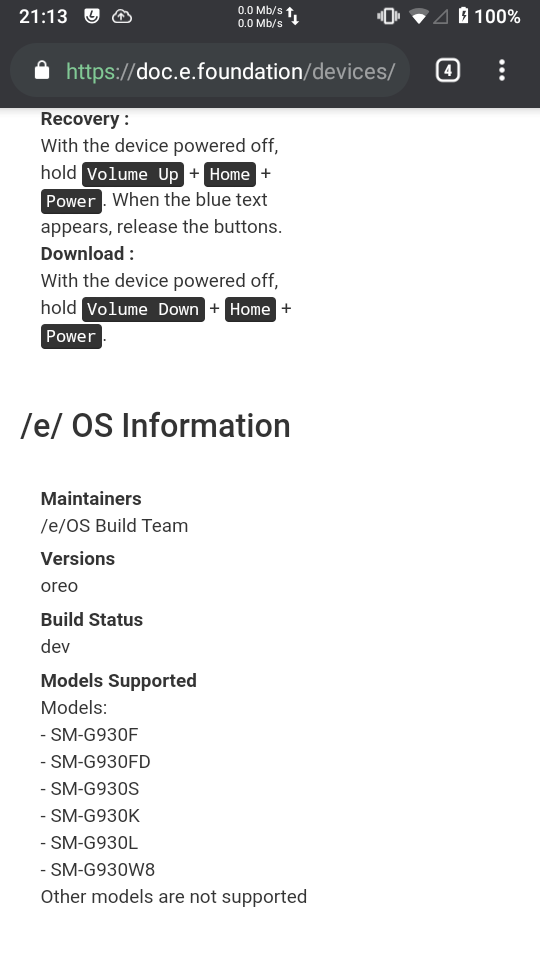
Useful key combinations to load alternative boot mode
.
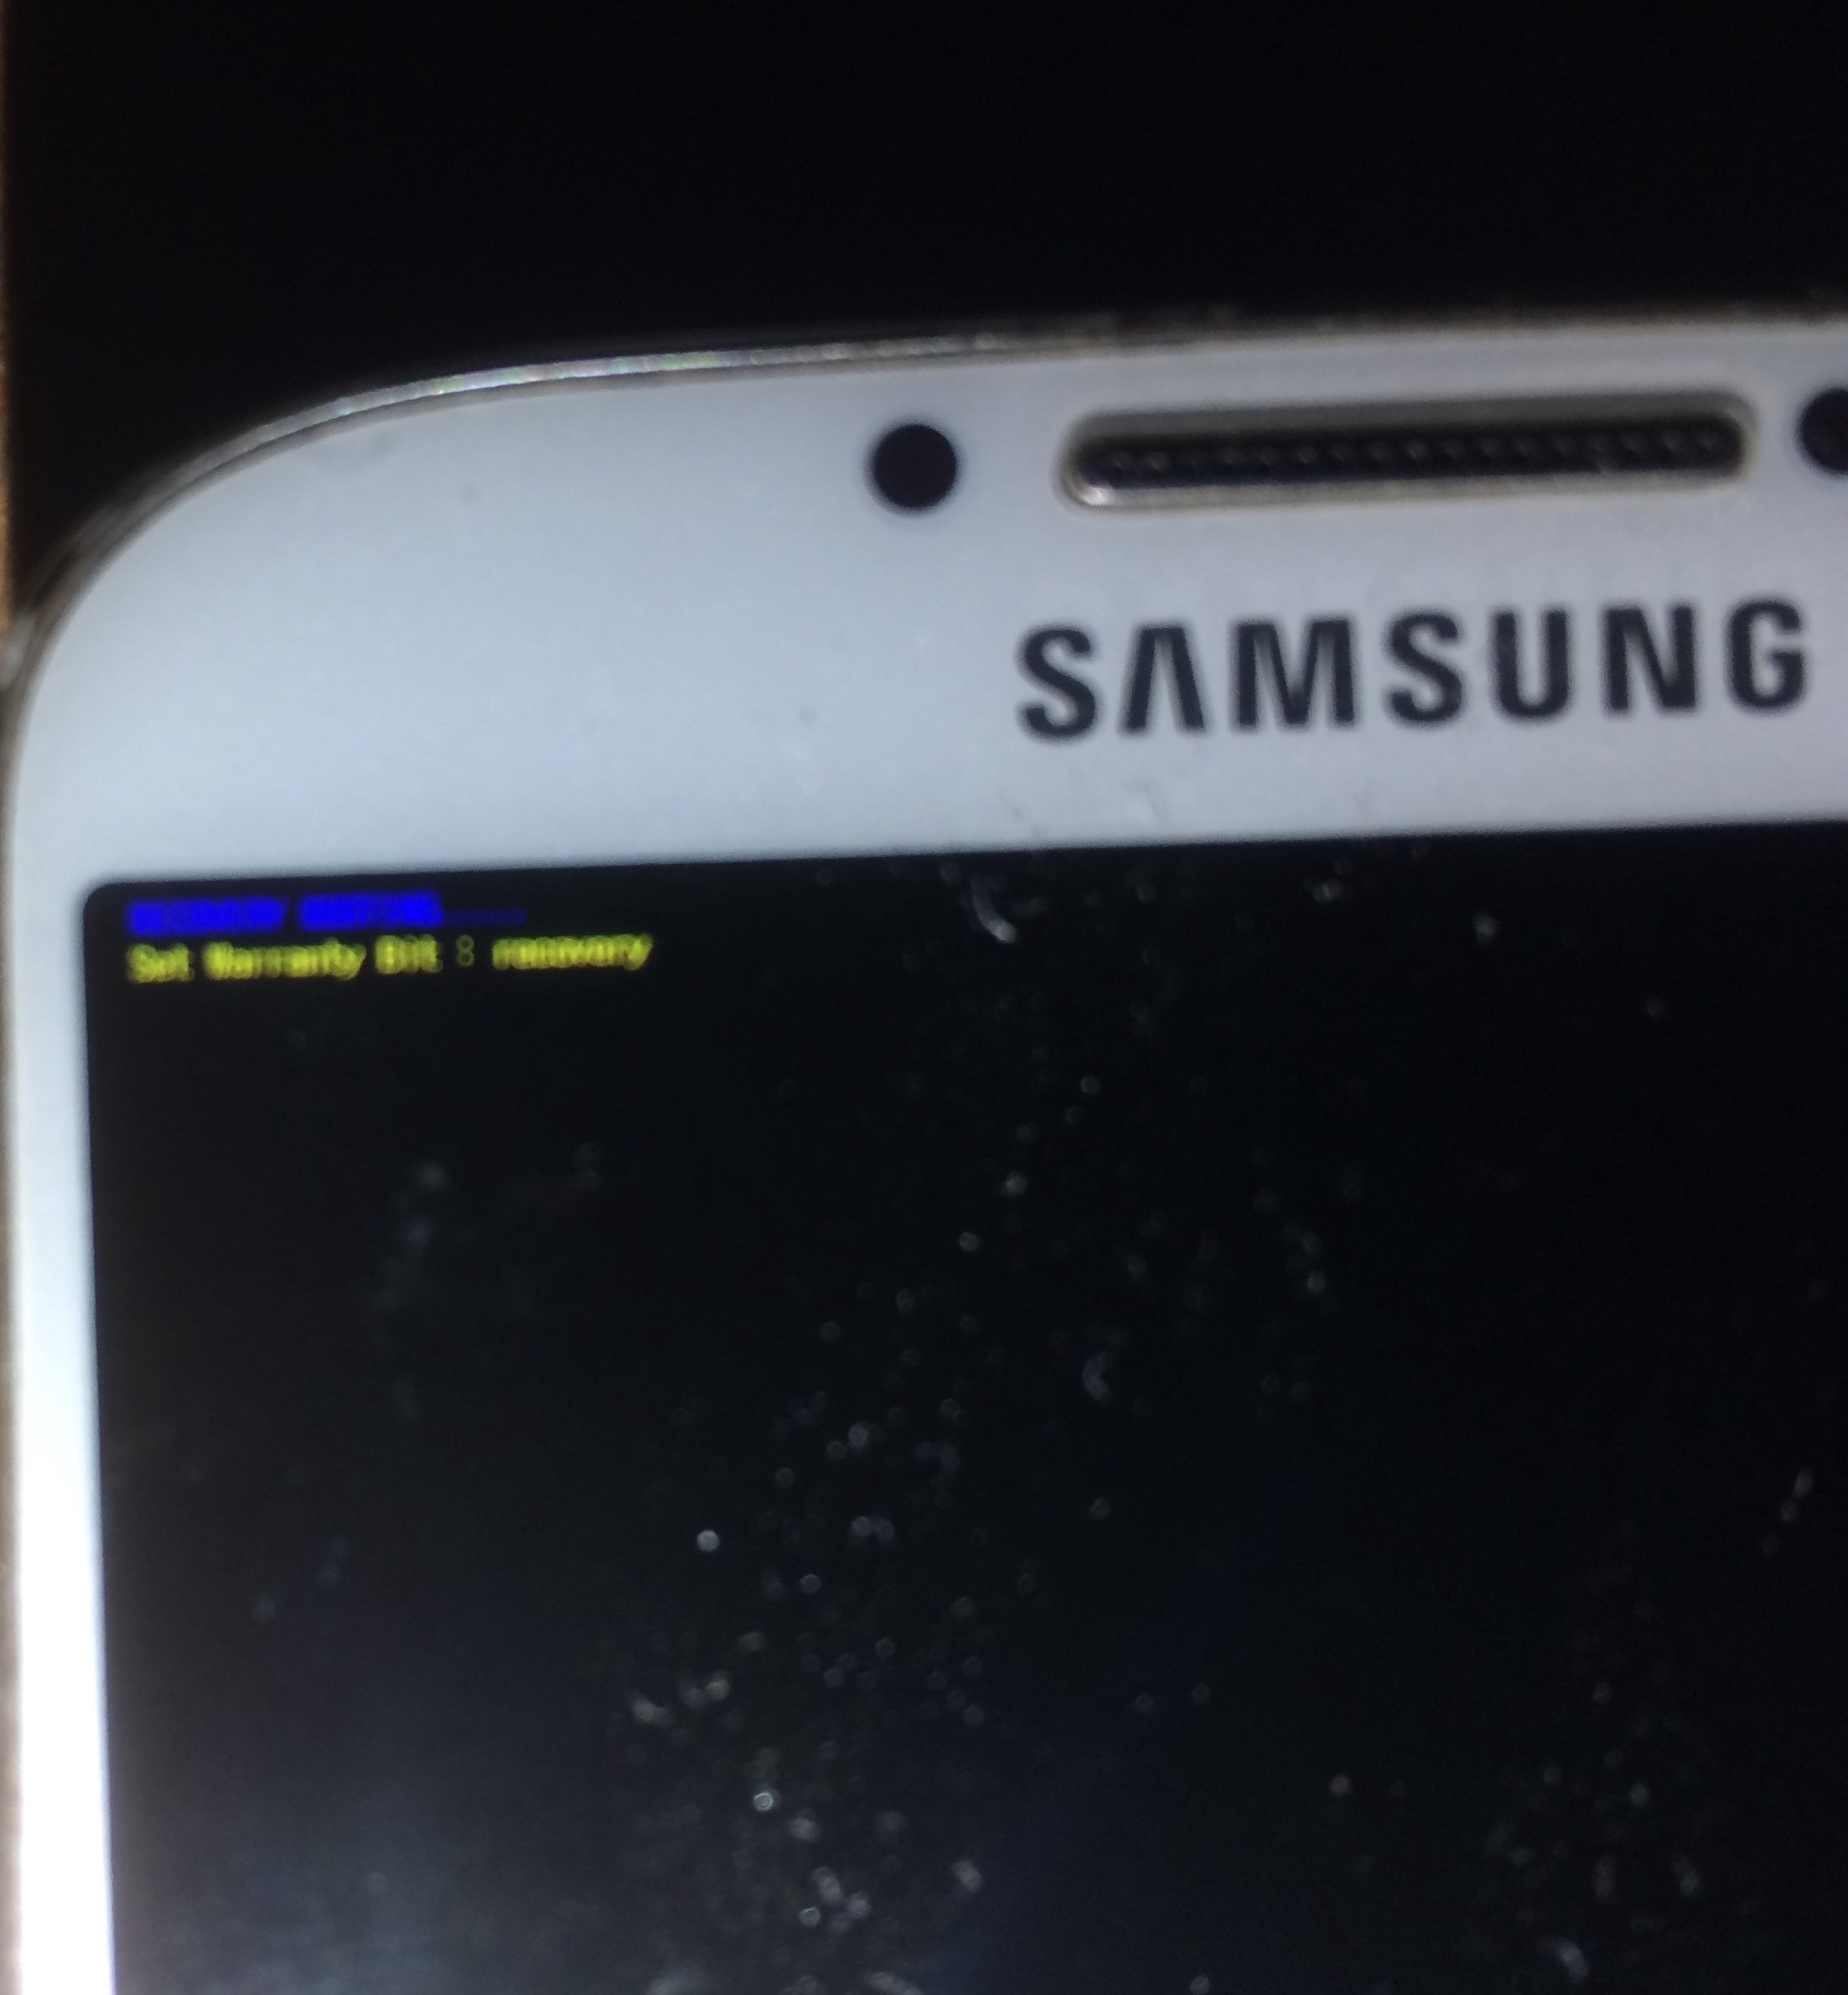
Usefull key combinations for Samsung devices
Useful key combinations for Samsung devices
Download Mode : volume down + home/bixby + power
Exit Download Mode (reboot) : volume down + power
Recovery Mode : volume up + home/bixby + power
.
Useful key combinations for Sony devices
Useful key combinations for Sony devices
This page on the the Sony Developer website lists some useful key combinations
- Fastboot mode: (for flashing recovery, or using other fastboot commands): Make sure your phone is turned off. Insert the USB cable into yor PC. Press and hold
Volume downkey, then insert the USB cable. The LED will light blue to show you are in fastboot mode - Flash mode: (for when using FlashTool) Make sure your phone is turned off. Insert the USB cable into your PC. Press and hold
Volume downkey, then insert the USB cable. The LED will light green to show you are in flash mode - Recovery mode: Make sure your phone is turned off and unplug your device from the PC. Press
Volume downandPowerkeys together. The phone should vibrate once, then boot into recovery
In addition, the following can be useful, if you need to reboot or power off your phone, but it is not responding to screen or key presses:
- Hard reboot: Press and hold
Volume(in the middle, not up or down) andPowerkeys - after a few seconds the device will vibrate. Release the keys and the device will attempt to reboot - Hard power off: Press and hold
VolumeandPowerkeys as for Hard reboot. Continue holding the keys after the first vibration until the device vibrates three times in quick succession. Release the keys and the device will be powered off
.
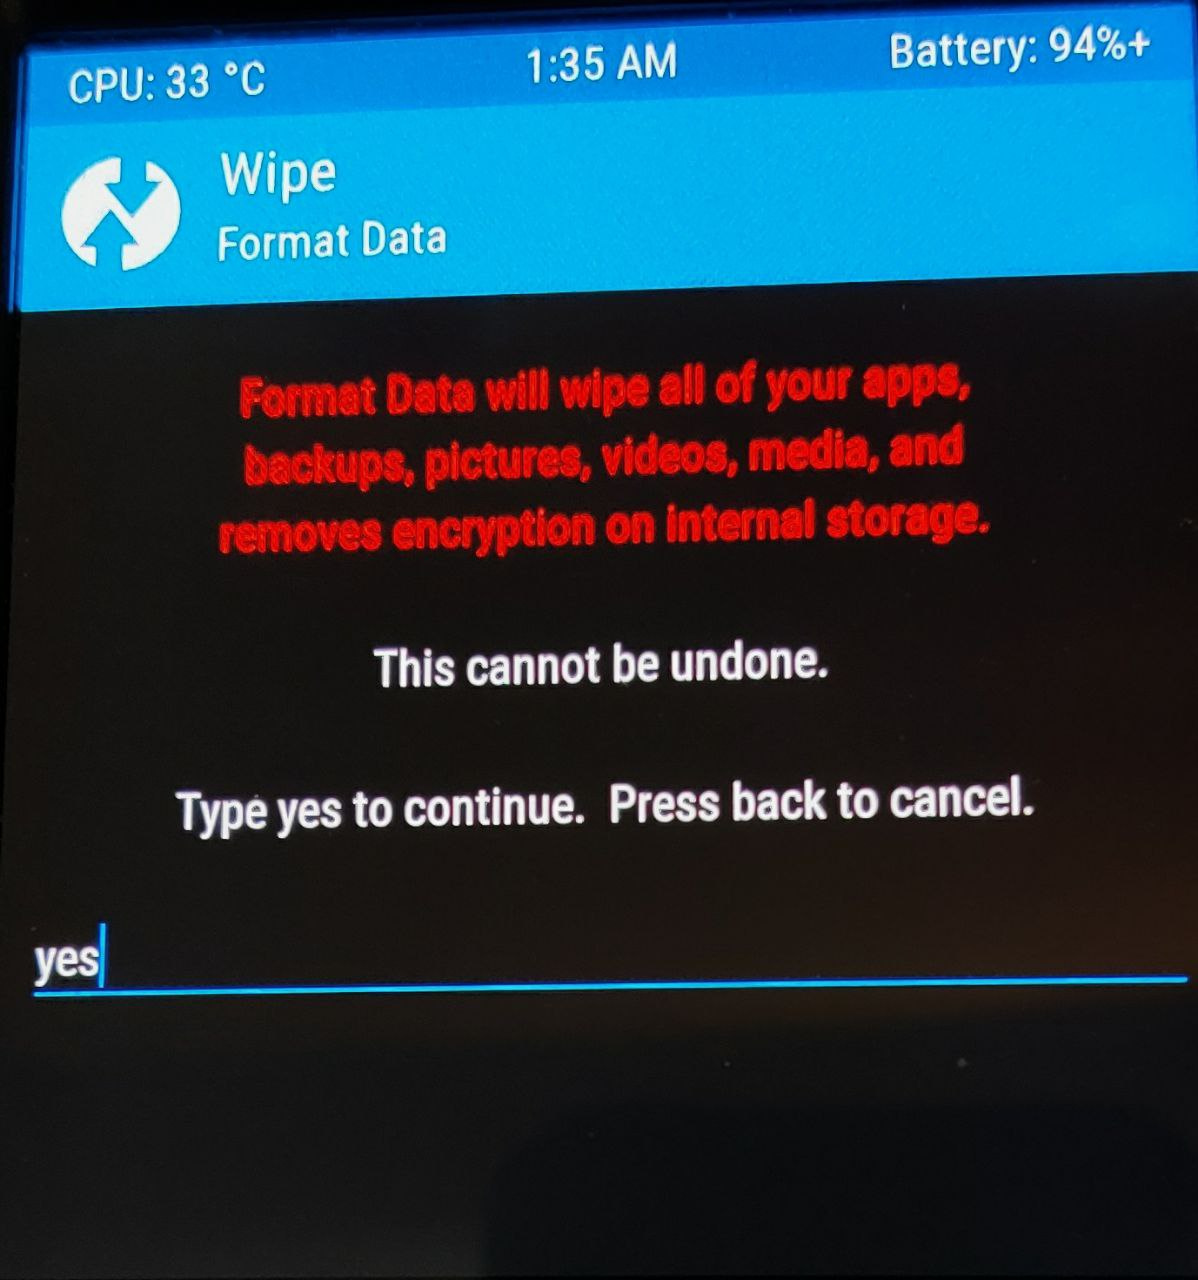
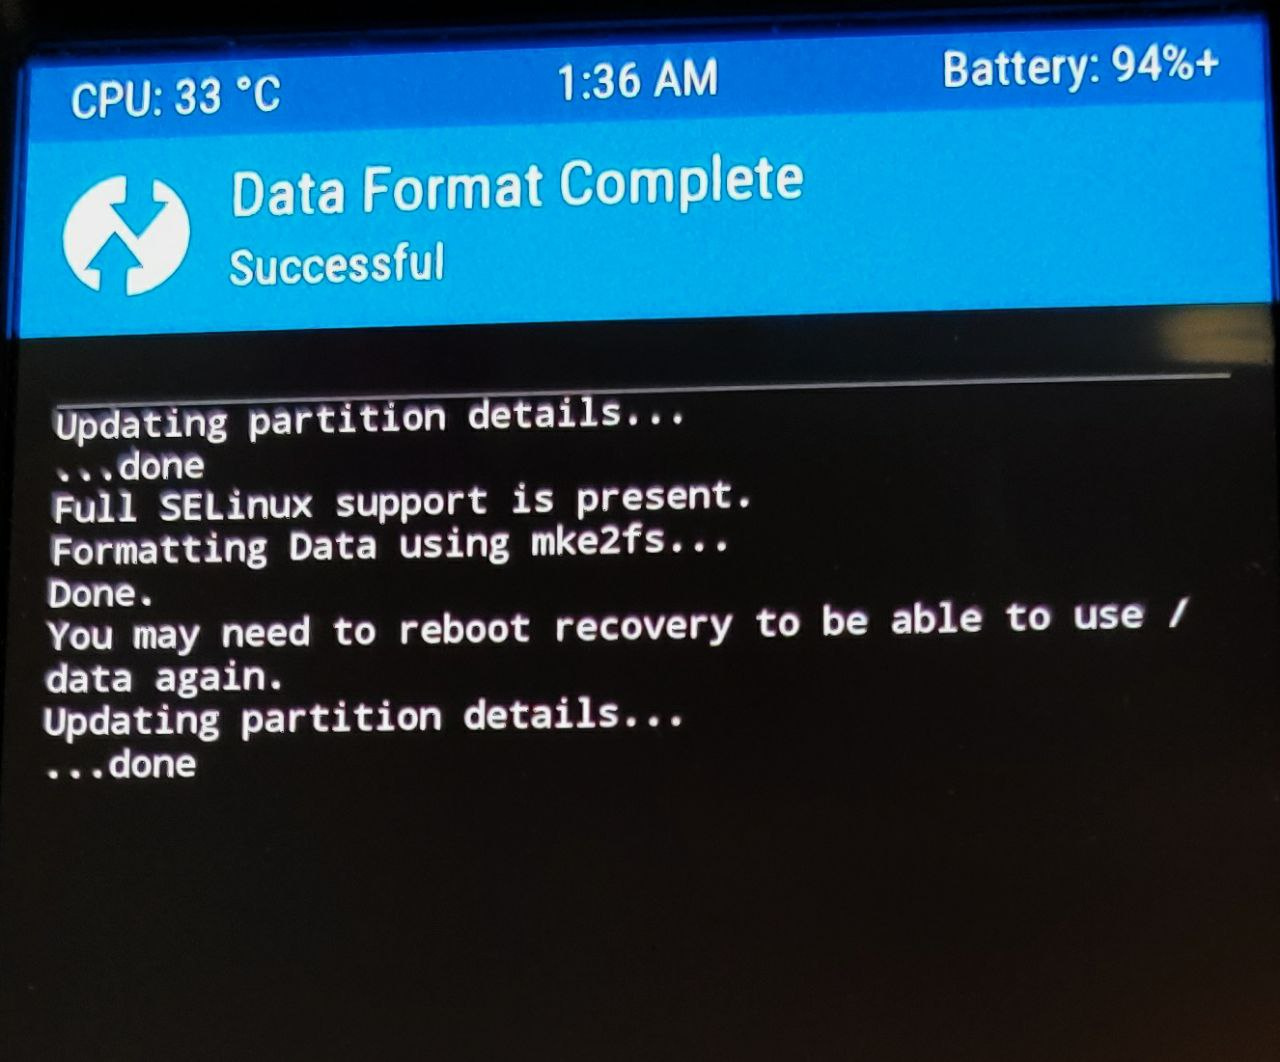
you are decided to try /e/ on your device,
so, you need to replace the existing system by /e/OS.
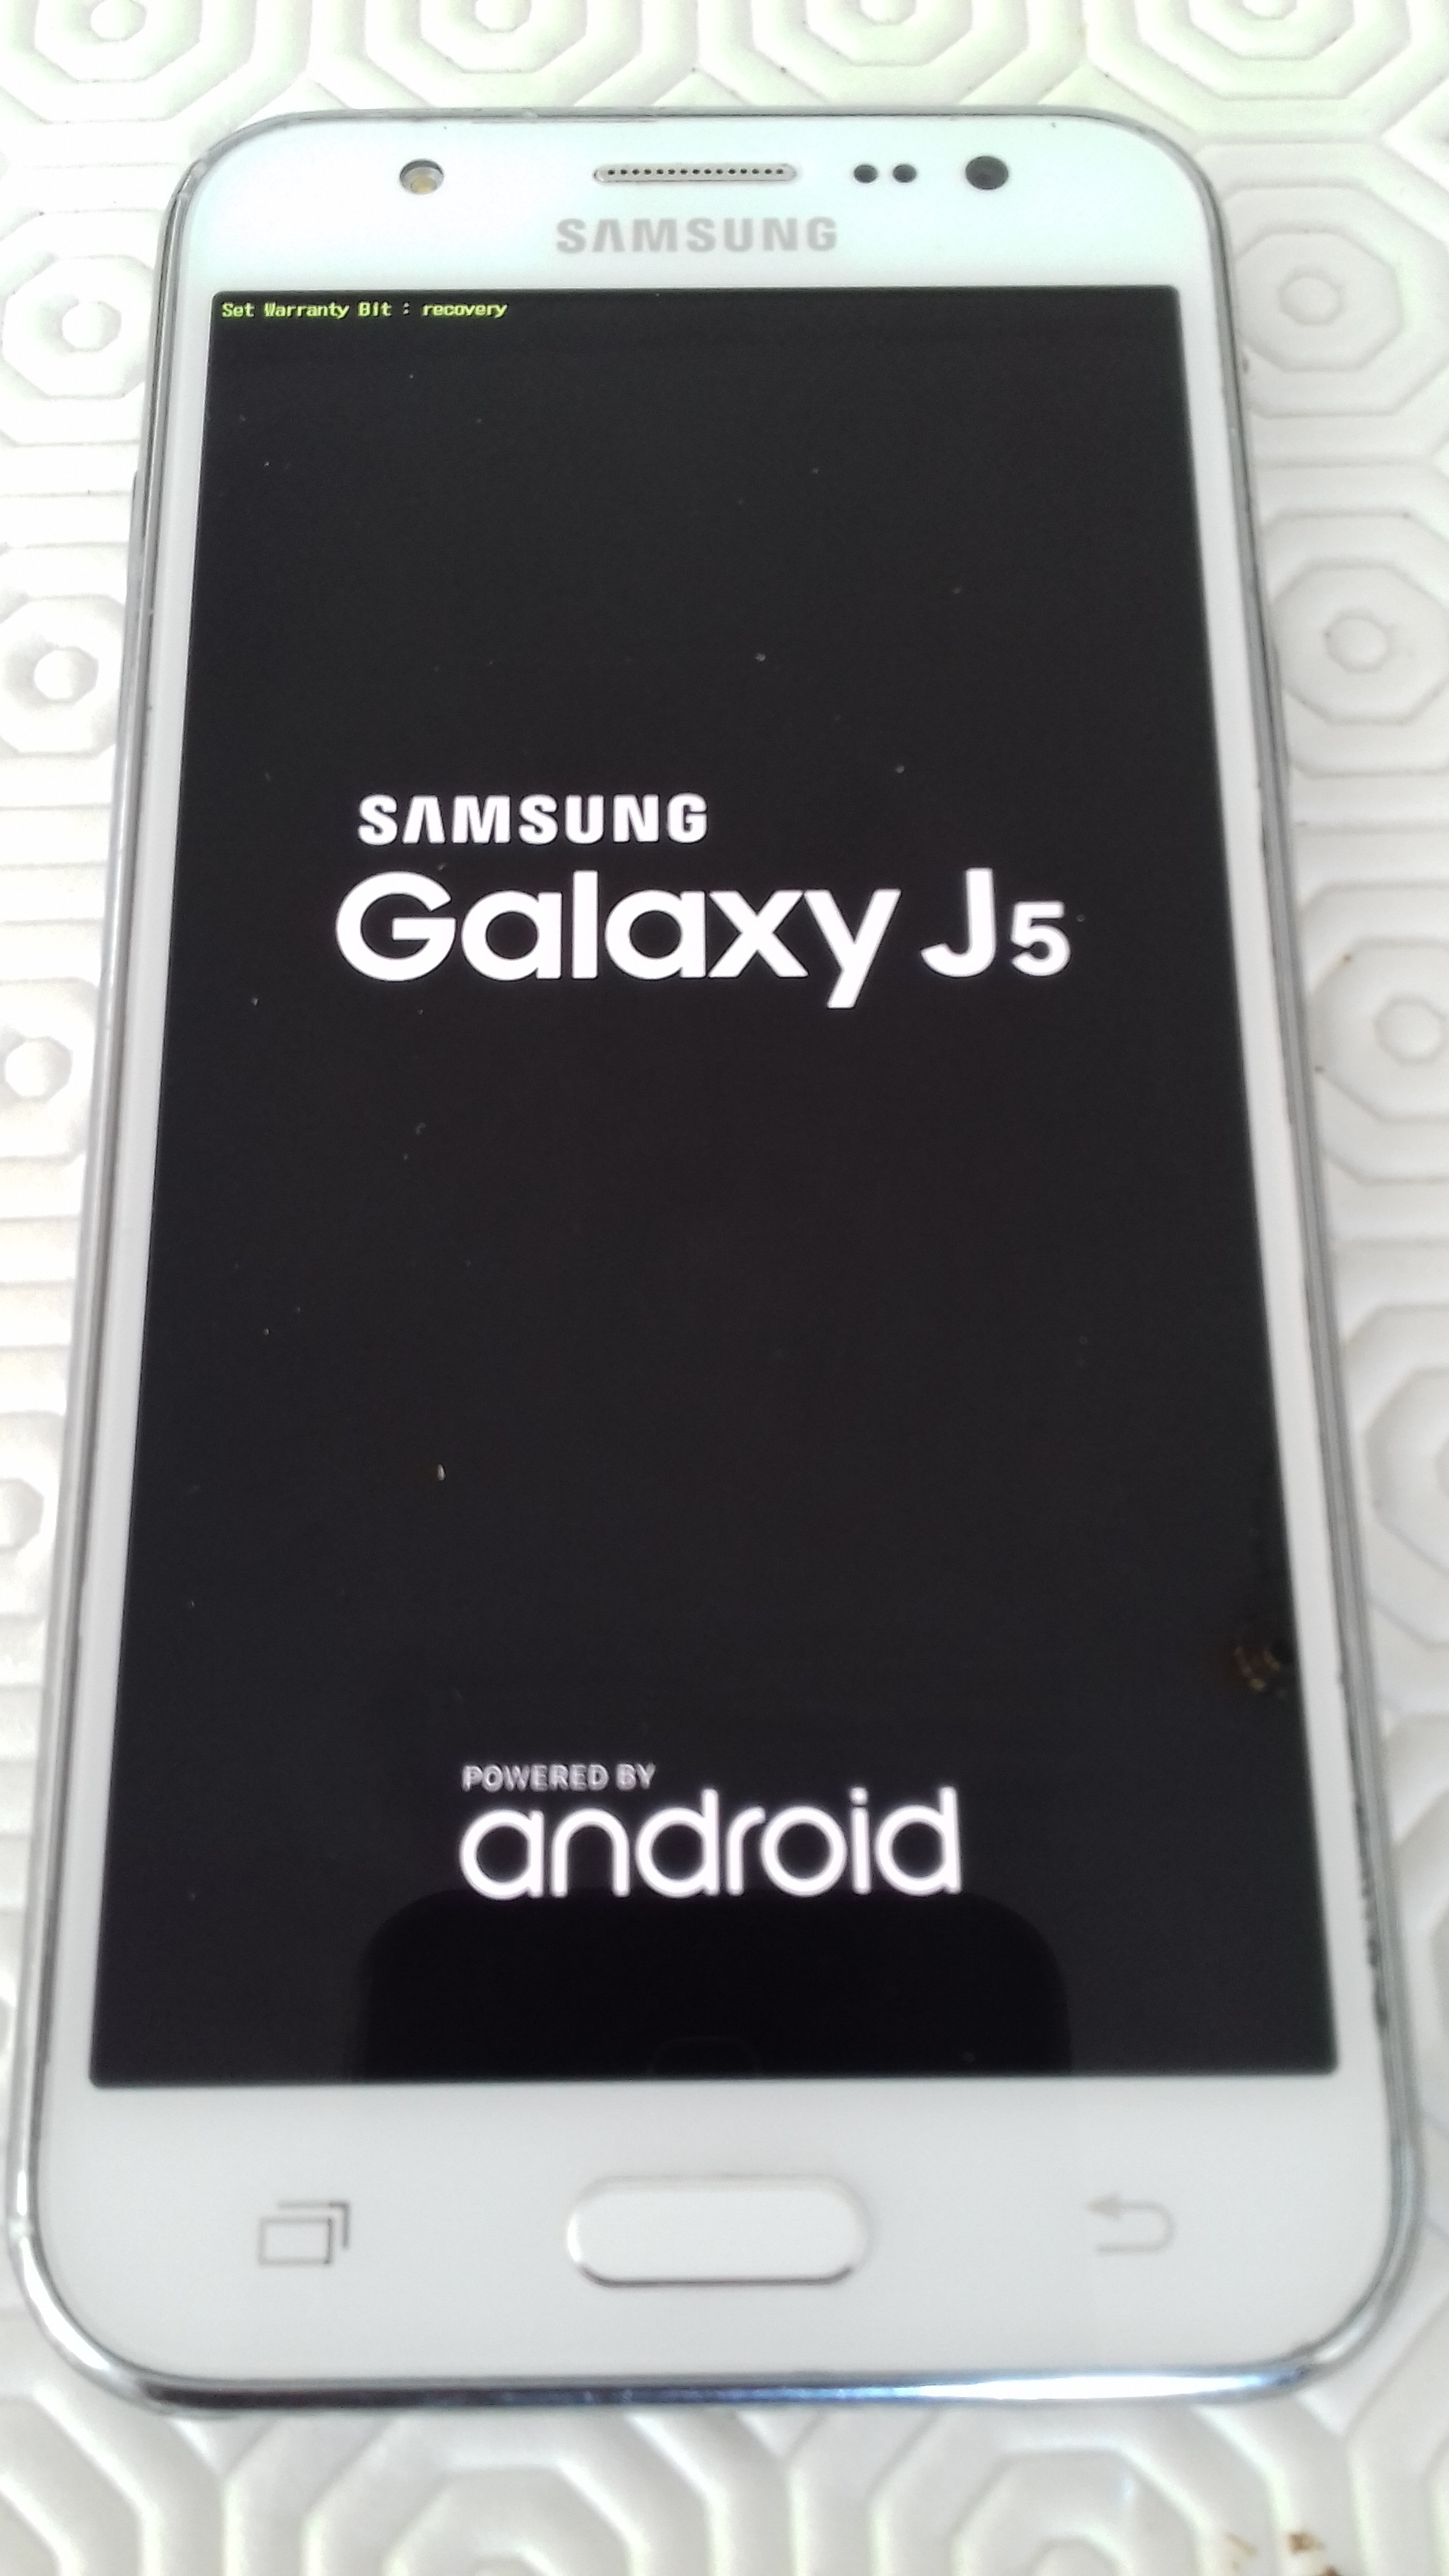
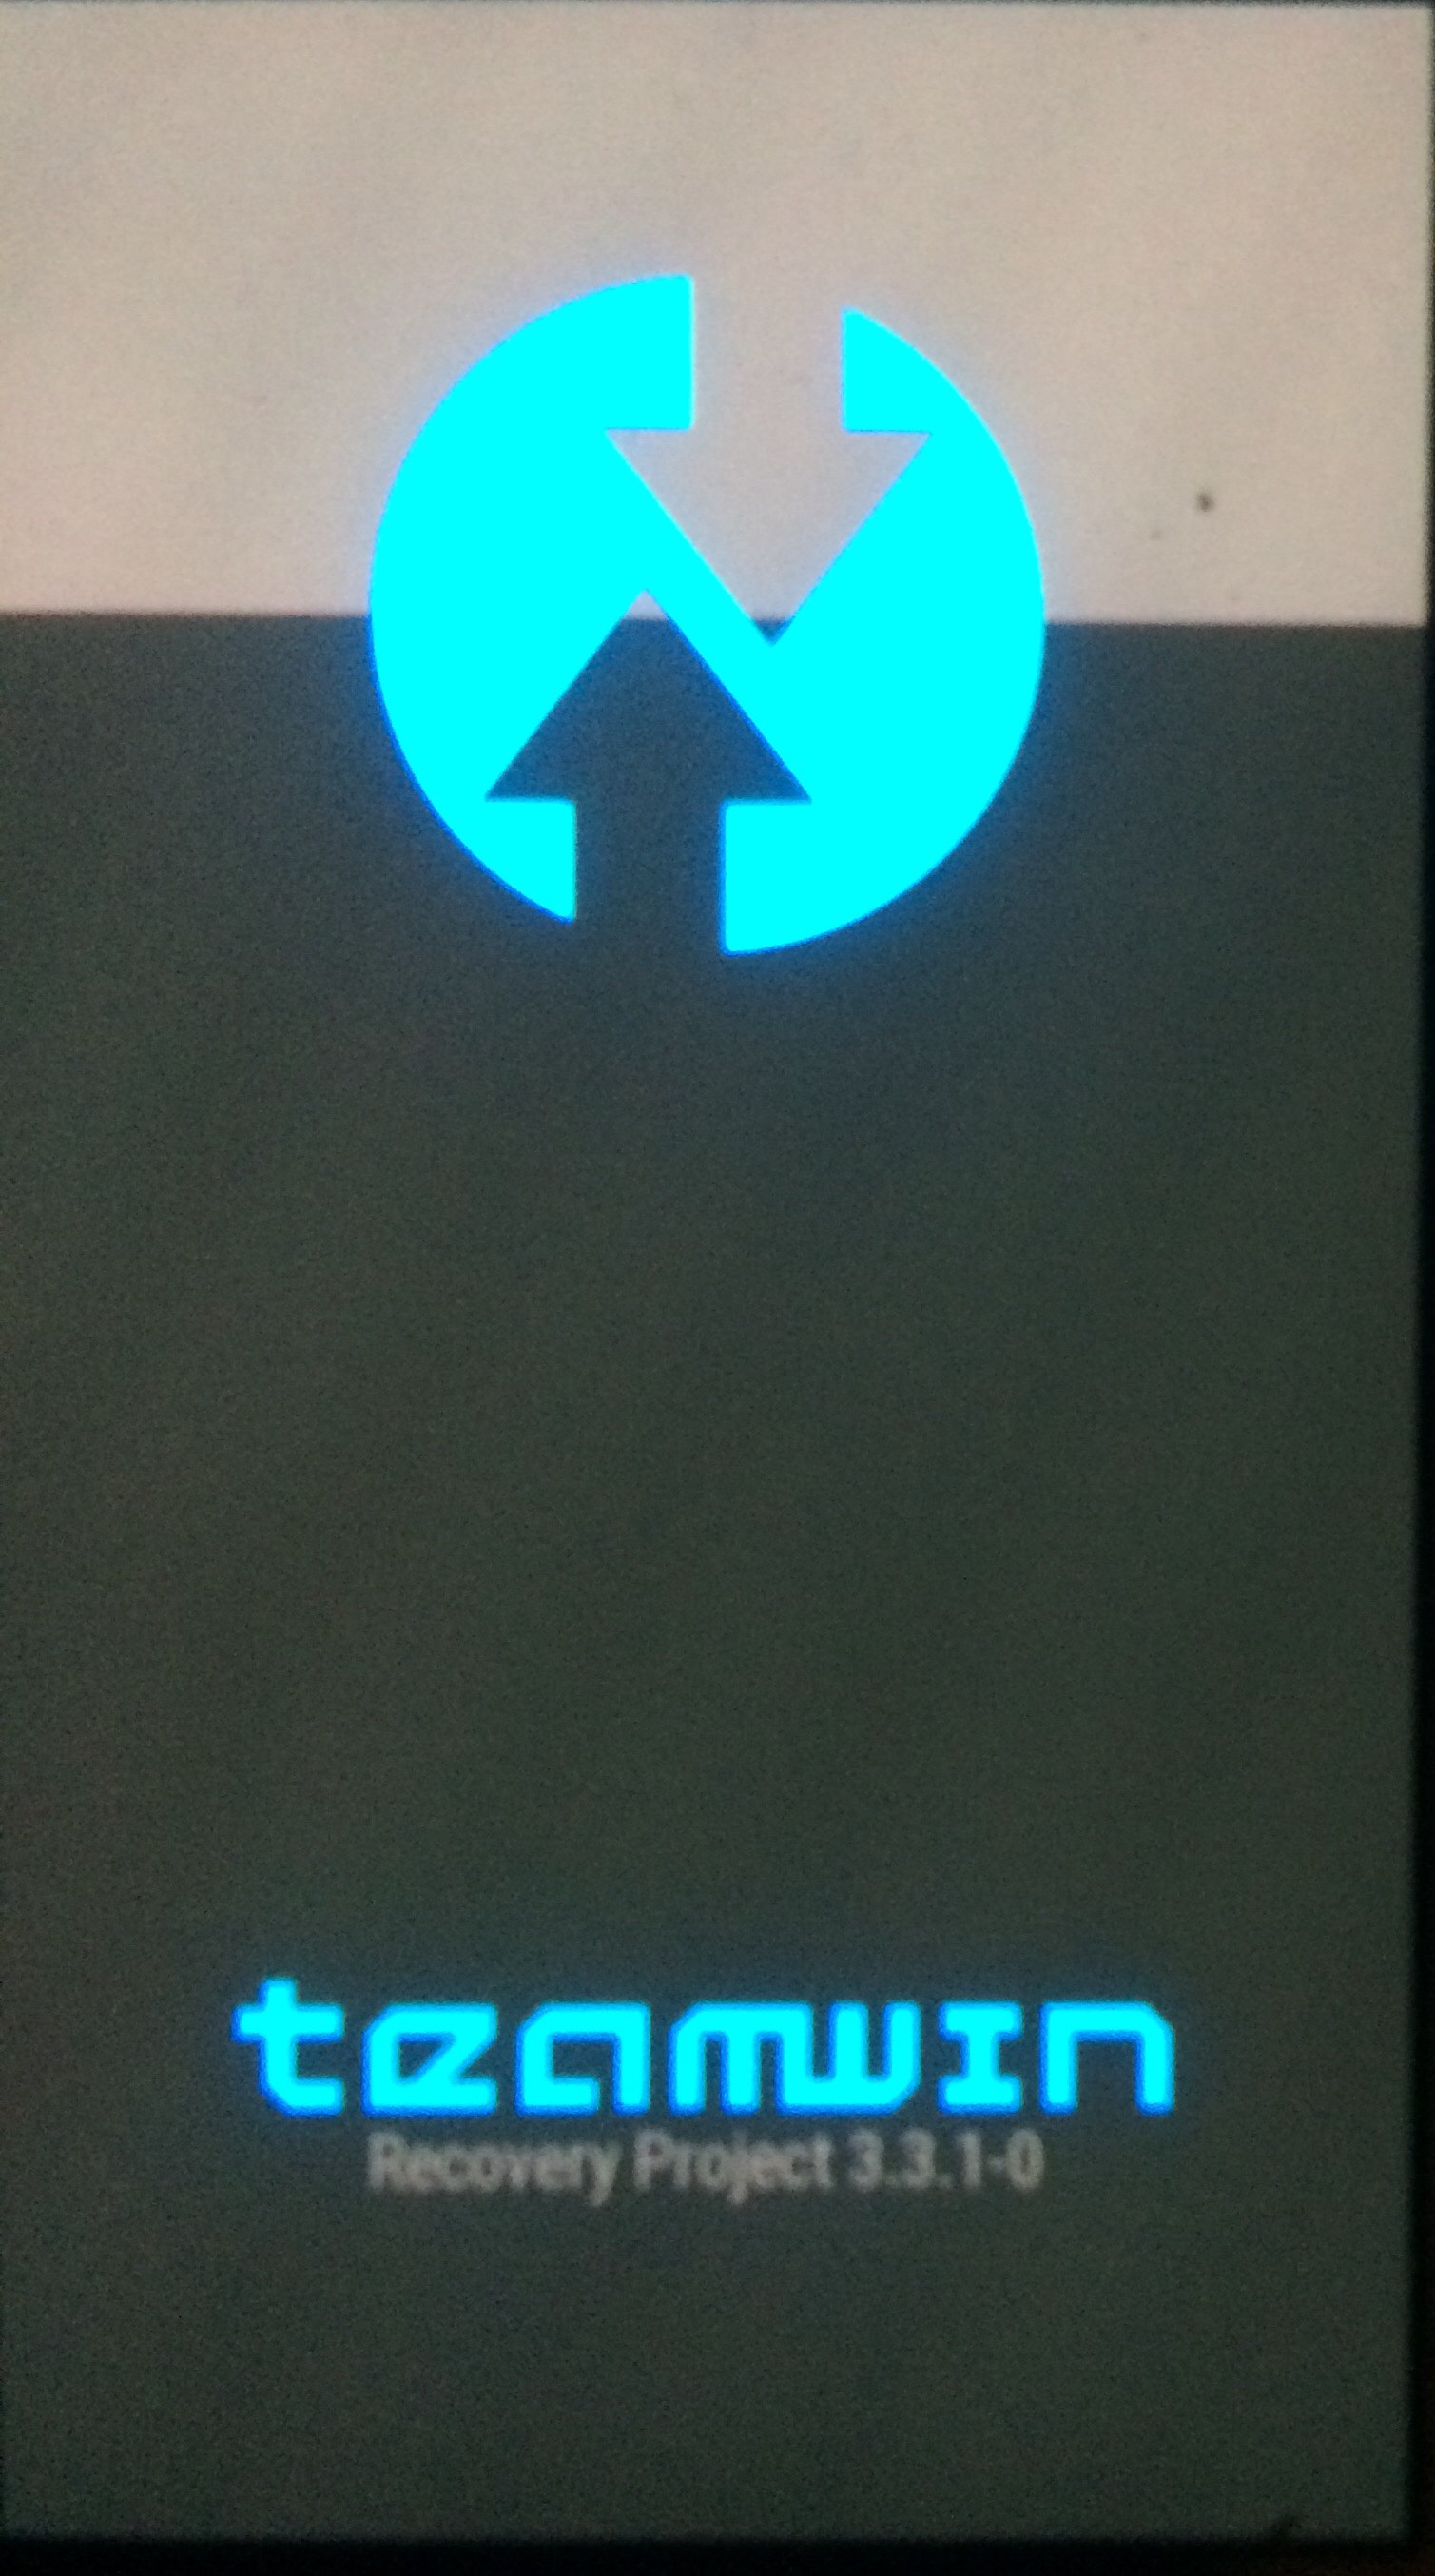
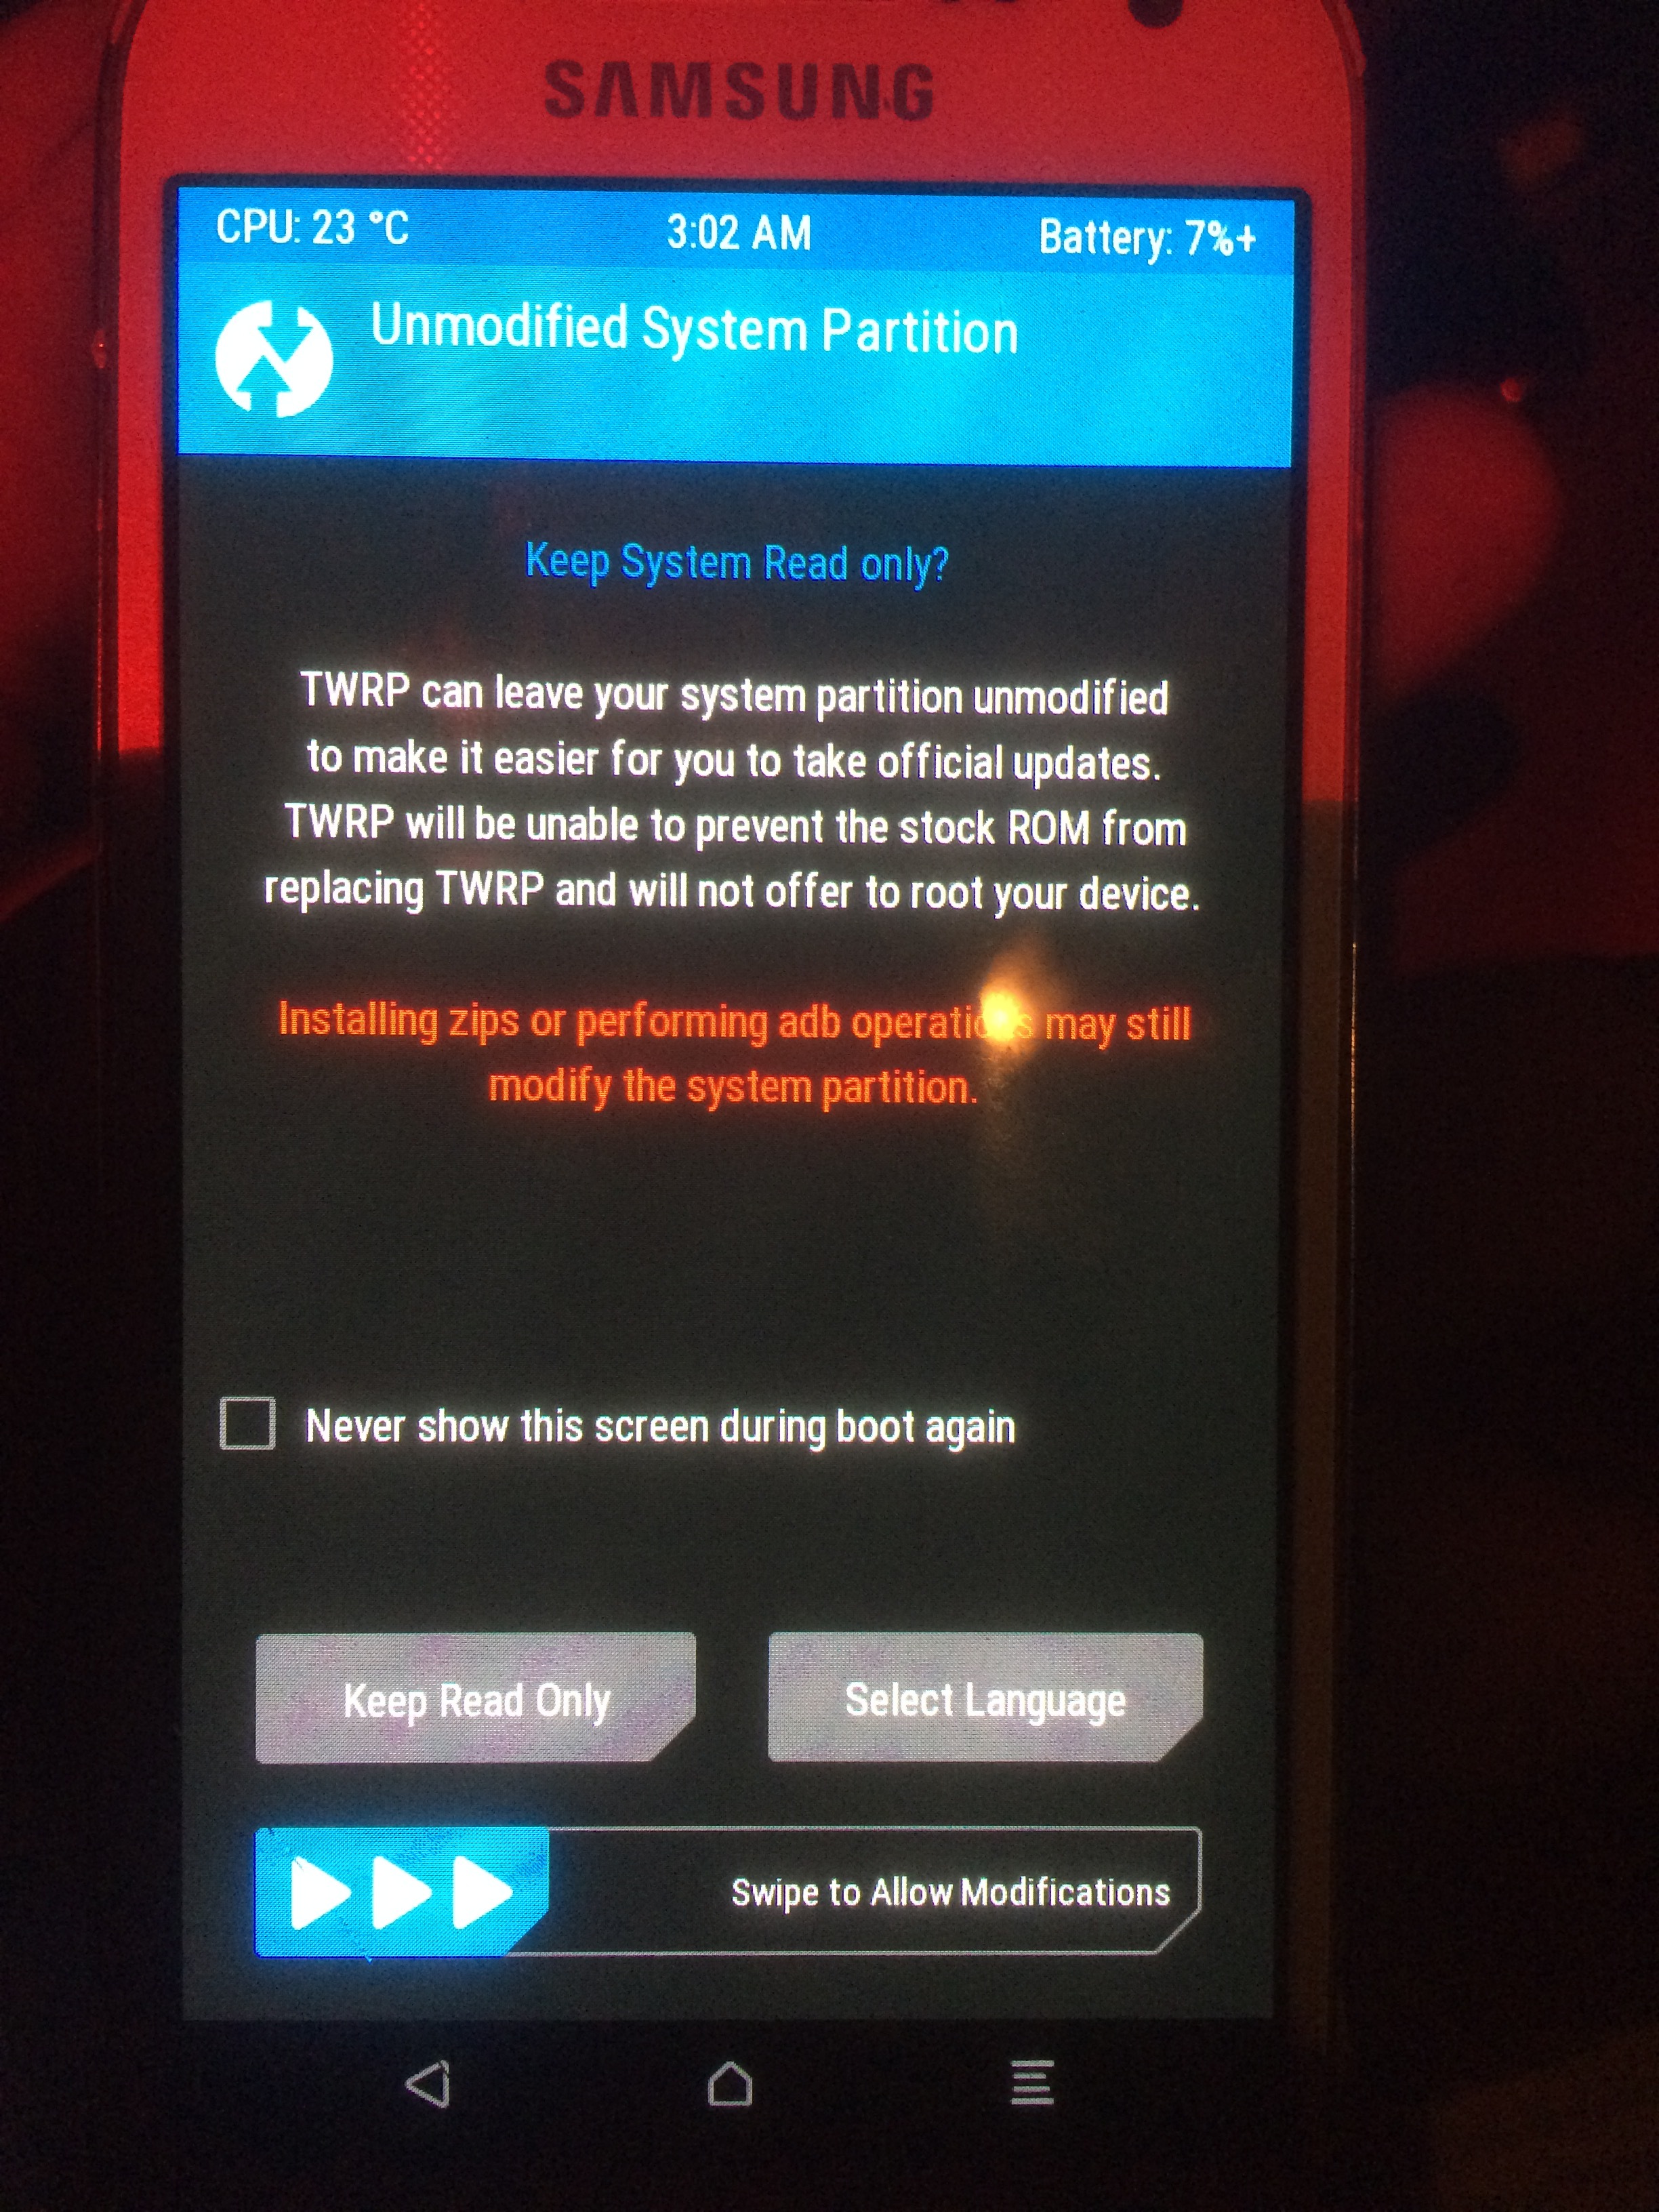
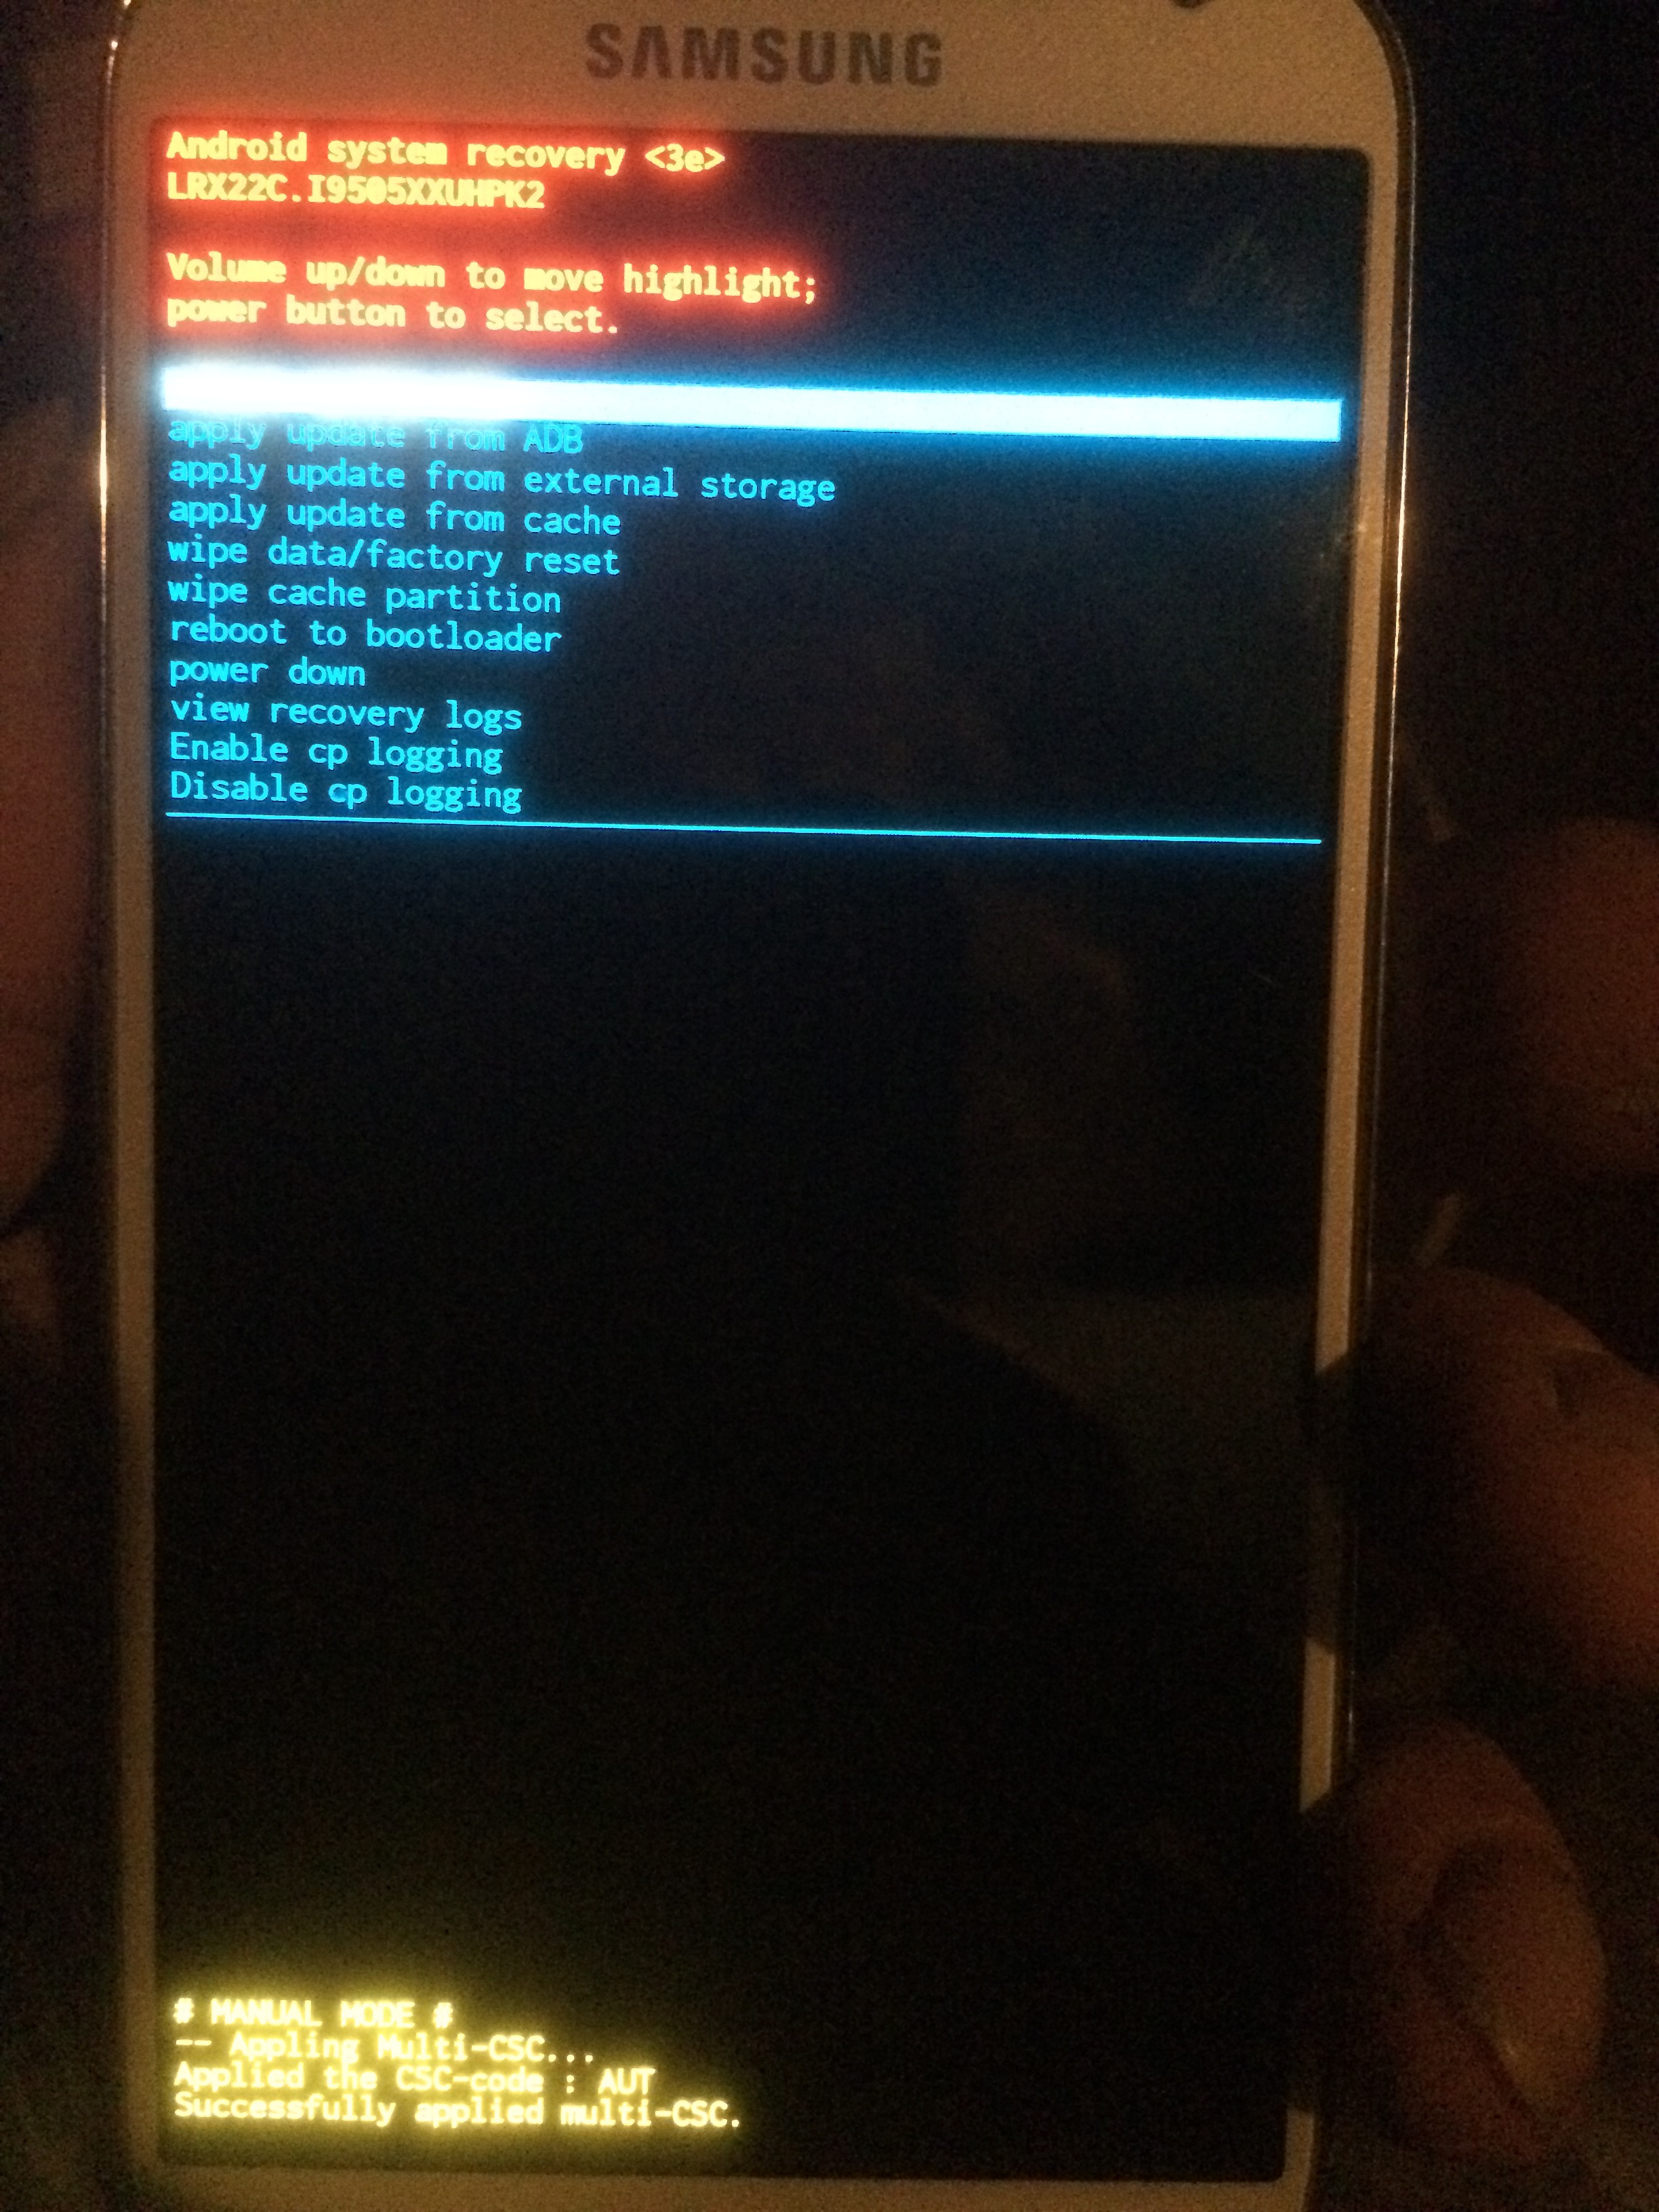
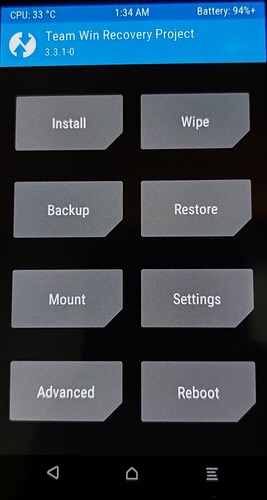
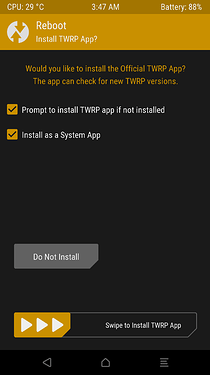
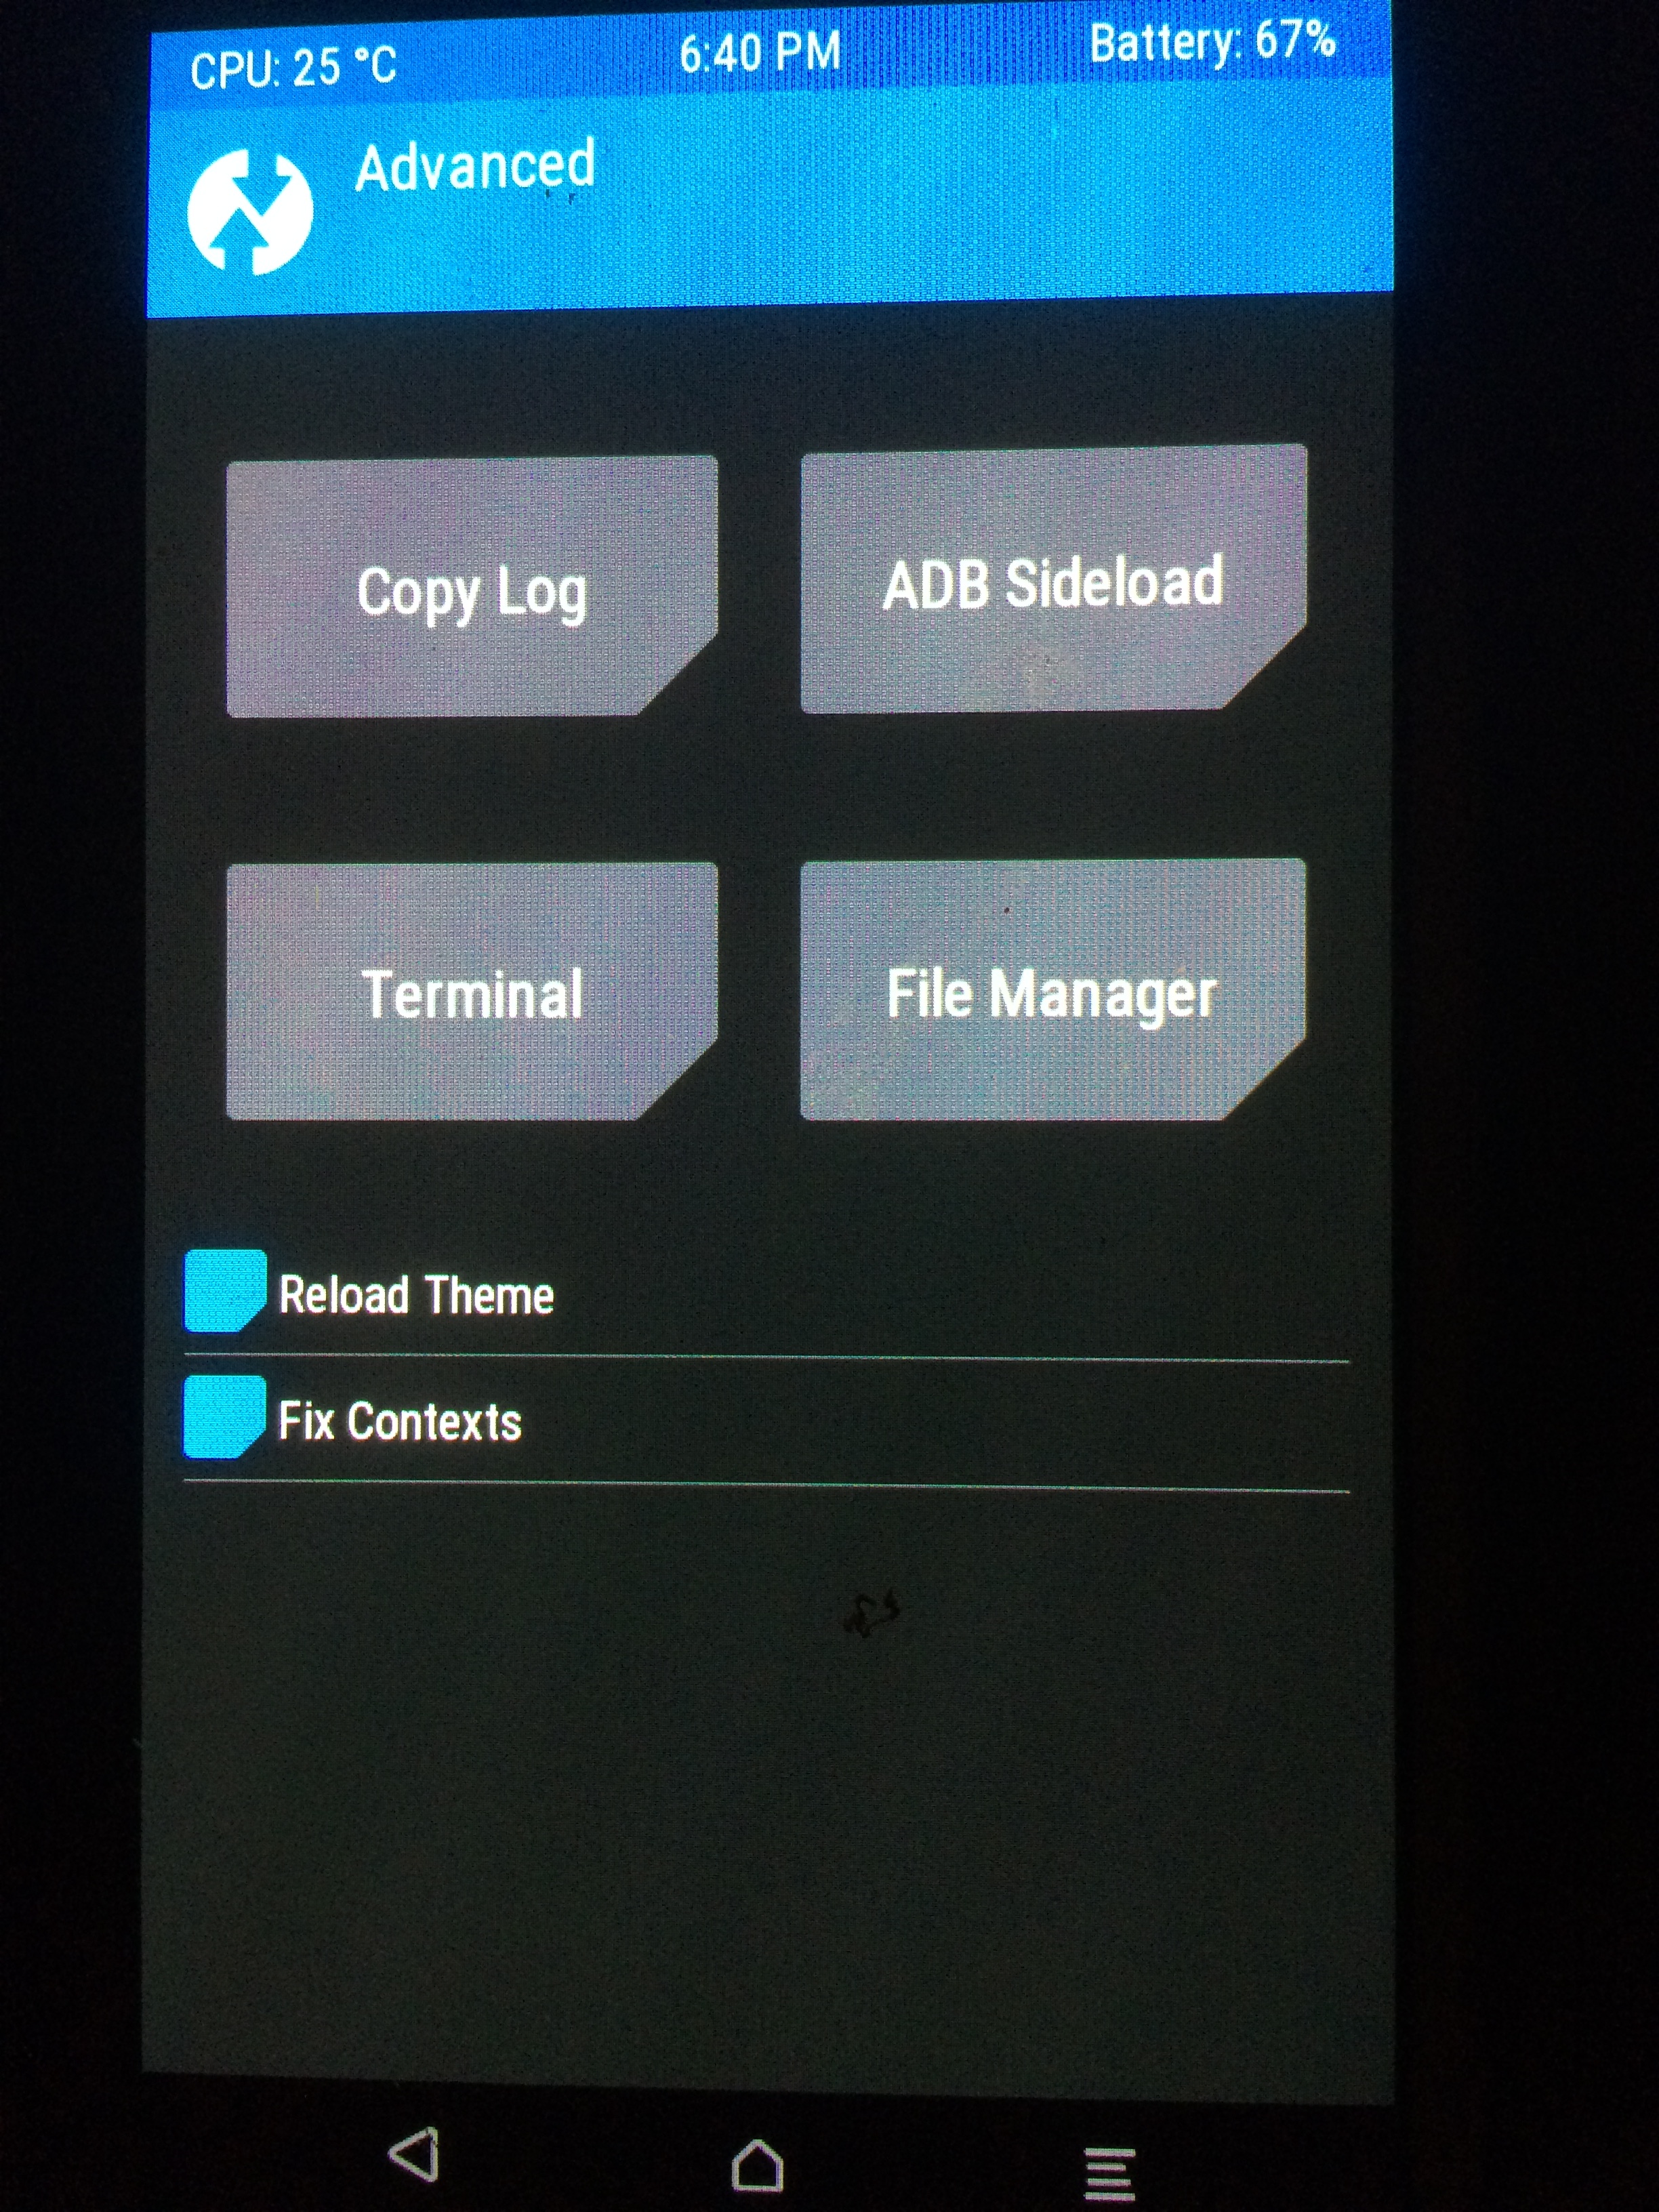
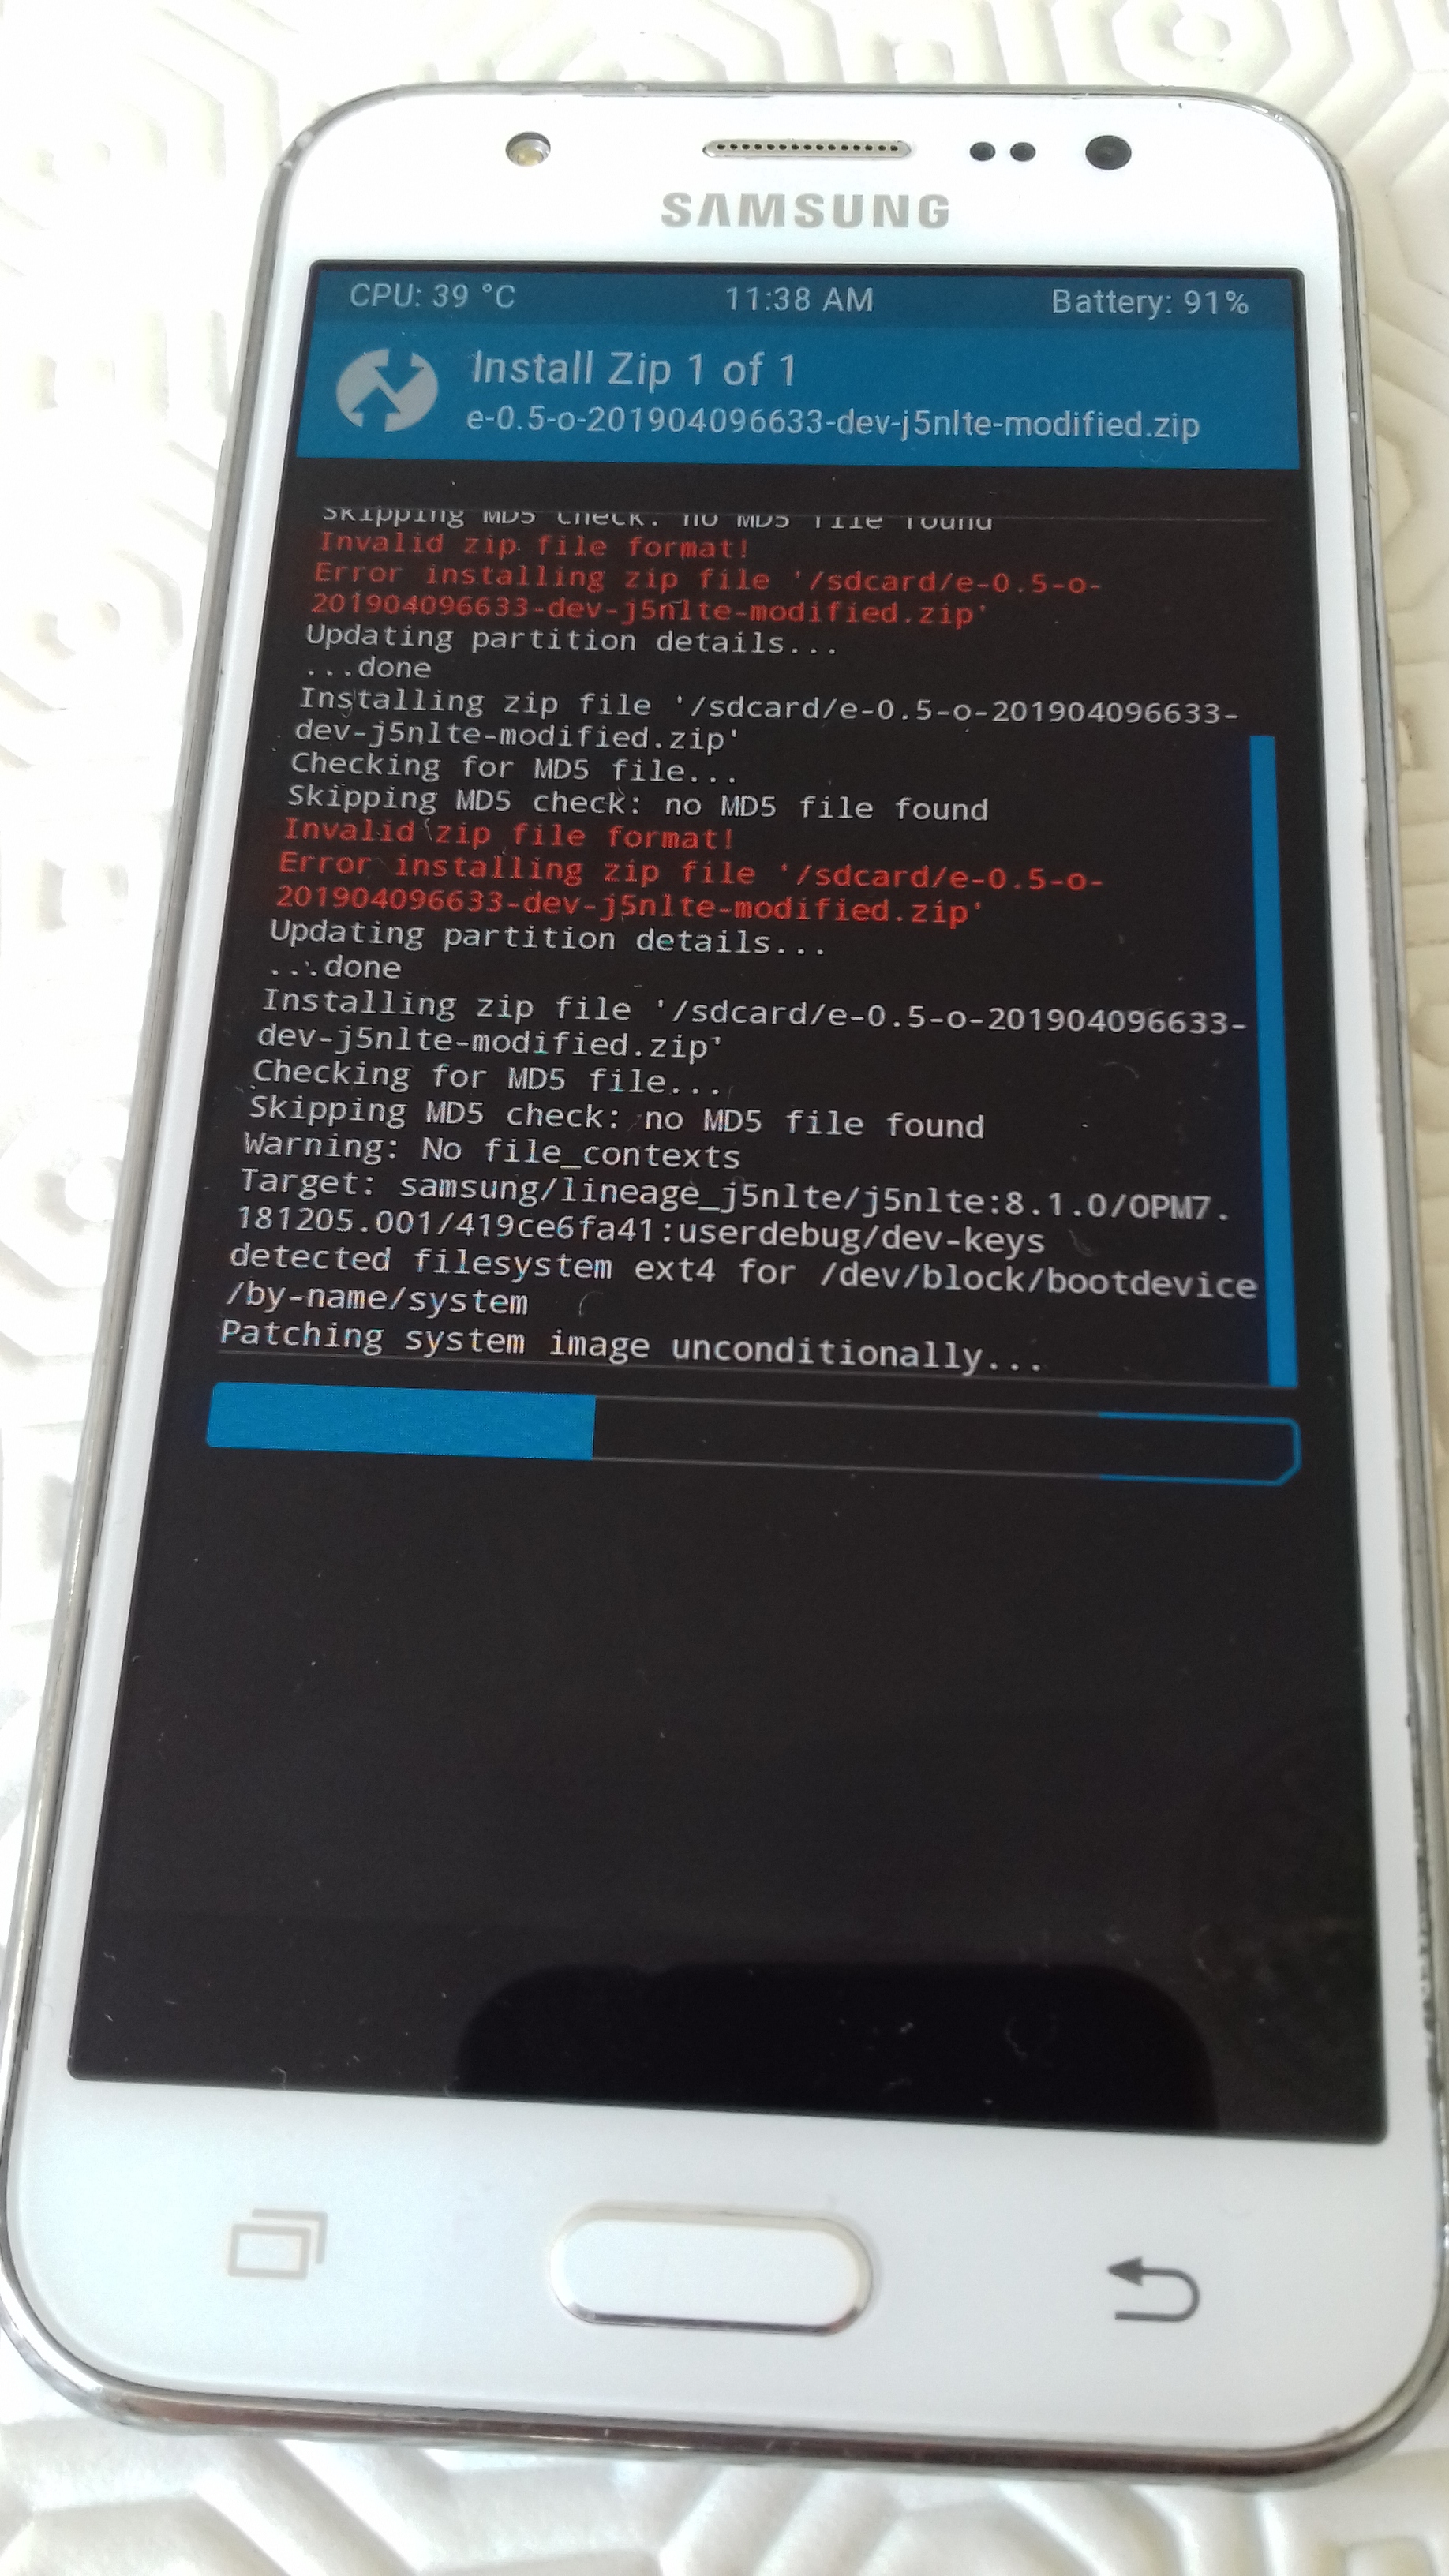
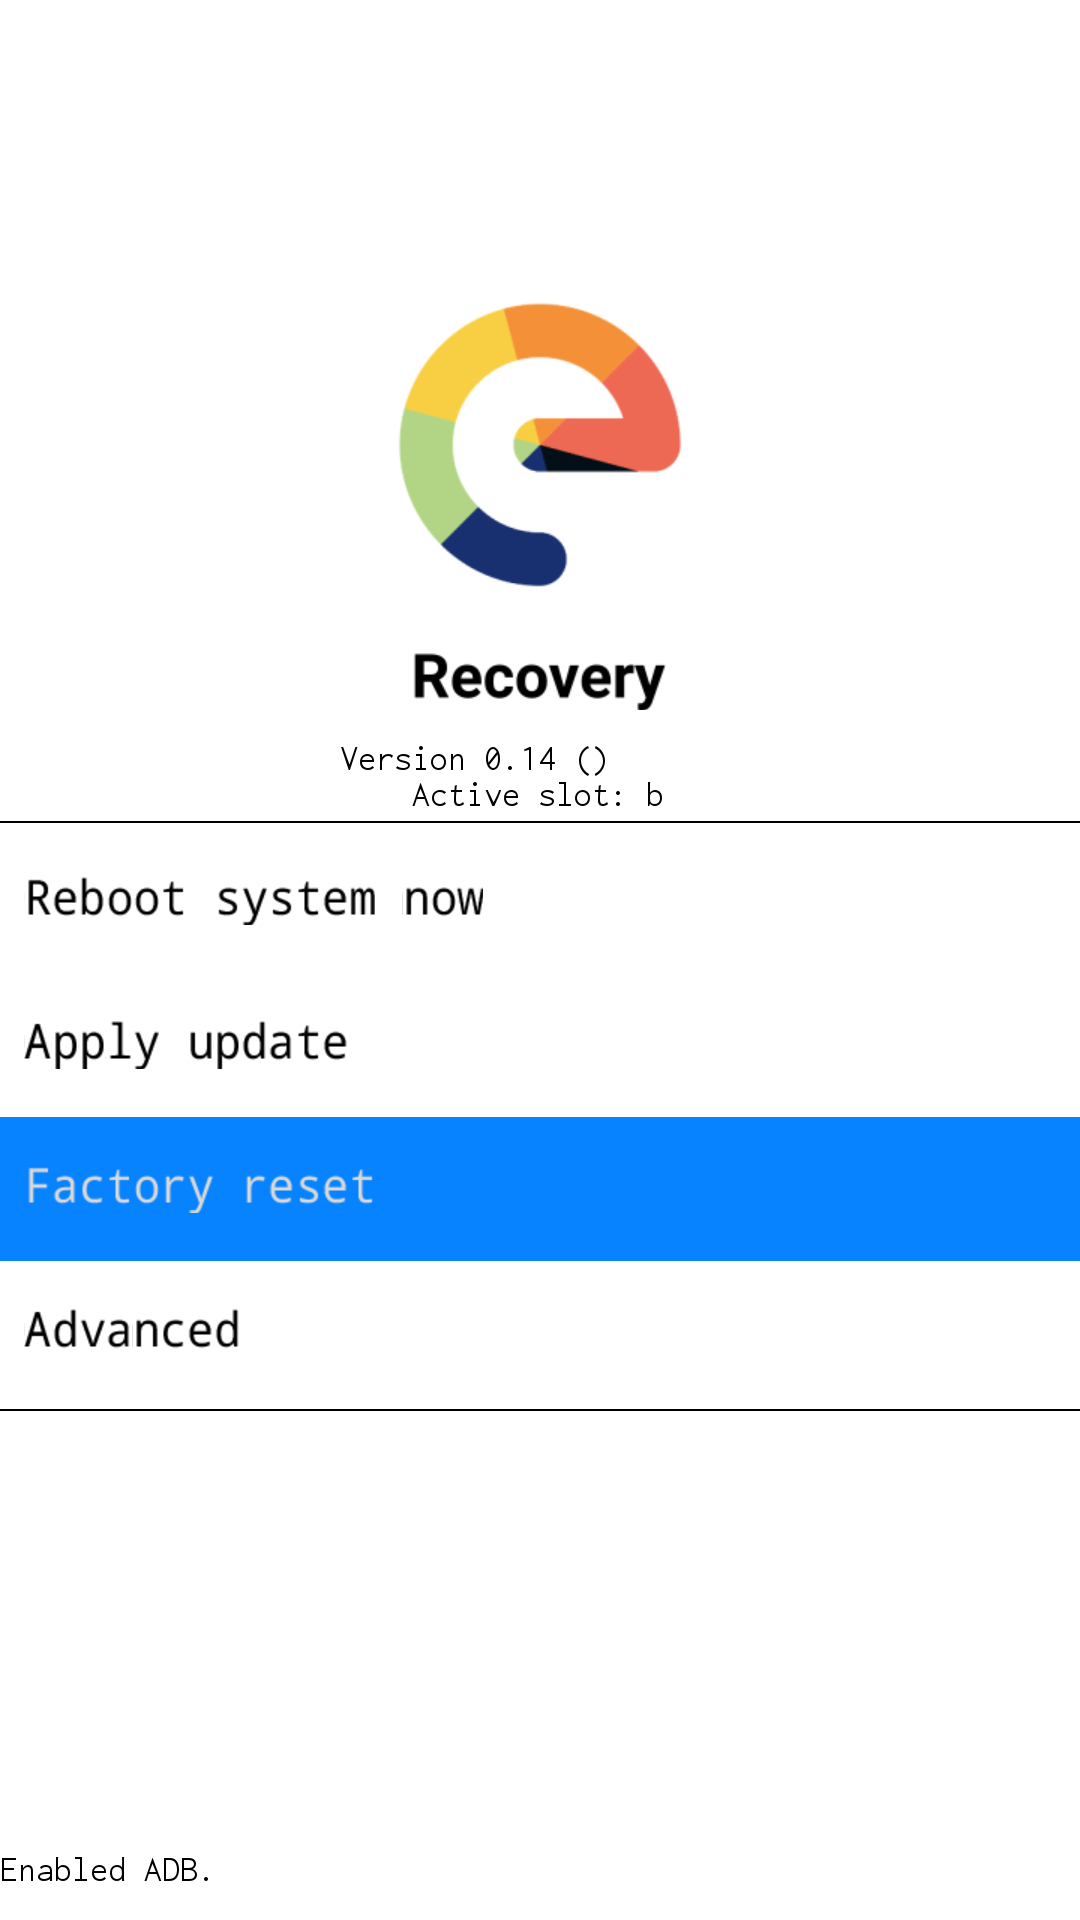
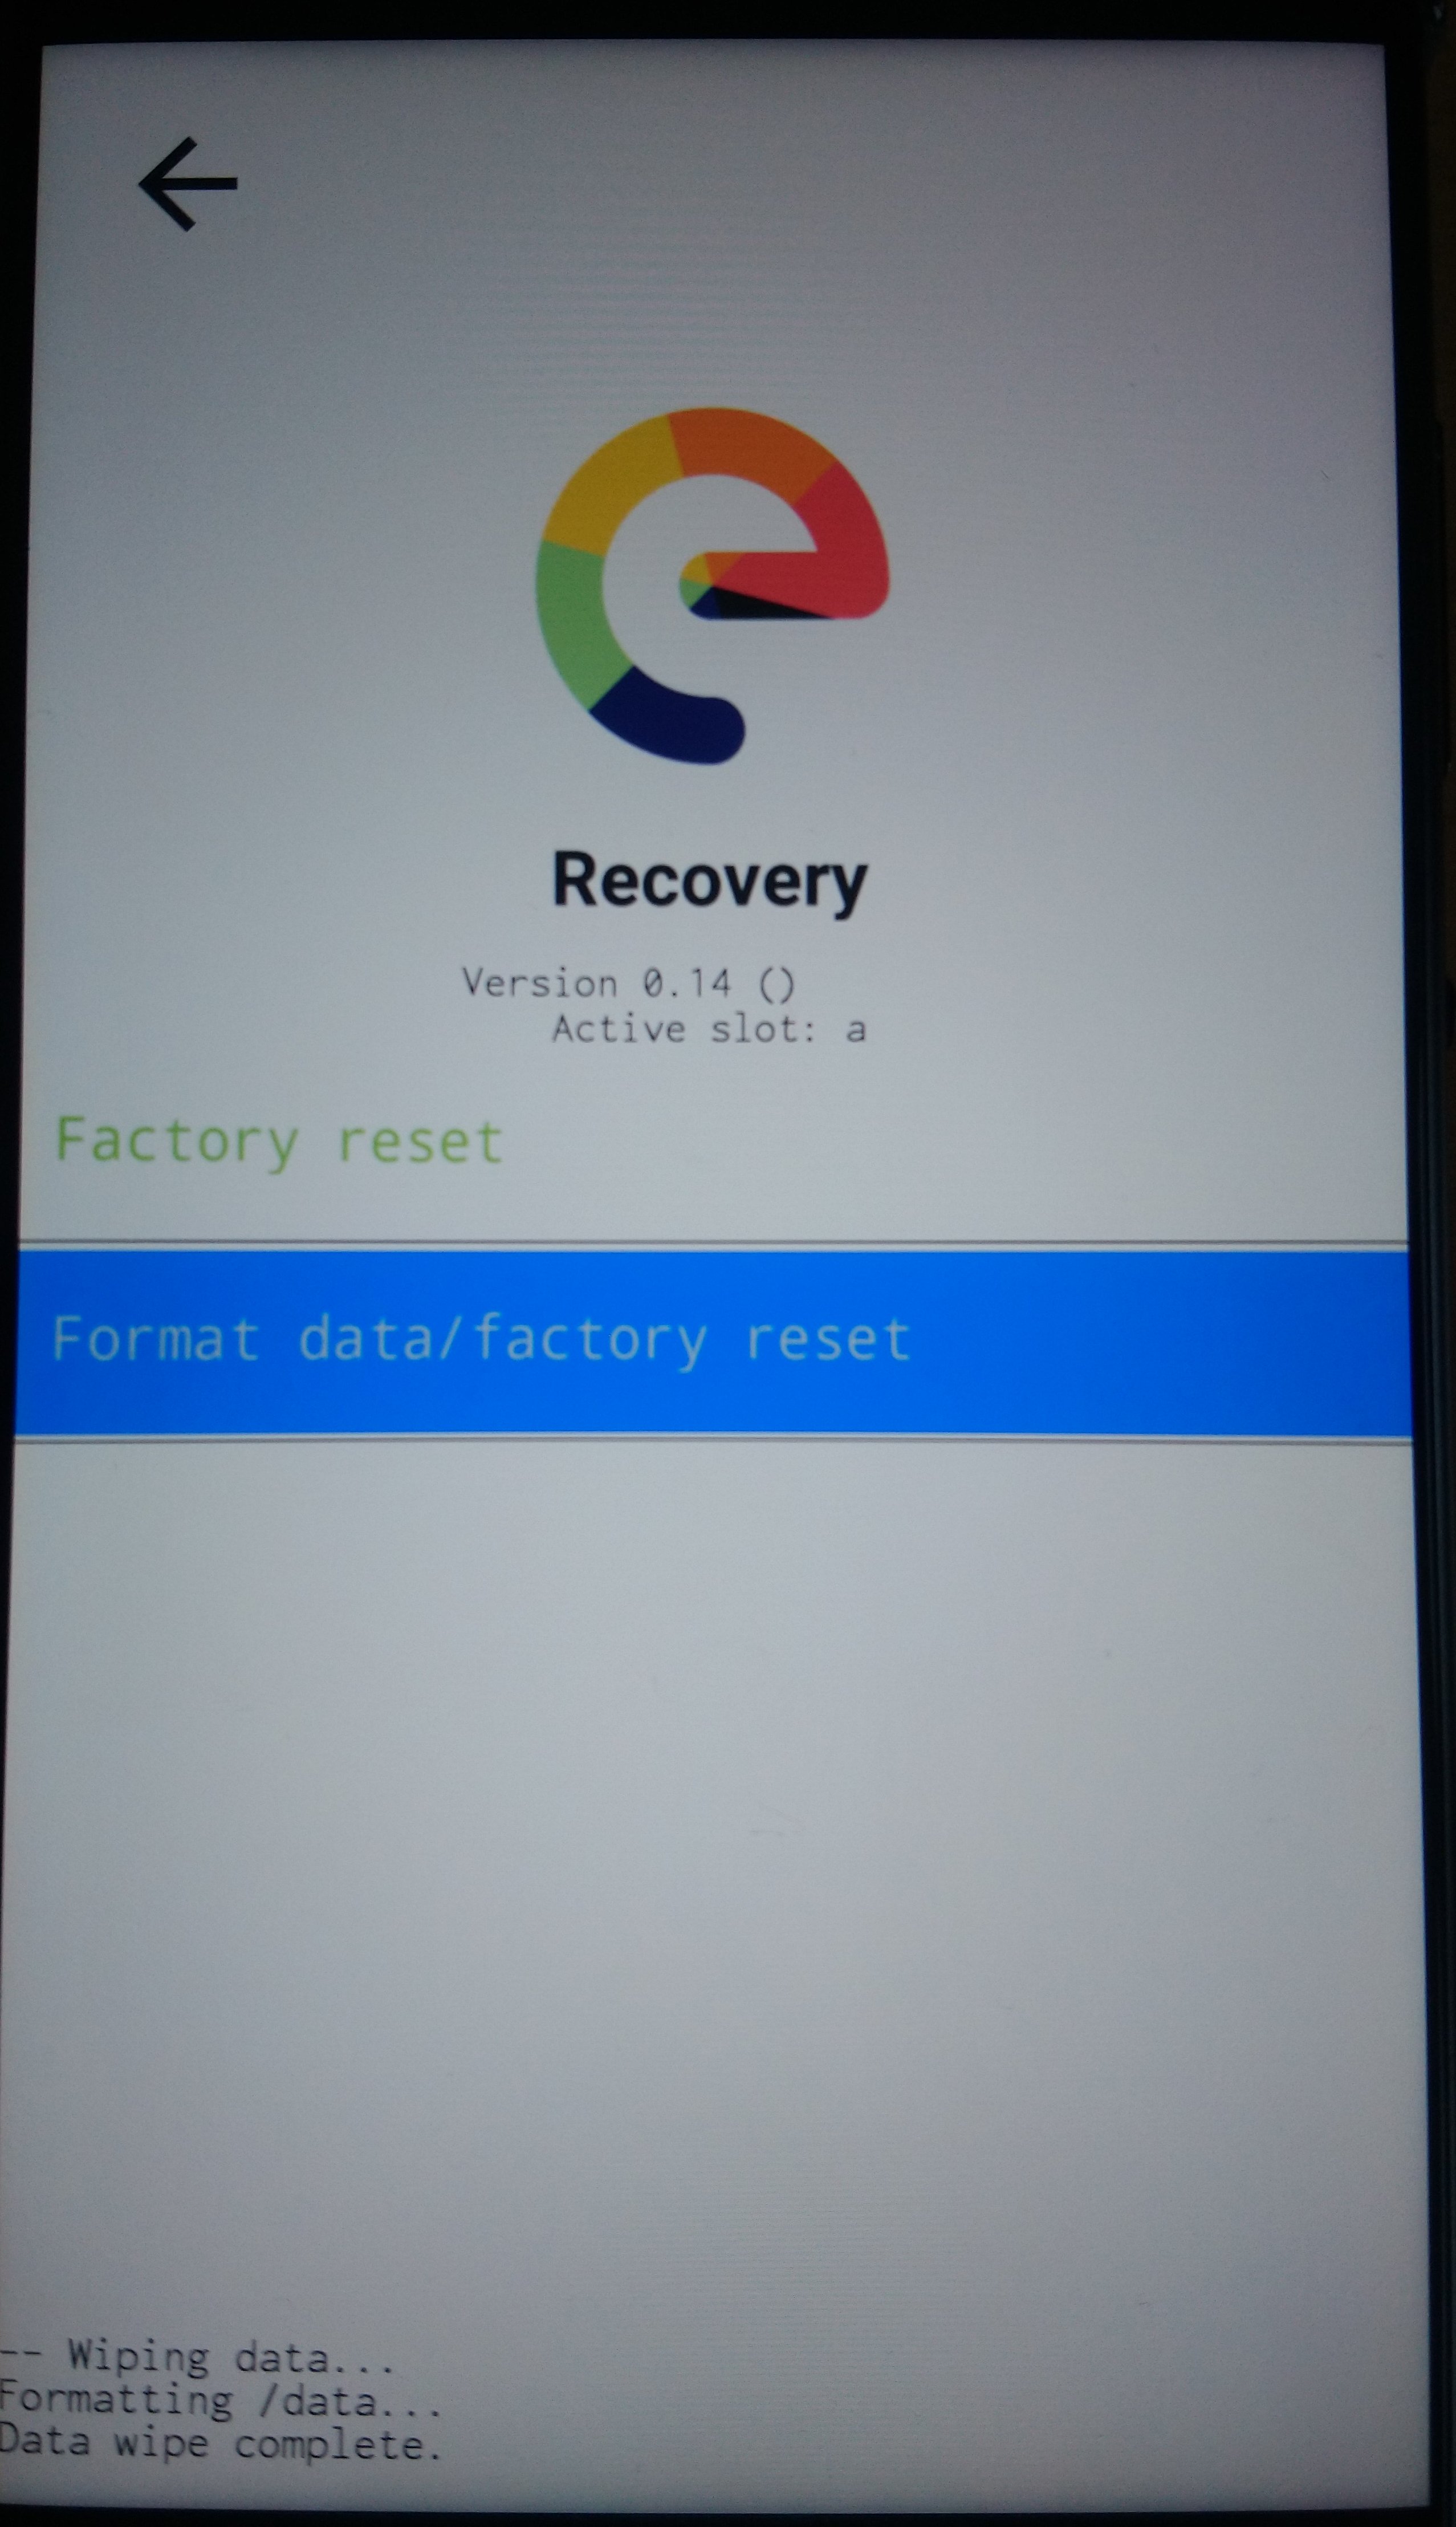
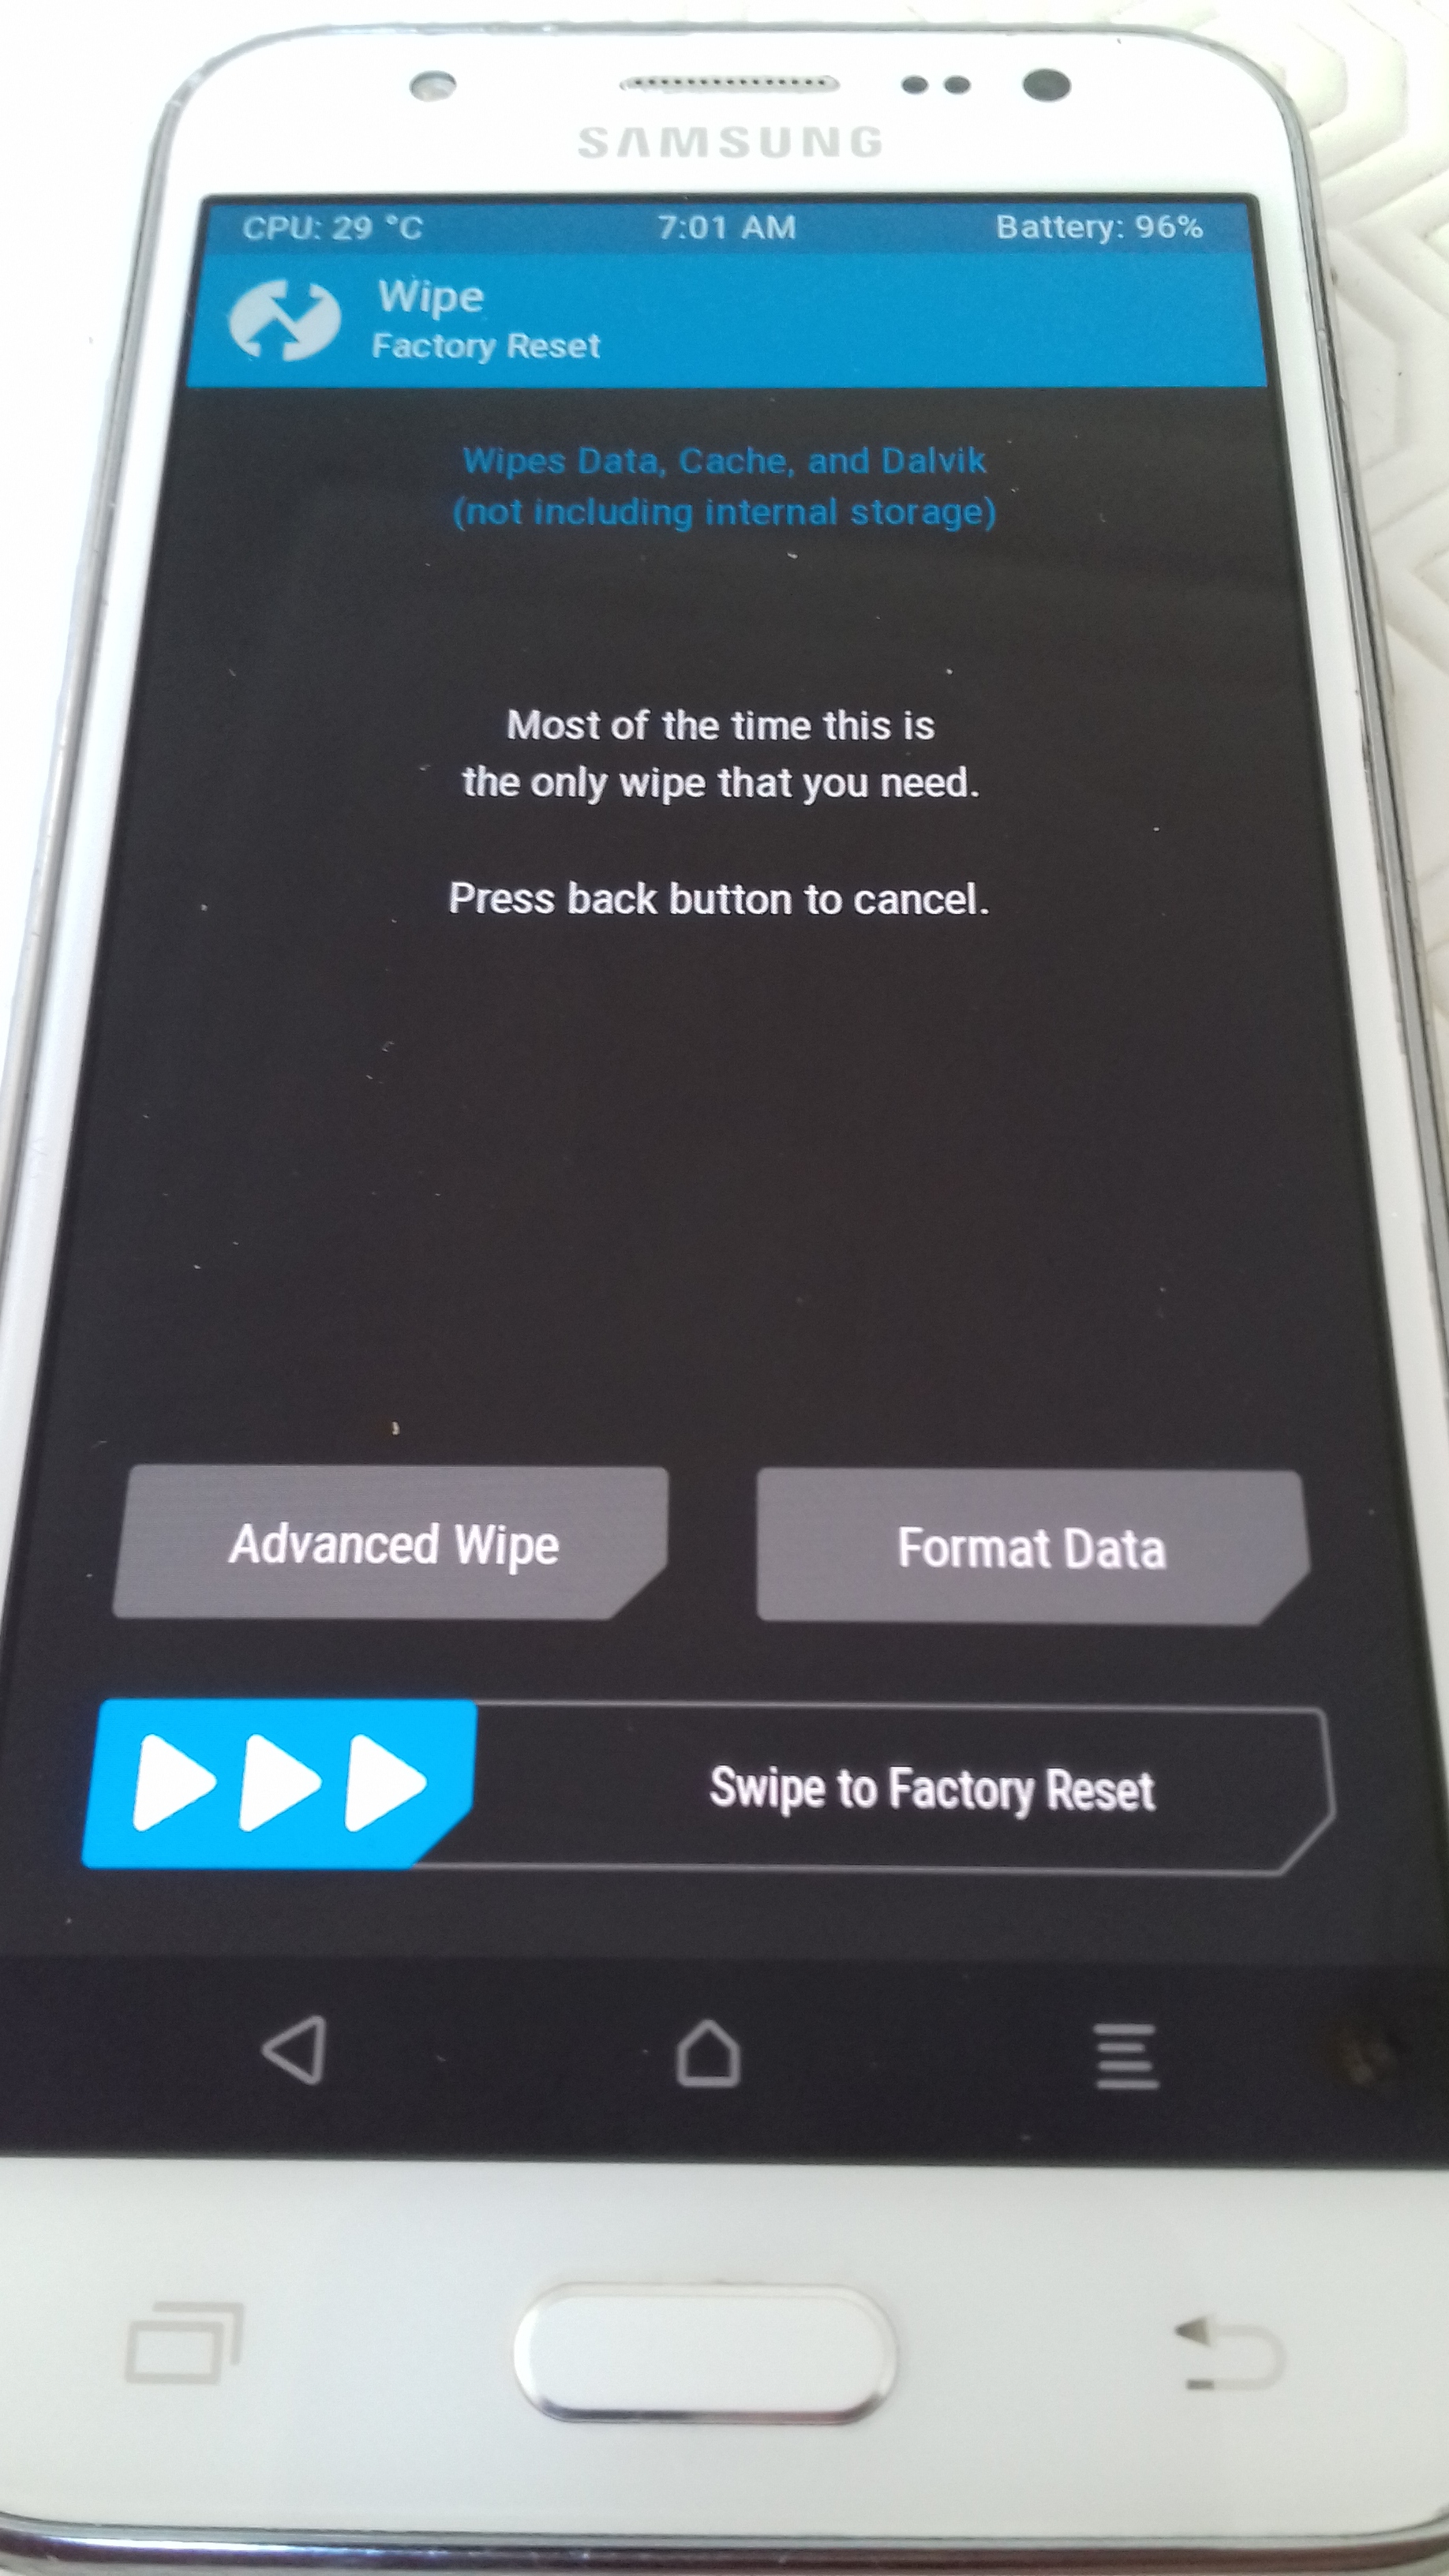
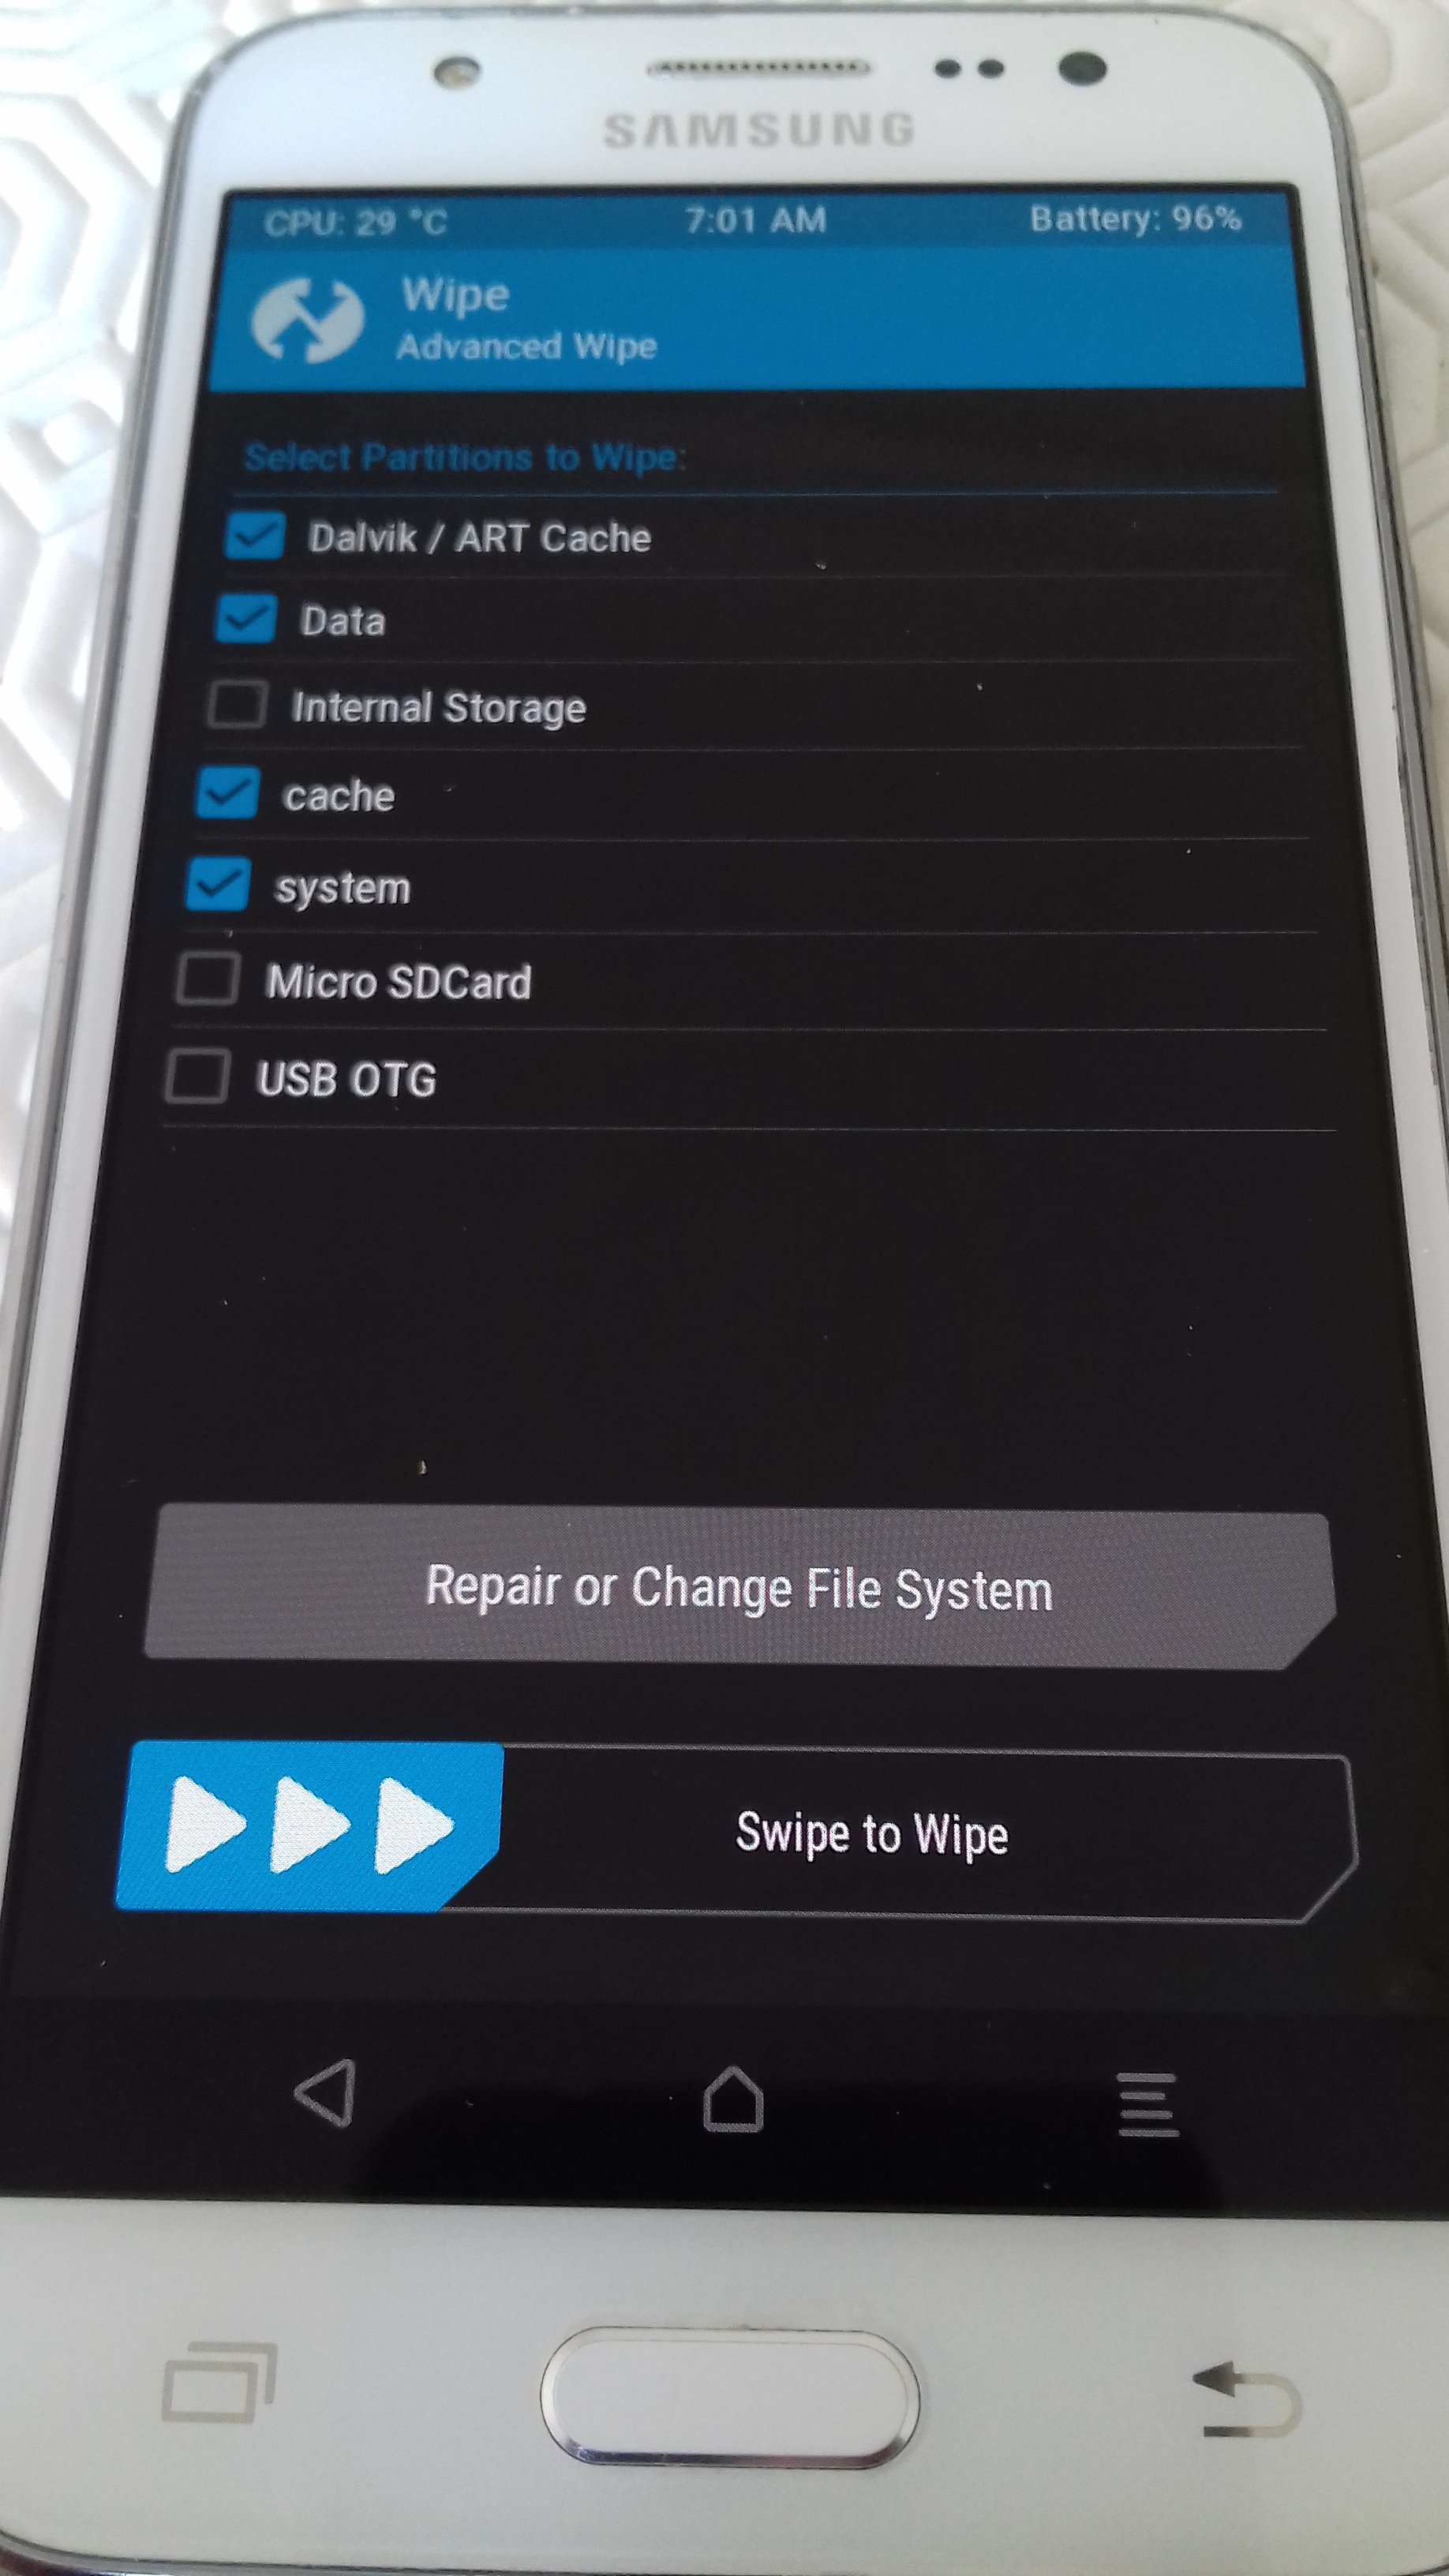
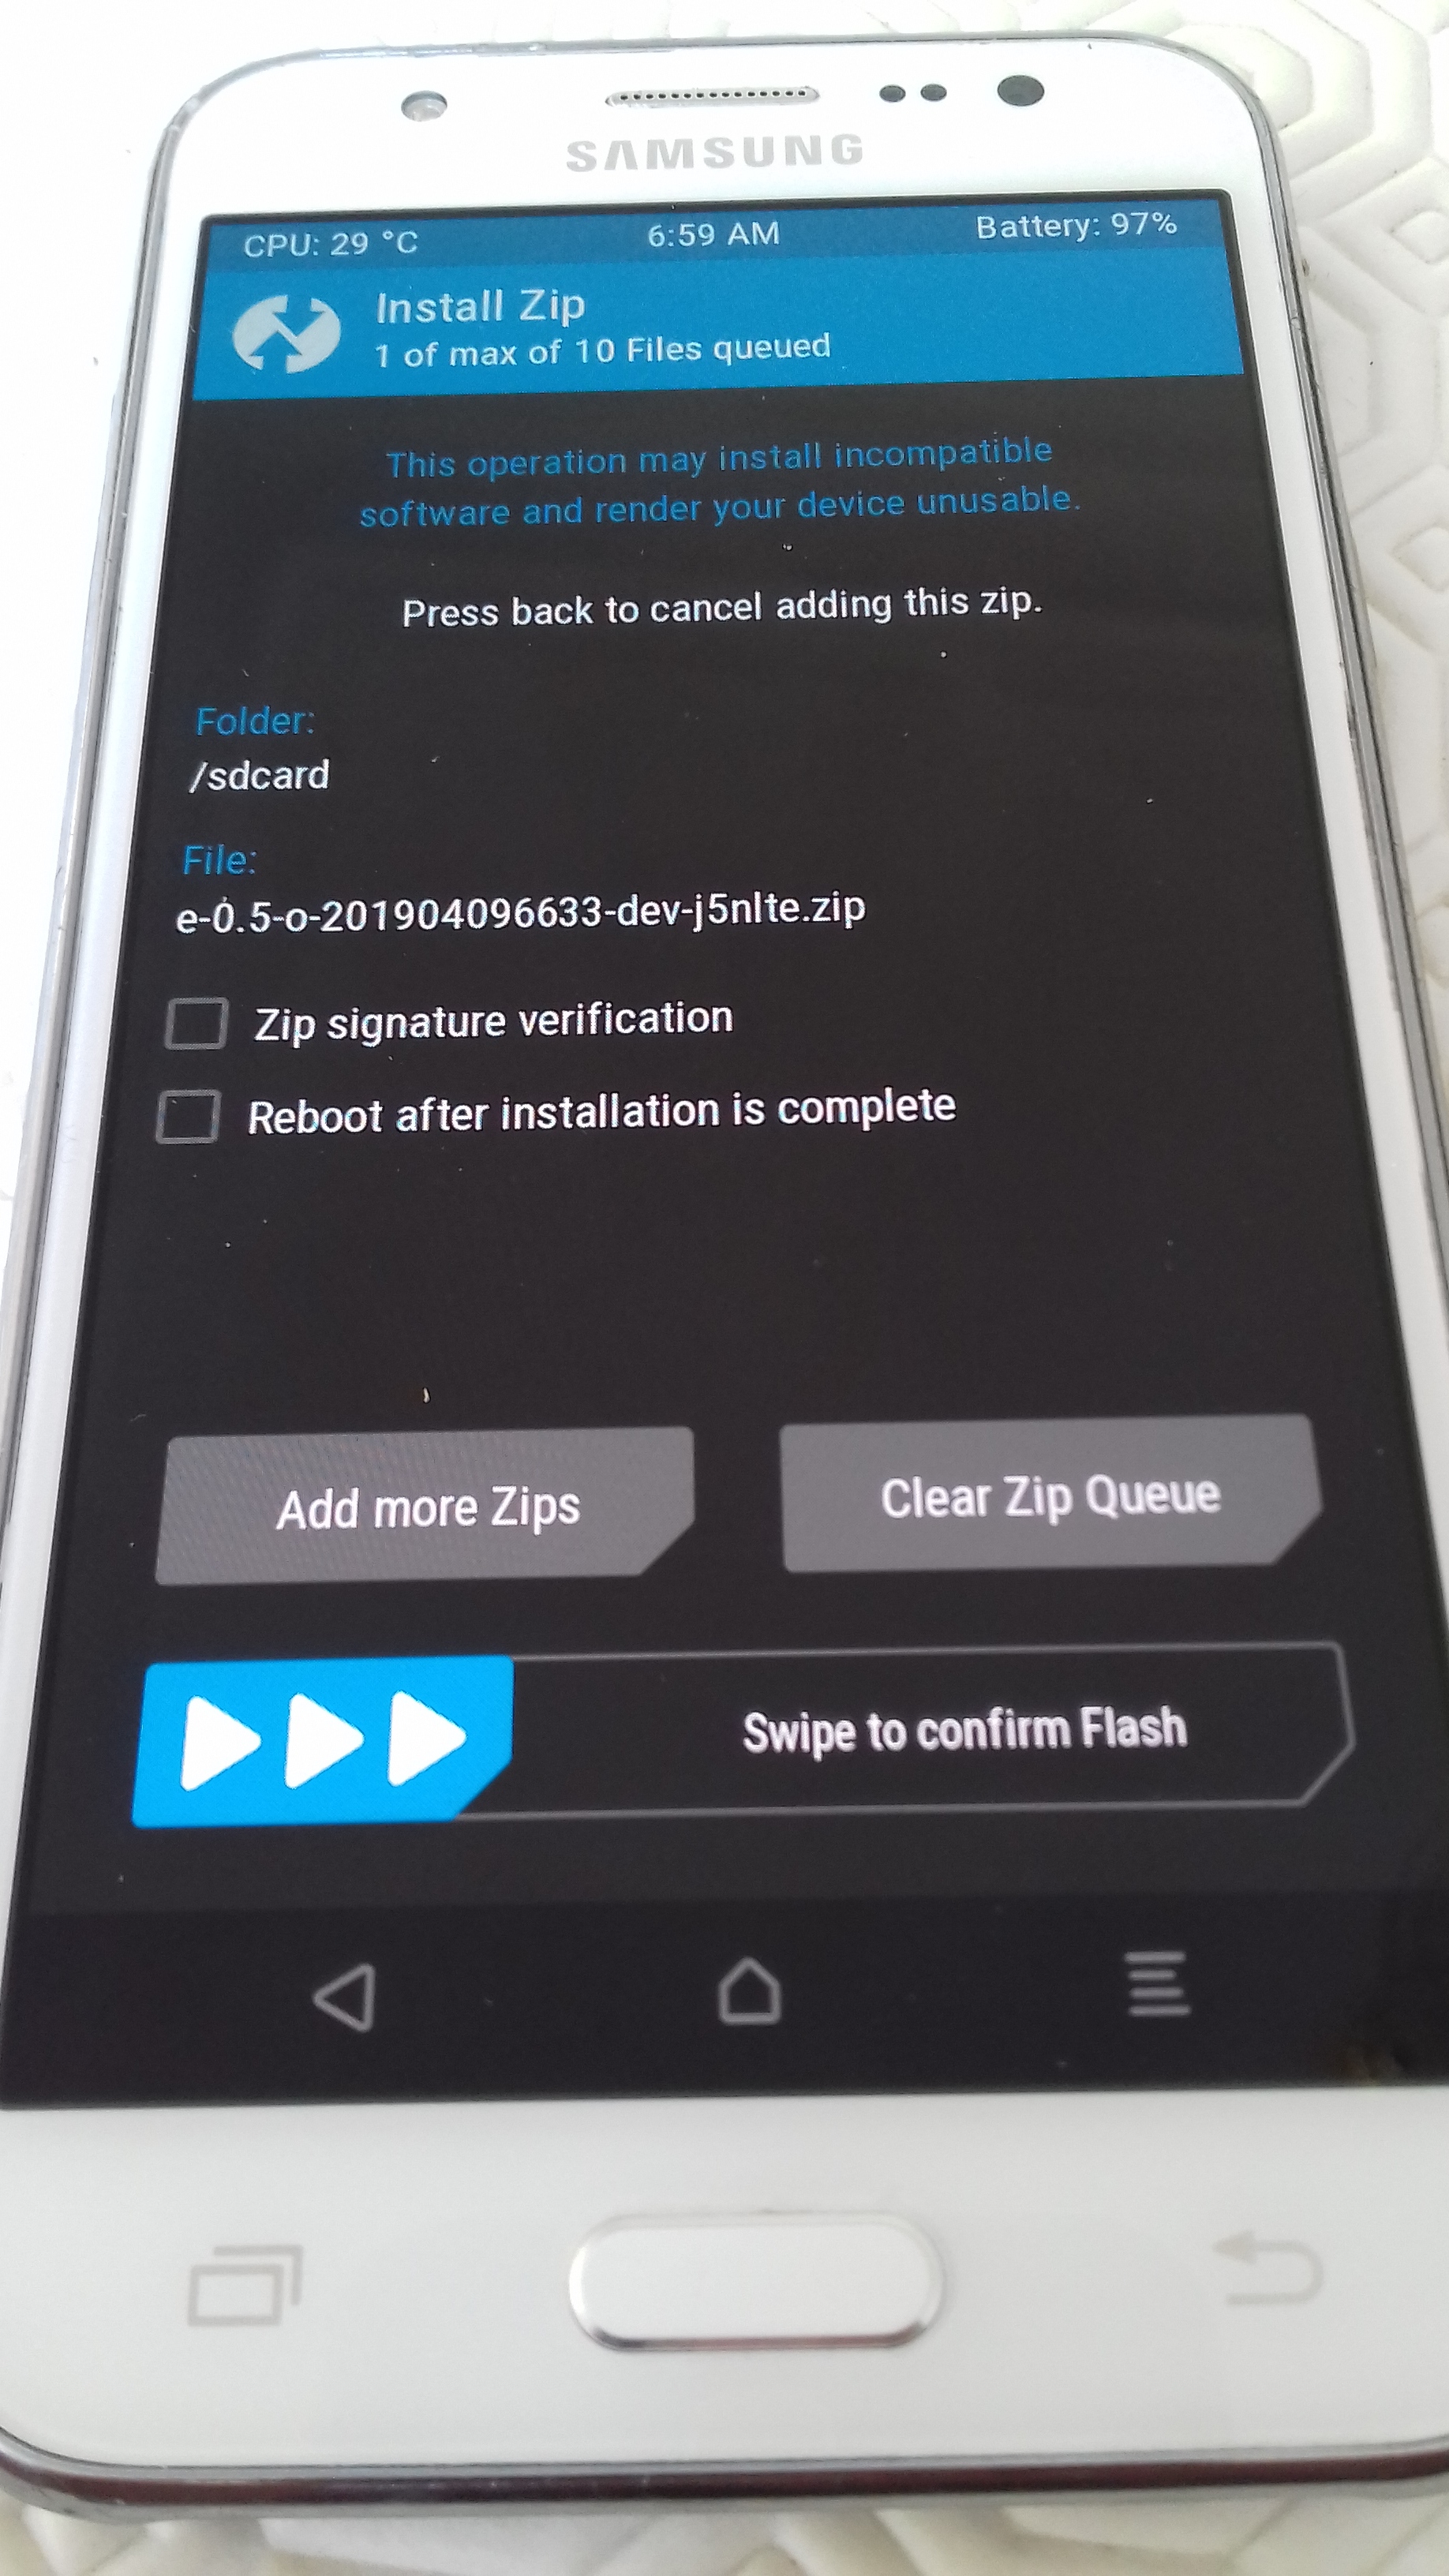
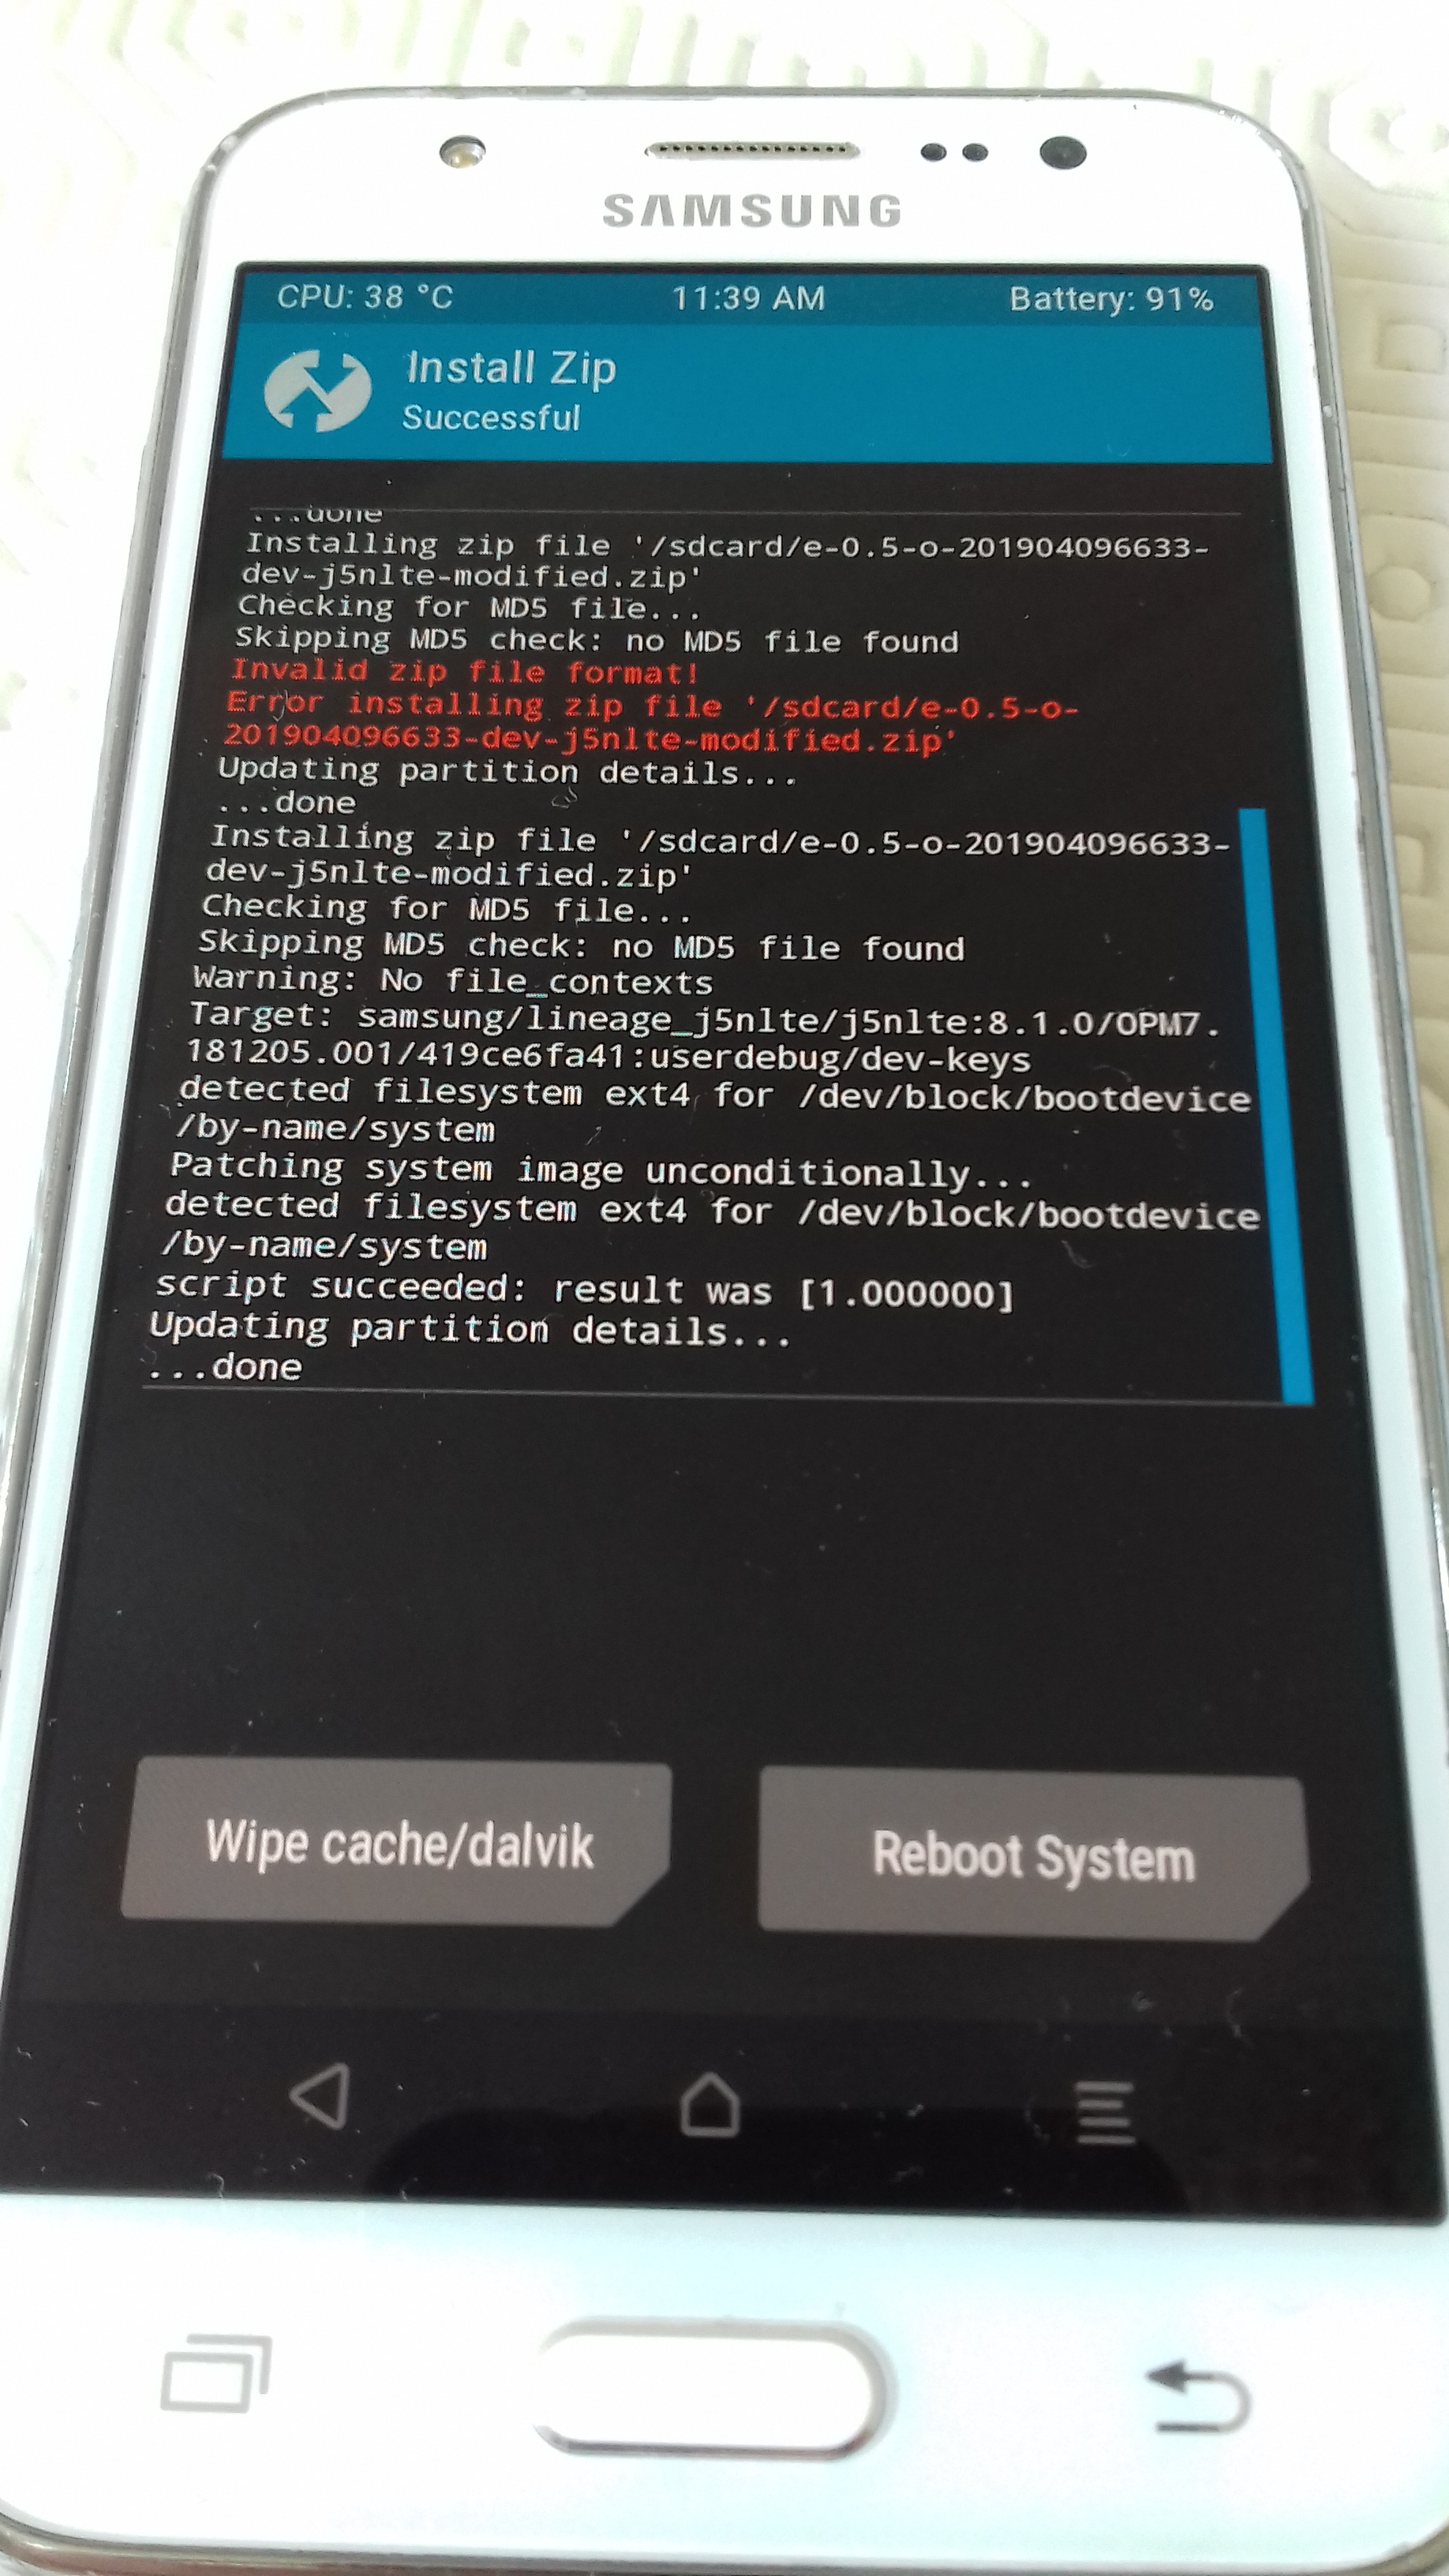
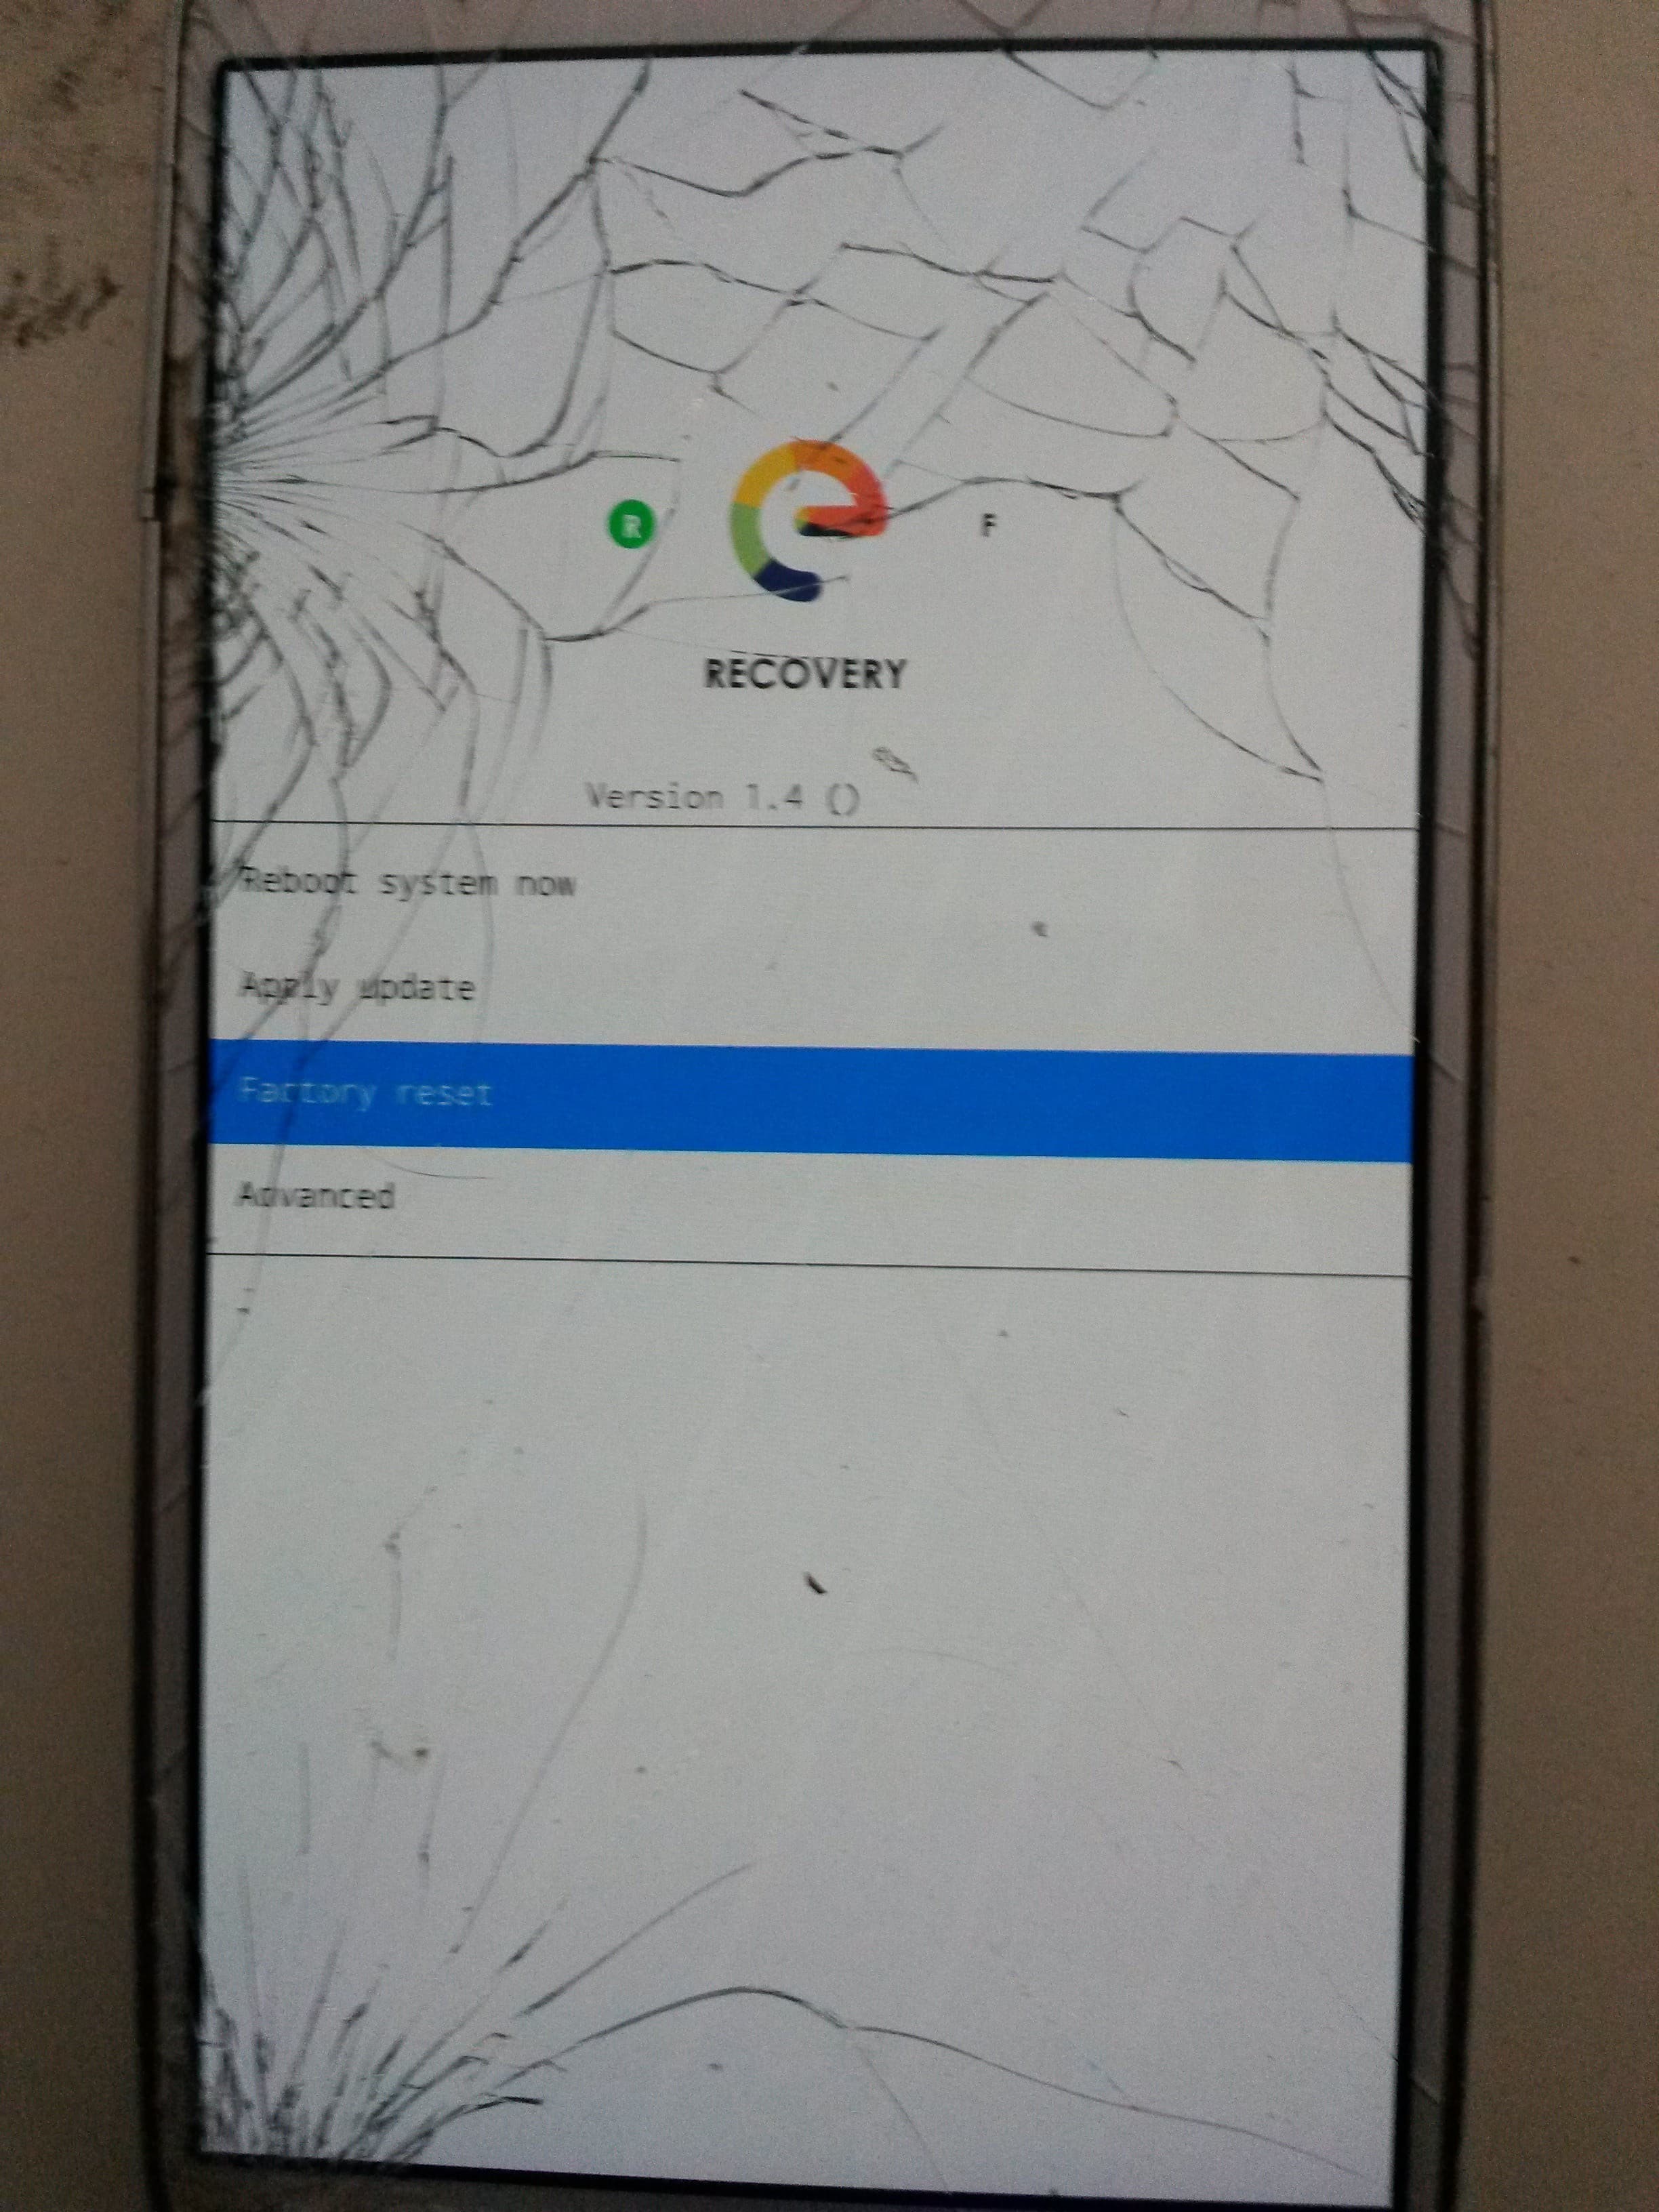
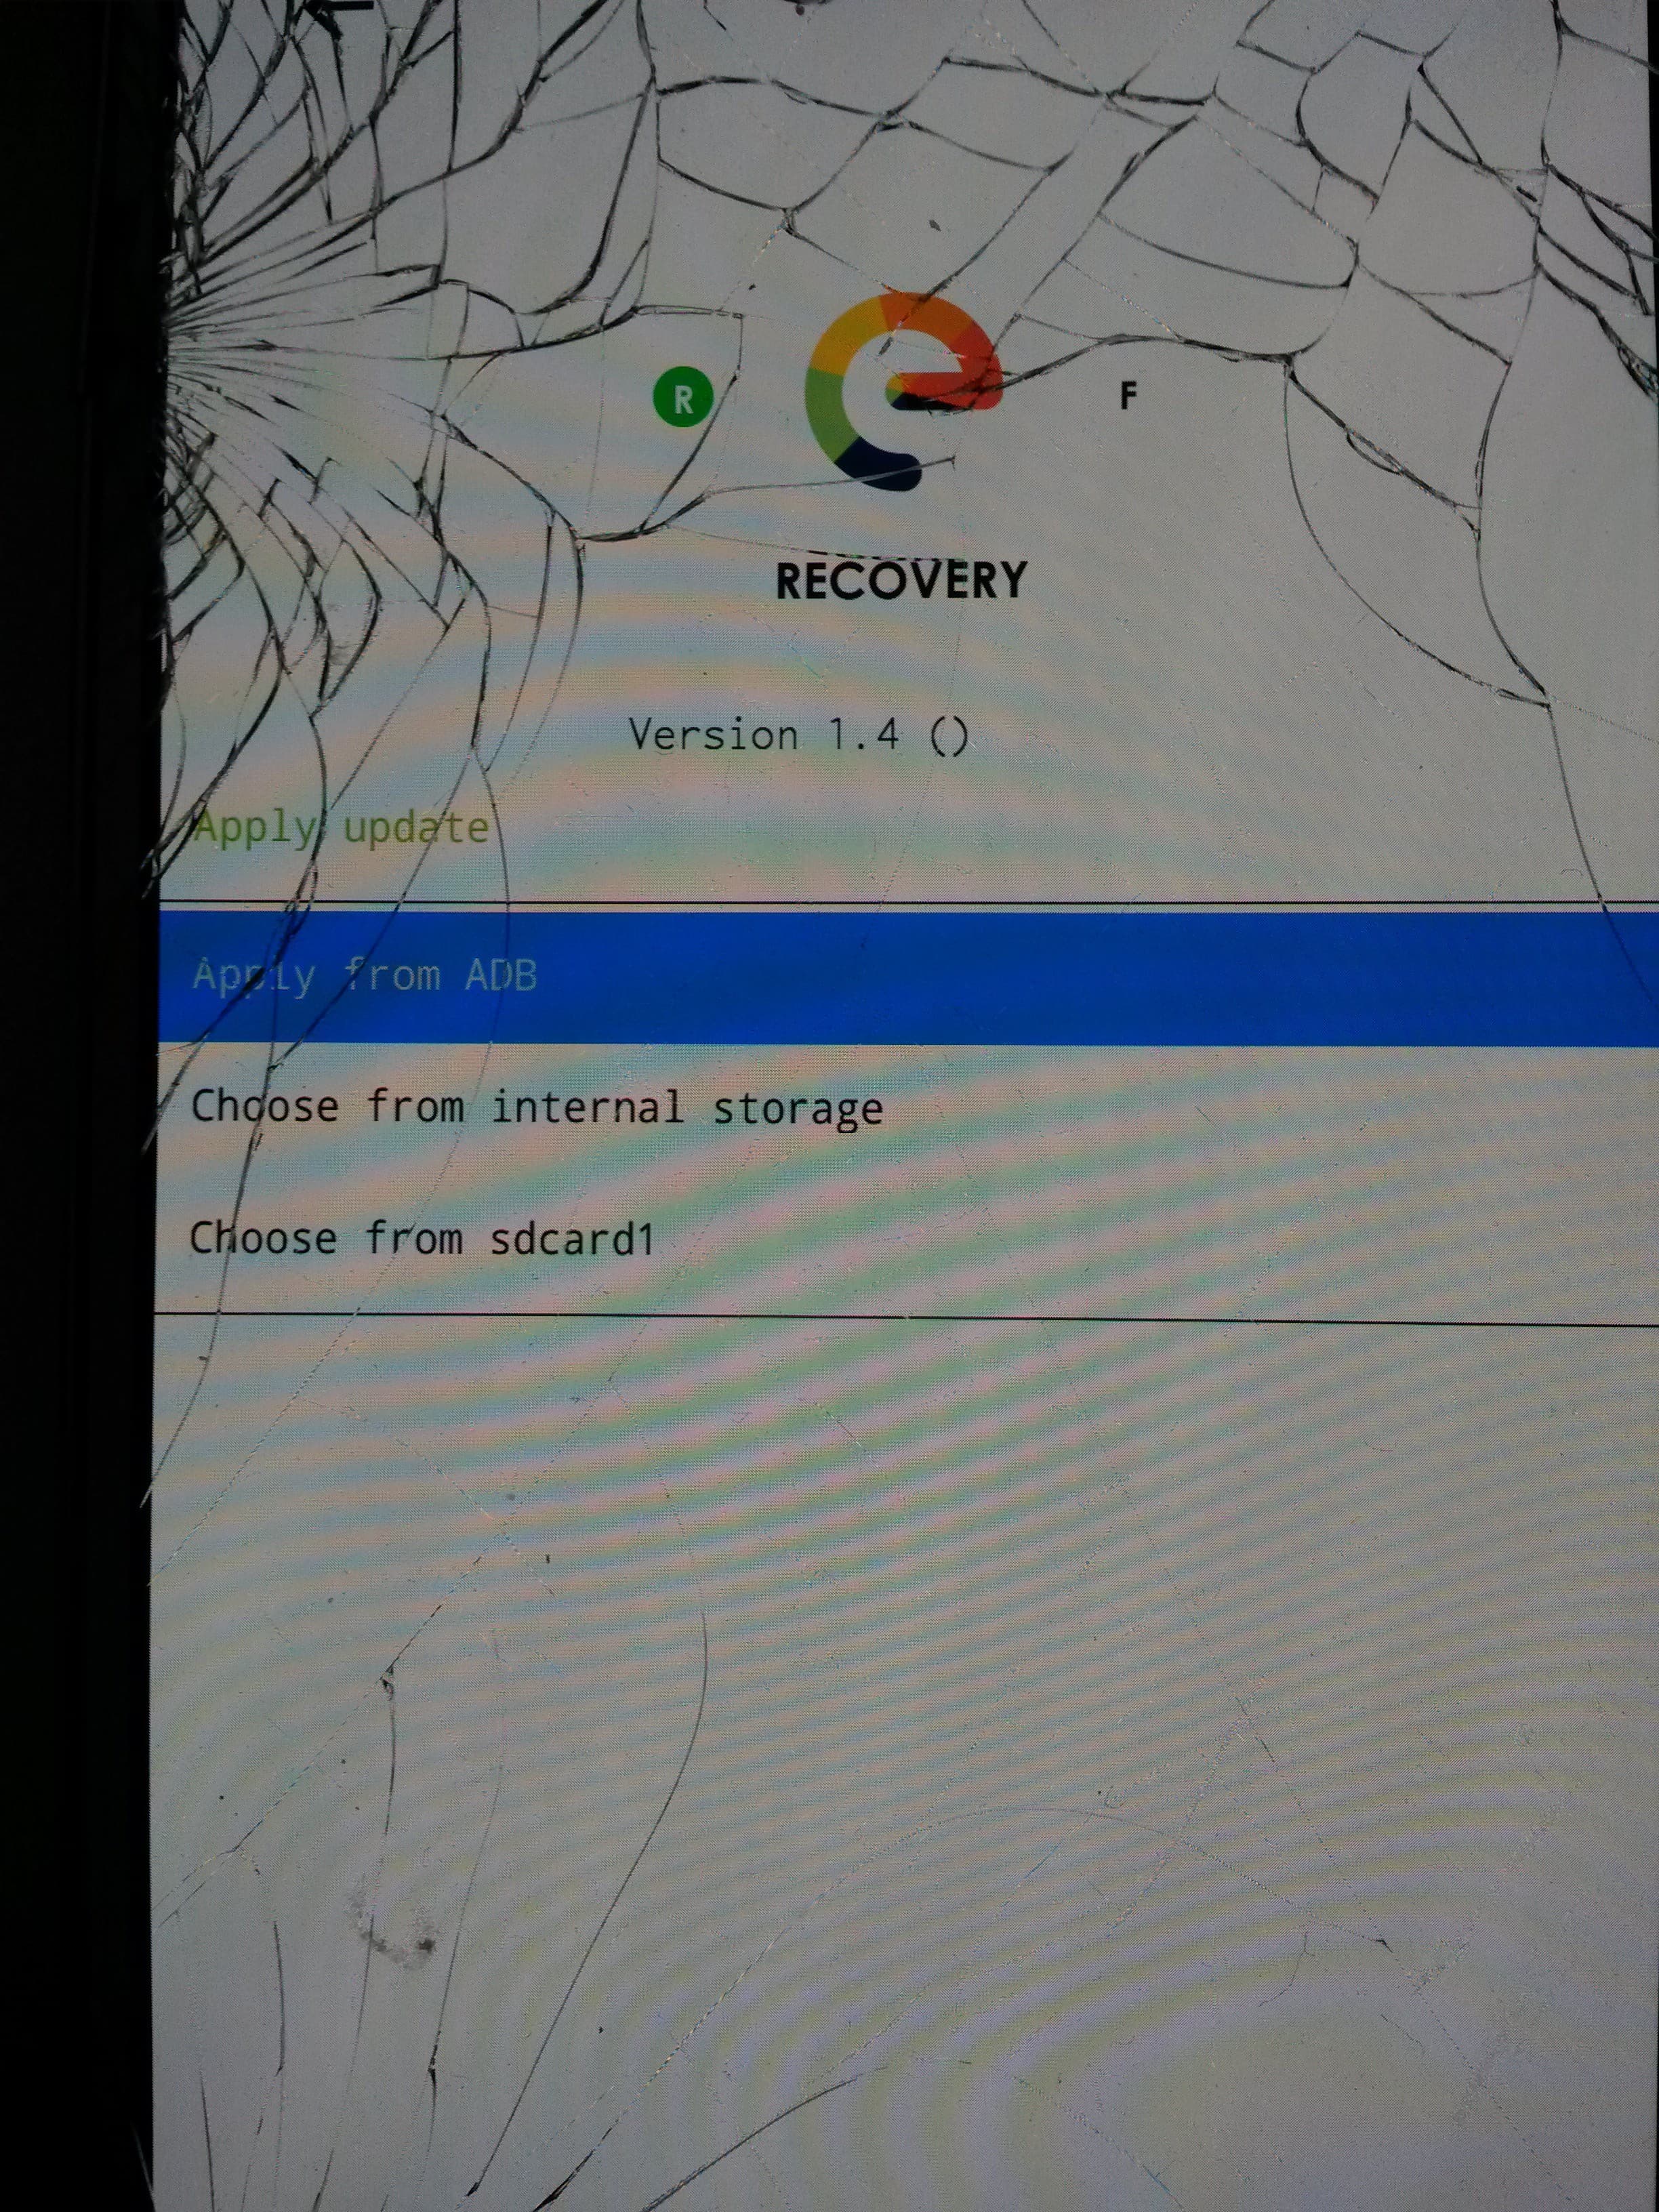
- To modify or change the /system partition of your device, you need to boot a custom recovery software that allow you to do that. ( e-recovery, based on AOSP-recovery or the best featured TWRP, from the Team Win Recovery Project ).
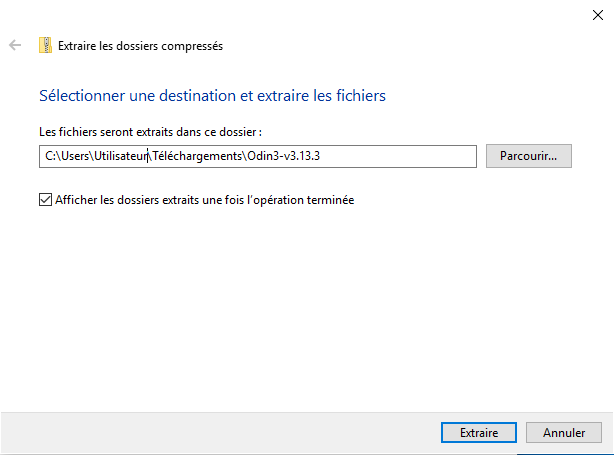
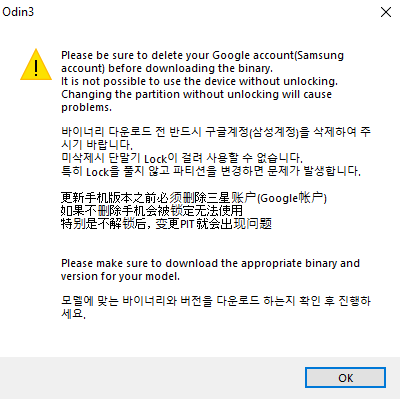
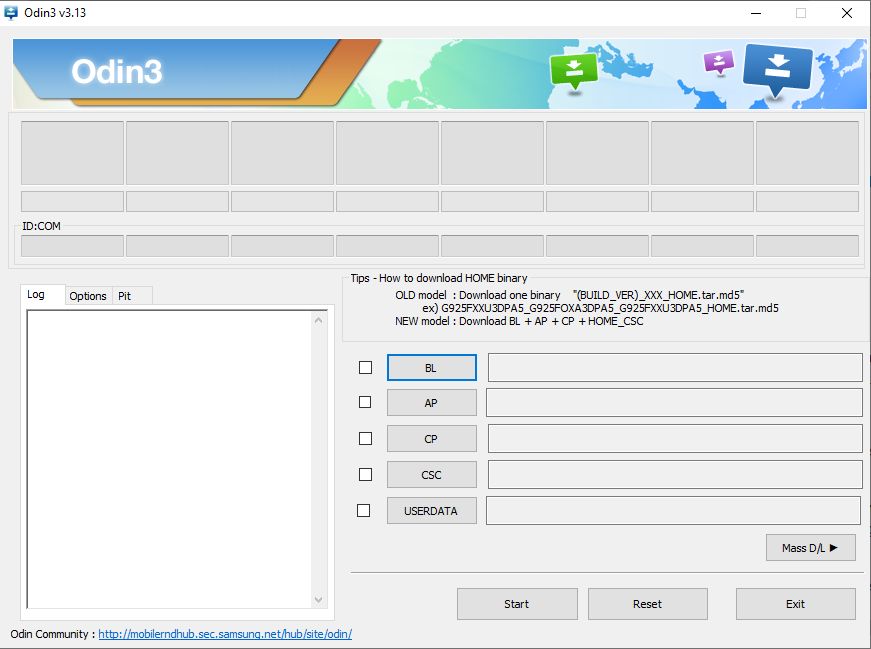
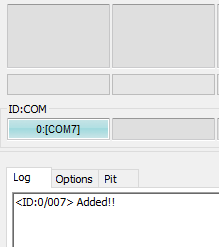
- To modify or change the /recovery partition of your device, you need to unlock the boot-loader and flash the custom recovery image to the ROM with the appropriate tools ( Fastboot or Heimdall or Odin )
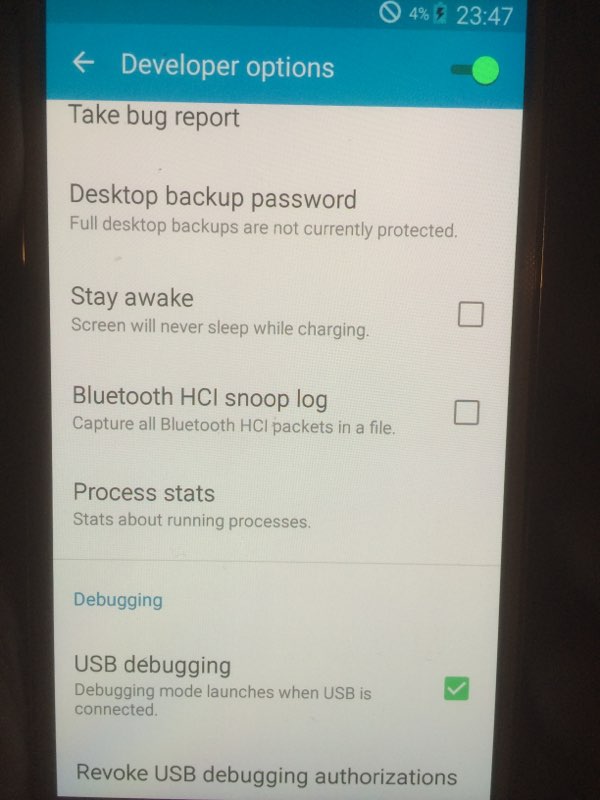
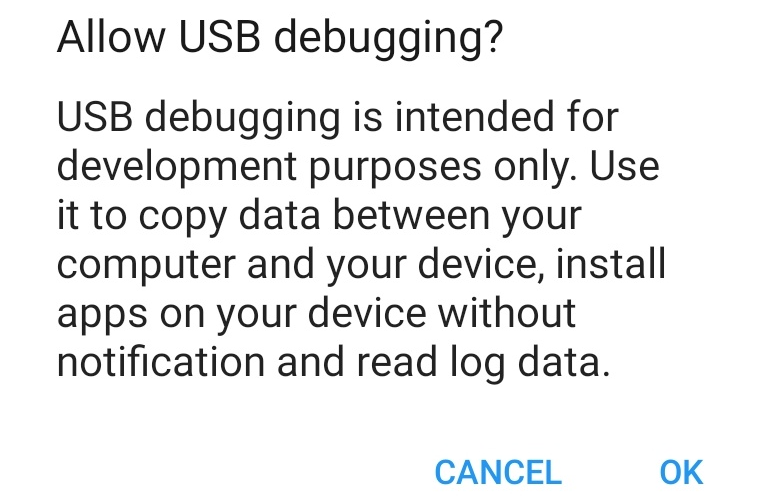
- To manage the device, you need to communicate with it. ( USB adb, the Android Debugging Bridge )
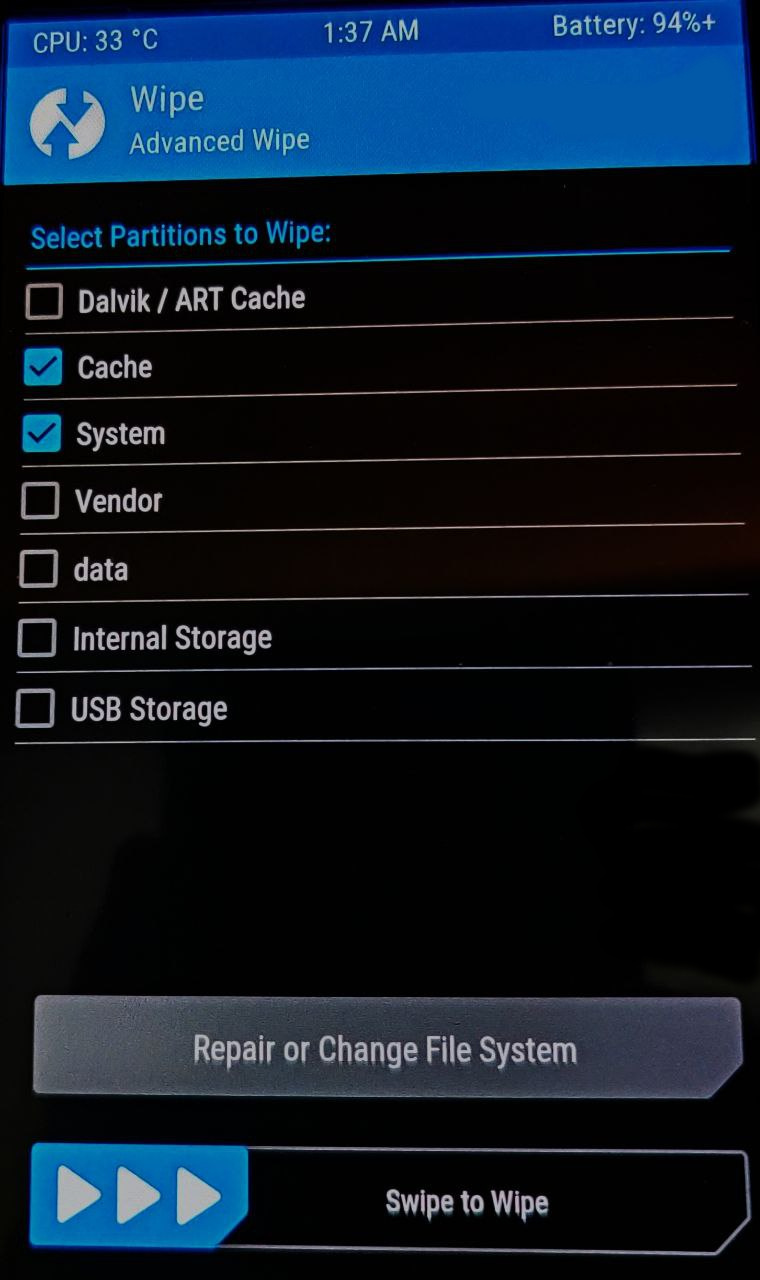
there are many /partitions on the phone ( ~30, depending of the device model ), but the install process will only modify /boot, /recovery, /system, and /data ( plus /cache and /dalvik-cache ).
NOT ALL THE DEVICE CONTENT ( hardware related )
.
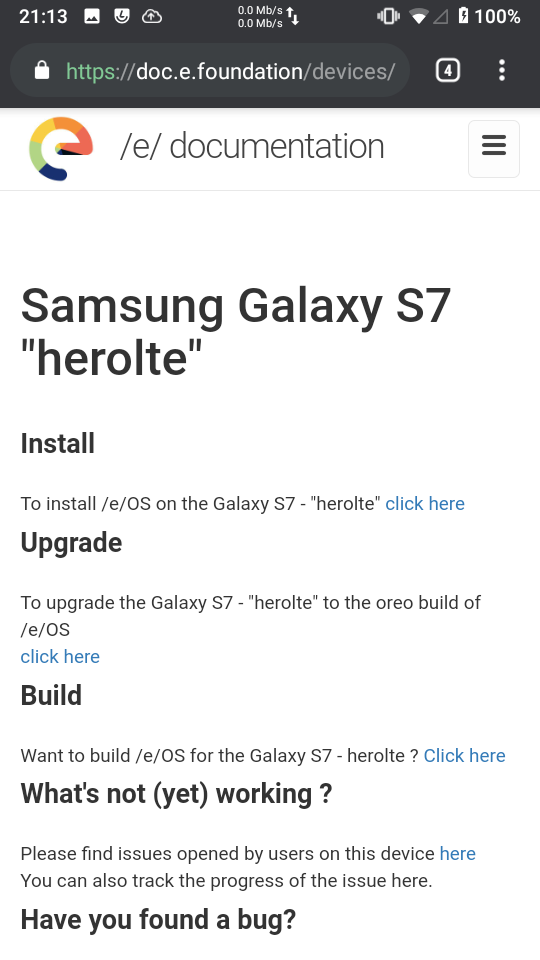
official documentation https://doc.e.foundation
.
you should read Getting started on /e/ by @Manoj
.
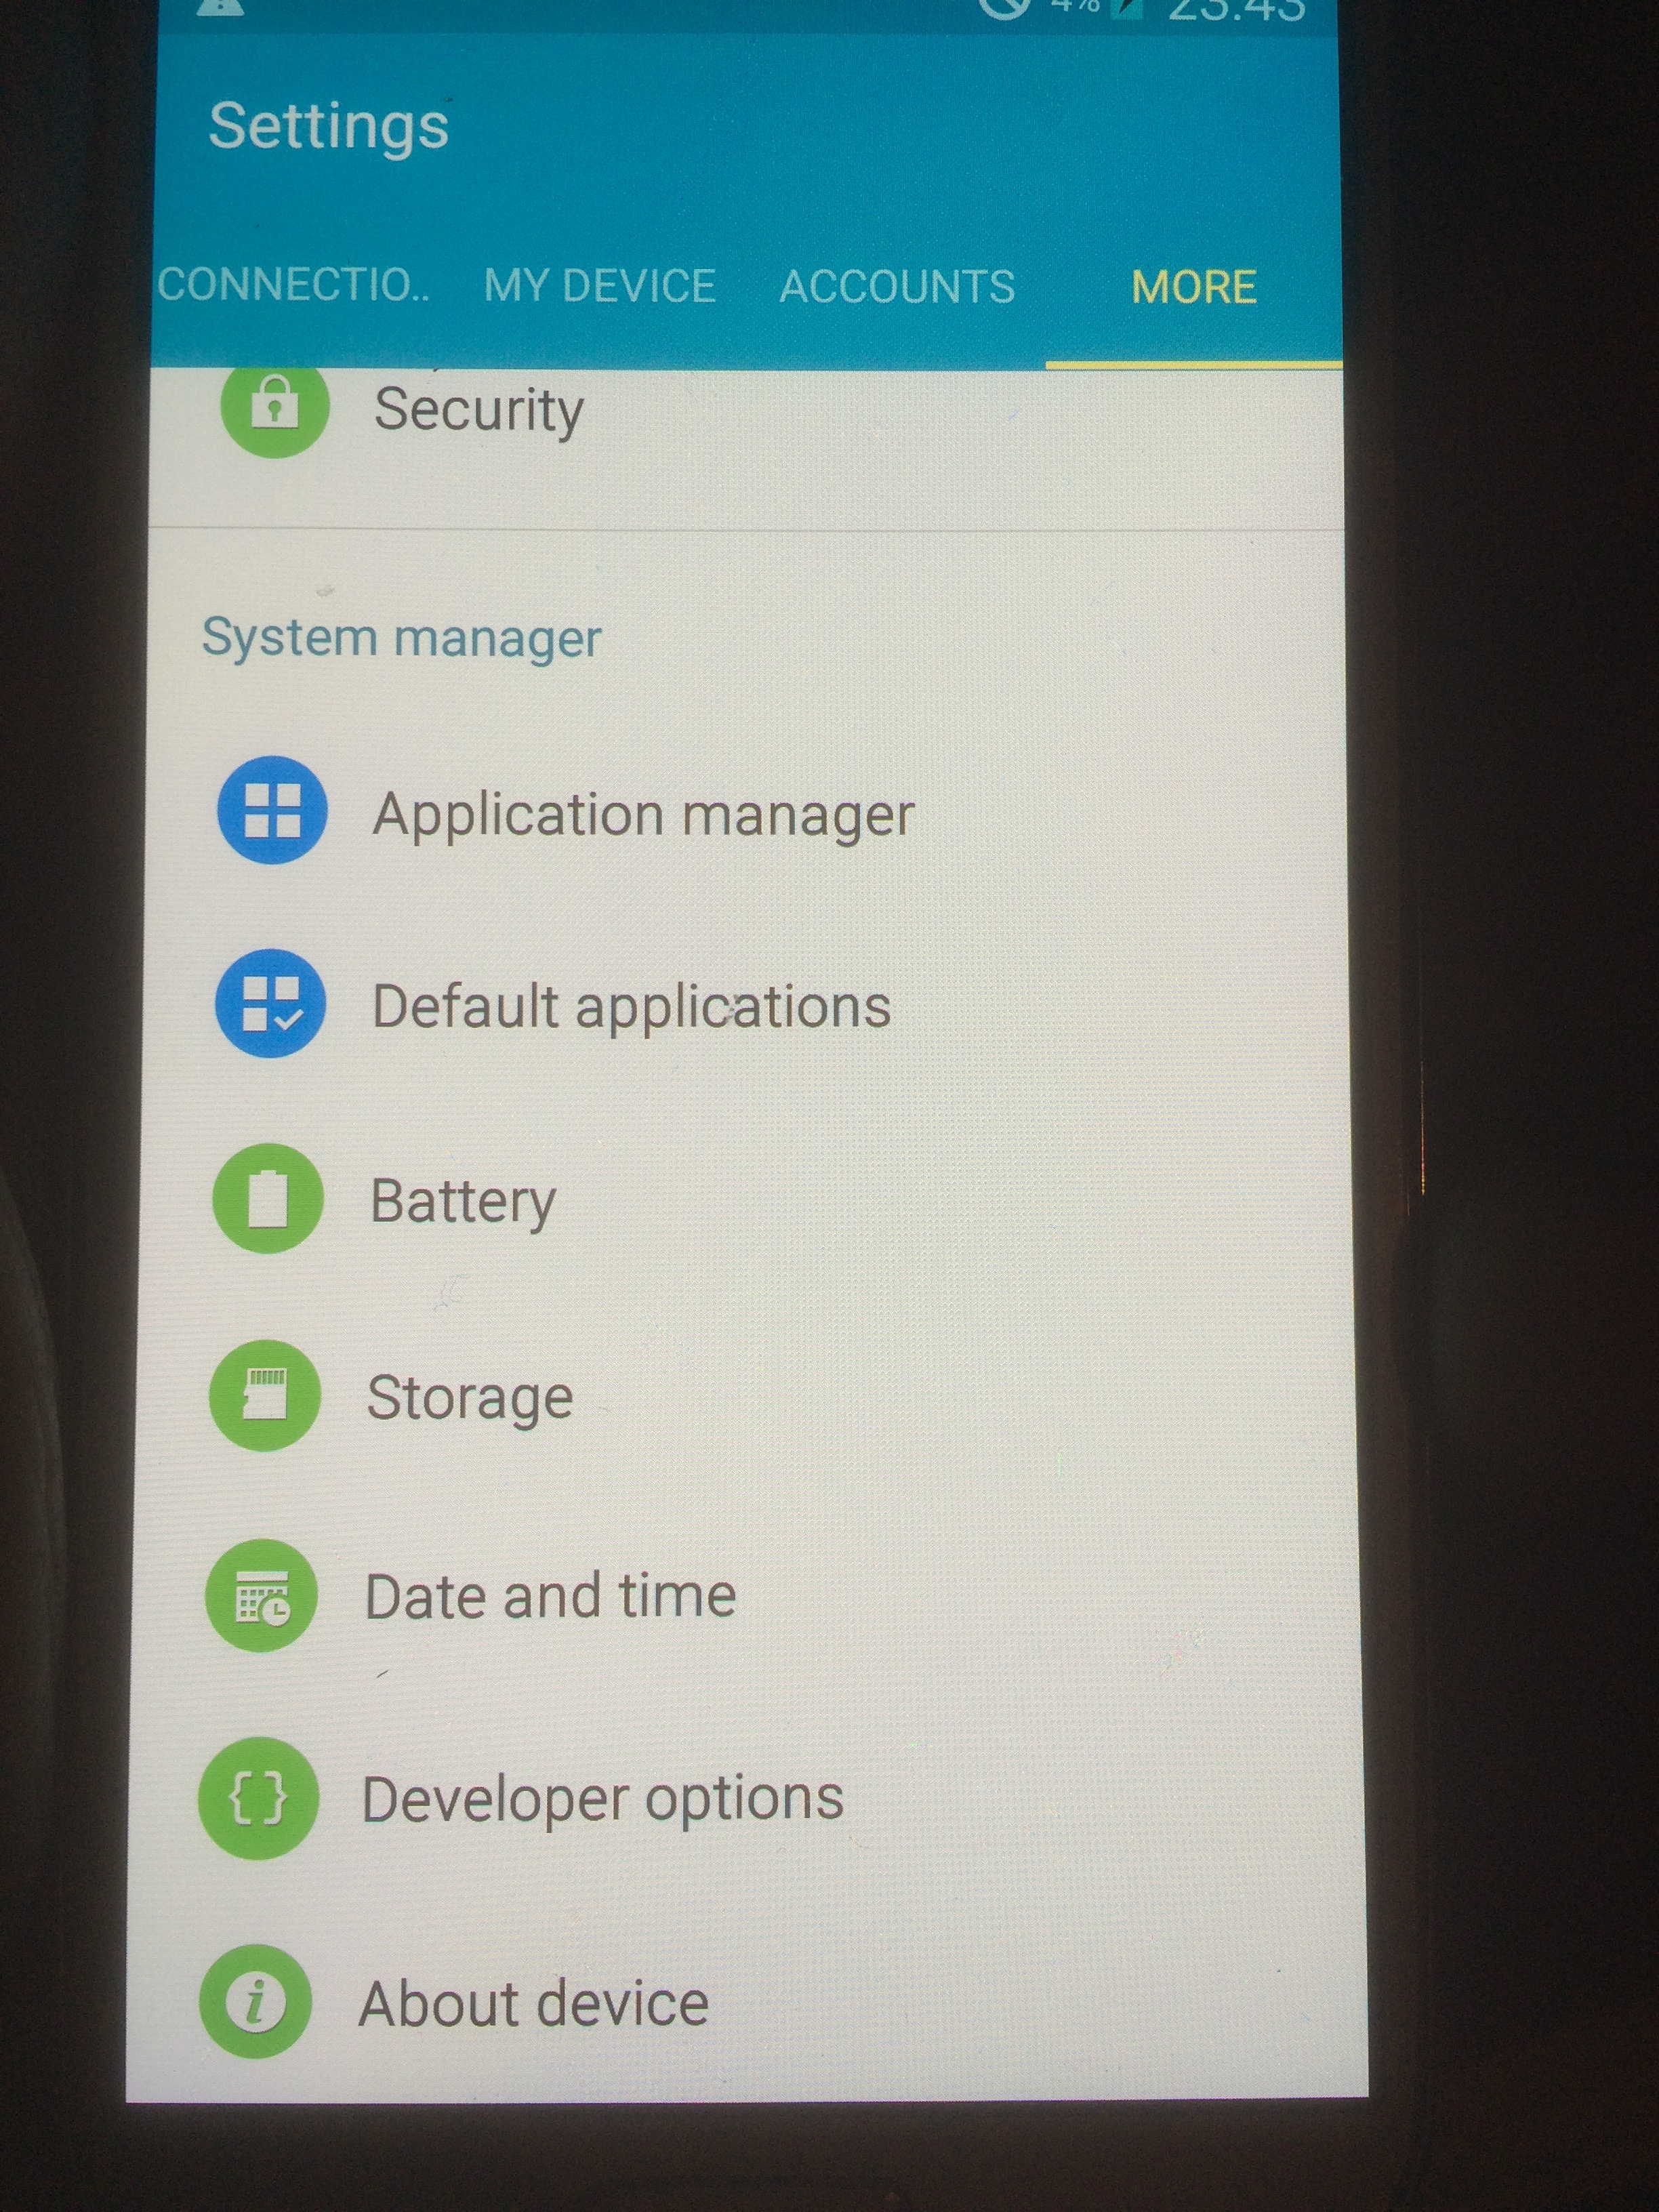
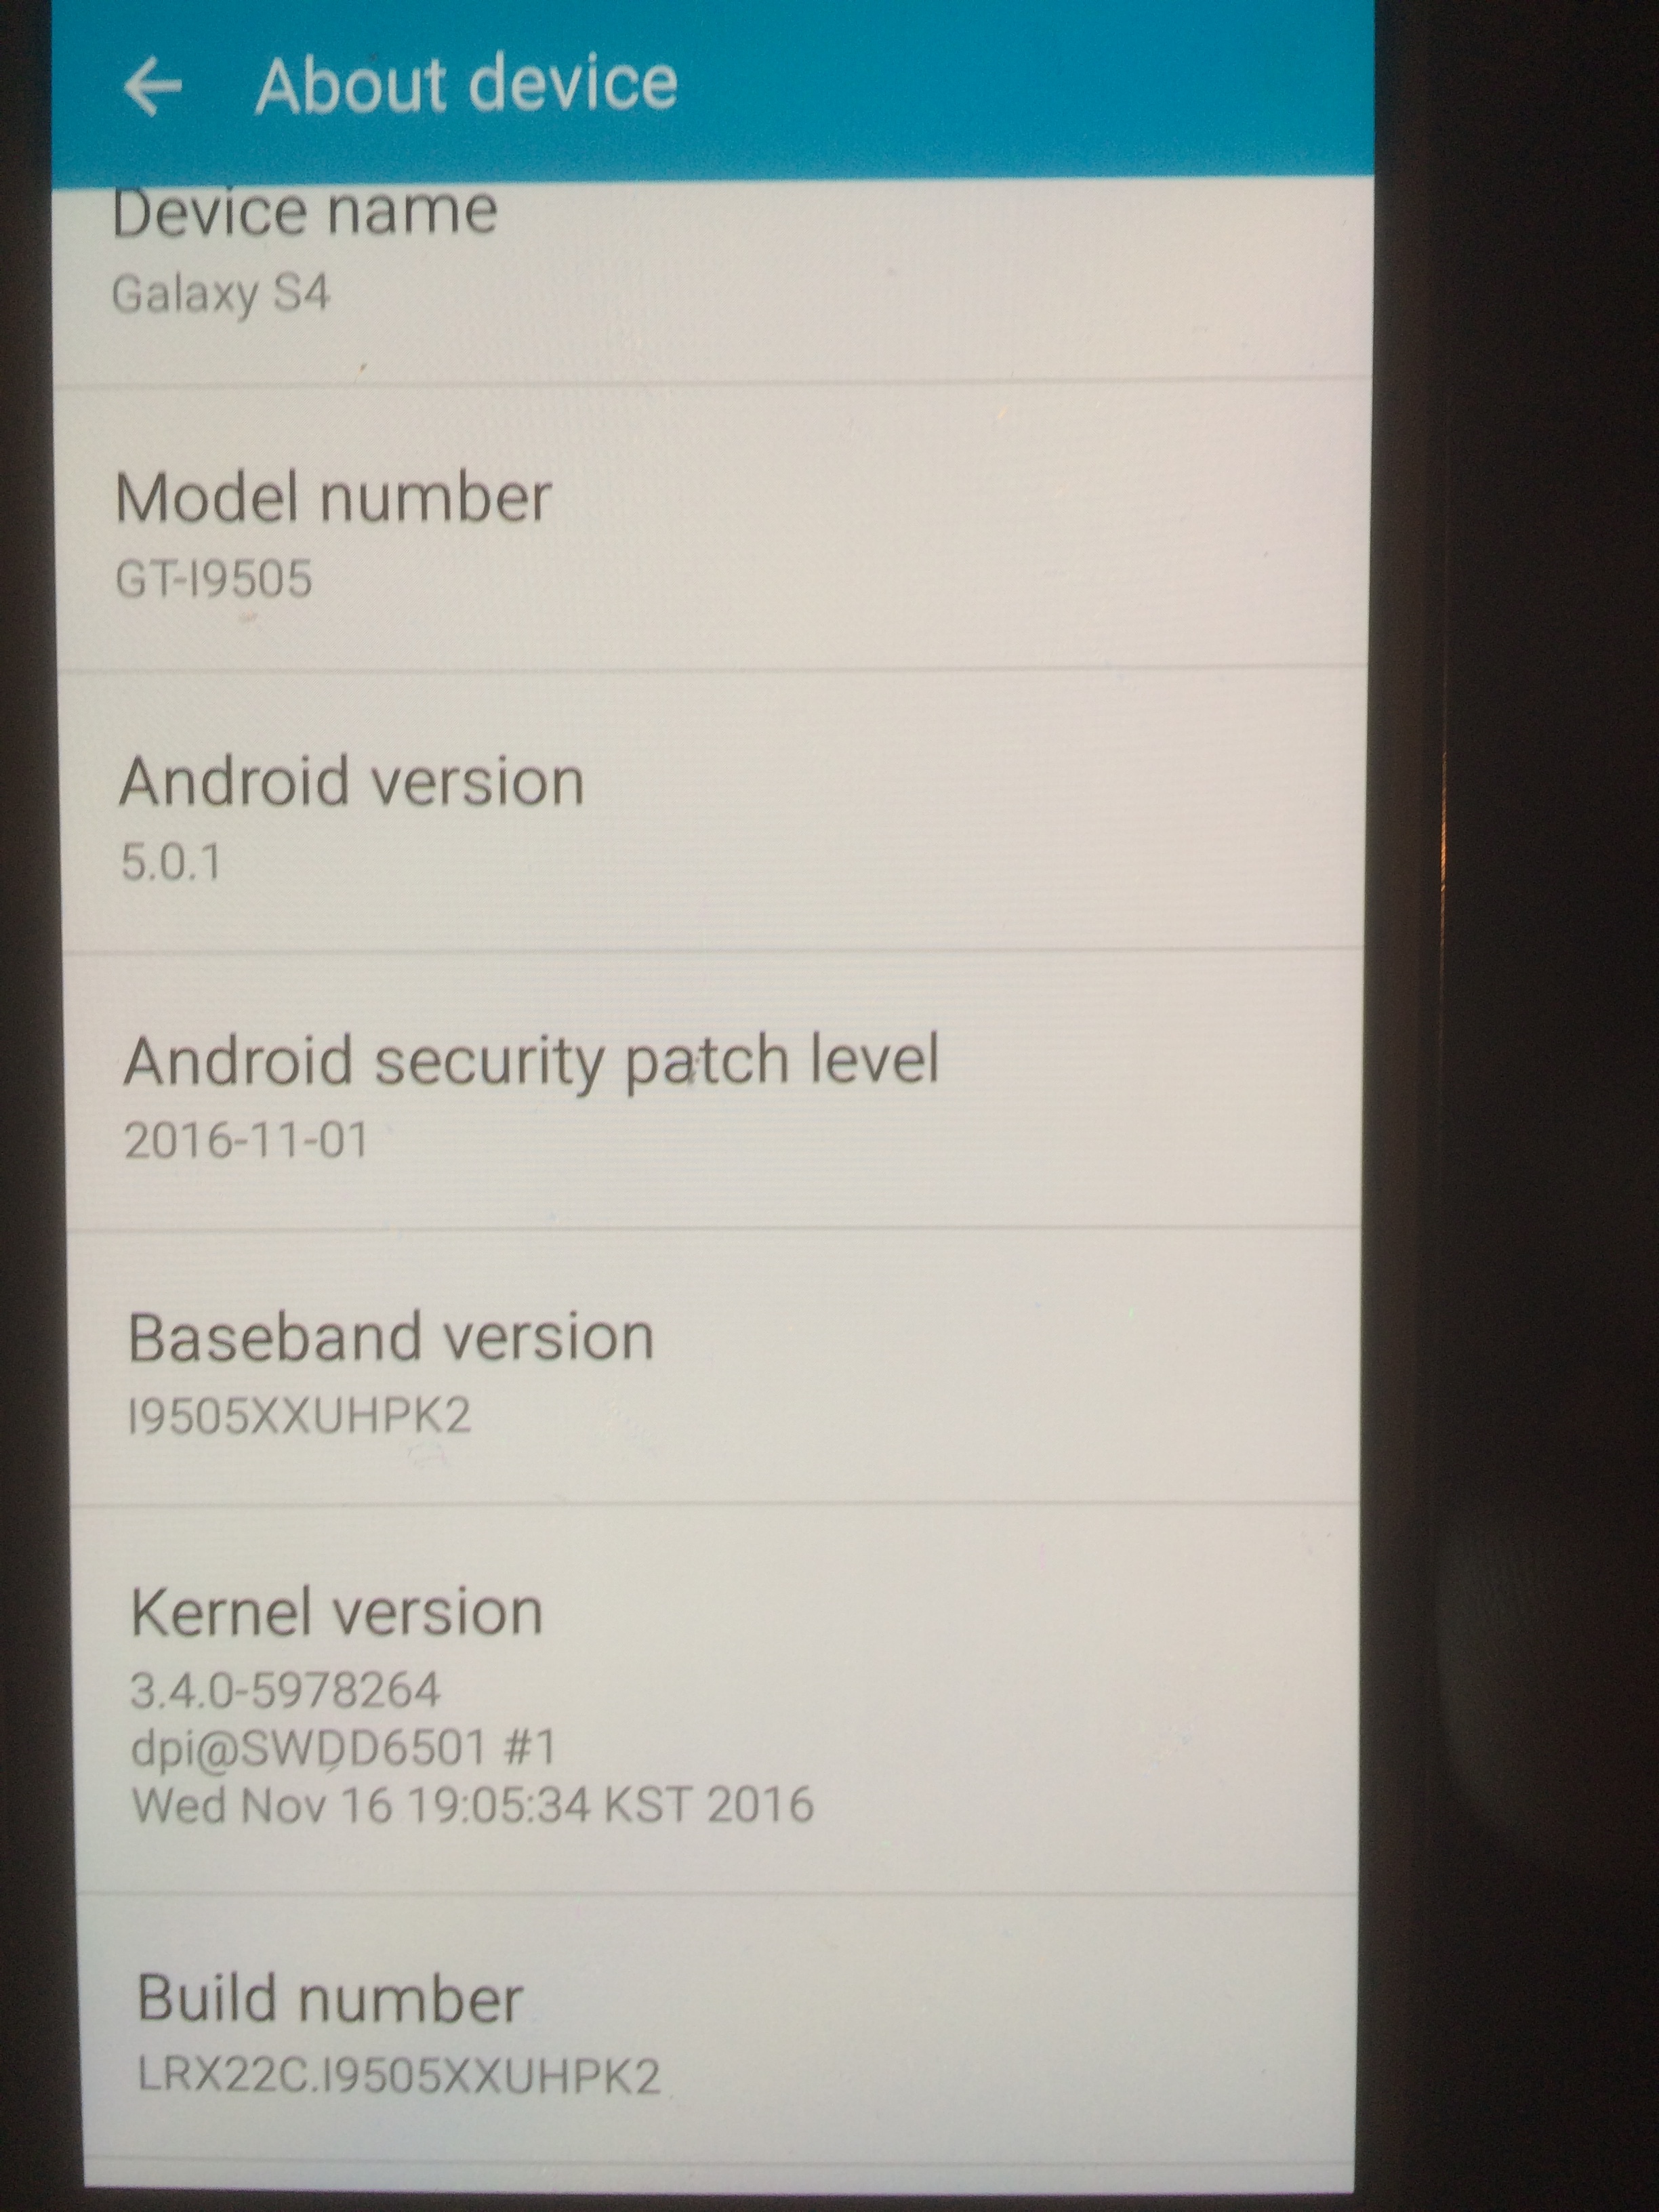
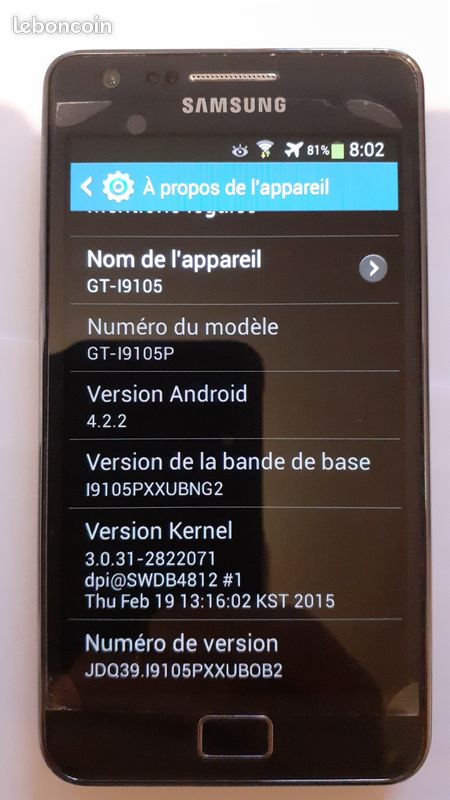
don’t miss know your hardware Samsung ? by @aibd
.
Please allways refer to your device specific official install documentation in parallelle,
and compare it with the various detailed illustrations of this guide into the installation process
for a “Custom android OS”, on any supported device !
.